After years working with email deliverability, I’ve seen one challenge come up again and again: Microsoft’s email ecosystem is often the toughest to crack.
Whether you’re sending to Outlook.com, Hotmail, Live.com, or Office 365 addresses, Microsoft’s strict filtering can be frustrating. when your perfectly legitimate emails end up in spam folders (or worse, get blocked entirely).
- Why Microsoft Outlook Filtering Is Different From Gmail and Yahoo
- 1. Set Up Your Email Authentication
- 2. Warm Up Your Sending Reputation Carefully
- 3. Monitor Your Reputation
- 4. Keep Your Email List Clean
- 5. Make Unsubscribing Easy
- 7. Fix Deliverability Problems Quickly
- Building Long-Term Trust with Microsoft
Need reliable delivery for your website emails? SendLayer makes it easy to send account notifications, receipts, and other critical emails from your website or app to Microsoft inboxes with excellent deliverability built-in.
Why Microsoft Outlook Filtering Is Different From Gmail and Yahoo
Before taking a closer look at solutions, it’s important to understand what makes getting into Microsoft inboxes so tough compared to other providers.
Microsoft has developed its own approach to email filtering based on decades of fighting spam across its many email platforms (Hotmail, Live, MSN, and now Outlook).
While all major email providers want to protect their users from spam, Microsoft’s specific filtering methods and tolerance levels create unique challenges for senders:
- They’re quicker to block emails when they spot problems
- Once you get on their bad side, they take longer to forgive
- They use unique filtering systems including SmartScreen and a secret user panel called Sender Reputation Data (SRD)
- They’re stricter about email authentication requirements
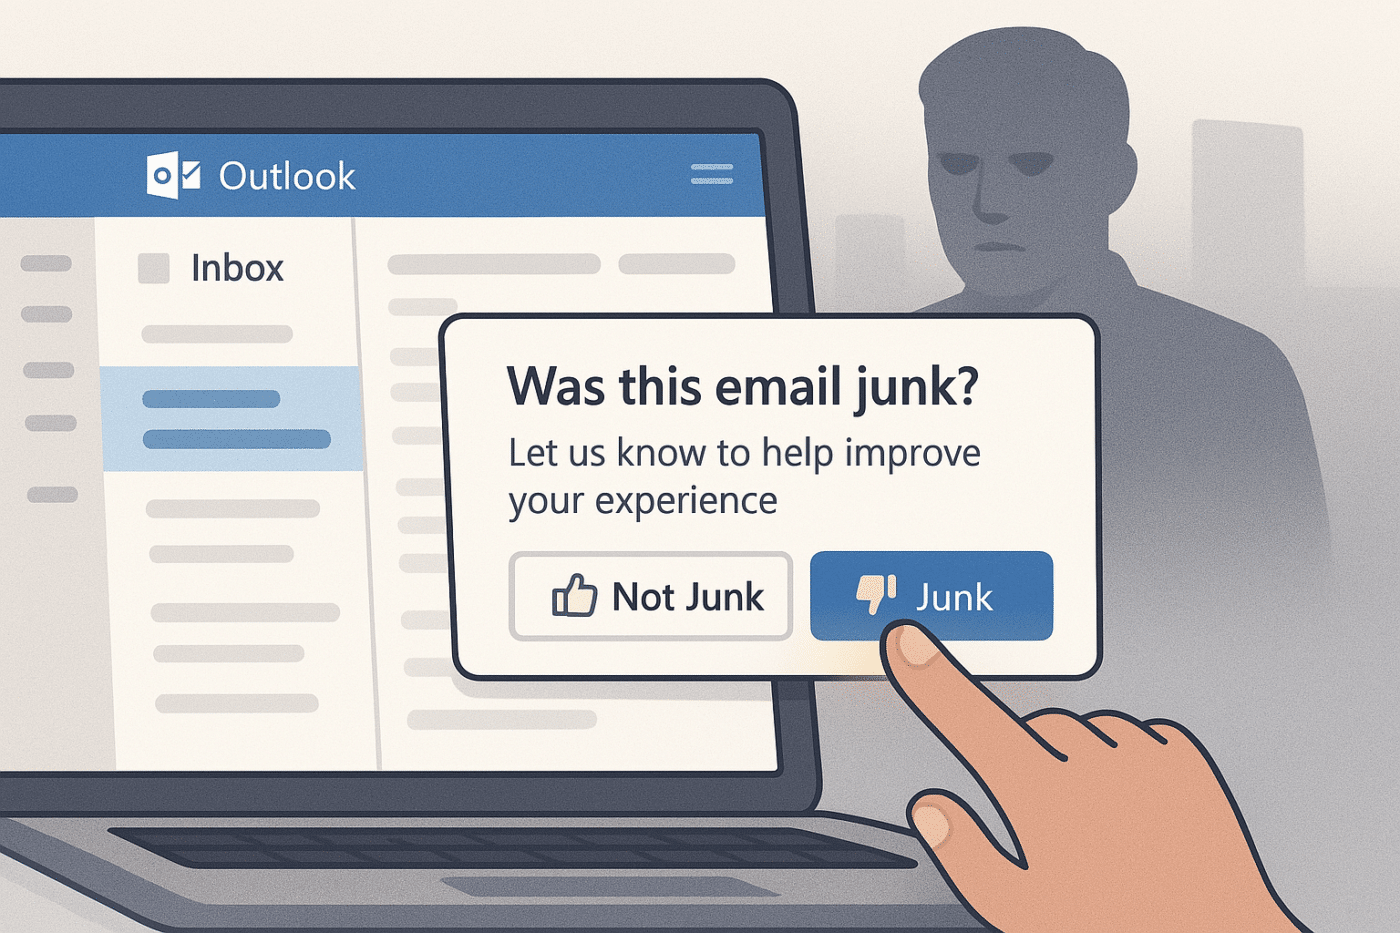
What is SRD? It’s Microsoft’s feedback system where they ask selected Outlook users to vote on whether your email is spam. Even one negative vote matters a lot because Microsoft specifically asked for this feedback.
Now let’s get to some actionable strategies that will help you reach more Microsoft inboxes.
1. Set Up Your Email Authentication
Microsoft now requires proper authentication for anyone sending lots of emails (over 5,000 per day). This isn’t just a recommendation anymore – it’s mandatory if you want your emails to reach Microsoft inboxes. Poor authentication is one of the top reasons Microsoft blocks legitimate emails.
You need these three authentication methods working together:
- SPF: A DNS record that says which servers can send email from your domain. This prevents spammers from forging your “From” address.
- DKIM: A digital signature that proves your emails are really from you and haven’t been tampered with during delivery.
- DMARC: A policy that tells receiving servers what to do if SPF or DKIM checks fail. Even a basic monitoring policy (p=none) shows Microsoft you’re taking responsibility for your domain’s emails.
Pro tip: Make sure your From address domain matches or is a subdomain of the domain you’ve authenticated with SPF/DKIM. This alignment is critical for passing DMARC checks and building trust with Microsoft’s systems.
Not sure how to set these up? Read our complete guide to How Email Authentication Works with SPF, DKIM, and DMARC for step-by-step instructions.
2. Warm Up Your Sending Reputation Carefully
If you’re just sending regular transactional emails from your website (like password resets or order confirmations), you probably won’t need to worry about warming up. These emails are typically sent one at a time as users take actions, not in large batches.
However, you should pay attention to warm-up procedures if:
- Your website or app suddenly needs to send thousands of emails daily
- You’ve just started using a new domain for sending emails
- You’re moving to a new email service provider with different IP addresses
- You plan to send marketing emails from the same domain you use for transactional emails
Microsoft is suspicious of new senders and limits new IP addresses to 10,000 messages per day. Here’s how to build trust:
- Start with 2,000 emails: Begin with this small batch for Outlook/Hotmail recipients
- Double volume daily: Increase gradually until you see an error message that includes the code RP-001, RP-002, or RP003
- Back off when you hit limits: When you see this error in your bounce messages or email service dashboard, reduce volume slightly until delays stop
- Send to your best contacts first: Focus on people who regularly open and click your emails
- Be patient: The warm-up takes 2-4 weeks – this is Microsoft’s testing period
- Let Microsoft know in advance: If you’re planning a significant warm-up, you can contact Microsoft through their support channels to request what some email experts call “pre-emptive accommodation.”
About Microsoft throttling error codes
When Microsoft throttles your sending, you’ll see specific error codes in your bounce messages:
- 421 RP-001: Your IP has exceeded the rate limit allowed due to IP/domain reputation
- 421 RP-002: Your IP has exceeded the rate limit on this connection due to reputation
- 421 RP-003: Your IP has exceeded the connection limit allowed due to reputation
These aren’t permanent blocks – they just mean you’ve hit their sending limits for new IPs. When you see these, scale back your volume and continue at a slower pace.
Sample Warm-up Schedule for Microsoft Domains
| Day | Daily Volume | Target Audience |
| 1-3 | 2,000 | Most engaged (opened in last 30 days) |
| 4-7 | 4,000-8,000 | Engaged (opened in last 60 days) |
| 8-14 | Up to 10,000 | Gradually include more users |
| 15-21 | Monitor for limits | Adjust if seeing RP-001 errors |
| 22-30 | Continue gradual expansion | Approach full volume if no issues |
3. Monitor Your Reputation
Microsoft gives you tools to see how they view your emails. These tools provide crucial insights into your sending reputation and can help you identify problems before they seriously impact your deliverability.
Smart Network Data Services (SNDS)
SNDS is Microsoft’s reputation monitoring portal that shows you exactly how they see your sending IP addresses. Here’s how to use it:
How to access SNDS:
- Visit the Outlook.com Smart Network Services Data Site and log in with a Microsoft account
- Create a Microsoft account if you don’t already have one
- Submit a request to monitor your IP addresses
- Wait for approval (usually within 24-48 hours)
- Once approved, you can access data for your IPs
SNDS will show you valuable information that can help you to monitor your deliverability to email addresses at Microsoft email accounts. Here you can see:
- Traffic volume – How many emails Microsoft received from your IP
- Spam complaint rate – The percentage of your emails users reported as spam
- Spam trap hits – Whether you’ve sent to any Microsoft-maintained spam traps
- Filter results – How many messages were filtered by Microsoft’s systems
- Reputation status – Your overall status as green (good), yellow (warning), or red (poor)
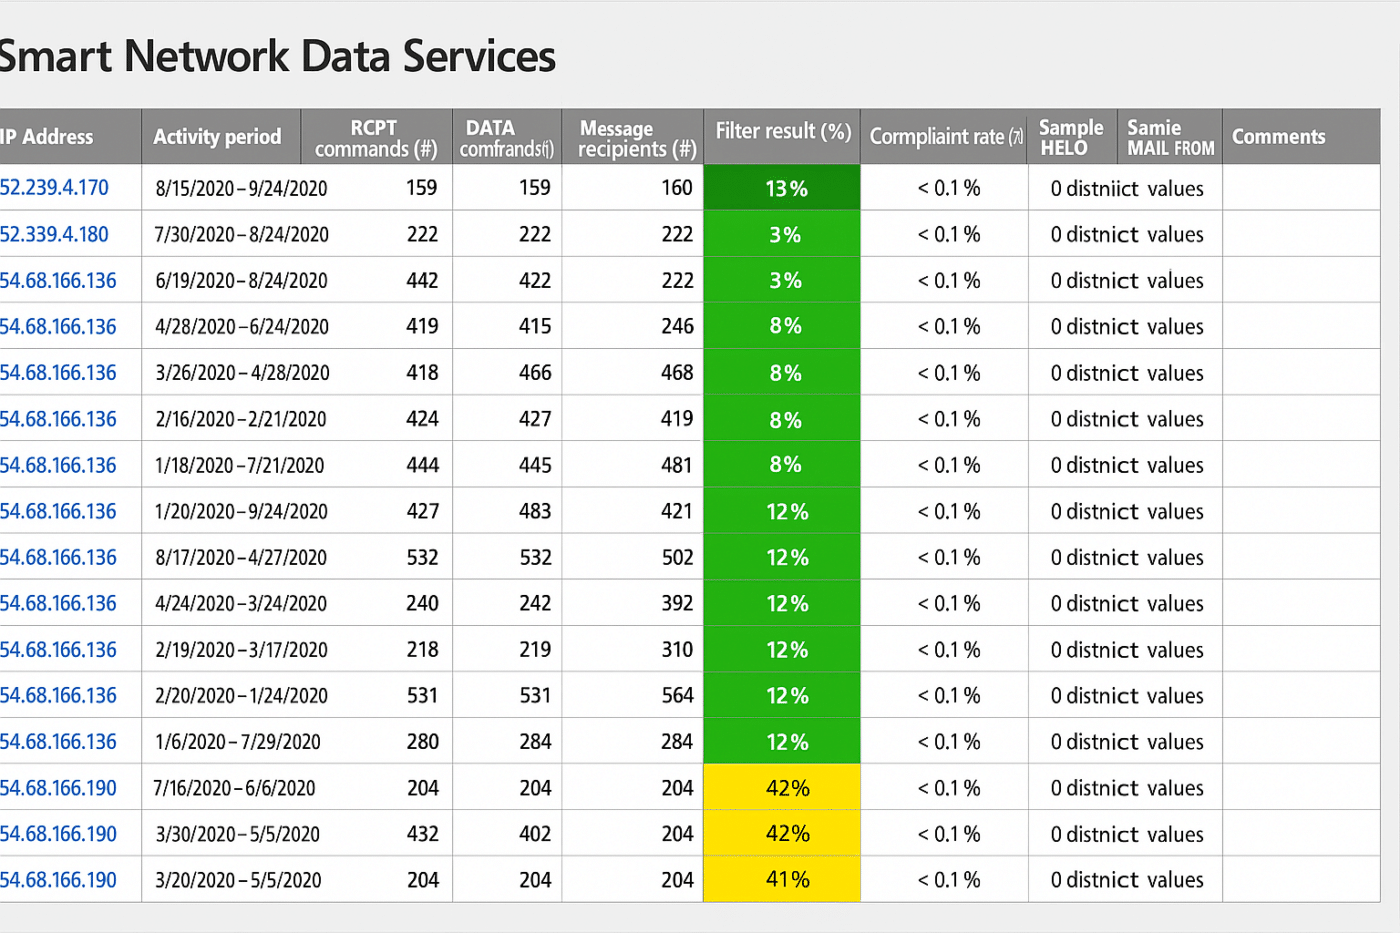
The color coded system makes it easy to see at a glance how your sender reputation is at Microsoft. If it’s green, good news! Your IP has good reputation and messages should deliver normally. However if it’s yellow you can consider this your early warning to address any issues. IPs with a red status are already considered poor reputation and messages are most likely being blocked or sent to spam.
If your IP does have yellow or red status, you should examine the data for high complaint rates or trap hits. Apart from looking out for anything unusual, make sure you’re following email best practices to reduce your spam complaint rate and reduce email volume and monitor SNDS daily to monitor improvements.
SNDS data is available for days when you’ve sent at least 100 messages to Microsoft recipients. This data can also help you detect compromised servers, malware, and other security issues that might affect your sending infrastructure.
Junk Mail Reporting Program (JMRP)
JMRP is Microsoft’s feedback loop system that sends you notifications when recipients mark your emails as spam.
How to set up JMRP:
- Register at Microsoft’s Junk Mail Reporting Program
- Enter your organization info and sending IP addresses
- Provide an email address where you want to receive complaint notifications
- Start receiving feedback within 72 hours
JMRP notifications contain a copy of the email that was complained about, header information showing delivery details, the recipient’s email address (sometimes hashed for privacy), and a timestamp of when the complaint occurred. This helps you to identify any problems with your email content and fix them before your sender reputation is damaged.
Microsoft pays close attention to how you handle JMRP complaints. Senders who continue to email users after receiving complaints will see their reputation deteriorate quickly.
SNDS gives you the big picture of your reputation, while JMRP provides specific feedback about individual complaints. Using both tools gives you a complete view of your Microsoft deliverability status and helps you identify and fix problems before they become serious.
4. Keep Your Email List Clean
Microsoft cares a lot about who you’re sending to. Bad list hygiene will quickly tank your reputation.
Watch for these warning signs:
- Too many bounces: Keep “unknown user” rates below 2-3%
- Spam complaints: Microsoft may penalize you if complaint rates reach just 0.5%
- Spam traps: Keep spam trap rates below 0.01%
- Low engagement: Microsoft notices when recipients ignore your emails
You don’t have to worry too much about maintaining an email list when you’re just sending transactional emails from your website or app but you should keep keep an eye on spam complaints and bounces all the same.
SendLayer helps to protect your domain reputation by automatically adding email addresses that have bounced to a suppression list. You can also monitor bounces and spam complaints in your email analytics dashboard so you’ll know immediately if there are any issues with your emails.
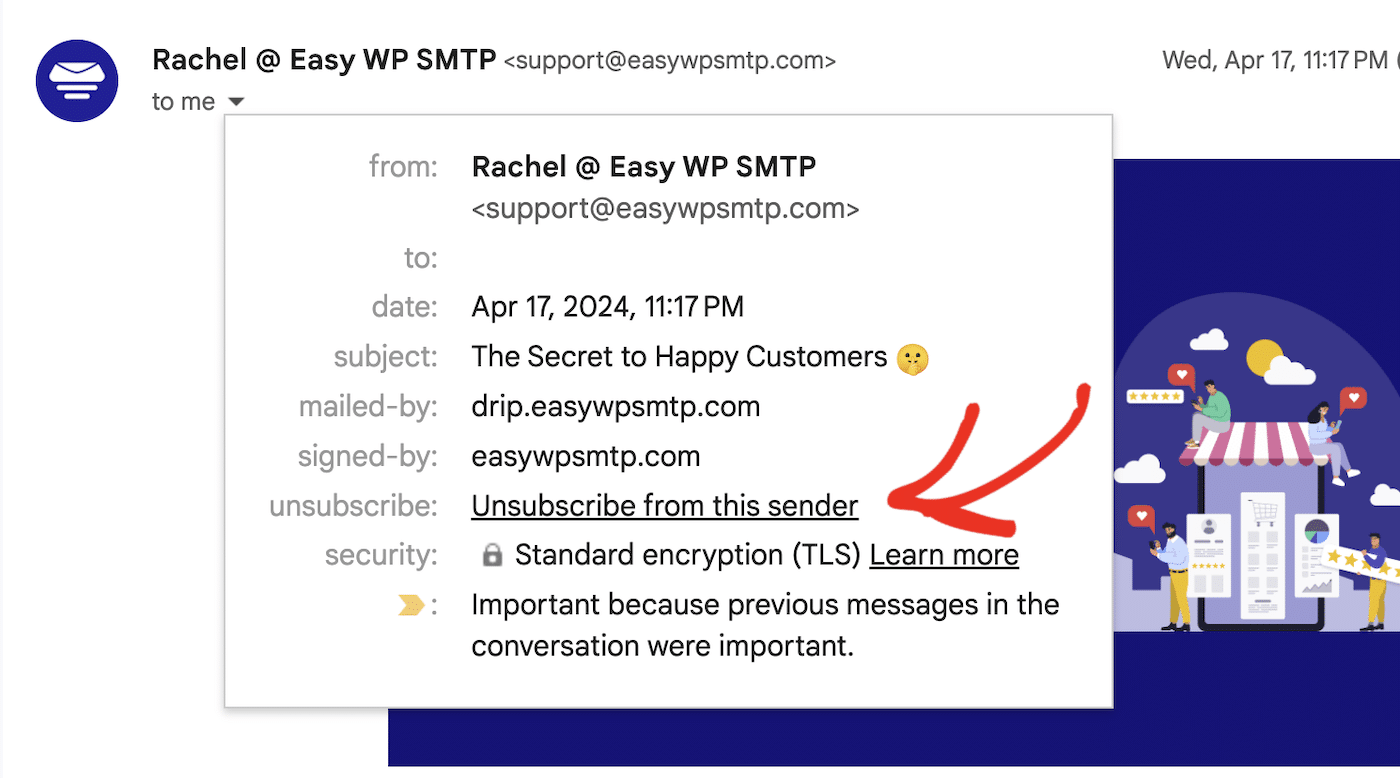
5. Make Unsubscribing Easy
When subscribers can’t easily opt out, they’re more likely to hit “Report as Spam” instead. This hurts your reputation with Microsoft.
You don’t legally need to include an unsubscribe link on transactional emails but if you’re including any marketing messages in emails such as order confirmations or you’re unsure whether your emails are purely informational rather than promotional, it’s best to be cautious.
Put your unsubscribe link where people can see it, make unsubscribing a one-click process if possible, and add the List-Unsubscribe header to your emails.
7. Fix Deliverability Problems Quickly
If your emails stop reaching Microsoft inboxes despite your best efforts, you can follow these steps to try and resolve the issue:
For Outlook.com/Hotmail Problems:
- Check SNDS data to find potential causes
- Use Microsoft’s Sender Support form to ask for help
- Explain what went wrong and how you fixed it
- Be patient but persistent—Microsoft support often takes multiple tries
For Office 365 Problems:
- Use the Office 365 Anti-Spam IP Delist Portal
- Follow their verification process
- Remember that company admins might have their own filters in place
Remember, when asking Microsoft to unblock you, aways fix the root cause first. Microsoft won’t help if you keep making the same mistakes.
Building Long-Term Trust with Microsoft
Getting into Microsoft inboxes isn’t just about technical fixes. You can build a strong sender reputation by demonstration you’re a sender who respects people’s inboxes.
The work you put into pleasing Microsoft often improves your reputation with other email providers too. It’s like raising your standards to meet the strictest teacher – iif Microsoft is happy with you, everyone else probably will be too.
Remember that deliverability isn’t “set and forget” and needs ongoing attention. But these strategies will help you reach more Microsoft inboxes and improve your sender reputation over time.
That’s it! Now you know how to improve deliverability to Outlook email addresses.
Next, did you know your email content could trigger spam filters even for genuine transactional emails? Check out our guide to spam trigger words and how to avoid them.
