
If your emails to Gmail users are bouncing or vanishing into spam, you’re not alone. Since 2024, Google enforces strict sender rules, and as of late 2025 it rejects non-compliant mail outright instead of just filtering it.
The short version: Gmail blocks your email when it can’t verify who sent it. Missing or failing SPF, DKIM, or DMARC authentication is the usual cause, along with a high spam-complaint rate or a missing one-click unsubscribe.
The good news is that almost every cause is fixable, and most fixes are one-time setup.
Here’s why Gmail blocks email, what Google’s current rules require, and how to get your messages delivered again.
Why Is Gmail Blocking Your Email?
Gmail blocks or rejects your email when it can’t confirm who really sent it, or when your sending reputation looks risky. In most cases it comes down to one of these:
- Your domain has no passing SPF and DKIM records.
- You send bulk mail without a DMARC record.
- Your spam-complaint rate climbs toward 0.3%.
- Your marketing email has no one-click unsubscribe.
- You connect over SMTP without TLS.
- Your sending domain or IP is on a blocklist.
When a message fails Google’s checks, you’ll often see error code 5.7.26 with this message:
550-5.7.26 This mail is unauthenticated, which poses a security risk to the sender and Gmail users, and has been blocked. The sender must authenticate with at least one of SPF or DKIM. For this message, DKIM checks failed, and the SPF check for [domain] failed with IP: [IP address].
That 5.7.26 error means both DKIM and SPF authentication failed, so Google couldn’t verify the sender. These checks, once applied, mainly apply to mail sent over IPv6. Now they apply to every message, and since late 2025, Google has rejected non-compliant bulk mail outright instead of routing it to spam.
The goal is simple: Google tightened its checks to cut down on the spam, phishing, and spoofed mail that reach Gmail users.
Google and Yahoo’s Sender Requirements
In February 2024, Google and Yahoo made email authentication mandatory, and Microsoft rolled out matching rules in 2025. The requirements first targeted bulk senders (more than 5,000 messages a day to Gmail), but Google now expects every sender to meet them.
Here’s what you need to send to Gmail without trouble:
- Authenticate your outgoing email: Set up SPF, DKIM, and DMARC, and make sure your mail passes domain alignment.
- Keep your spam rate low: Stay under 0.1%, and never let it reach 0.3%. Google effectively enforces around 0.08%, which is fewer than one complaint per 1,250 emails.
- Use a TLS connection: Plain, unencrypted SMTP gets refused. Check your mail client and any app sending over custom SMTP to confirm TLS is set as the security protocol.
- Use an accurate sender name: Your display name must reflect who you really are and shouldn’t mislead recipients.
What Changed in 2025 and 2026
Google rolled out enforcement in stages, which is why senders who were fine in 2023 are suddenly blocked now:
- February 2024: the authentication requirements took effect, starting with temporary failures and warnings.
- Late 2025: Google began permanently rejecting bulk mail that fails the rules, rather than sending it to spam.
Google also added a Compliance Status dashboard to Postmaster Tools, so you can see exactly which requirement you’re failing.
What Are SPF, DKIM, and DMARC?
SPF and DKIM are authentication protocols configured in your domain’s DNS records and available to mail servers to authenticate incoming emails.
Sender Policy Framework (SPF) prevents spammers or unauthorized users from sending email that claims to be from your domain. It includes a list of all IPs authorized to send email from your domain. When a mail server checks the SPF record, it can verify that your email was genuinely sent from your domain or an approved IP address. If you have not set up an SPF record, this authentication check will fail.
DomainKeys Identified Mail (DKIM) verifies that messages sent from your domain have not been changed or tampered with since they left your outgoing mail server and were received by Google’s incoming mail server.
Domain-based Message Authentication, Reporting, and Conformance (DMARC) specifies what to do with an email if either SPF or DKIM authentication fails.
DMARC authentication helps senders monitor emails sent from their domain, so they can quickly detect any mail spoofing attempts.
How to Set Up SPF, DKIM, and DMARC to Authenticate Your Emails
Your SPF, DKIM, and DMARC records are stored in your DNS settings, which you should find in your domain’s control panel.
If you’re not sure where to access your DNS settings, contact your web host or domain provider for advice.
You will need to create the SPF, DKIM, and DMARC records to add to your DNS settings. The process for this can be a little complicated, so if you’ve not done it before, you should ask your email service provider to supply these or give you further instructions on setting them up.
Alternatively, you can use SendLayer to set up authentication for you.
SendLayer is an SMTP email delivery service that improves your email deliverability by authenticating your domain.
Additionally, SendLayer protects your domain’s sender reputation by setting up a subdomain for outgoing emails. The platform also includes tools to log your emails and track email delivery status, opens, and unsubscribes, so you’ll know immediately if there are any issues.
Setting Up Email Authentication in SendLayer
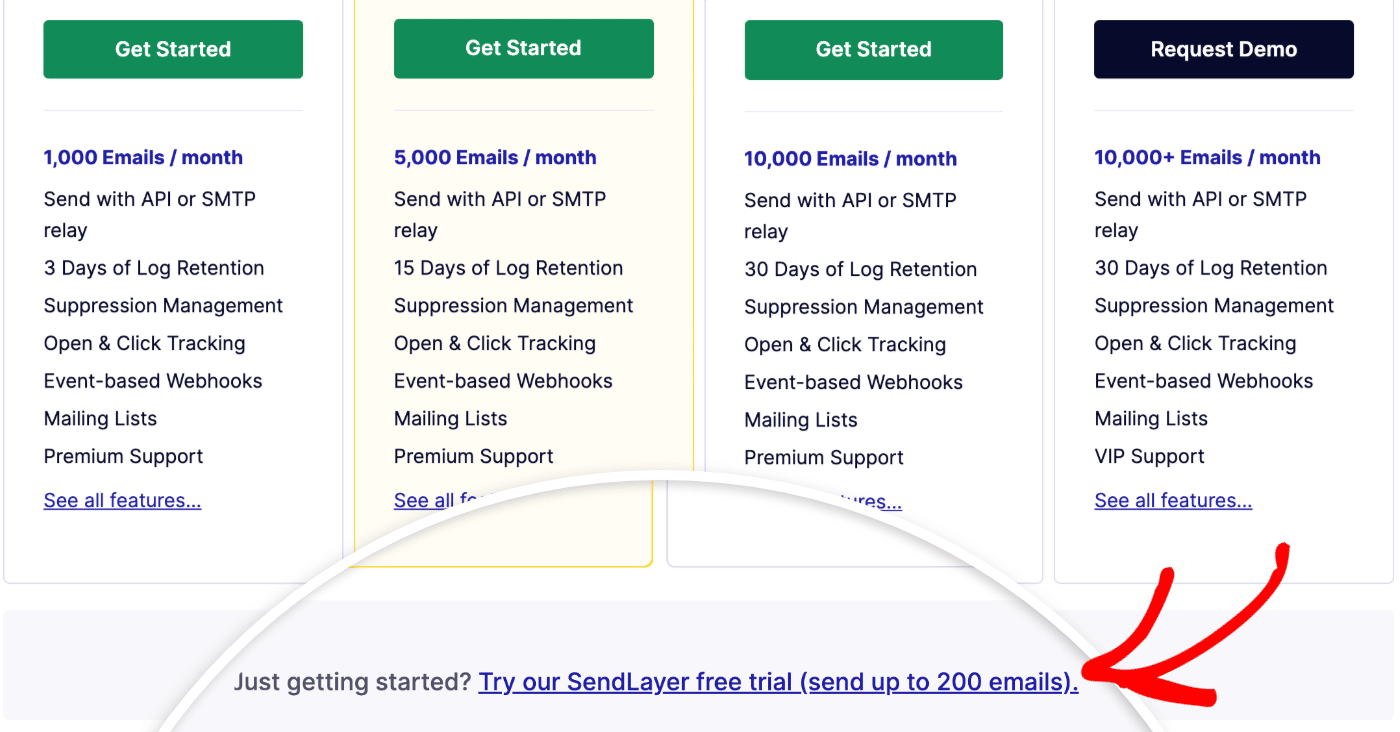
SendLayer offers several plans, depending on the volume of emails you send each month. You can sign up by visiting the pricing page, choosing a plan, and clicking the Get Started button.
SendLayer also offers a free trial, so you can try it out before signing up for a paid plan. To sign up for the free trial, click the link at the bottom of the pricing table.
Once you’ve created your account, log into your SendLayer dashboard.
Adding and Authorizing Your Domain
You will need to add the domain you’ll be sending email from to your SendLayer account. Click the Add Domain button in the top right to enable SendLayer to create SPF and DKIM records for your domain.

Type in your domain and click the Add Domain button.

SendLayer will generate 5 new DNS records for you. These records include:
- A record to define a subdomain used exclusively for sending email (this protects the reputation of your root domain)
- A DMARC record, which tells mail servers what to do if messages fail authentication
- An SPF record for authentication
- A DKIM record for authentication
- A TXT record to verify domain ownership
You should add these DNS records to your domain DNS settings in your web hosting account or domain management control panel. See our complete domain setup guide for more help with this.

Once you’ve added all 5 DNS records to your domain, go back to SendLayer, tick the box, I have added these DNS records and am ready to proceed, and click the Verify DNS Records button.

Note: changes to your domain DNS settings can take time to propagate across the internet. You may need to wait up to 48 hours until SendLayer can verify your DNS settings.
To make sure your domain is authorized, navigate to Settings in the sidebar menu of your SendLayer dashboard, then scroll down to the DNS Records & Settings section.
If SendLayer has been successful in verifying your domain’s DNS records, you will see a green checkmark in the Status column.

To use SendLayer’s SMTP for sending emails, you’ll need to configure custom SMTP settings on your website or use SendLayer’s API to integrate with the platform that’s sending out emails on your behalf.
SendLayer integrates with WordPress, WooCommerce, Magento, and over 1,000 other apps. Read the getting started documentation for more information on integrating with SendLayer.
How to Check if Gmail Is Blocking Emails From Your Domain
If Gmail is blocking your emails, they will be bounced back with an error message, so check your mail server logs regularly. If many emails are failing or bouncing, resolve the issue quickly to avoid damage to your sender reputation.
The fastest way to see your standing is the Compliance Status dashboard in Google Postmaster Tools, which flags the exact requirement you’re failing. SendLayer also includes email logs in your account dashboard and can send notifications of failed messages, so you’ll know about any problems as soon as they occur.
If your domain has been added to the Gmail blacklist, you will see error messages with the code 421 or 550. If this is the case, you will need to contact Google to submit an unblock request.
It can take weeks for Google to remove your IP from its blocklist, and you’ll need to prove you’ve taken steps to improve your sender reputation. So it’s best to follow best practices from the start to avoid being blocked.
Best Practices for Sending to Gmail Accounts
If you’ve set up SPF and DKIM records for your domain and ensured your emails are being authenticated, there may be another reason why Gmail is blocking your emails.
Ensure you’re following these guidelines when sending email campaigns to subscribers who use Gmail.
- Send email to engaged users only: make sure subscribers want to receive mail from you and clean your lists regularly to remove unengaged users.
- Make it easy to unsubscribe: Include a clear unsubscribe link in marketing emails and consider setting up one-click unsubscribe to avoid spam complaints.
- Make sure recipients opt-in to receive emails from you: Don’t automatically subscribe users to mailing lists, and consider a double opt-in to confirm before adding them to a list.
- Increase sending volume slowly: It looks suspicious if you suddenly start sending a high volume of emails, particularly if your domain is new. Instead, increase the number of emails you send out slowly and consider spreading the emails you send over a period of time instead of sending mass emails all at once.
- Don’t purchase email lists from other companies: While buying email lists isn’t illegal in most locations, it’s certainly frowned upon, increases the risk a user will report spam, and can damage your sender reputation.
Prevent Mail Sent to Gmail Users From Being Blocked or Sent to Spam
Aside from these bulk sender guidelines, there are a few other things you can try to make sure your transactional emails and other email messages aren’t rejected or end up in the spam box instead of the Gmail inbox.
- Monitor the reputation of your sending domain: Gmail will block emails from your domain if it has a poor sender reputation. You can use a tool like Google Postmaster Tools (also take a look at our guide to setting up Postmaster Tools) or MXToolBox to check your domain’s reputation
- Send email from a subdomain: Setting up a subdomain that is used only for sending emails will protect the reputation of your main domain name.
- Monitor your email bounce rate: Gmail may block emails you send if your bounce rate is high. While it’s impossible to eliminate all email bounces, you can use an email suppression list to remove invalid email addresses and help keep your bounce rate to a minimum.
- Keep marketing emails and transactional emails separate: Be careful about including promotional content in transactional emails. While it’s generally okay to send a coupon or link to a promotion in a transactional email from time to time, keep this to a minimum.
- Avoid sending emails with attachments or lots of images: Google may flag emails if the content is suspicious or looks spammy.
- Write your email subject lines carefully: Certain words can trigger spam filters, so be sure you’re following best practices for writing email subject lines.
- Don’t send emails from a brand new domain: Gmail and other mail servers will often automatically reject emails if the domain has been recently registered and is sending out messages in bulk. If you just registered a new domain, it’s best to wait a few months and warm up the domain gradually before you start sending emails from your site.
FAQs
We get a lot of support requests from users having issues with Gmail blocking their emails. Here are some of the most common questions we receive:
What is Gmail error 5.7.26?
Error 5.7.26 means Gmail rejected your message because it failed authentication. Both SPF and DKIM didn’t pass, so Gmail couldn’t verify the sender. Setting up SPF, DKIM, and DMARC correctly for your sending domain resolves it.
Will Gmail reject my email if I send fewer than 5,000 a day?
The bulk-sender rules target senders above 5,000 messages a day to Gmail, but authentication failures can get any sender blocked. Treat SPF, DKIM, and DMARC as required no matter your volume.
Why is Gmail rejecting my forwarded emails?
Gmail may detect forwarded emails as email spoofing in some cases. This happens if your forwarding mail server is modifying messages before sending them. To avoid this, make sure you have set up SPF and DKIM authentication for your sending domain. You should also avoid modifying messages. This may be done automatically by third-party software such as virus checkers.
How to know if someone blocked you on Gmail?
Even if Gmail successfully authenticates your email, individual users can request to block all email from a specified email sender. This will route all emails from this address or domain to the spam box. While there’s no way to know for sure if a user has blocked your sender address in their “Filters and blocked addresses” settings, you can monitor your mail logs to check for spam reports and unsubscribes.
How do I know if Gmail has blacklisted my domain?
There are several free services you can use to check if your IP or domain has been added to a public email blacklist. You can also monitor your email logs for error messages that indicate your domain has been blocked.
What is the difference between Gmail blocking email and the Gmail spam filter?
Gmail uses a filter to decide if an email is spam or not. This filter includes many pre-defined criteria, and it’s possible for some of your emails to be marked as spam, while others are not. However, if Gmail has added your IP or sending domain to the blocklist, it will be automatically rejected before it is checked by the spam filter.
Why is Gmail suddenly blocking emails?
If you’ve been sending emails successfully to Gmail users and they’ve suddenly started being blocked, this is usually because your mail isn’t authenticated. Google now rejects unauthenticated email, so make sure you’ve set up SPF, DKIM, and DMARC records for your sending domain.
That’s it! Now you know why Gmail is blocking your email and how to fix it.
Next, would you like to learn more about sending email from a subdomain? Check out our article on why you should send email from a subdomain for more information.
Ready to get your emails to the inbox? Get started today with the most user-friendly, powerful SMTP email delivery service. SendLayer Business includes 5,000 emails a month with premium support.
