Would you like to view data about all the emails you’ve sent using SendLayer?
SendLayer includes analytics you can view right from your account dashboard for an overview of all the emails you’ve sent so far.
In this tutorial, we’ll show you how to access these analytics, and how to read and interpret them.
Before you get started:
Accessing the SendLayer Analytics Screen
To view your analytics, you’ll first need to log in to SendLayer and go to your account dashboard. On the main dashboard page, you’ll see an overview of your analytics.
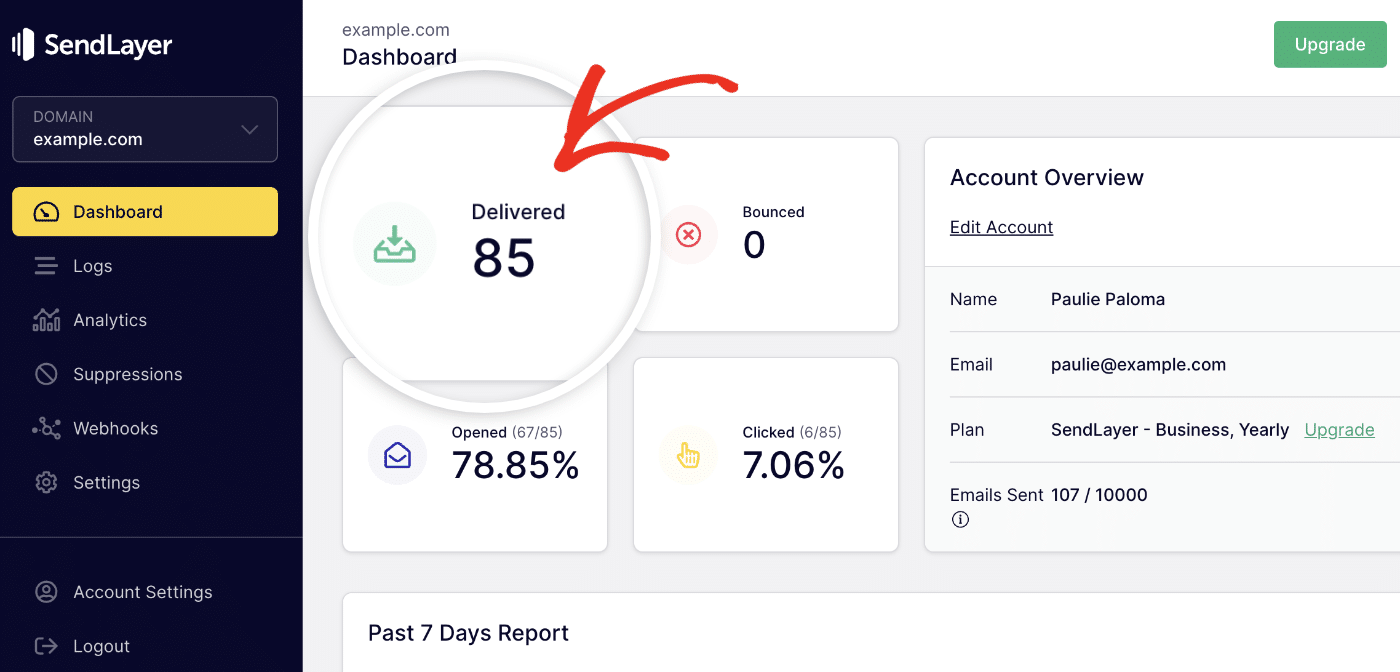
Click on Analytics in the navigation menu on the left side of the screen to go to the Analytics page for your domain.

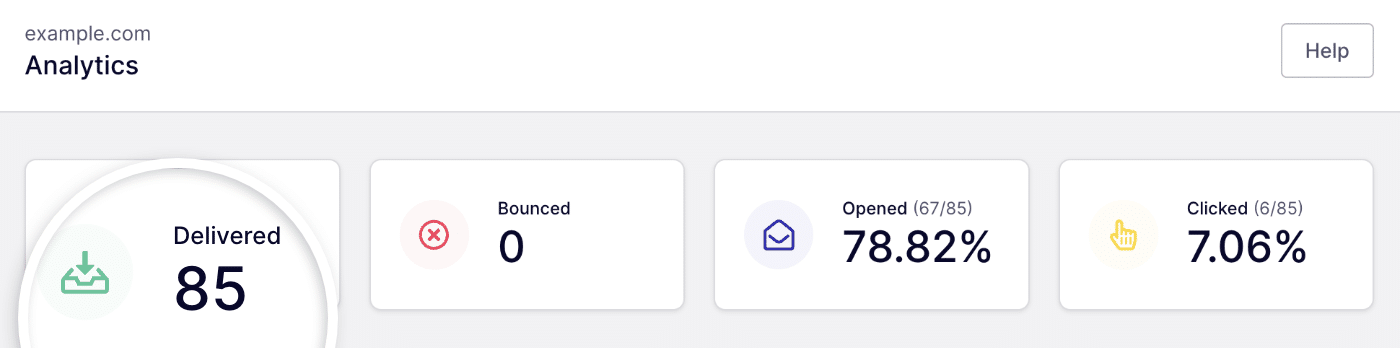
This page is split into 3 sections, which we’ll cover in detail below.
Viewing Your Key Performance Indicators
The first section of the Domain Analytics page shows some Key Performance Indicators (KPIs) that you can check at a glance for an idea of how your emails are performing.
Delivered Emails
First, you’ll see the number of emails you’ve sent using SendLayer that have been delivered in the past 30 days.
Bounced Emails
Next, you can check how many of your emails have bounced.
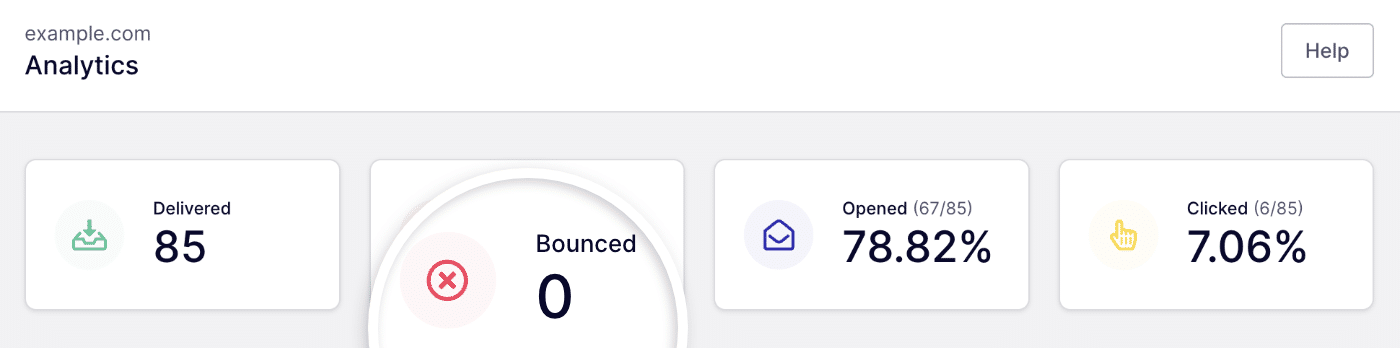
An email will bounce if the recipient’s mail server rejects it for some reason. With SendLayer, you can expect your bounce rate to stay reasonably low since our platform helps you authenticate your sending domain and send emails over SMTP to improve deliverability.
However, emails can bounce if they’re sent to an invalid address, the recipient’s inbox is full, or there’s a problem with the receiving mail server. If you see an increase in the number of bounced emails sent from your account, you can do some investigating to find out if there’s a problem you need to fix.
SendLayer automatically adds any email addresses that return bounced emails to your suppression list to protect your sending domain’s reputation.
Open Rate
SendLayer can also track your emails’ open rate to give you an idea of how many recipients are actually reading your emails and not just deleting them right away.
On the Domain Analytics page, you can see your open rate as a percentage.
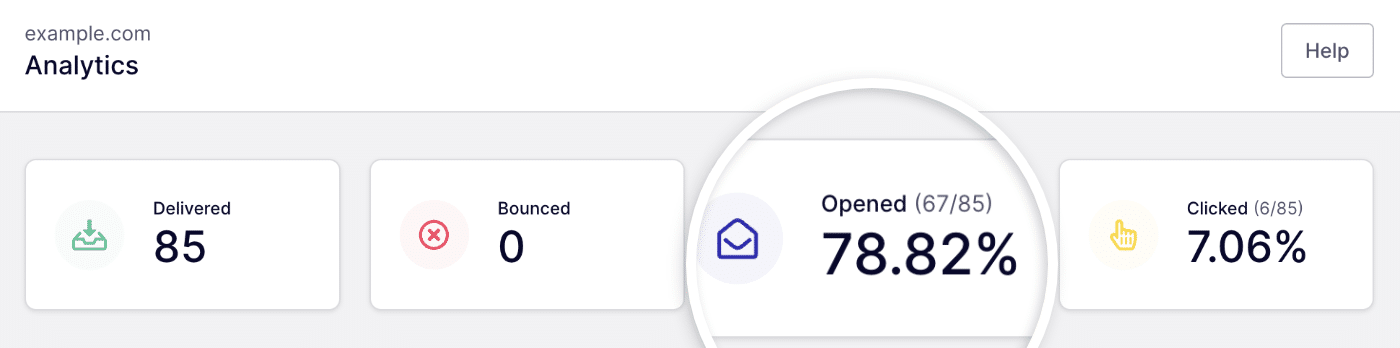
We also show the total number of opened versus sent emails above the percentage.
Note: Open tracking must be enabled to view your open rate. Check out our tutorial on how to enable open tracking for details.
Click-Through Rate
Finally, if you include links in your emails, SendLayer can track whether recipients click on them.
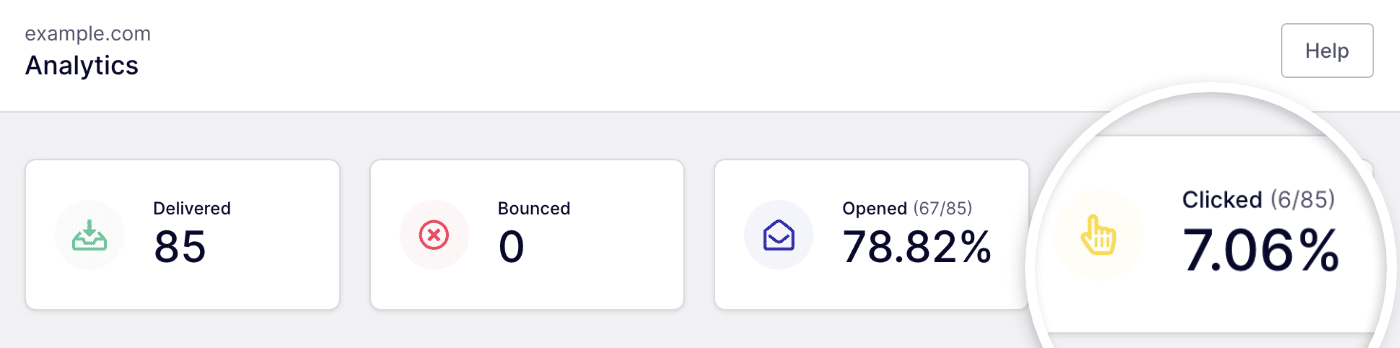
Like your open rate, the Analytics shows your click rate as a percentage, as well as the total number of links, clicked versus emails sent.
Note: Click tracking must be enabled to view your click-through rate. To learn how to enable this setting, please see our guide to click tracking.
Viewing Your Analytics Report
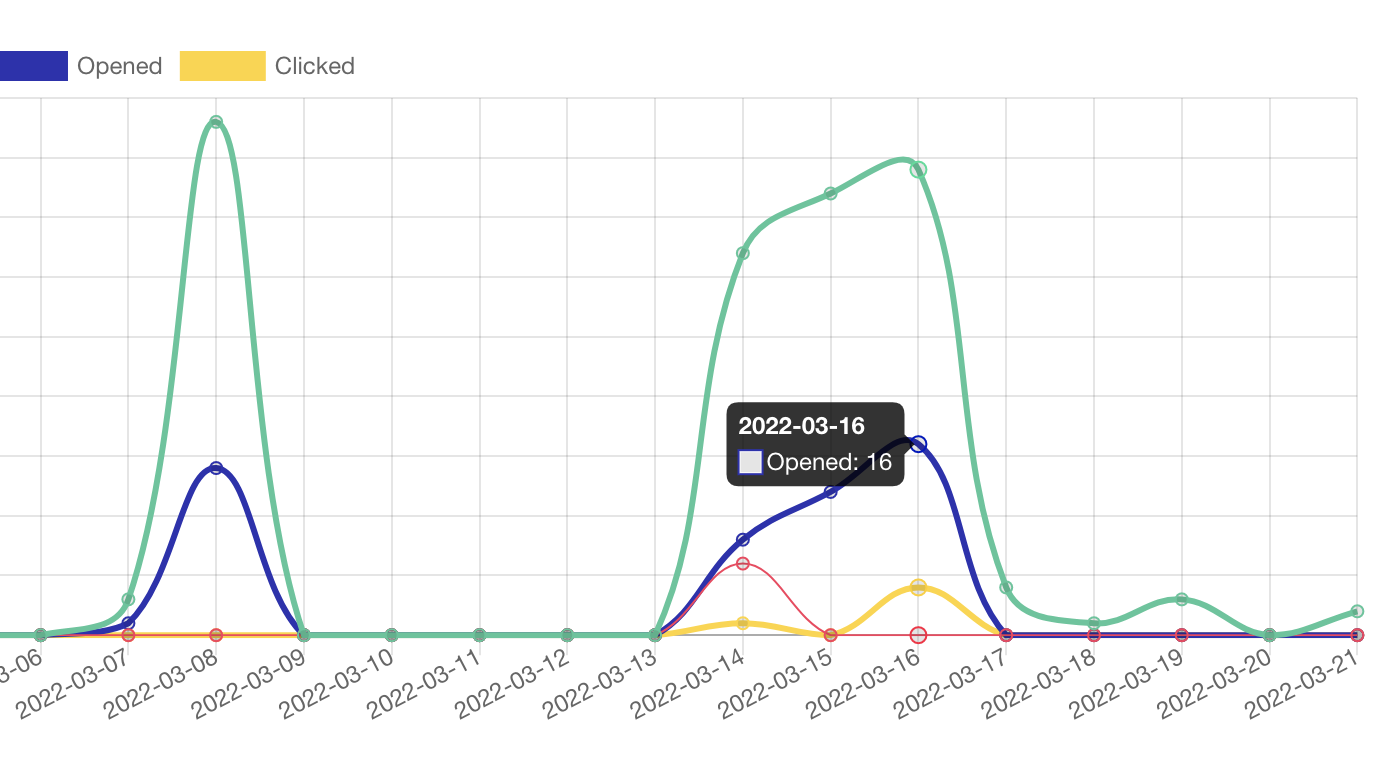
The next section of the Analytics page is the analytics report. It shows you a graph of the emails that have been sent, bounced, opened, and clicked through.
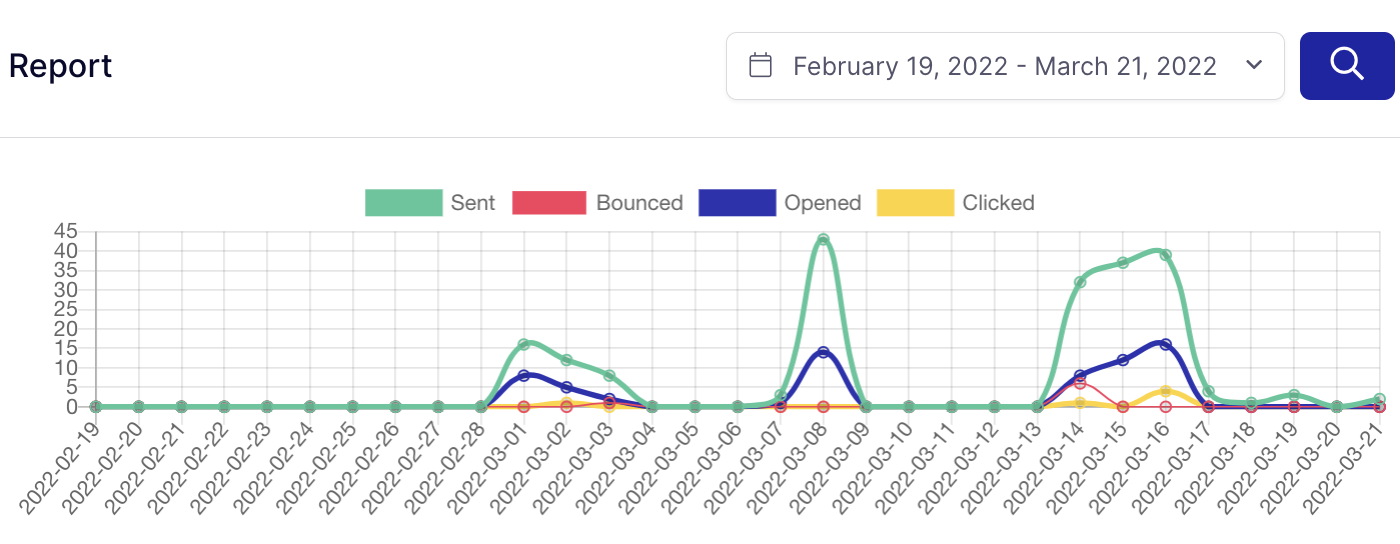
You can hover over any point on the graph to see the details for that data.
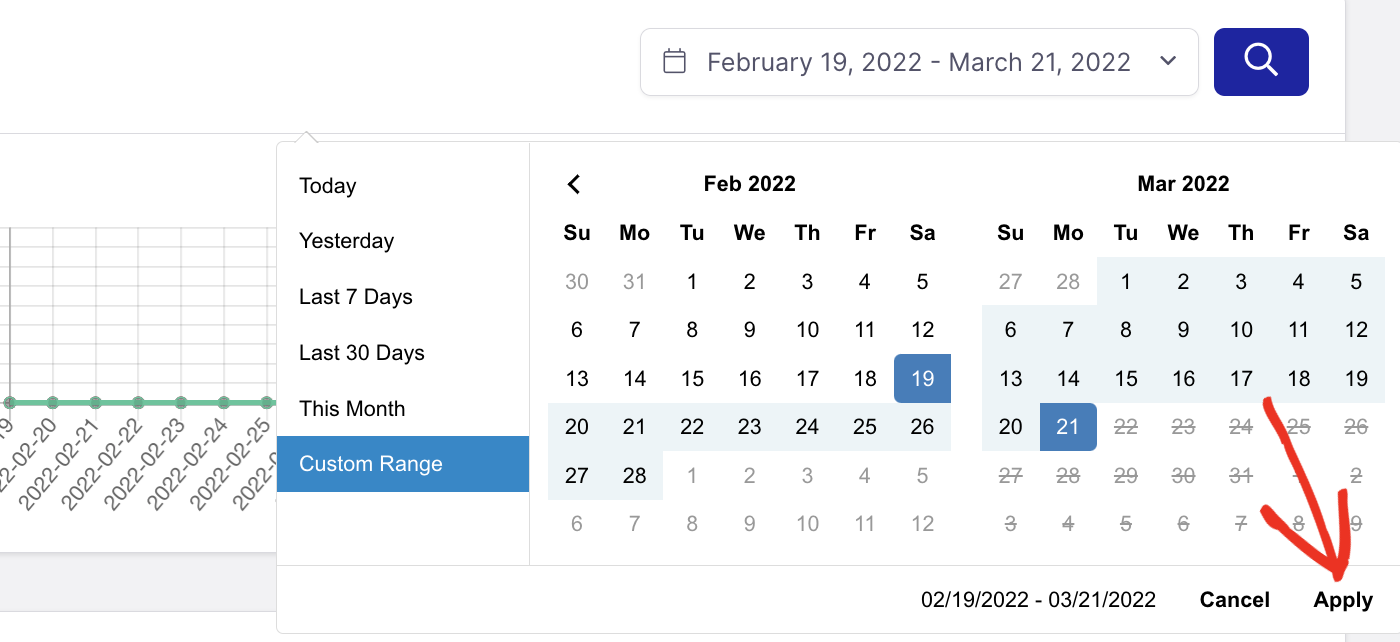
You can also filter this information by date to view analytics for a given time period. Just click on the dropdown in the top right corner of the report to open the date picker and choose your date range.
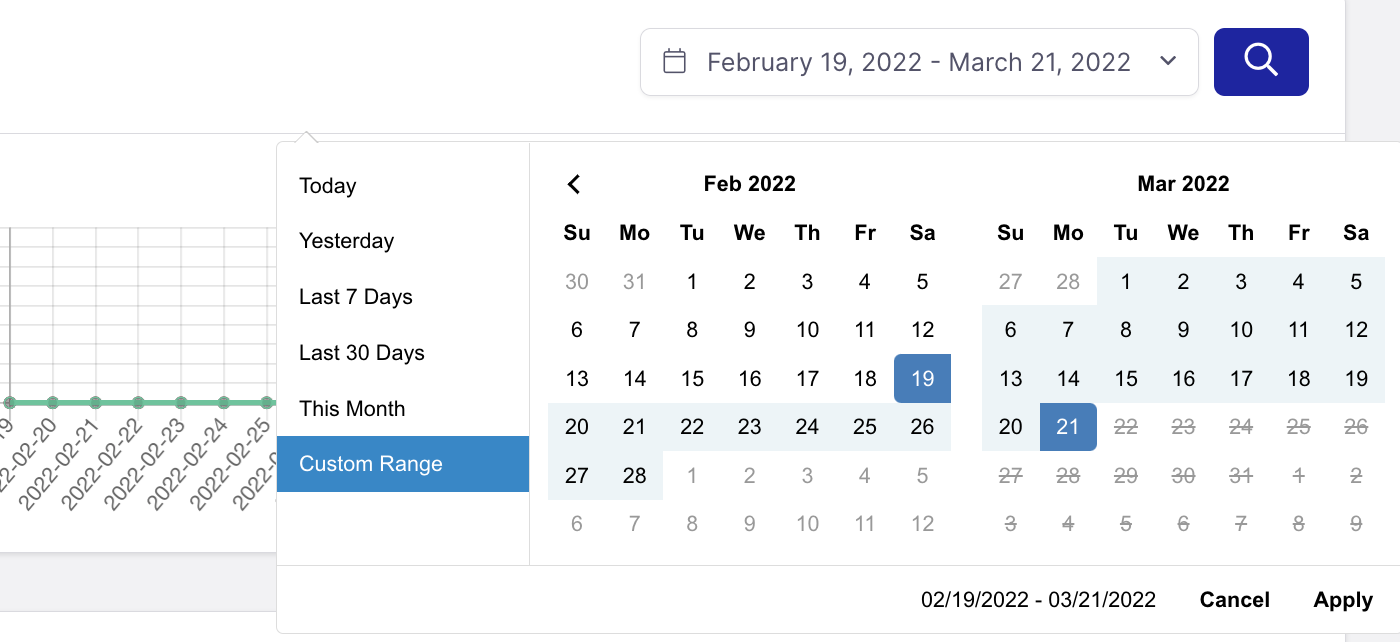
Then click on Apply to see the results.
Viewing Analytics by Email Tag
Note: Email analytics by tag are only available if you’re sending emails through our secure API.
Finally, if you’re using email tags, you can view analytics by tag in the table at the bottom of the Analytics page.

This section also shows your unsubscription rate, in addition to your open rate, click-through rate, and the number of emails sent with each specific tag.
That’s it! Now you know how to view and read your SendLayer analytics.
Next, would you like to learn about email logs? Check out our tutorial on how to view email logs in SendLayer for more information.