Would you like to keep track of who’s unsubscribed from your emails?
SendLayer’s unsubscribe tracking allows you to view details about each time a contact unsubscribed from one of your transactional emails.
In this tutorial, we’ll show you how to track unsubscribes in SendLayer.
Before getting started, be sure to:
How Unsubscribe Tracking Works
When unsubscribe tracking is enabled, SendLayer adds an unsubscribe link to each email that’s sent from your domain.
If an email recipient clicks the unsubscribe link, they will be redirected to a page letting them know that they’ve unsubscribed.
Once they’ve unsubscribed, their contact information will be added to the suppression list in your SendLayer account. This means they will no longer receive any future emails from the sender that they received the email from.
Enabling Unsubscribe Tracking
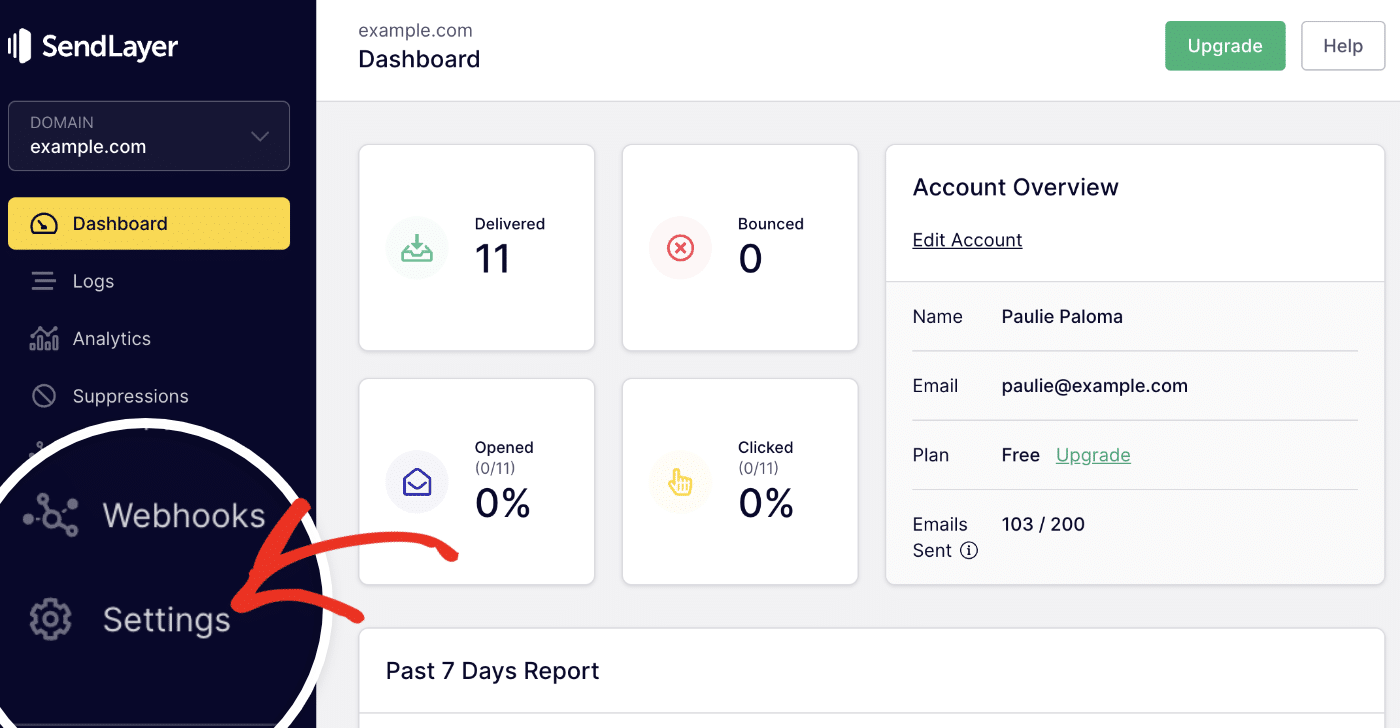
First, sign in to your SendLayer account and navigate to your dashboard. From here, click on the Settings option in the left sidebar menu.
Then, scroll down to the Tracking section of the Domain Settings page.
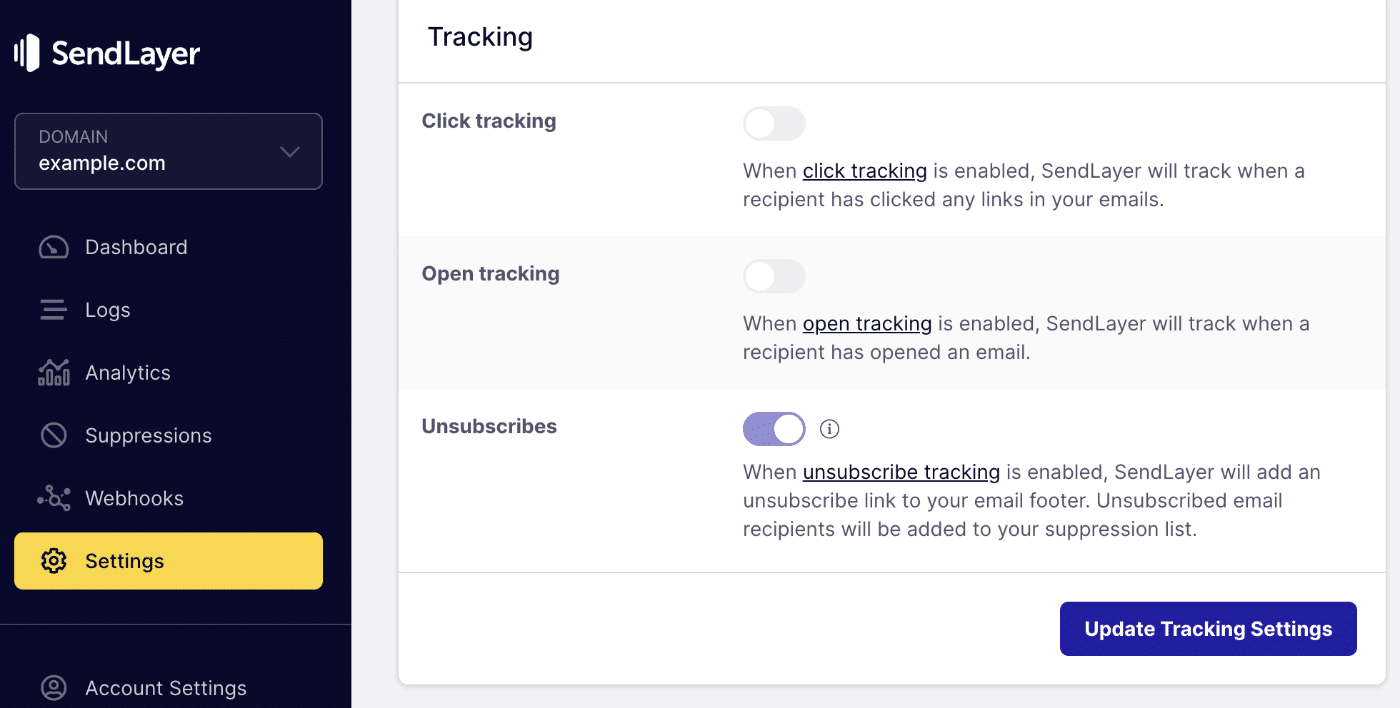
To enable unsubscribe tracking, toggle the Unsubscribes option to the on position.
When you’re ready, go ahead and click the Update Tracking Settings button to save the changes.
Analyzing Unsubscribes
In your SendLayer dashboard, there are two places where you can view information about your unsubscribes: Logs and Suppressions. We’ll cover both of these below.
Viewing Unsubscribes in Logs
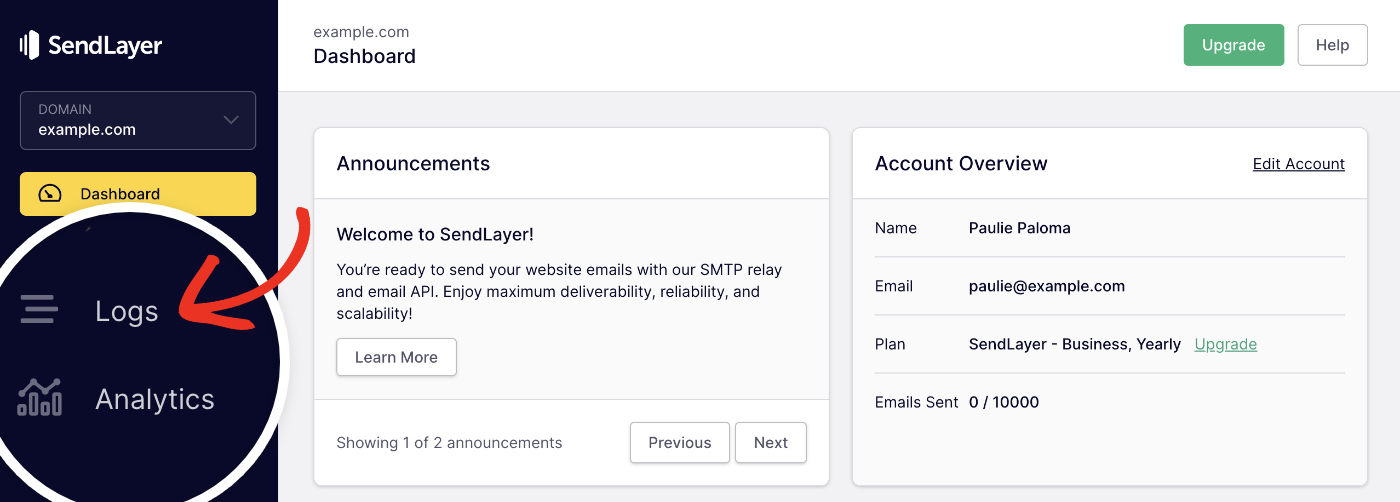
To view unsubscribe metrics, you can check the domain log. To get to the Domain Logs page, click the Logs option in the sidebar menu of your dashboard.
At the top of the page, you’ll see the Report graph that contains data regarding the status of your emails.
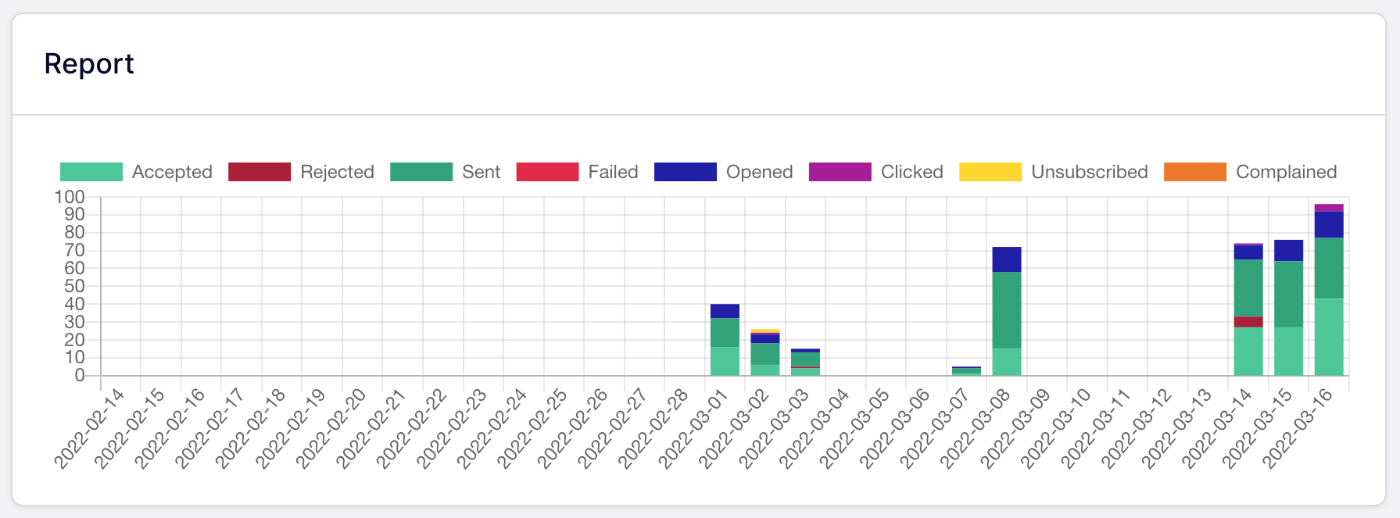
In the graph, any unsubscribe will be represented by a yellow bar. If you hover over the yellow bar, you’ll see the date and the total number of unsubscribes on that day.
If you scroll down to the Latest Logs table, you’ll see all unsubscribes marked with a yellow dot.
For each unsubscribe in the table, you’ll also see the following:
- TIMESTAMP: The time the contact unsubscribed
- EVENT: unsubscribed
- RECIPIENT: The recipient’s email address
- ACTION: Unsubscribed
When you click on an unsubscribe in the table, you can see more information regarding the unsubscribe event. For example, you can view relevant tags and the recipient’s geolocation, IP address, device type, and operating system.
Viewing Your Suppression List
All contacts that have unsubscribed will appear in your suppression list. To view the contacts that have been added to your suppression list, click the Suppressions option in the sidebar menu of your SendLayer dashboard.
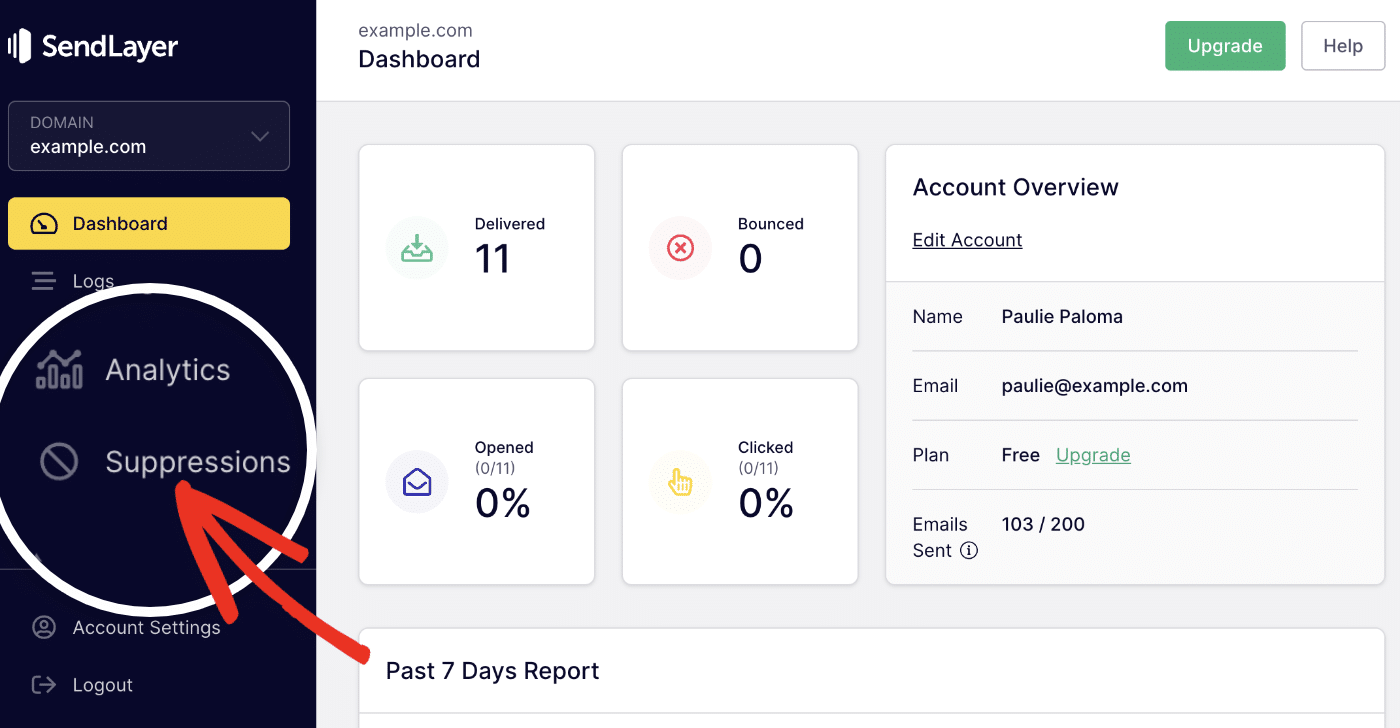
This will take you to the Domain Suppressions page where you can view and manage suppressed email addresses.
On this page, you’ll see a Suppressed email addresses table with a list of the email addresses for the contacts that have unsubscribed.

That’s it! Now you know how to use unsubscribe tracking in SendLayer.
Next, would you like to understand how SendLayer rate limiting works? Check out our tutorial on rate limiting for more information.