Are you ready to complete your domain setup and start sending emails with SendLayer?
By setting up a domain, you’ll improve email deliverability rates and be able to send emails from any email address at your domain.
In this tutorial, we’ll cover how to complete your domain setup.
Before you get started, you’ll need:
- Access to your web hosting account’s DNS settings
Adding a Domain
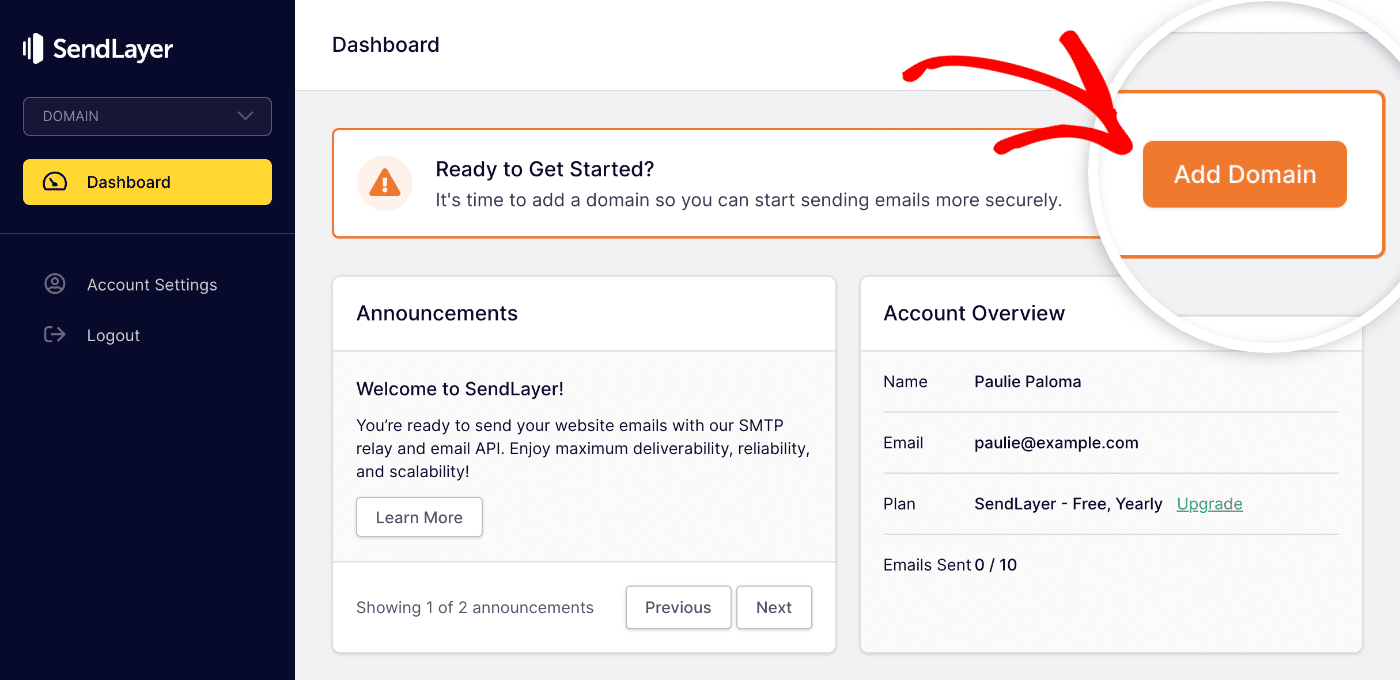
First, you’ll need to log in to your SendLayer account dashboard.
Once you’re in your account dashboard area, there are two ways to add your first domain. First, you can start by clicking the orange Add Domain button at the top of the page.
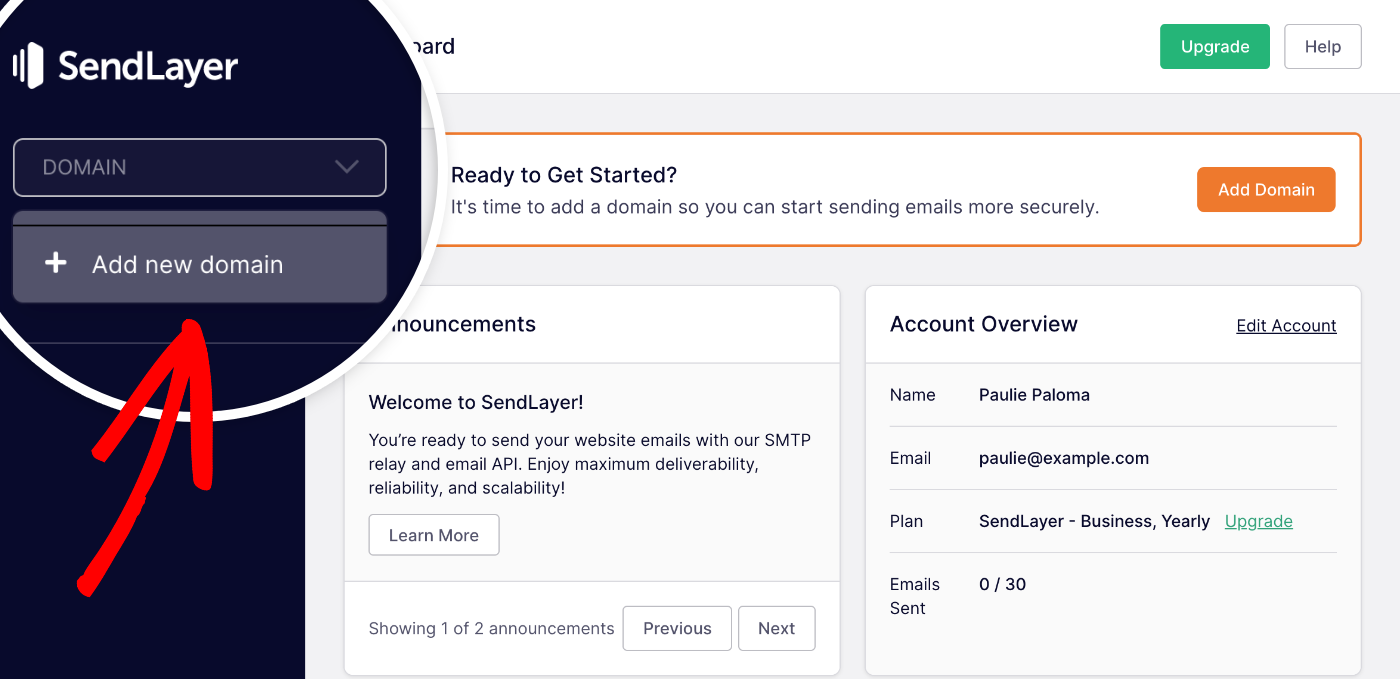
Alternatively, you can click on the DOMAIN dropdown located in the sidebar menu.
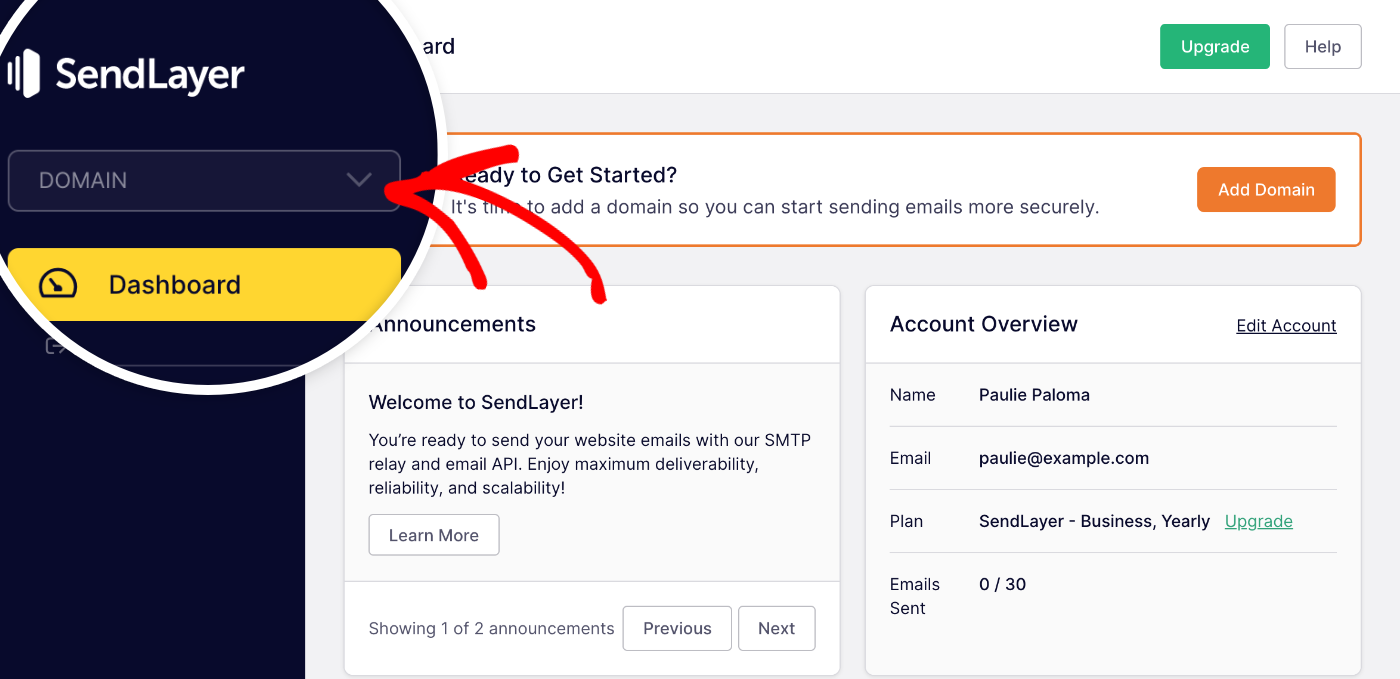
Then, select the Add new domain option.
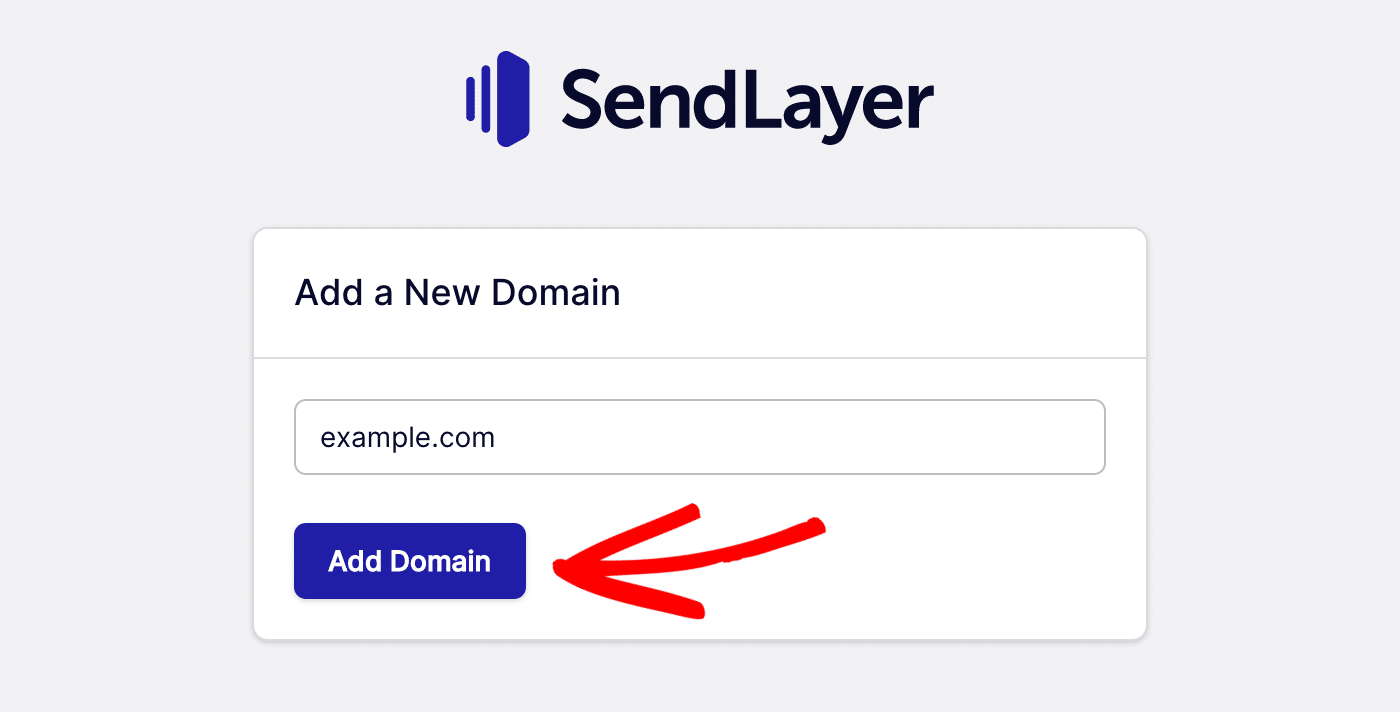
Both of those options will take you to a new page where you’ll be prompted to add your domain. Go ahead and type in your domain and click the Add Domain button.
Accessing DNS Records
Once you’ve added your domain, SendLayer will automatically detect your domain host and generate DNS (Domain Name System) records for you.
Depending on your domain host, you can either automatically verify your domain or manually add the 5 DNS (Domain Name System) records generated for it.
Using the One-Click Domain Verification Option
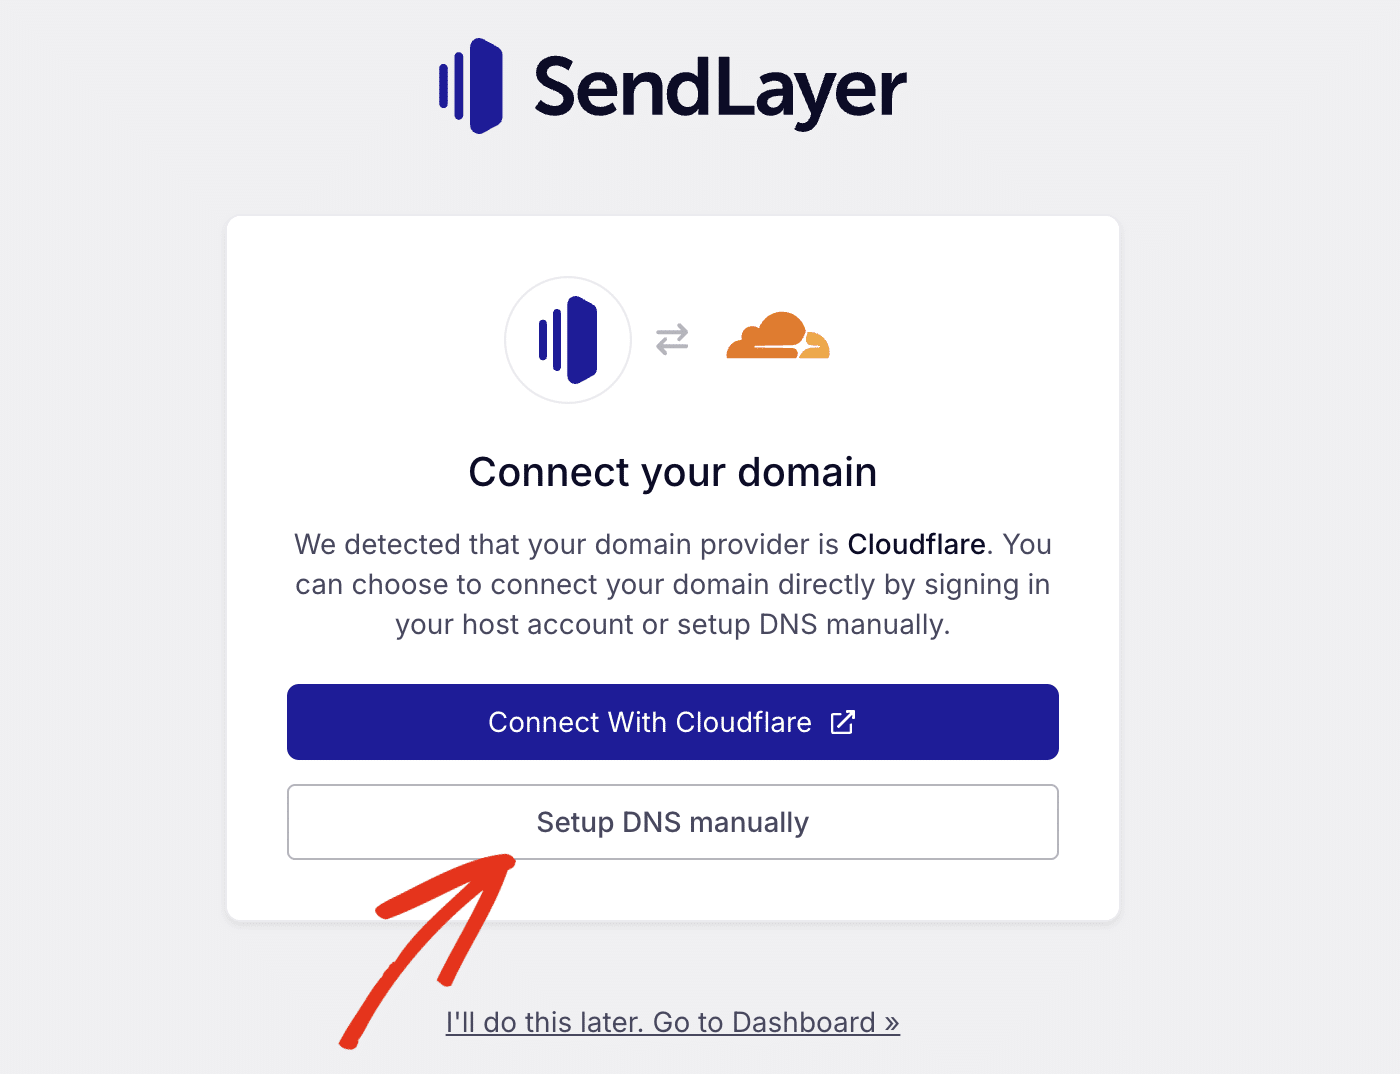
To use the one-click verification option, click the Connect With Cloudflare button.
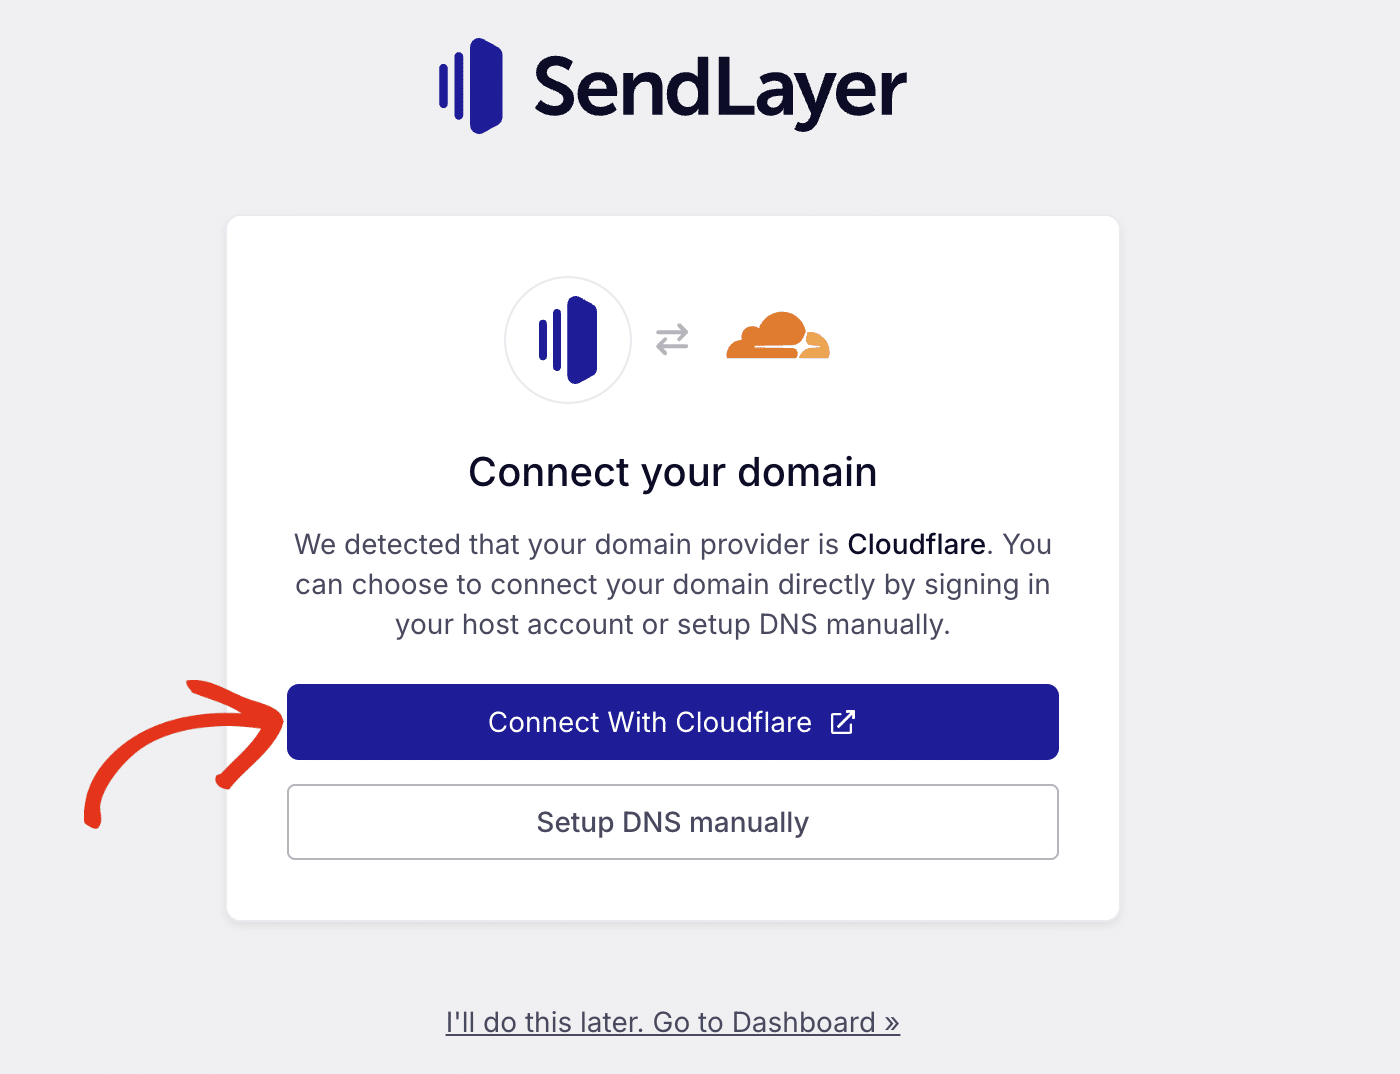
Note: The one-click method above uses Cloudflare. However, the steps are similar regardless of your domain host.
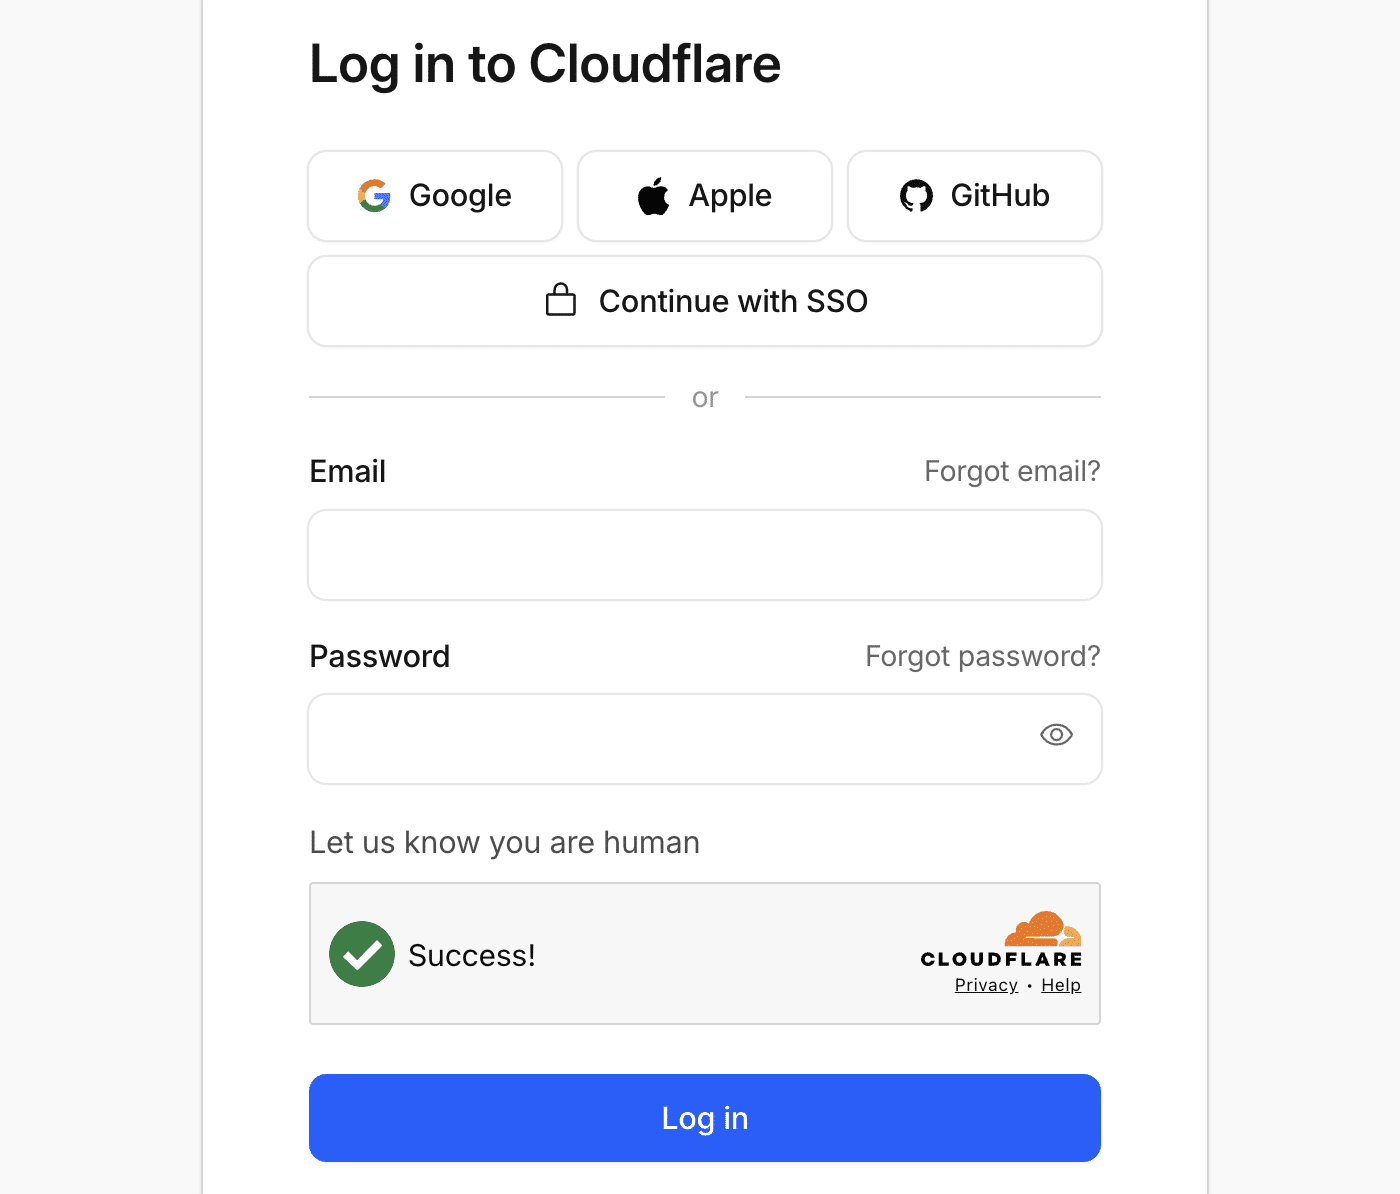
After that, you’ll need to log in to your Cloudflare account.
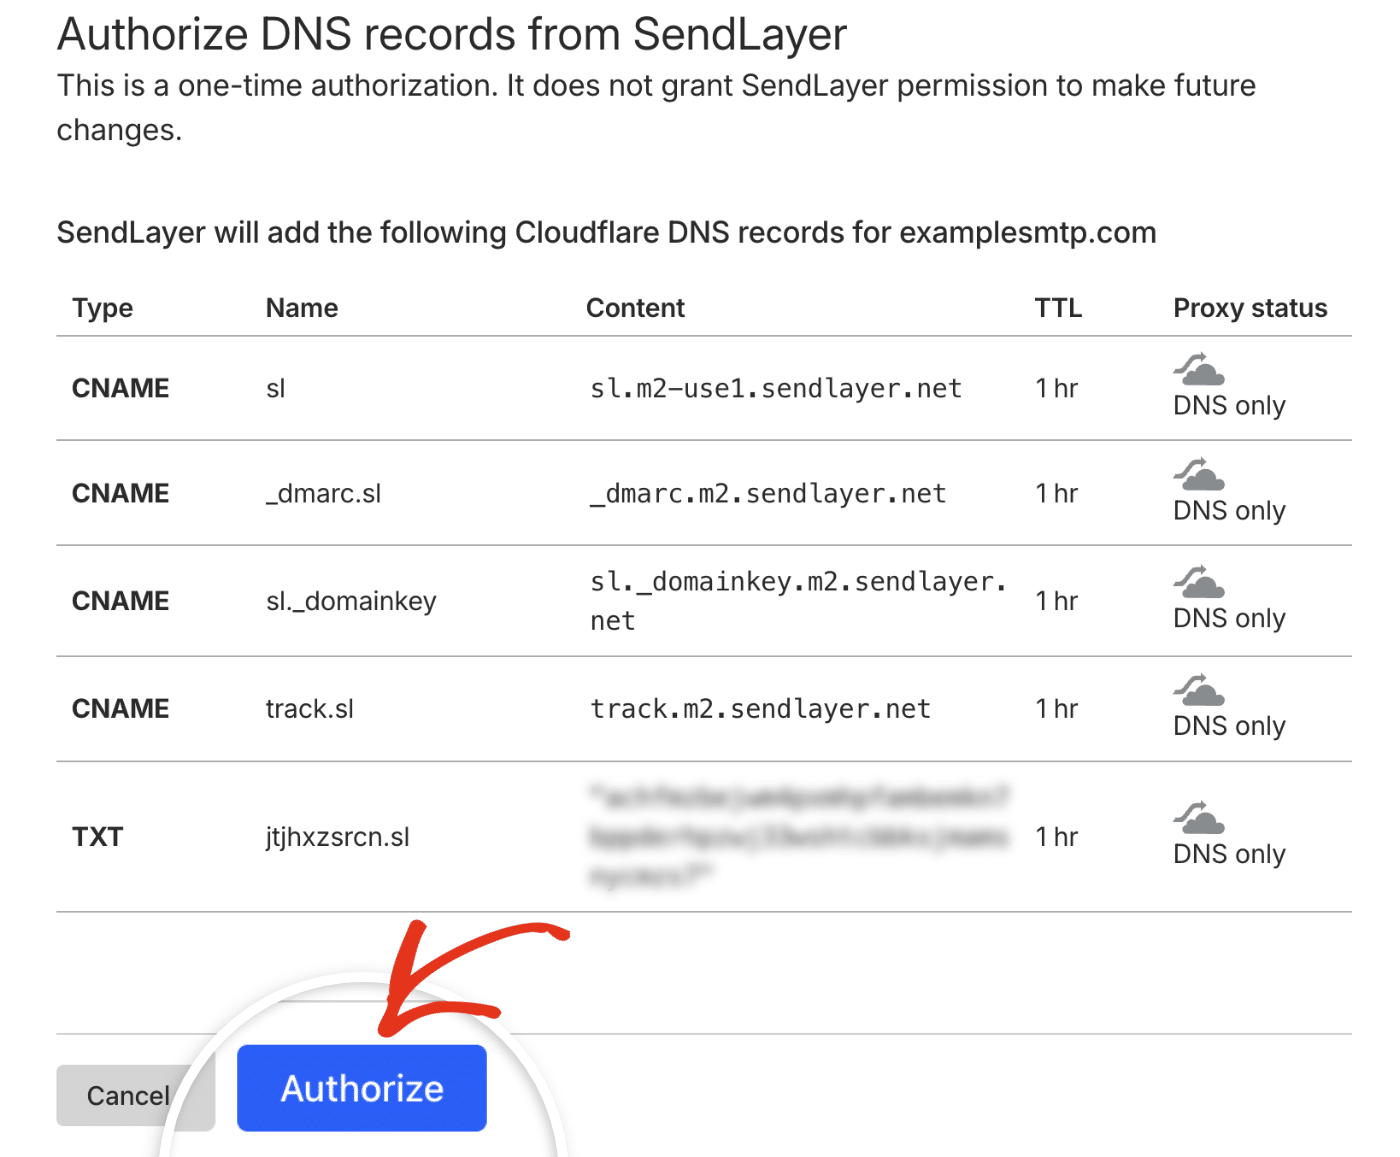
Once logged in, you’ll see the list of records you need to add to your account. Click Authorize to add them.
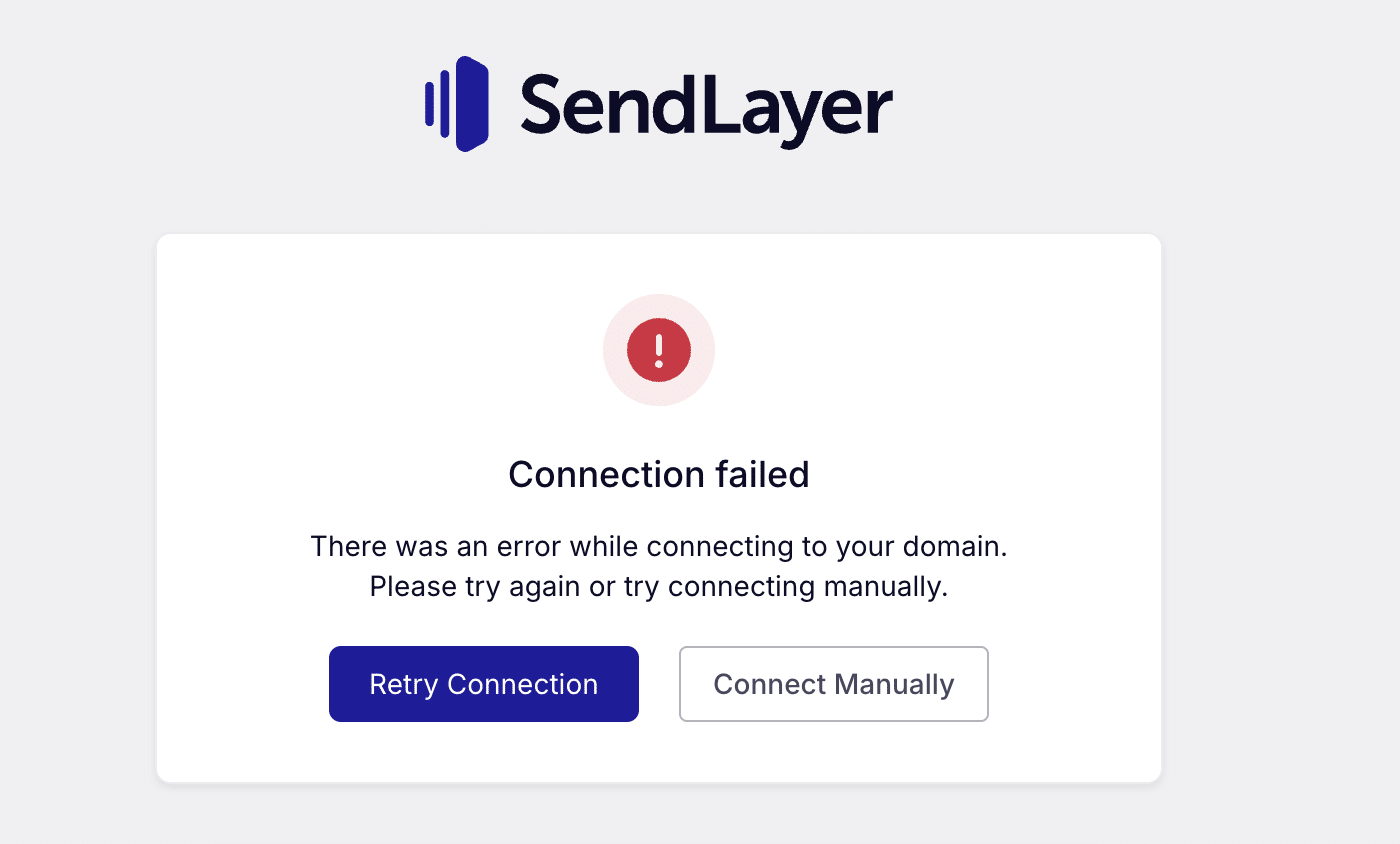
You’ll be directed back to the domain setup page with a success notification. You can click the Verify DNS Connection to check the status of the DNS propagation.
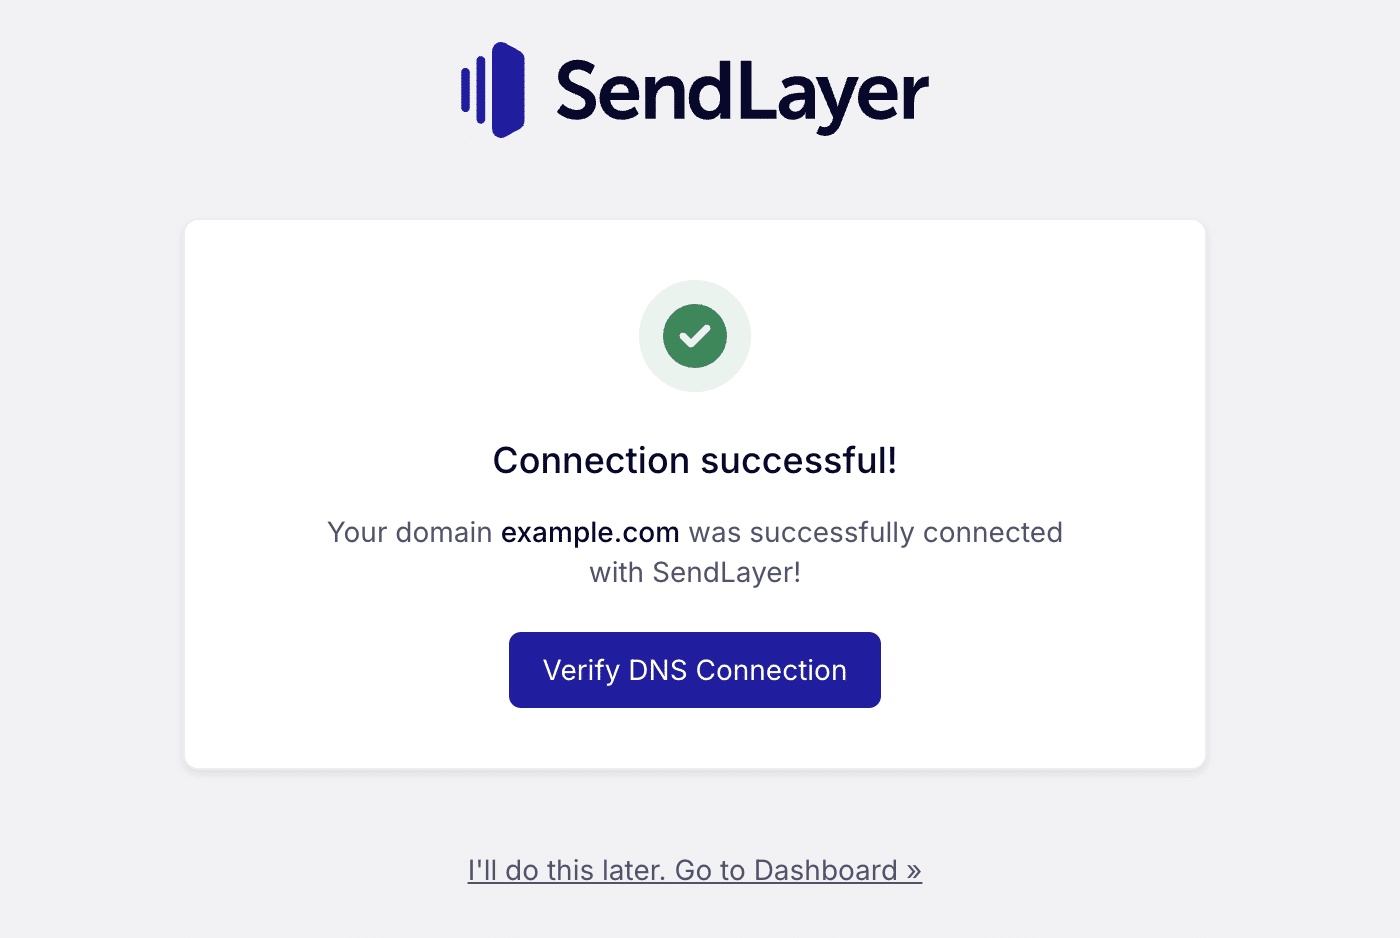
You might encounter a ‘Connection failed’ error. When this happens, you can either retry the connection or manually add the DNS records to your hosting account.
Manually Add DNS Records
To manually add the DNS records to your site, click the Setup DNS Manually button.
If SendLayer doesn’t detect your domain host, you’ll see the general DNS settings for your domain.

You can click the choose your domain host link to select your domain host from the available options.

In the overlay that appears, click the Choose your domain host dropdown and select your domain service provider.

If you can’t find your domain host from the list, we recommend setting it to Other and using the general domain host DNS records.
Here are the types of DNS records that SendLayer provides:
Each type of DNS record has a HOSTNAME, VALUE, and TTL (time to live) that’s specific to your domain. This information will need to be added to your web host’s DNS settings for each individual DNS record that SendLayer provides, which we’ll cover in the next steps.
Locating Your Site’s DNS Settings
To connect SendLayer to your site, head over to your web hosting account and locate the DNS settings. We recommend keeping your SendLayer account and hosting account open in separate windows or tabs, so you can quickly switch between the two.
Adding DNS Records to Your Site
Once you’ve located your site’s DNS settings, it’s time to add your DNS records.
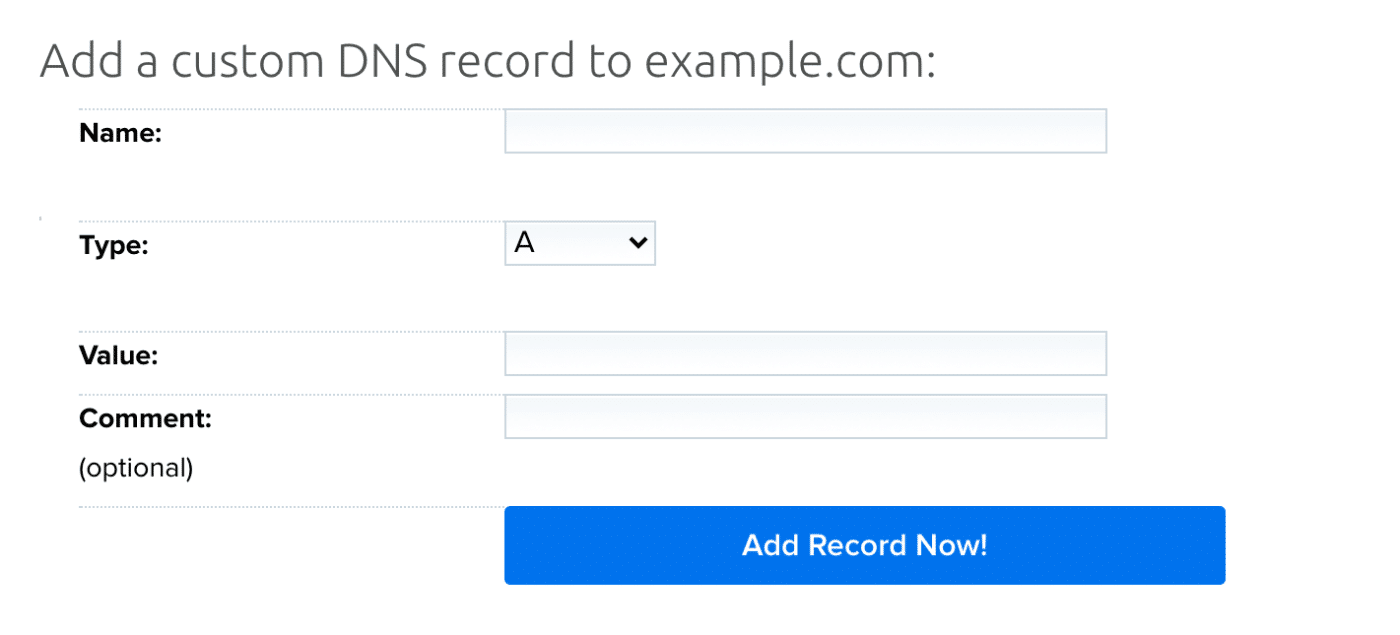
In your DNS settings, you should see an option to add a DNS record. Here you’ll typically see inputs for the DNS record name, type, value, and TTL. However, the names of these values might vary slightly, depending on your web hosting service.
Note: The DNS settings provided in our examples are for demonstration only. Your DNS settings will likely look different, depending on which web hosting service you’re using to host your domain.
For each of the records provided, be sure to add the TYPE, HOSTNAME, and VALUE exactly how they are in SendLayer. If you have an option to add a TTL, be sure to add that too.
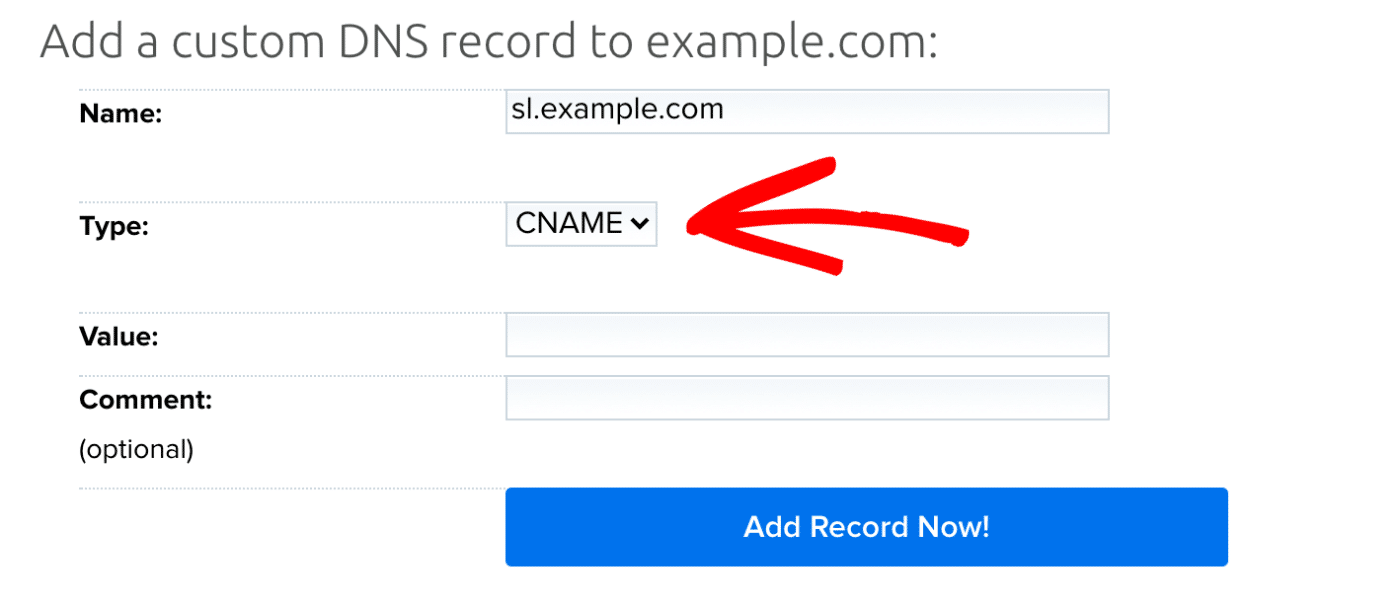
As an example, we’ll add our first CNAME record to our DNS settings in our web hosting account.
First, we’ll copy the HOSTNAME from our SendLayer DNS records by clicking on the copy icon.
Next, we’ll switch over to our web hosting account and paste our HOSTNAME into the Name field.
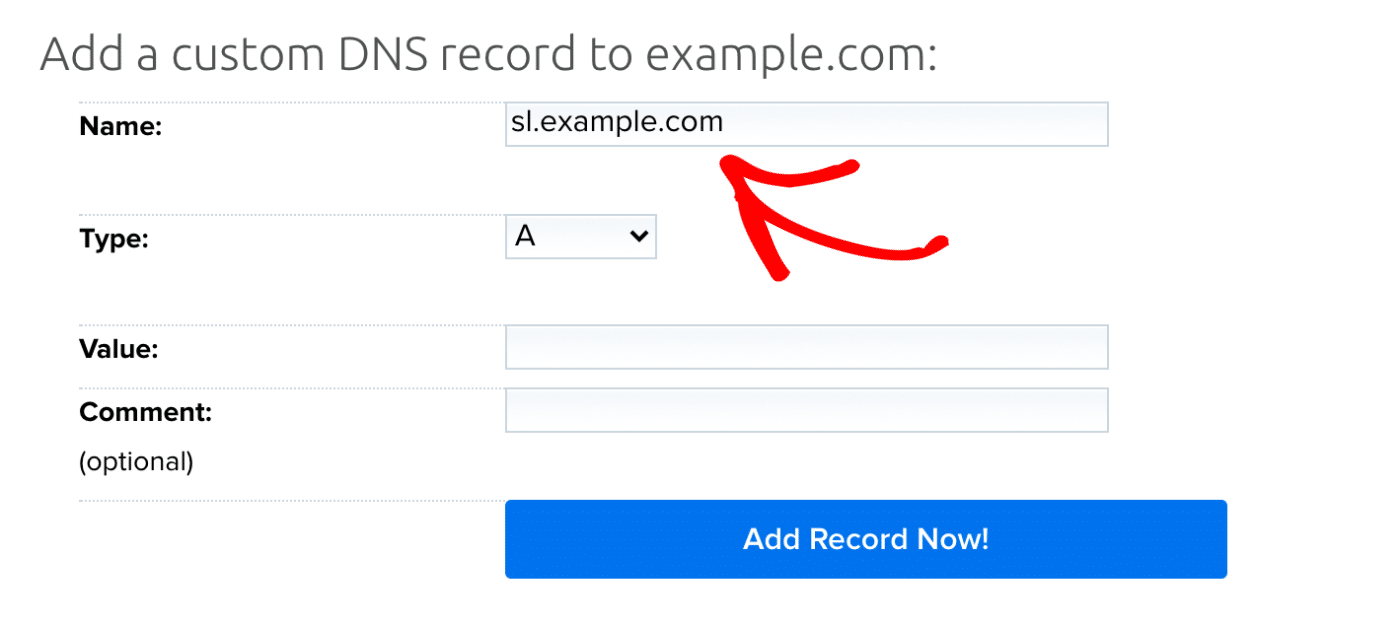
Note: Some hosting providers automatically append your domain name to the DNS record. If this is the case, be sure to remove your domain from the DNS record that SendLayer provides. For example, .example.com would need to be removed from sl.example.com, leaving just sl as the record you’d add.
Then, in the Type section, select CNAME from the dropdown.
After that, head back to your SendLayer account and copy the VALUE by clicking on the copy icon.
Then, navigate back to your web hosting account and paste the VALUE into the Value field.

Note: Some hosting providers, like Cloudflare, automatically enable proxying for CNAME records. Be sure to disable this setting for each of your SendLayer CNAME records so that the Proxy Status is DNS Only.
Finally, click the add record button.

Once you’ve successfully added your first DNS record, be sure to repeat this process with the remaining DNS records that are in your SendLayer account. You should be adding a total of 4 CNAME records and 1 TXT record.
Note: It can take up to 24-48 hours for DNS changes to propagate.
Frequently Asked Questions
These are some of the most common questions we receive about setting up DNS records for SendLayer.
I’m not sure which account to use to access my DNS settings. What should I do?
If you’re not sure where your website is hosted, or if you had someone else (like a web developer) set up your web hosting for you, you can use free online tools to help you determine where your site is hosted.
Below is a list of some of the most popular tools for looking up your hosting provider:
- WordPress Theme Detector by WPBeginner
- IsItWP
- Sitechecker
All of these tools work similarly. Just type your domain into the search bar to see what hosting provider appears in the search results. Here is an example of some results using IsItWP:
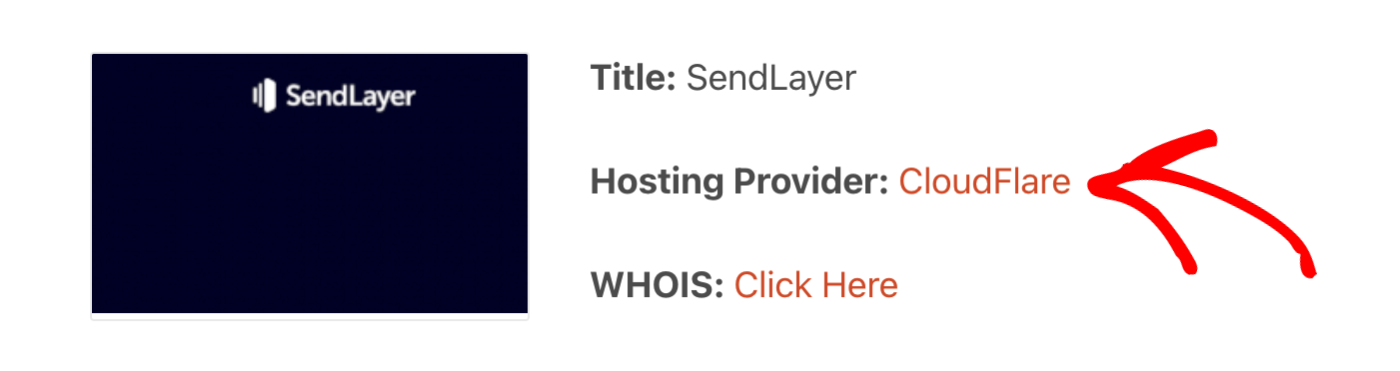
Once you find your hosting provider, you can follow its account recovery process to figure out your username and password or reach out to their support team for further assistance.
That’s it! Now you know how to complete your domain setup.
Next, would you like to learn how to link your site to SendLayer? Check out our tutorial on integrating with SendLayer for more information.