Ready to set up SendLayer for your site on Name.com?
SendLayer streamlines the process of sending transactional emails from your Name.com domain.
In this tutorial, we’ll show you how to set up SendLayer for your site on Name.com.
Before getting started, be sure to:
Accessing DNS Records in SendLayer
Once you’ve added a domain to your SendLayer account, SendLayer will automatically detect your domain host and generate 5 DNS (Domain Name System) records unique to your domain.

If it doesn’t detect the correct domain host, click Change your domain host here to choose your domain registrar.

In the overlay that appears, click the Choose your domain host dropdown and select Name.com from the available options.

Note: Once you’ve added a domain to your account, SendLayer generates a subdomain for you, namely sl.
For instance, if your domain is example.com, SendLayer will give you sl.example.com. To learn more, check out our guide explaining why SendLayer creates a subdomain.
SendLayer provides the following types of DNS records:
Each record type has a unique HOSTNAME, VALUE, and TTL (time to live) for your domain. For Name.com, you’ll only need to use the HOSTNAME and VALUE for each record. We recommend leaving the TTL as default when using Name.com.
We’ll cover all you need to add each of the 5 DNS records to your Name.com account in the next few steps.
Locating DNS Settings in Name.com
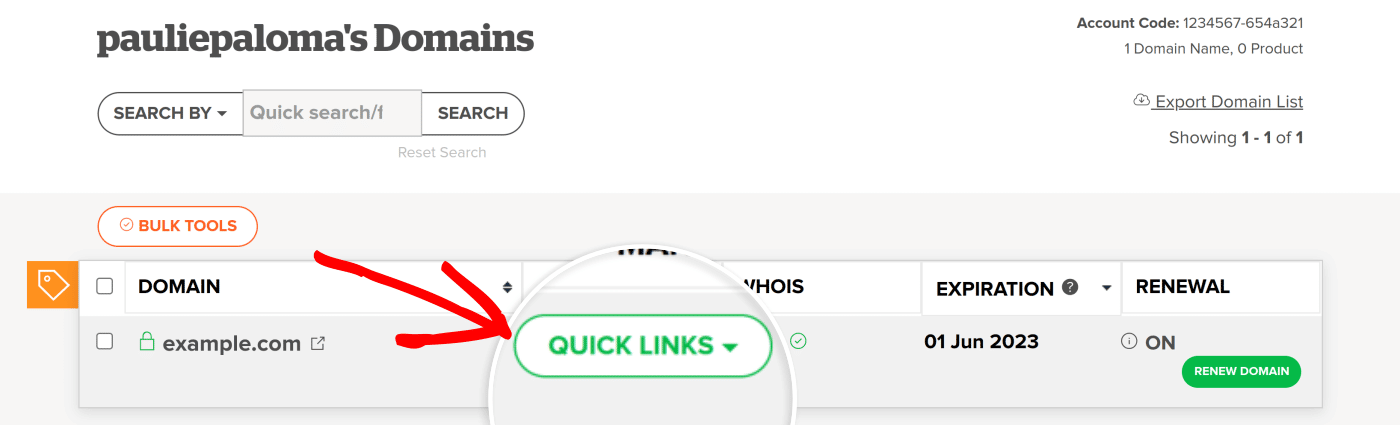
Once you’re ready, log in to your Name.com account and click MY DOMAINS.

You’ll see a list of all your domains:

On the domain you’d like to modify, click QUICK LINKS.
Next, click Manage DNS Records.
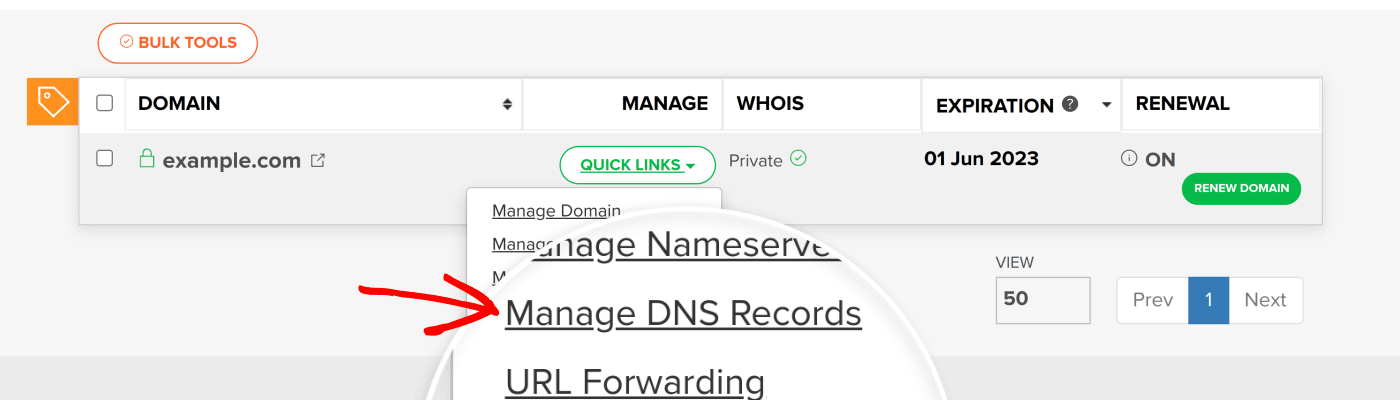
You will now see a list of all records corresponding to your domain.
Adding DNS Records in Name.com
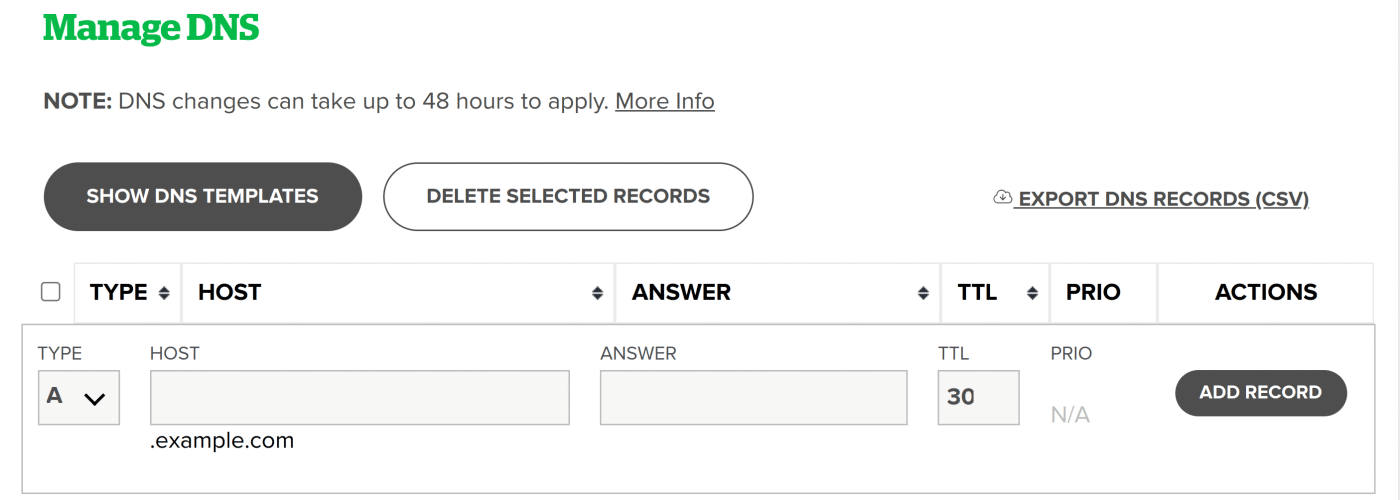
First, choose the type of record you’d like to add from the dropdown list.

For the first record, select the type CNAME.

Next, copy the HOST from the corresponding record in SendLayer.

Name.com will automatically append your domain when adding the HOST to any record.

Next, copy the VALUE from SendLayer. You can use the copy icon in the SendLayer interface to simplify the process.

Now, type or paste the value into the ANSWER field on Name.com.

Be sure to leave the TTL at the default value of 300 seconds, which is equal to 5 minutes.
Once you’ve added the necessary information from SendLayer, click ADD RECORD.

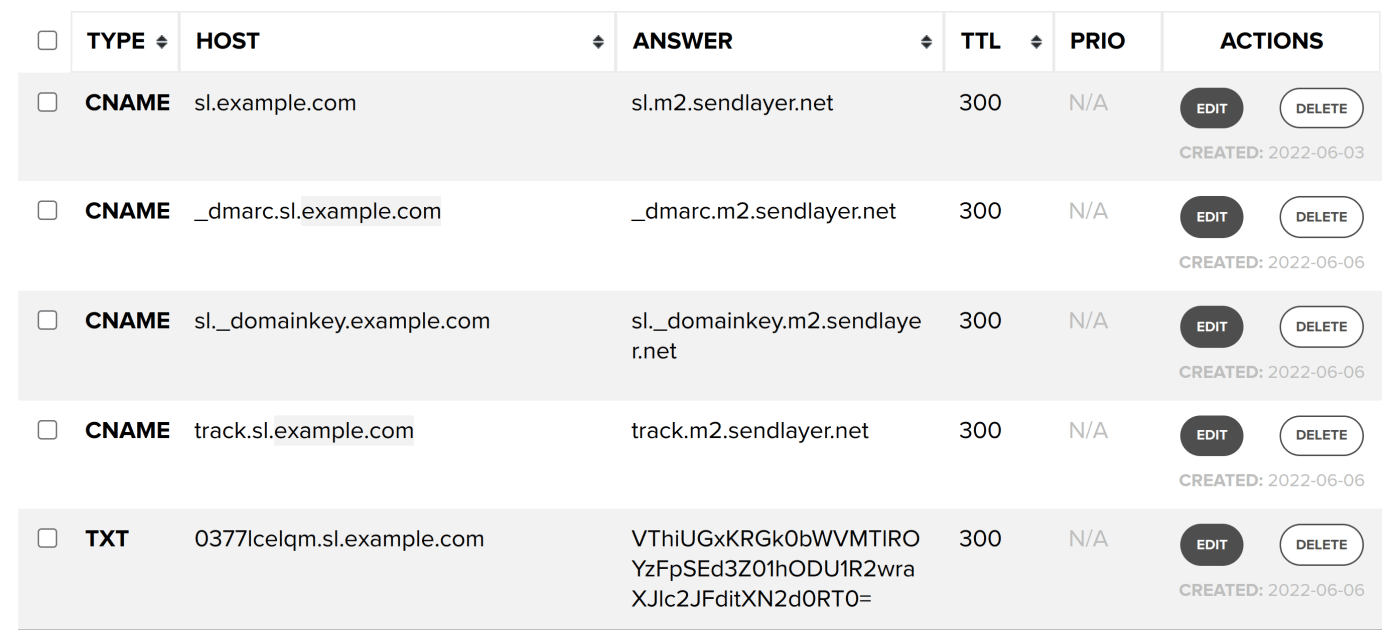
That’s all you need to finish this setup. Just repeat the previous steps using the corresponding HOST and VALUE to add the remaining 4 records. When you’re finished, you should have 4 CNAME records, and 1 TXT record, for a total of 5.
This should give you a list of records similar to this example:
Note: New records may take between 24 to 48 hours to propagate.
Checking Your Domain Status
You can easily verify that your DNS records have been successfully propagated from right within SendLayer. Please note that it may take between 24-48 hours before the changes to your domain are fully applied.
That’s it! Now you know how to set up SendLayer on Name.com.
Next, would you like to learn how to add additional domains to your account? Check out our tutorial on adding additional domains for more information.