Would you like to add additional domains to your SendLayer account?
Each SendLayer plan supports a different domain limit per account. All you need to do is authorize your additional domains, and you’ll be on your way to sending emails.
In this tutorial, we’ll show you how to authorize additional domains in your SendLayer account.
Before getting started, you’ll need:
- Access to your web hosting account’s DNS settings
Adding an Additional Domain
First, log in to your SendLayer account dashboard.
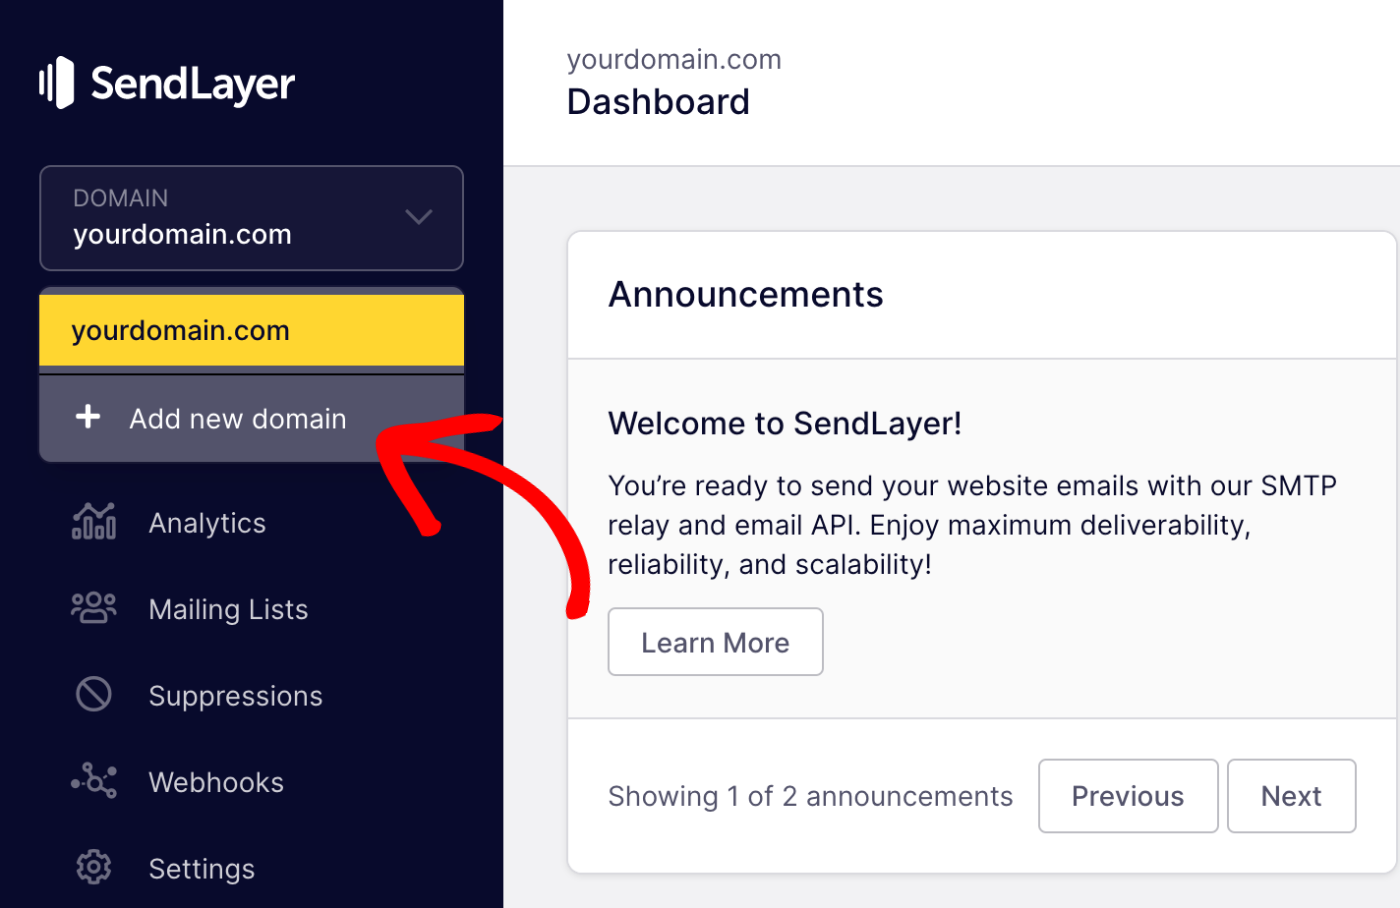
Once you’ve accessed your dashboard, click on the DOMAIN dropdown in the navigation menu.

Then, from the dropdown list, select the Add new domain option.
- Trial and Starter: Limited to 1 domain
- Business: Allows up to 3 domains
- Growth: Allows up to 5 domains
- Scale: Allows up to 20 domains
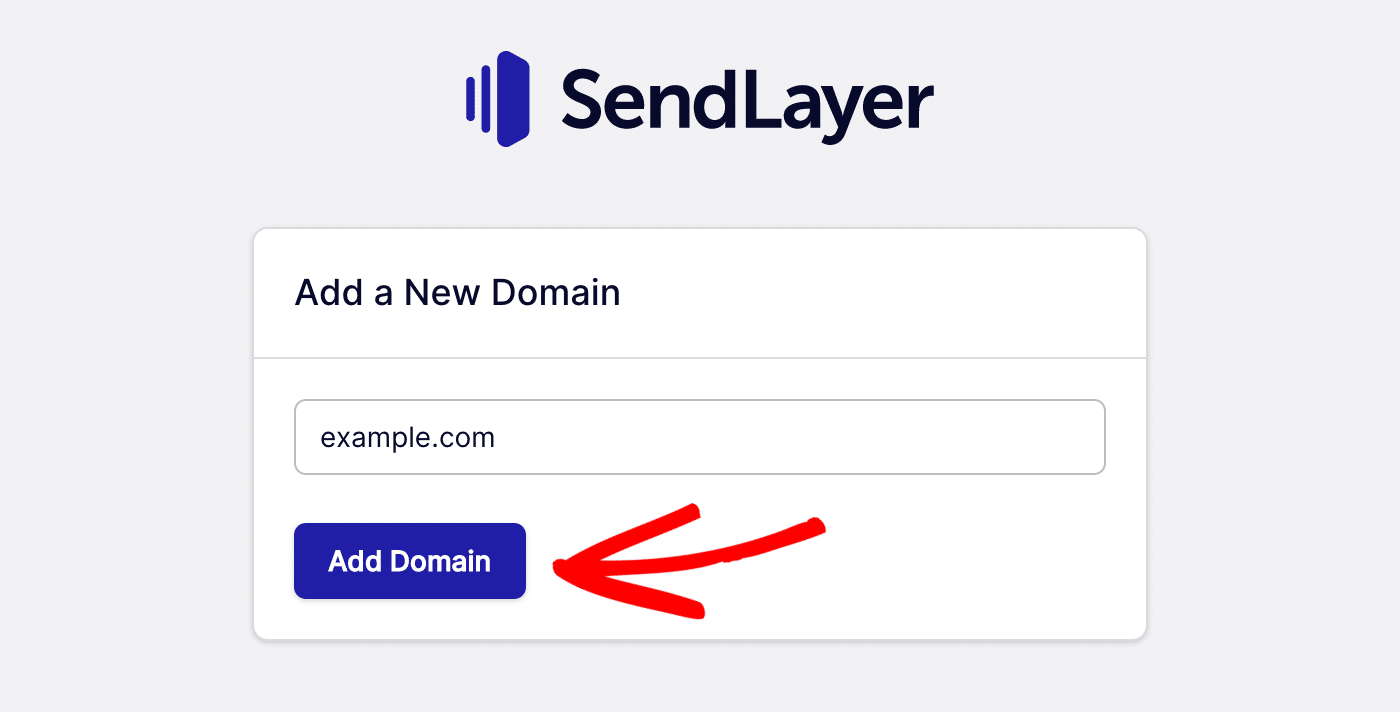
Next, you’ll be prompted to add your new domain. When you’re ready, go ahead and add your domain in the field provided.
SendLayer will then generate DNS (Domain Name System) records for your new domain.
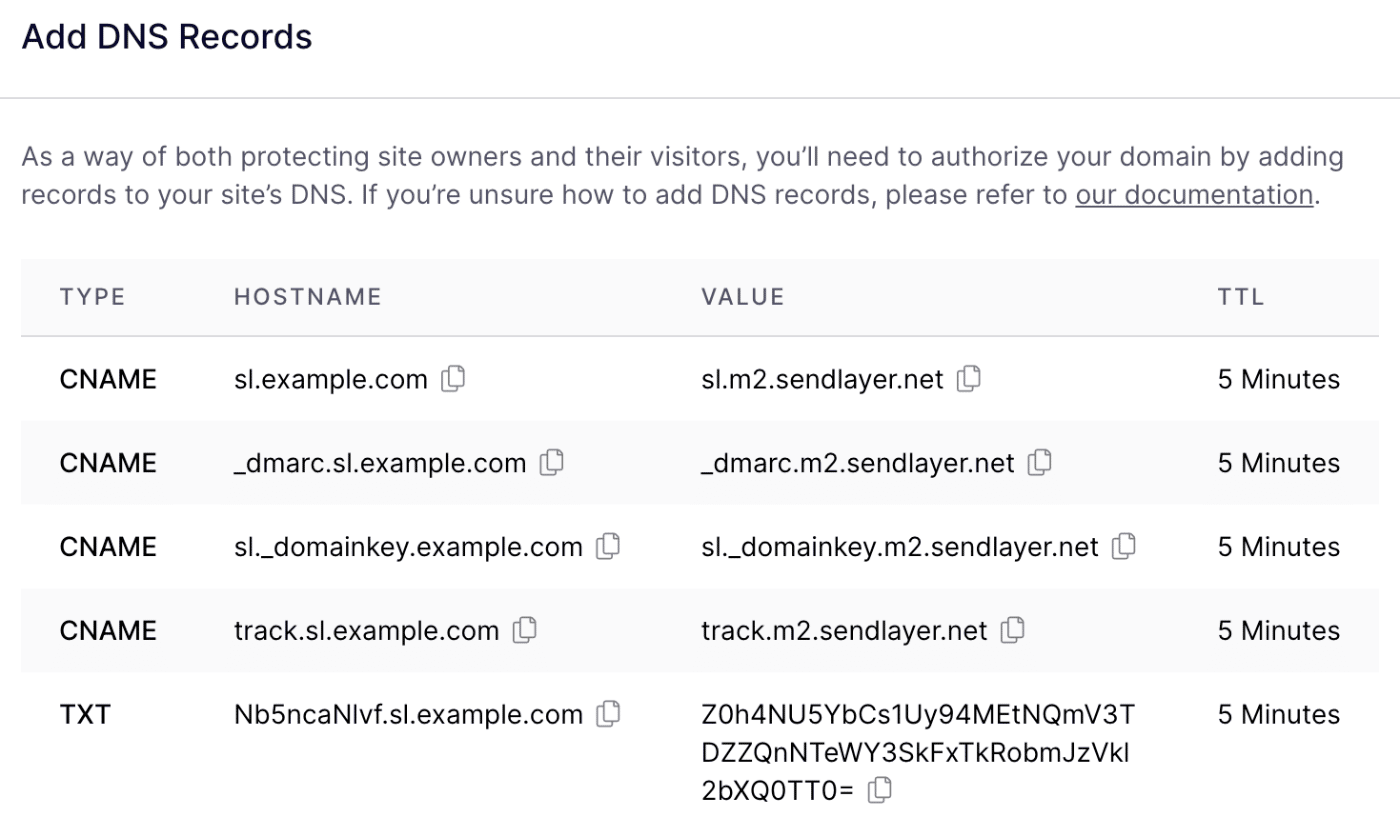
You’ll need to add these records to your web host’s DNS settings. For more details on adding DNS records, check out our tutorial on completing your domain setup.
Switching Between Domain Dashboards
Each domain you add will have a separate dashboard you can access. This allows you to configure different settings for each of your domains and easily view data specific to a single domain at a time.
To access your different domains, click on the DOMAIN dropdown in the left sidebar menu.

Here you’ll see a list of all the domains you’ve added to SendLayer. To view a specific domain’s dashboard, click on the domain you’d like to see.
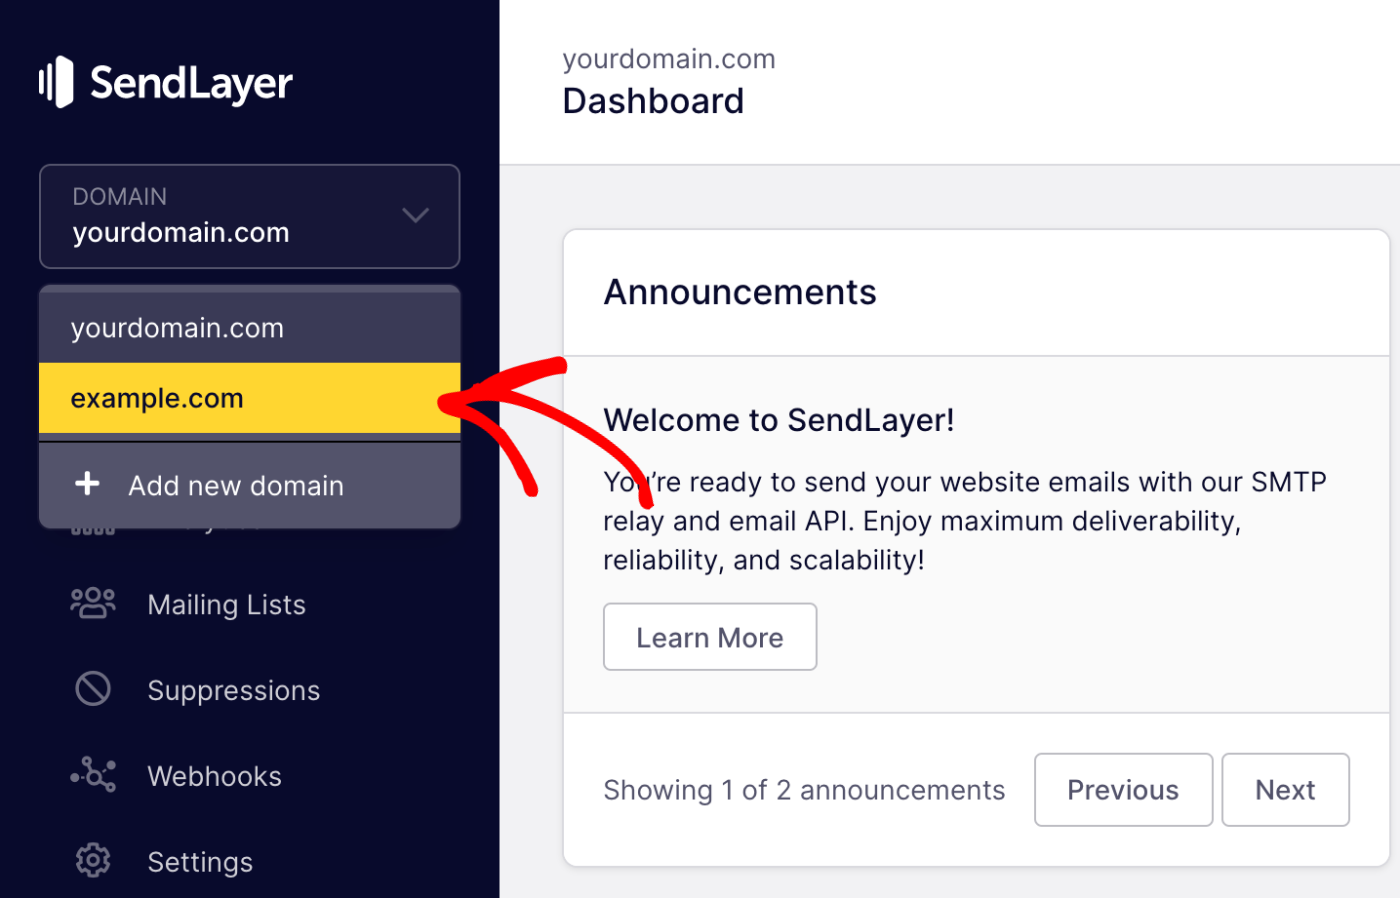
Finally, you’ll be redirected to the dashboard specific to that domain.
Increasing Your Account’s Domain Limit
SendLayer allows you to increase your domain limit by purchasing additional domains as addons. This is helpful if you need access to more domains without upgrading your SendLayer plan.
To get additional domains, click on Account Settings to access your account information.
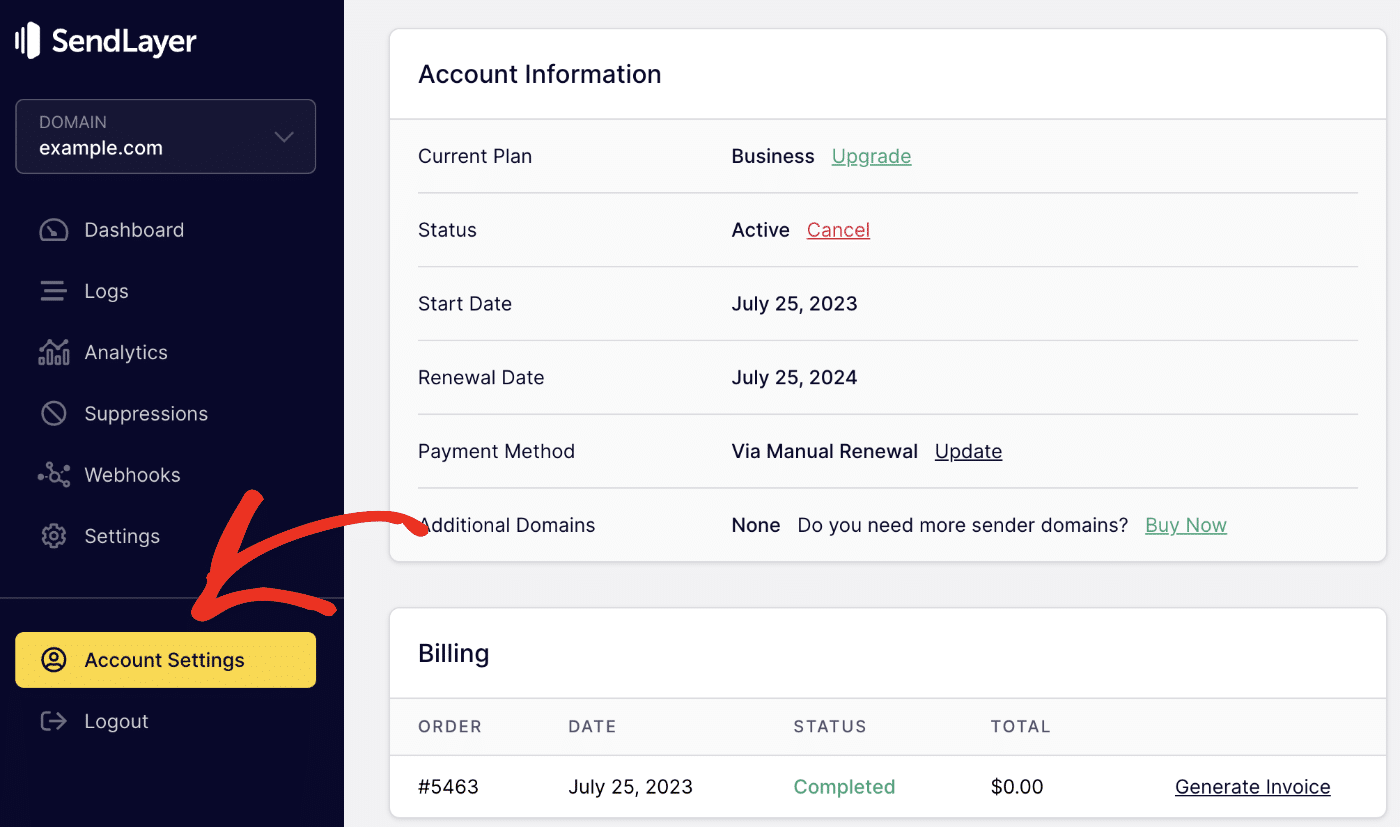
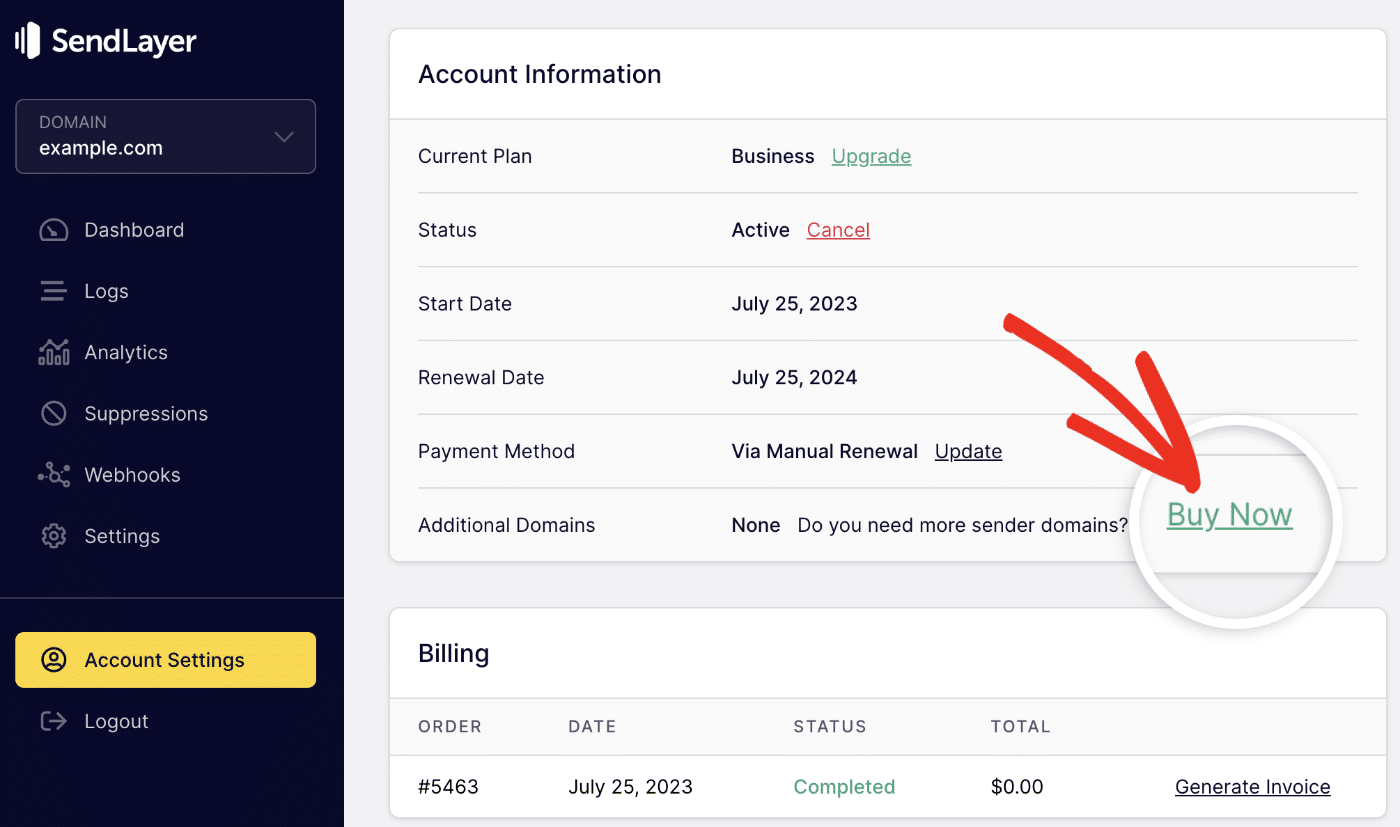
Under the Account Information section, you’ll see details about your current plan. To proceed, click the Buy Now button next to Additional Domains.
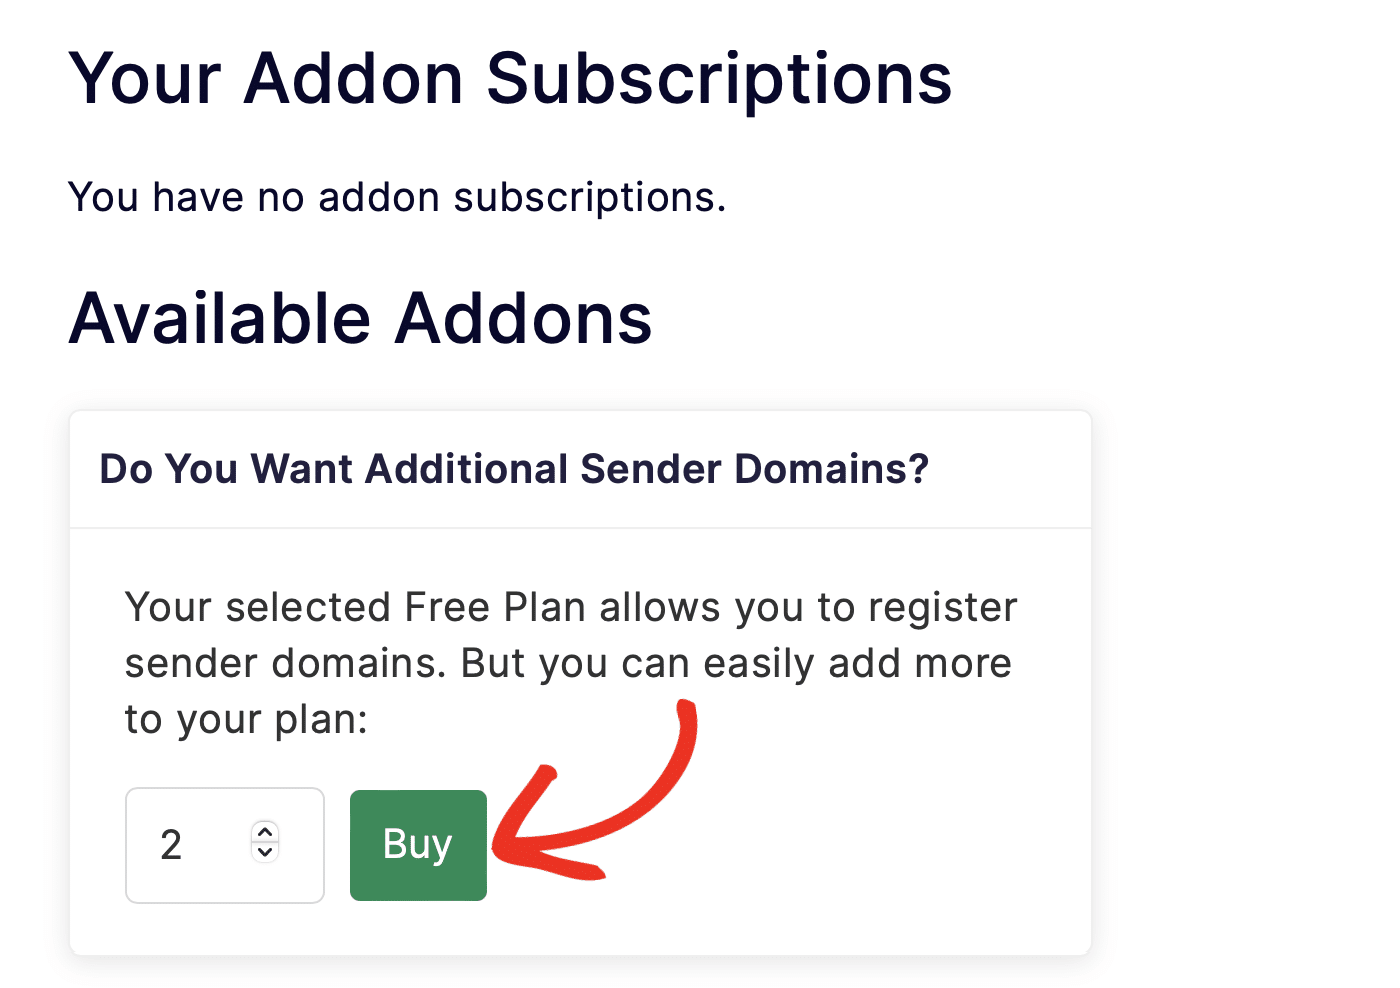
In the Available Addons page, specify the number of domains you’d like to add to your account. Then click Buy to proceed.
You’ll be directed to the checkout page to complete your purchase.
That’s it! Now you know how to add additional domains to your SendLayer account.
Next, would you like to learn how to further manage your domain settings? Check out our tutorial on editing domain settings for more information.