Would you like to link SendLayer to your domain on Google Domains?
SendLayer makes sending transactional emails from your Google Domains domain seamless with its simple integration and reliable delivery.
In this tutorial, we’ll show you how to set up SendLayer with a site that’s hosted on Google Domains.
Before getting started, be sure to:
Viewing DNS Records in SendLayer
After you’ve added your domain, SendLayer will automatically detect your domain host and generate 5 unique DNS (Domain Name System) records specifically for your domain.

If it doesn’t detect your domain host, click choose your domain host and select your domain registrar.

In the overlay that appears, click the Choose your domain host dropdown and select your domain registrar from the available options.

If you don’t find Google Domains from the dropdown, we recommend choosing the Other option and using the general DNS settings.

Note: When you add a new domain to your SendLayer account, we’ll create a subdomain for you that starts with ‘sl‘ (e.g. sl.example.com). For additional information, be sure to check out why SendLayer creates a subdomain.
Here are the types of DNS records that SendLayer generates:
The 5 records will each have a TYPE, HOSTNAME, VALUE, and TTL (Time To Live) that correspond to your domain. For Google Domains, you’ll need the HOSTNAME, TYPE, TTL, and VALUE information.
Locating DNS Settings in Google Domains
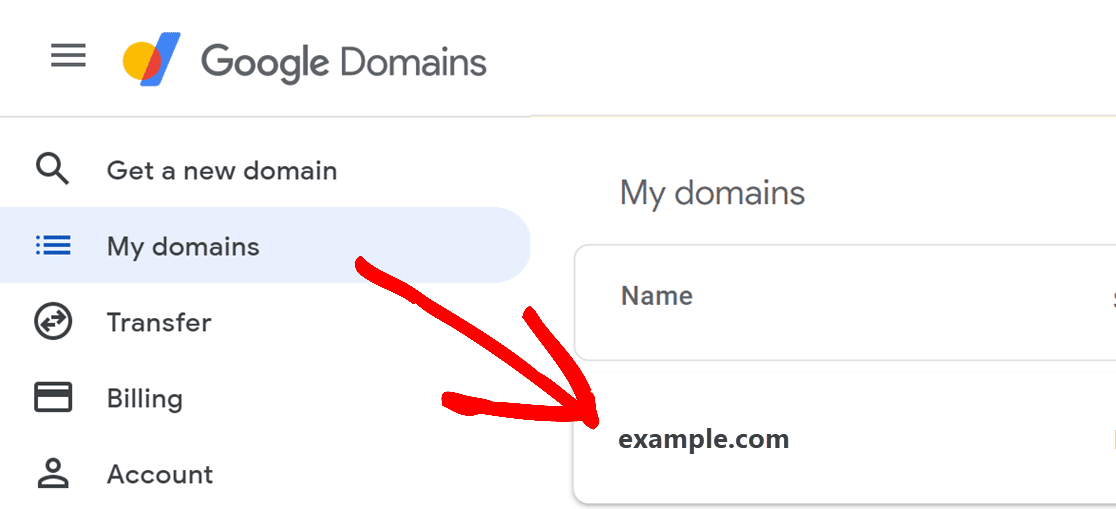
To view the DNS settings for your domain, log in to your Google Domains account.
Once you’ve successfully logged in to your account, click on the domain name under My domains.
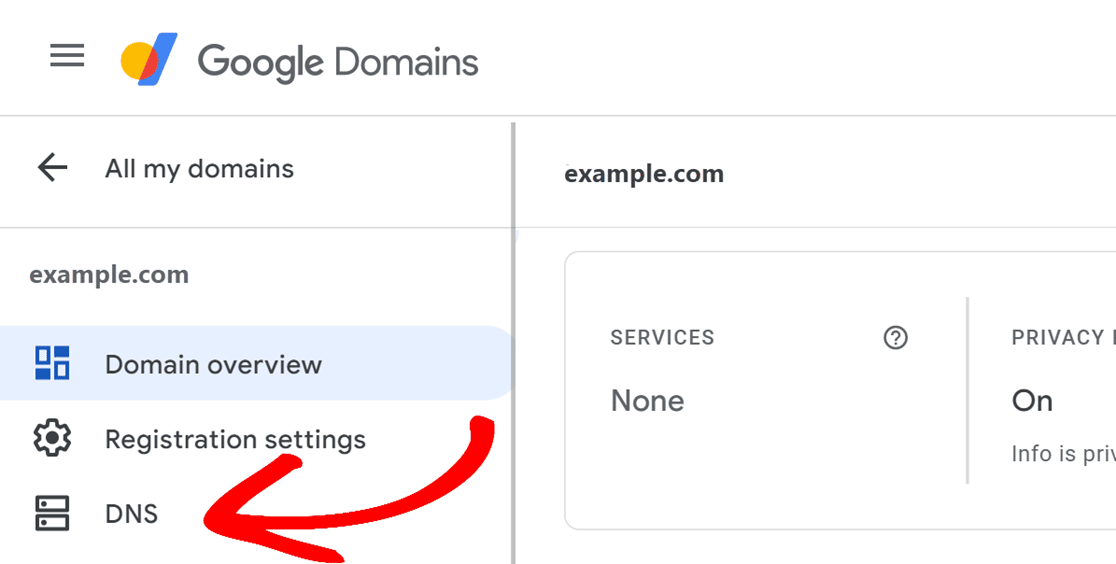
Next, click on DNS in the side menu. This will open the domain’s Resource records where you can add new DNS records and manage existing ones.
In the next section, we’ll cover how to add SendLayer DNS records to your Google Domains account.
Adding DNS Records in Google Domains
Under the Resource records section, you can add details for a single custom DNS record. Here you’ll see inputs for the DNS Host name, Type, TTL, and Data (Value).
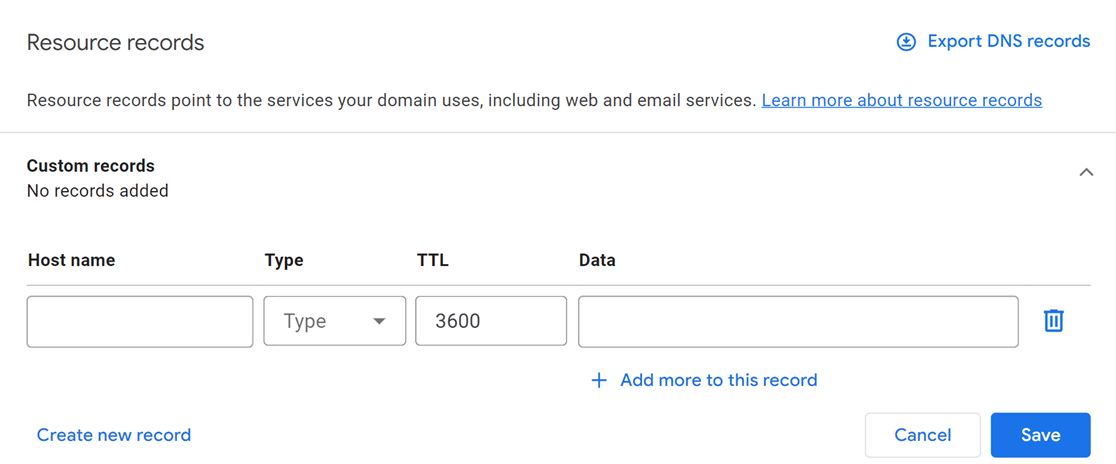
You’ll need to add each of the 5 DNS records that SendLayer generates to the corresponding fields in your Google Domains account.
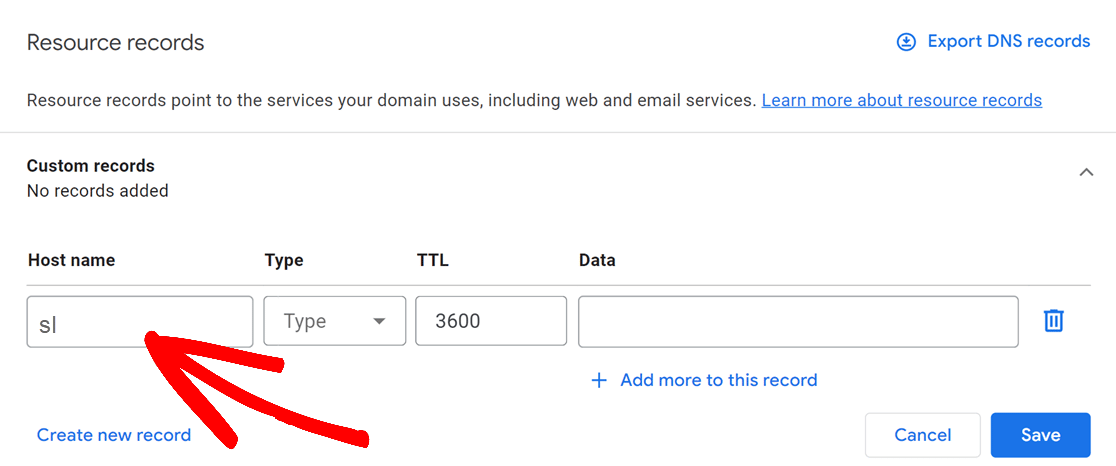
As an example, we’ll add our first CNAME record to our Google Domains DNS settings.
First, navigate to your SendLayer account and locate the HOSTNAME. Here, you’ll need to copy the sl subdomain and add it to the Host name field in Google Domains.

Google Domains will automatically add your domain name to the hostname of the DNS records that you add to your account.
Note: If you’re using the Other domain host option, the CNAME record in SendLayer will have a HOSTNAME of sl.example.com. In Google Domains, we only need to enter the sl subdomain since Google Domains will expand this to sl.example.com on its own.
Once you’ve identified the HOSTNAME, switch over to your Google Domains account and add the HOSTNAME to the Host name field.
Next, select the type CNAME from the Type dropdown.
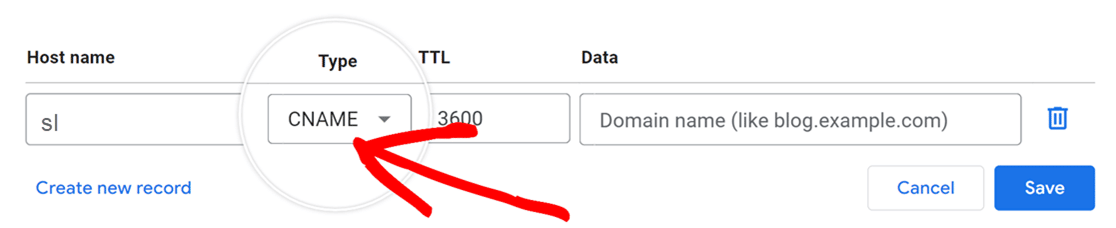
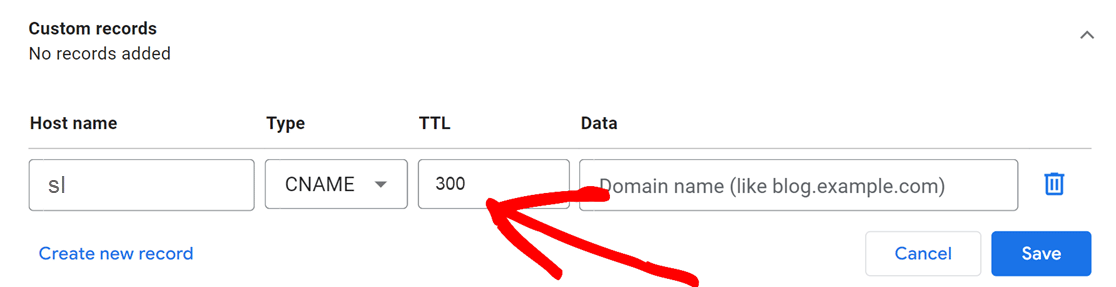
Now, click the TTL field and enter 300, which is equivalent to 5 minutes.
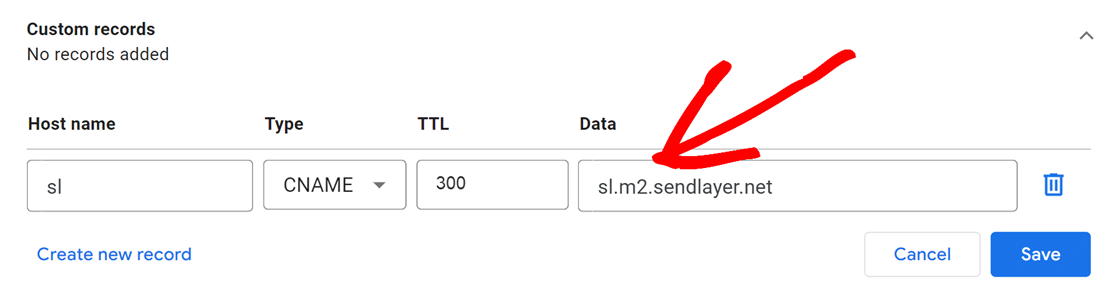
Then, navigate back to your SendLayer account and copy the VALUE by clicking on the copy icon.

Next, head back to Google Domains and paste the VALUE into the Data field.
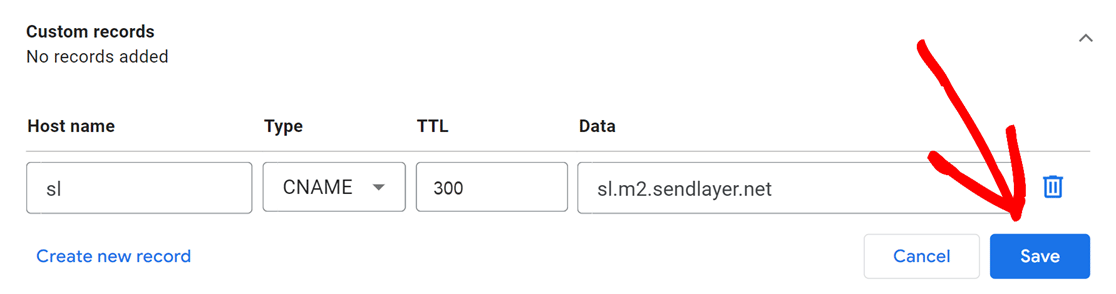
Now that you’ve entered the details for your first DNS record, go ahead and click the Save button.
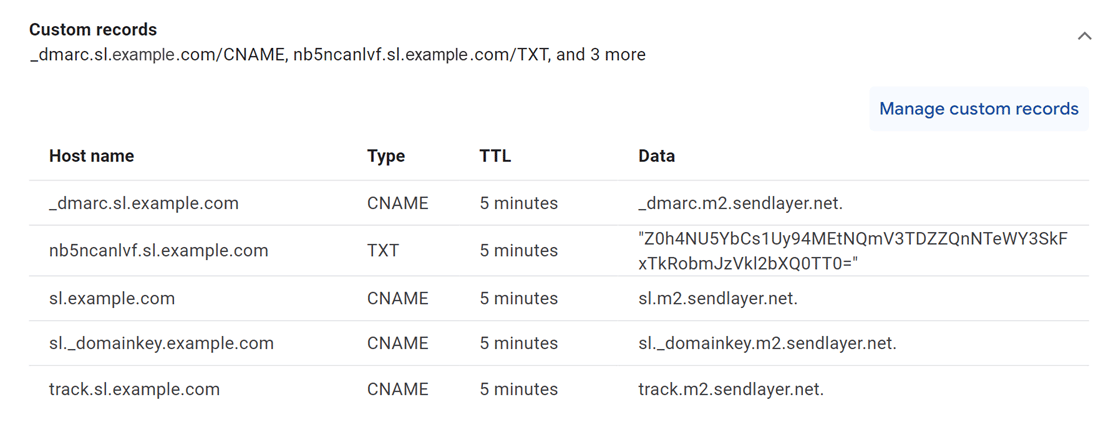
Once you’ve successfully added your first DNS record, be sure to repeat this process with the remaining DNS records that are in your SendLayer account. You should be adding a total of 4 different CNAME records and 1 TXT record.
When you’re done, you should see them listed under Custom records in your Google Domains account.
Note: It can take up to 24-48 hours for DNS changes to propagate.
Verifying Your Domain Status
After adding the DNS records to your Google Domains account, you can check for successful propagation from your SendLayer account. Note that it may take 24-48 hours for your web hosting account to implement the DNS changes.
To learn how to check if your DNS records have been added successfully, check out our tutorial on checking your domain status.
That’s it! Now you know how to set up SendLayer on Google Domains.
Next, would you like to learn how to check that your emails are successfully reaching users’ inboxes? Check out our tutorial on checking the email log for more information.