Ready to get started with SendLayer?
SendLayer makes it quick and easy to set up an account and start sending transactional emails.
In this tutorial, we’ll show you all you need to know to create a SendLayer account.
Creating a New SendLayer Account
To begin creating a new SendLayer account, head over to our pricing page and select your preferred plan by clicking on the Get Started button.

If you’d prefer to start with a free trial, click the Take SendLayer for a free trial (send up to 200 emails) link at the bottom of the pricing table.

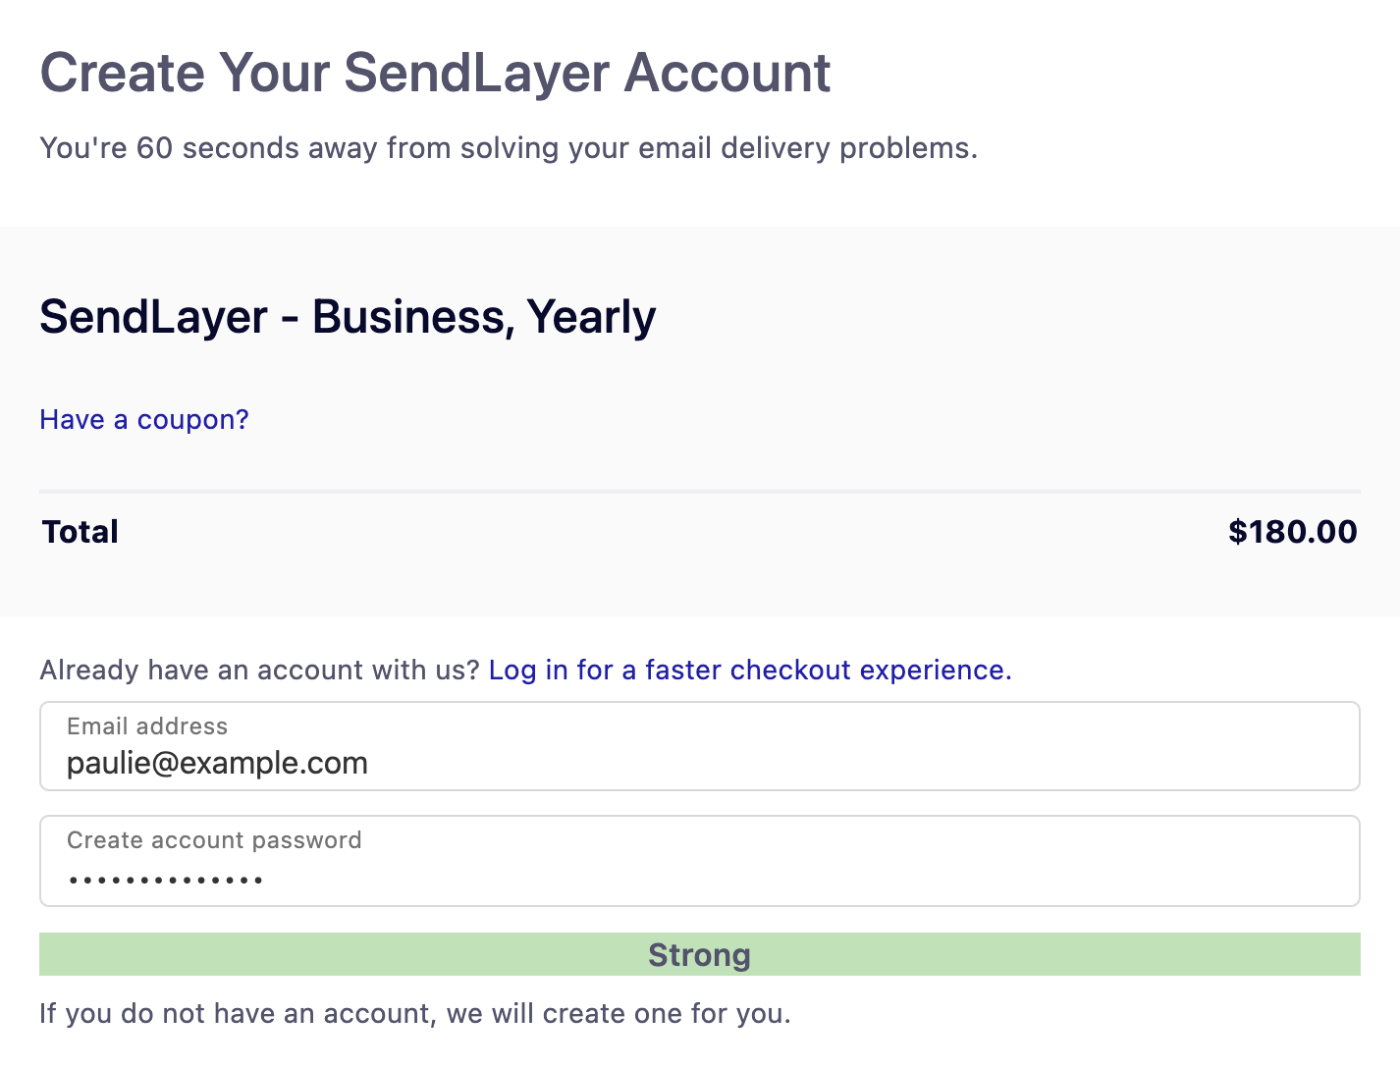
After you’ve selected your preferred plan, you’ll be redirected to our checkout page. To create an account, you’ll need to enter your email address and create a password.
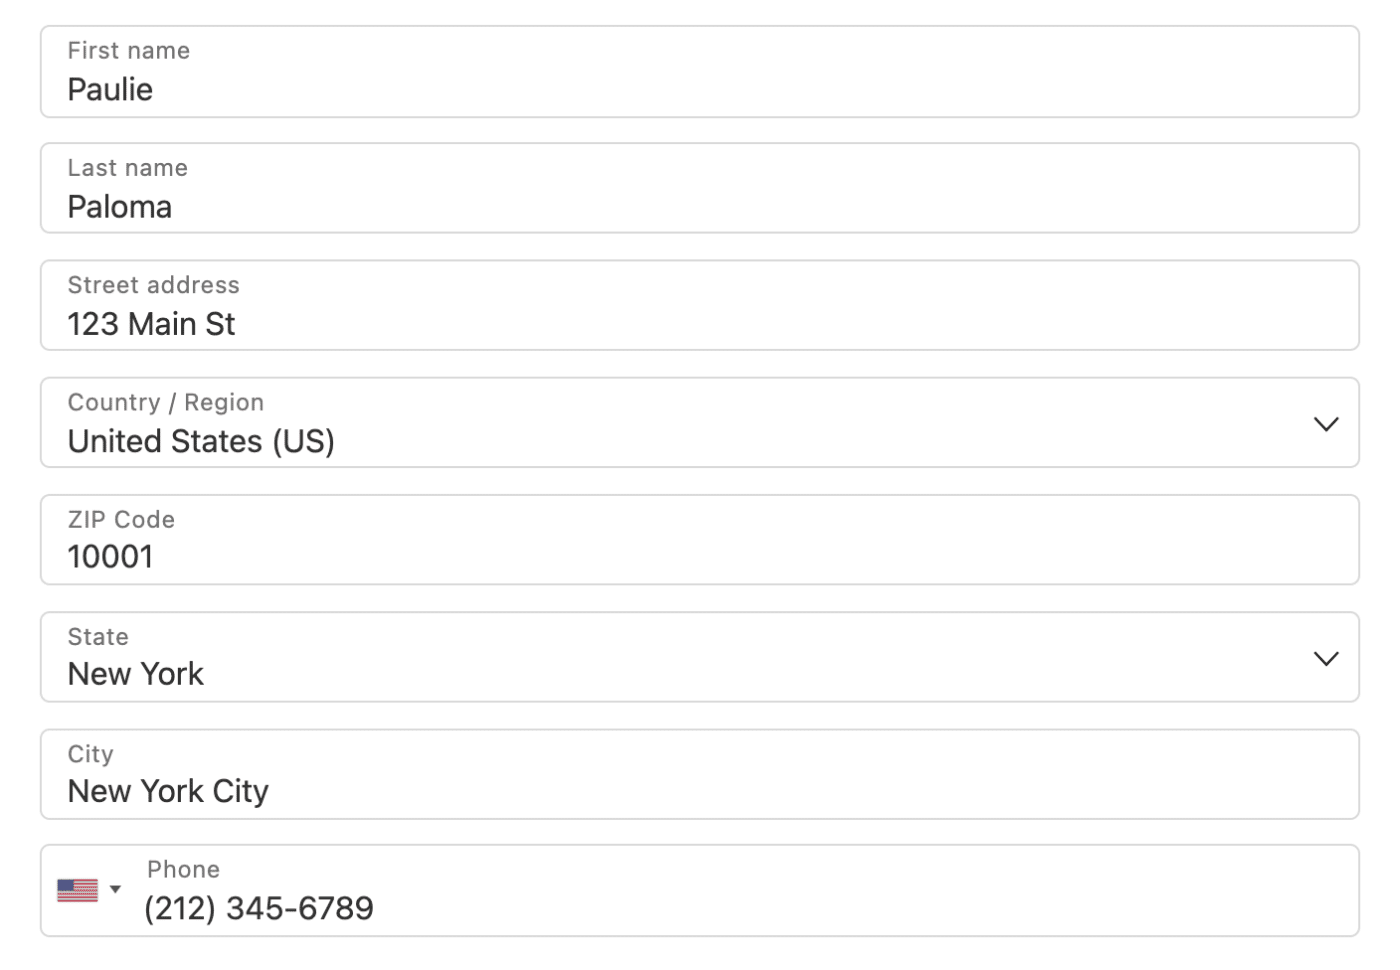
Then, be sure to add your name, address, and phone number in the required fields.
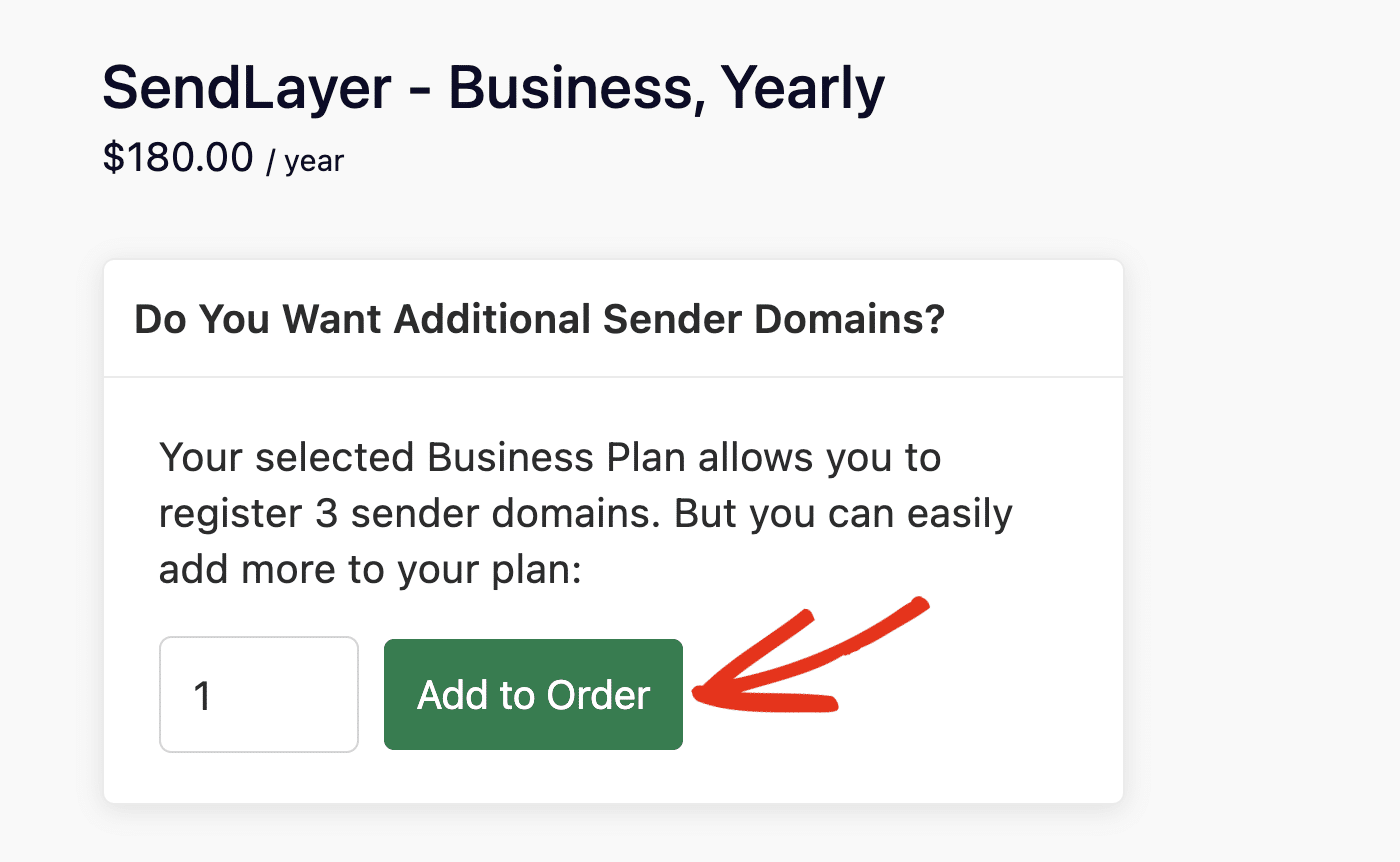
On the right side of the page, you’ll see details about your chosen plan’s sender domain limit. You’ll also see the option to include additional sender domains before completing your payment.
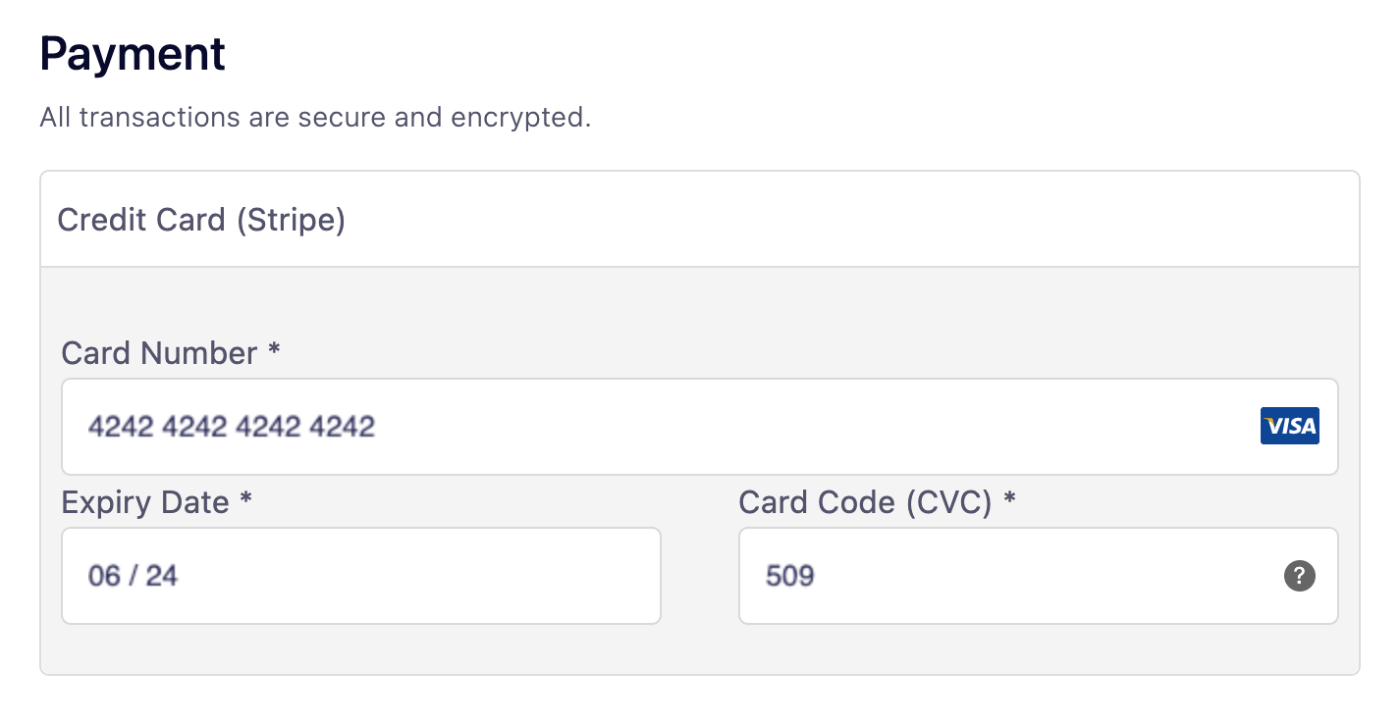
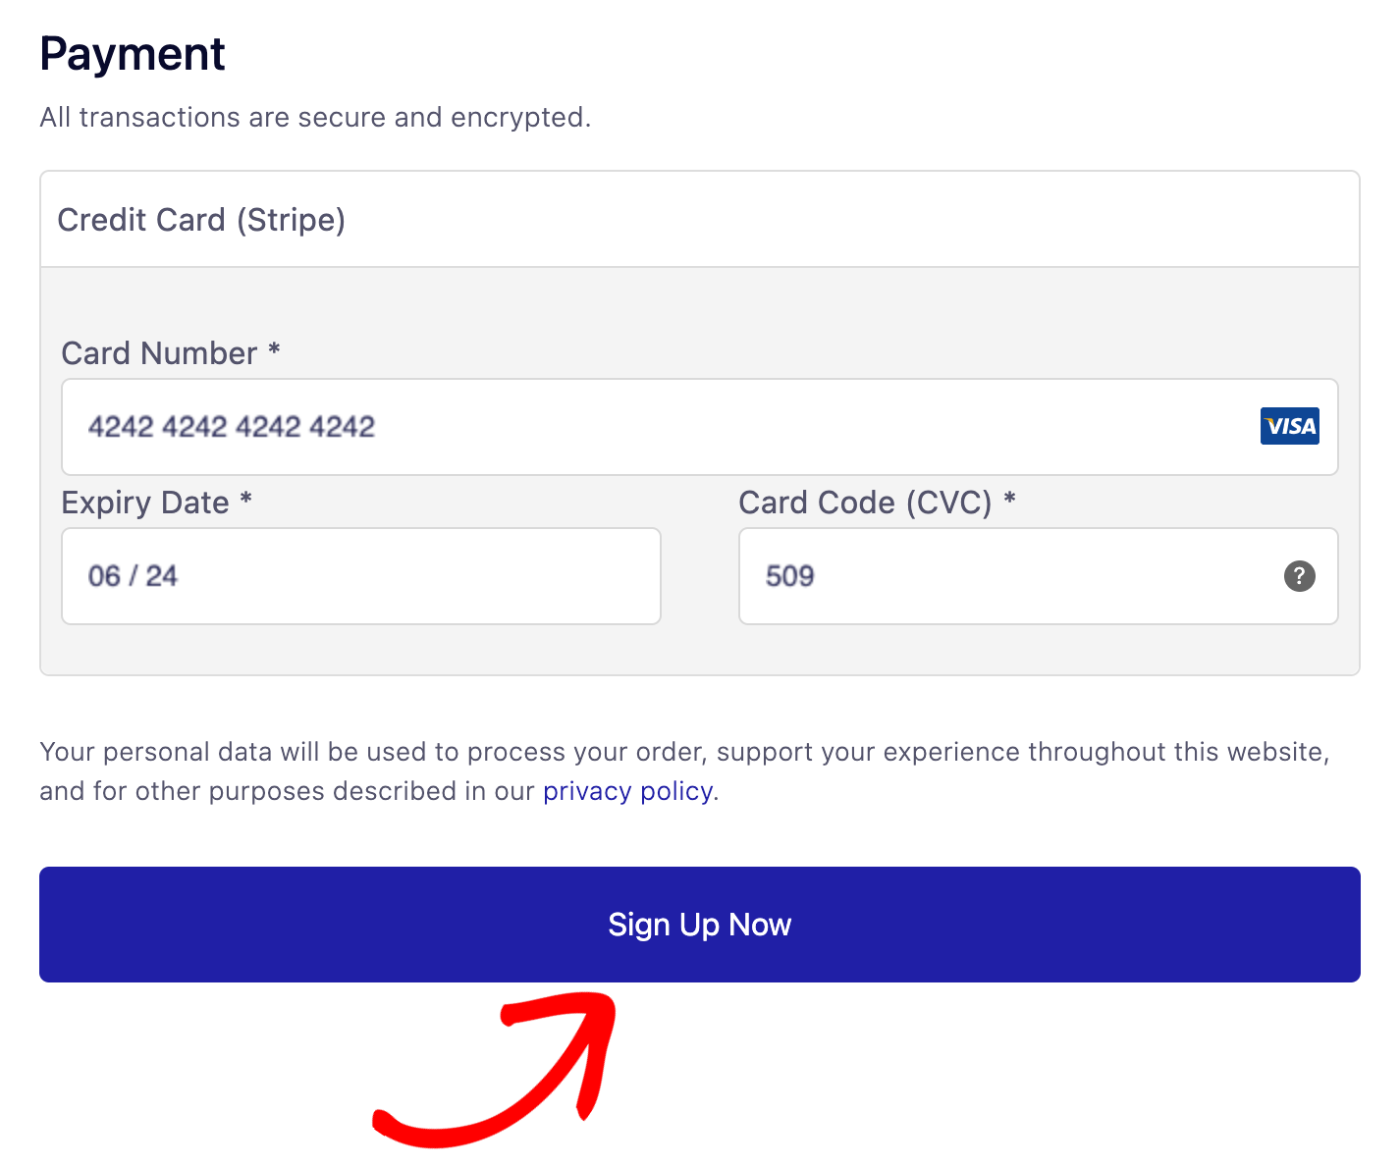
In the Payment section, go ahead and enter your credit or debit card details.
When you’re ready, click the Sign Up Now button to complete your account setup.
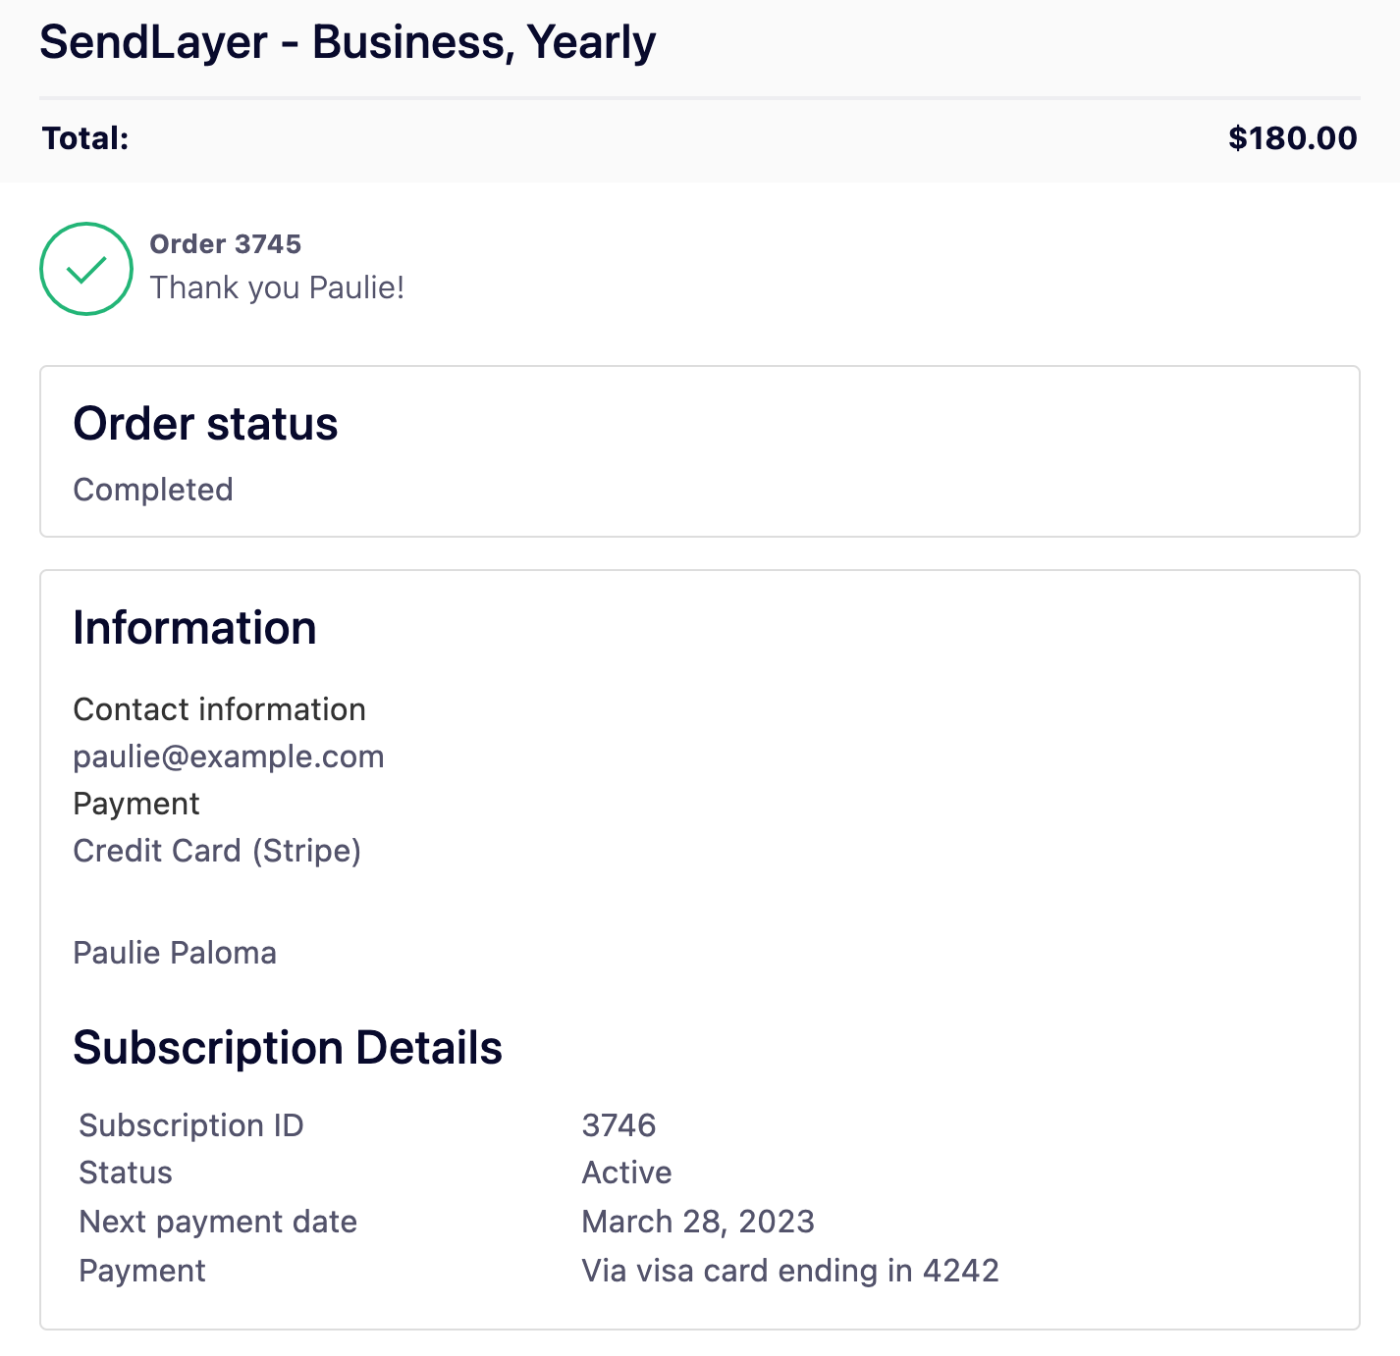
Now, you’ll see a confirmation page letting you know that your account has been created.
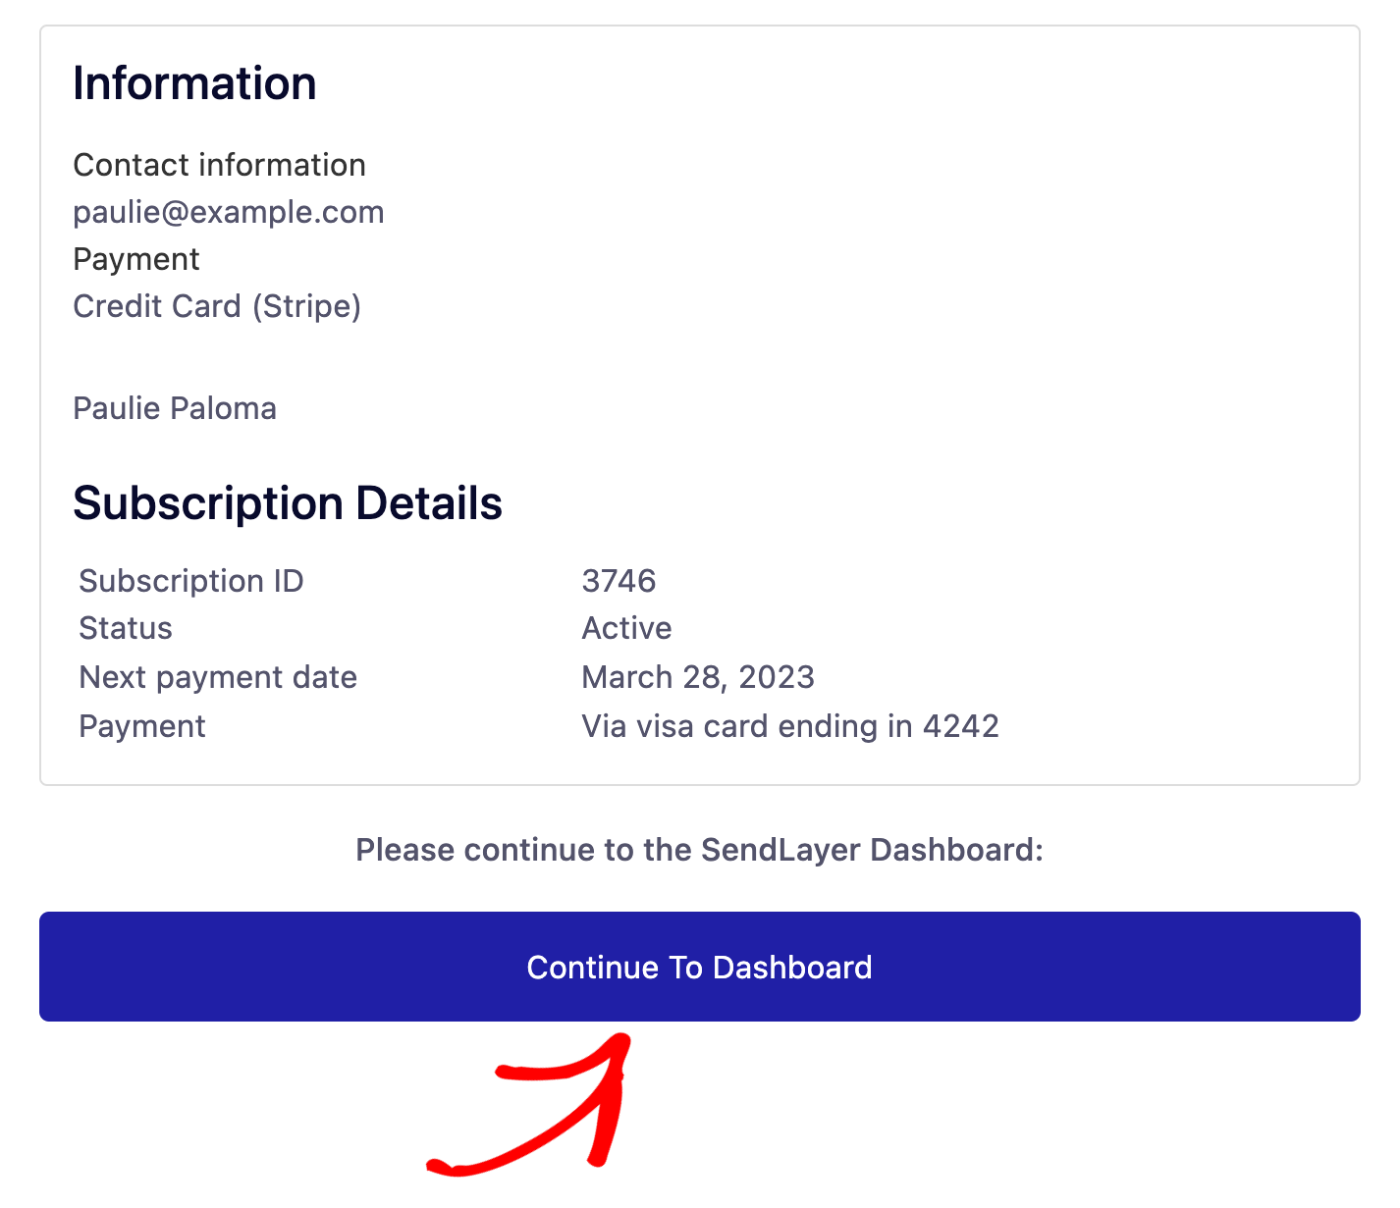
For instant access to your newly created SendLayer account, click the Continue to Dashboard button located at the bottom of the page.
Frequently Asked Questions
These are some of the most common questions we receive about creating a Sendlayer account.
Why is a credit card required for the free trial?
A credit card is required to set up an account as a means of account verification and to ensure that no interruptions to your email delivery occur once you’ve reached the trial limit.
That’s it! Now you know how to create a SendLayer account.
Next, would you like to learn how to start sending emails with SendLayer? Check out our tutorial on authorizing your domain for more information.