Are you ready to use SendLayer with your Bluehost domain?
SendLayer makes it super easy to send transactional emails from your domain on Bluehost.
In this tutorial, we’ll show you how to set up your domain with SendLayer on Bluehost.
Before you get started, be sure to:
Accessing DNS Records in SendLayer
When you add a domain to your account, SendLayer will automatically detect your domain host and generate 5 DNS (Domain Name System) records unique to your domain.

If it doesn’t detect the correct domain host, click Change your domain host here to choose your domain registrar.

In the overlay that appears, click the Choose your domain host dropdown and select Bluehost from the available options.

Note: Every time you add a new domain to your account, SendLayer creates a subdomain for you, namely sl. For example, if your site is example.com, SendLayer will create sl.example.com for you.
For more information, check out our article on why SendLayer creates a subdomain.
SendLayer provides the following types of DNS records:
Each record has a HOSTNAME, VALUE, and TTL (time to live) unique to your domain. These 5 records must be set up in Bluehost so you can use SendLayer with your domain. We’ll show you how to set up these DNS records in the following steps.
Locating DNS Settings in Bluehost
To get started, open Bluehost and log in to your account.
Note: For a more straightforward operation, we recommend keeping SendLayer and Bluehost open side by side in your browser.
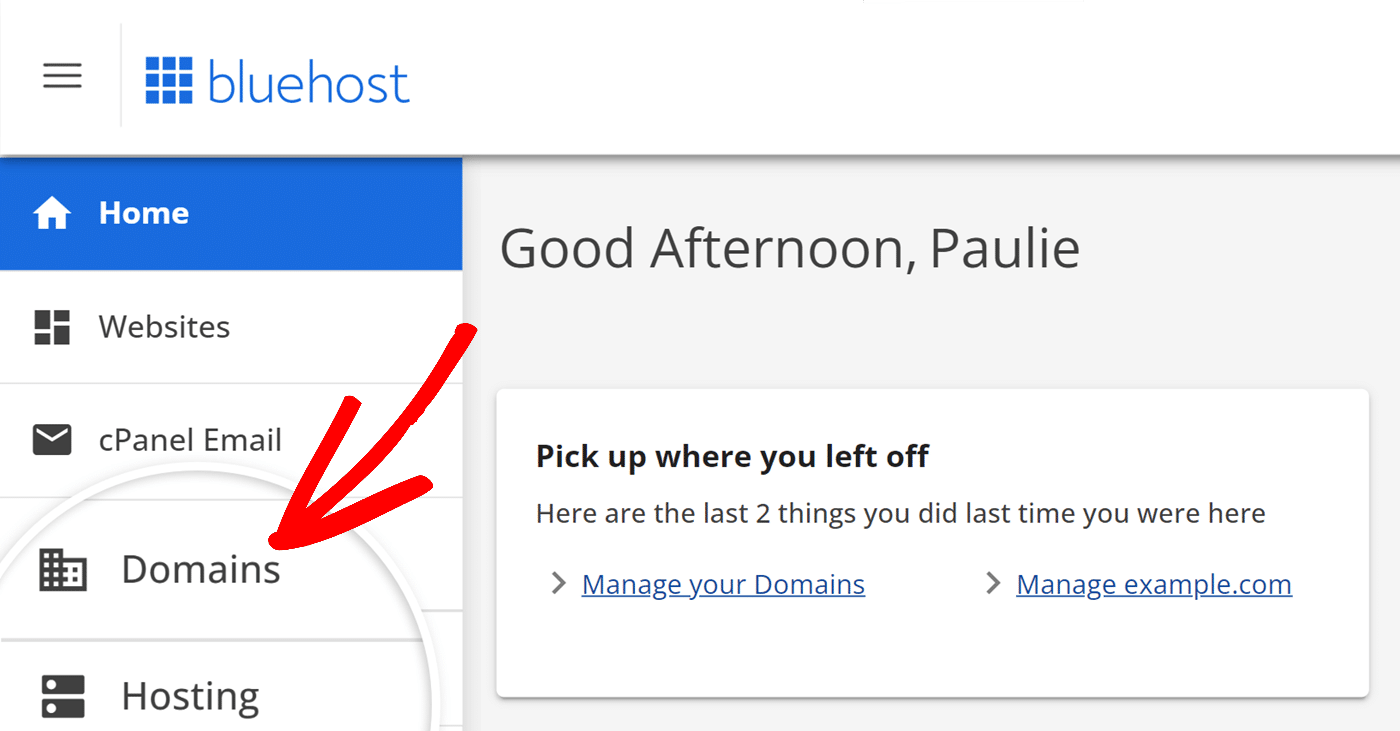
To find your domain’s DNS settings once you’ve logged in, first click Domains.
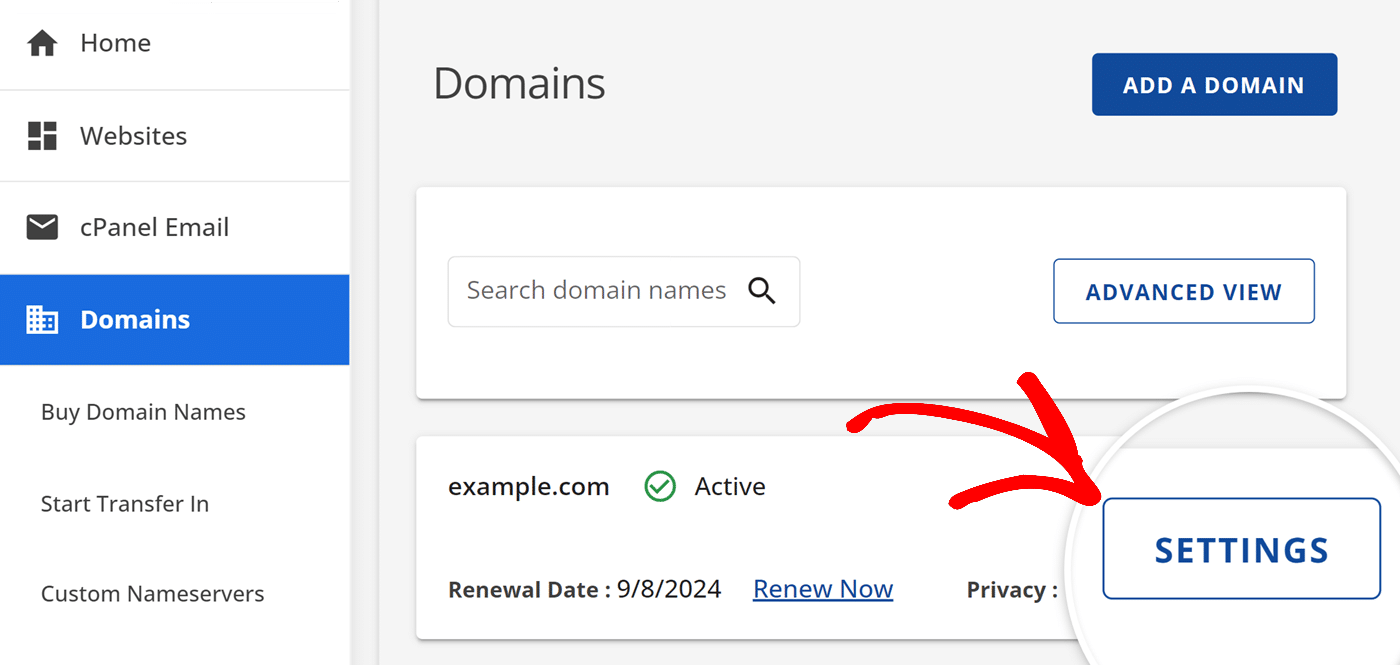
Next, find the domain you’d like to connect to SendLayer, and click SETTINGS.
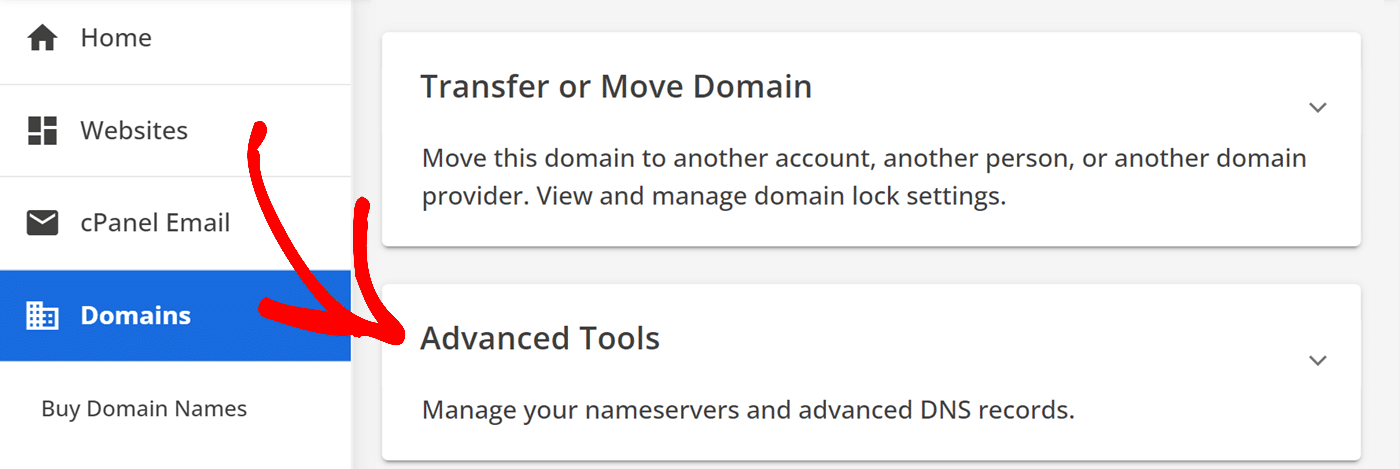
On the next page, scroll to the bottom of the page and click on Advanced Tools to modify the DNS settings.
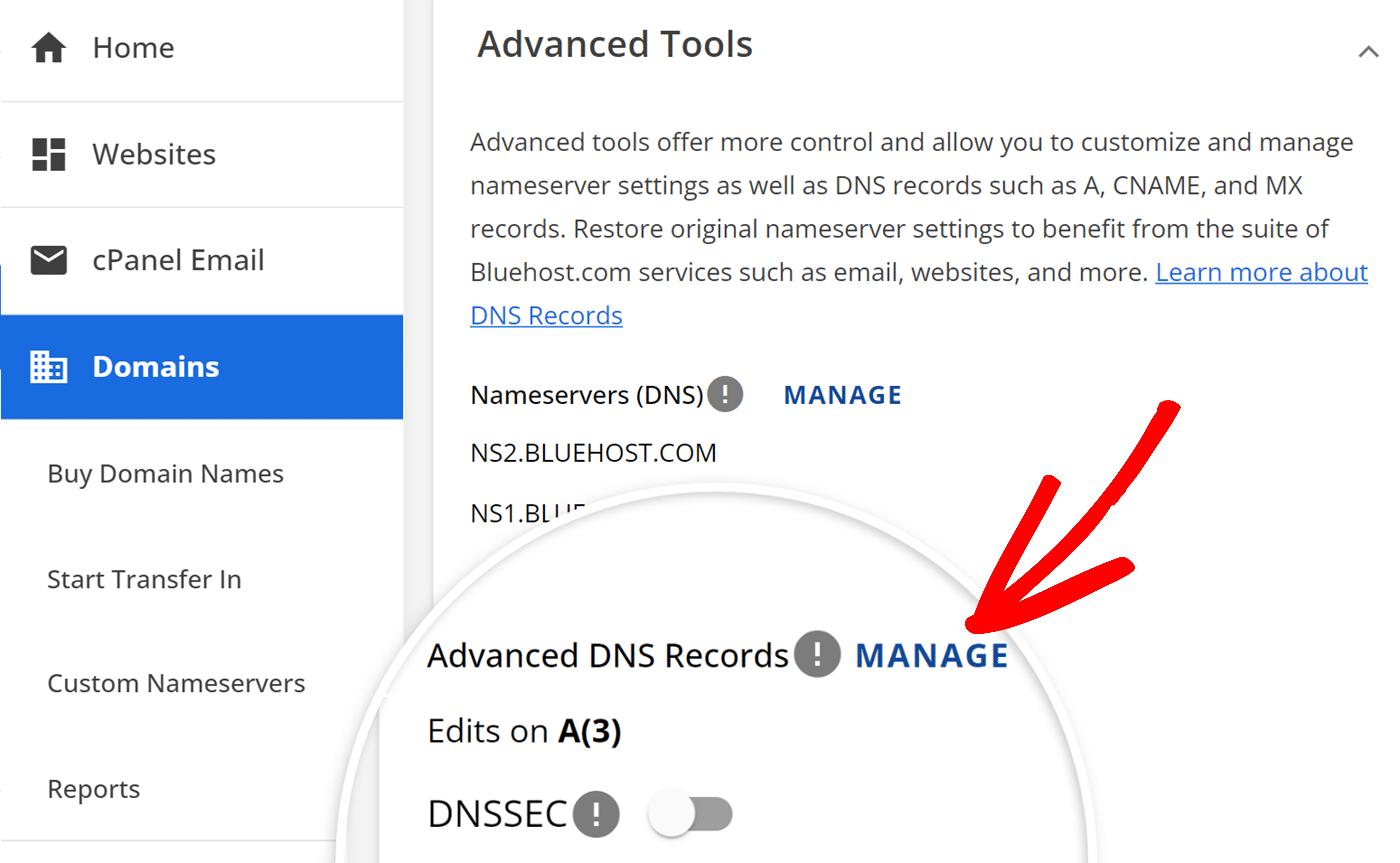
Then, click MANAGE under the Advanced DNS Records section.
Note: You may encounter a popup warning about modifying DNS settings. If it appears, simply click CONTINUE to proceed.
From here, you’ll be able to add new DNS records, which we’ll cover in the next section.
Adding DNS Records in Bluehost
To add a new DNS record to your domain, click the + ADD RECORD button.
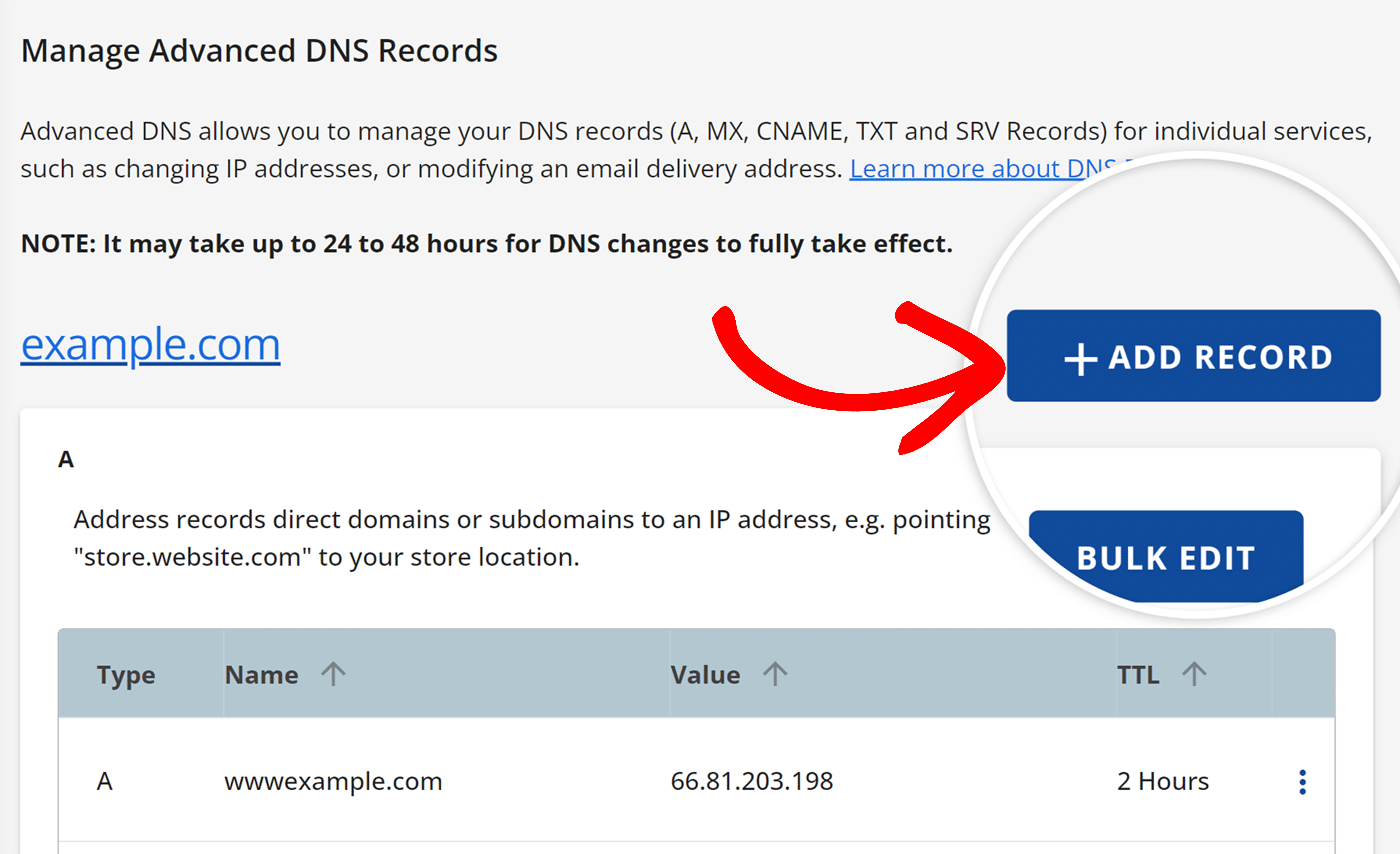
This will open a popup that allows you to enter details for a single record.
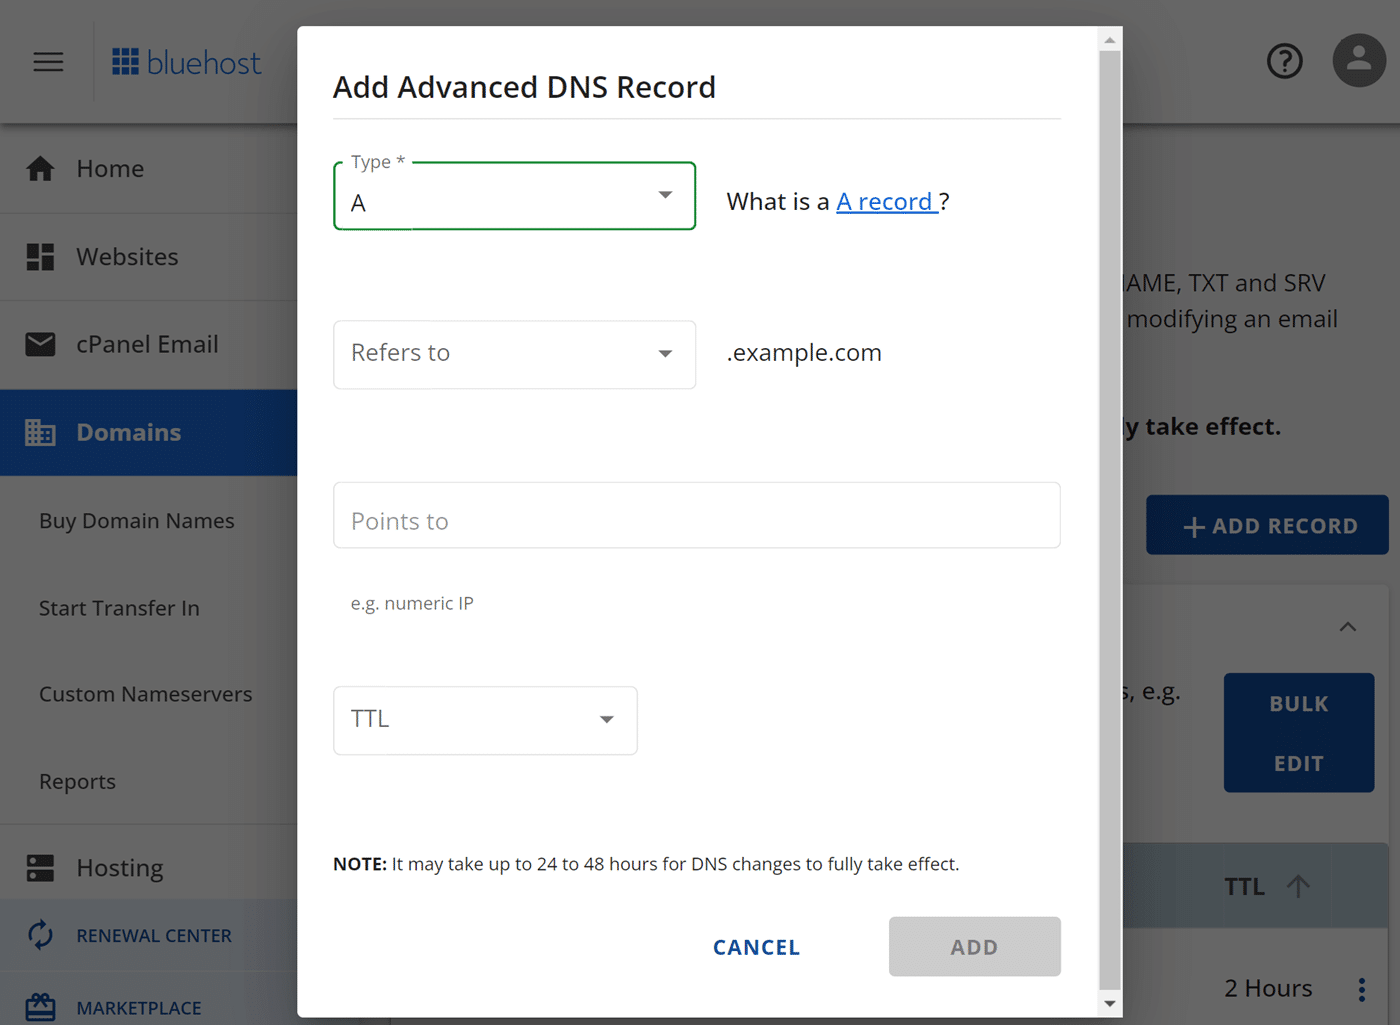
You’ll need to add each of the 5 DNS records that SendLayer generates to the corresponding fields in your Bluehost account.
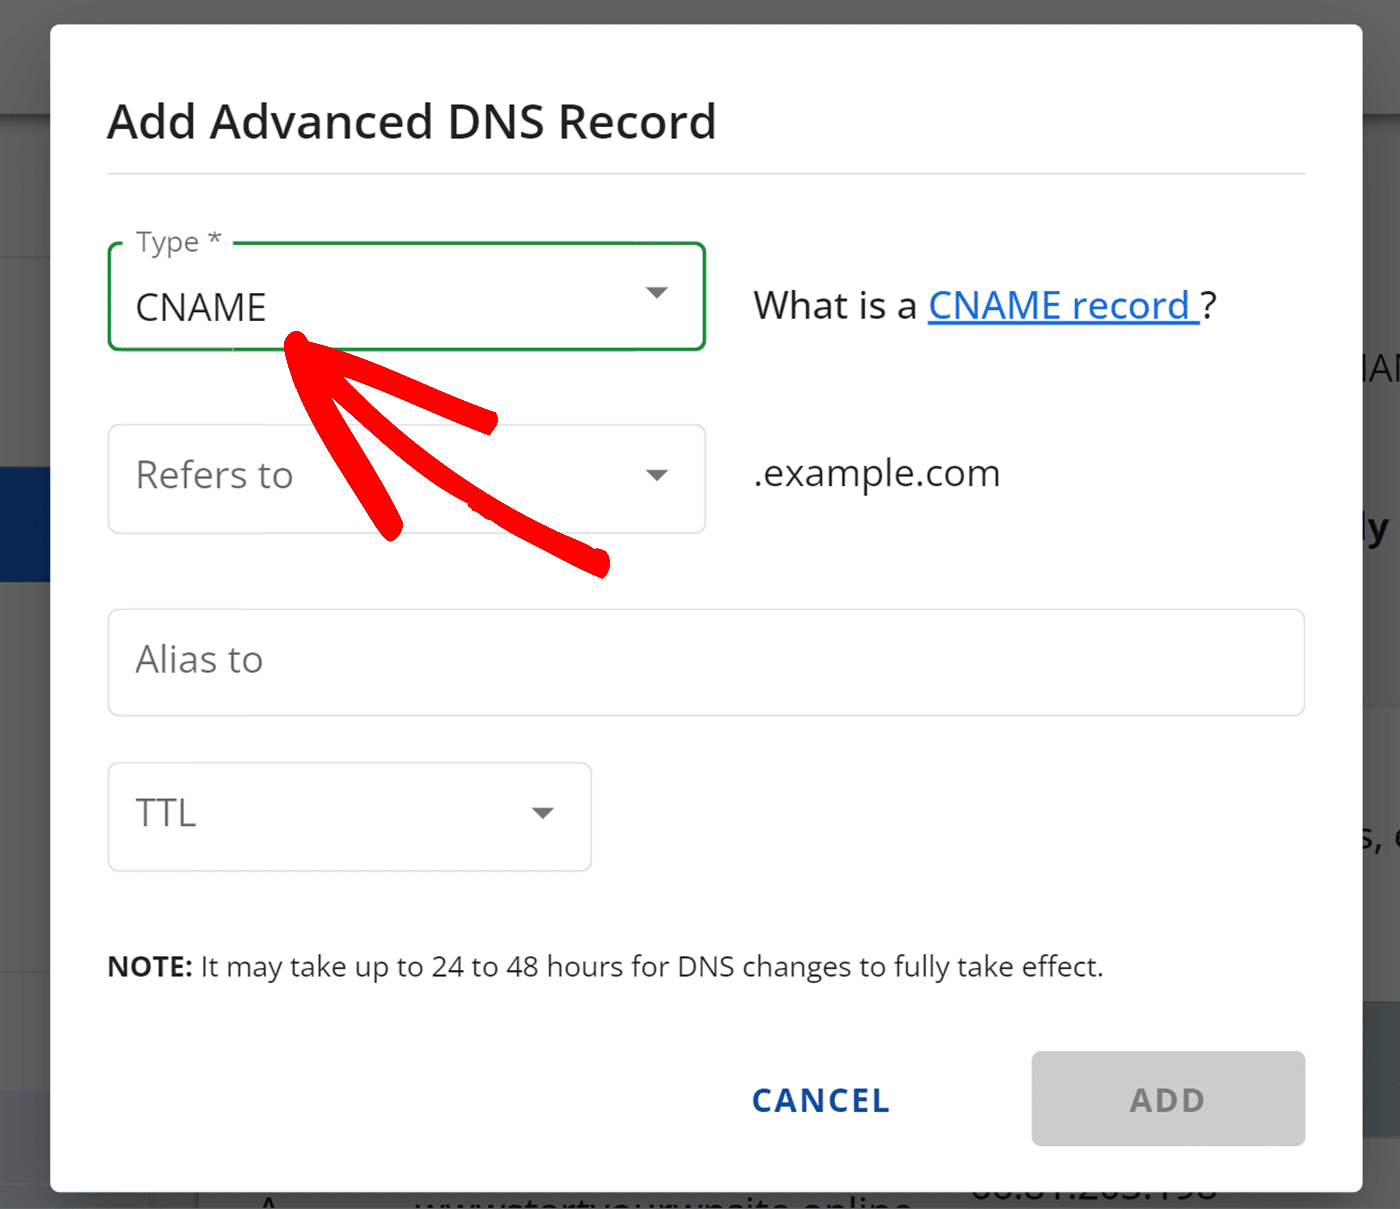
As an example, we’ll add our first CNAME record to our Bluehost DNS settings.
First, click the Type dropdown and select CNAME from the list of DNS record types.
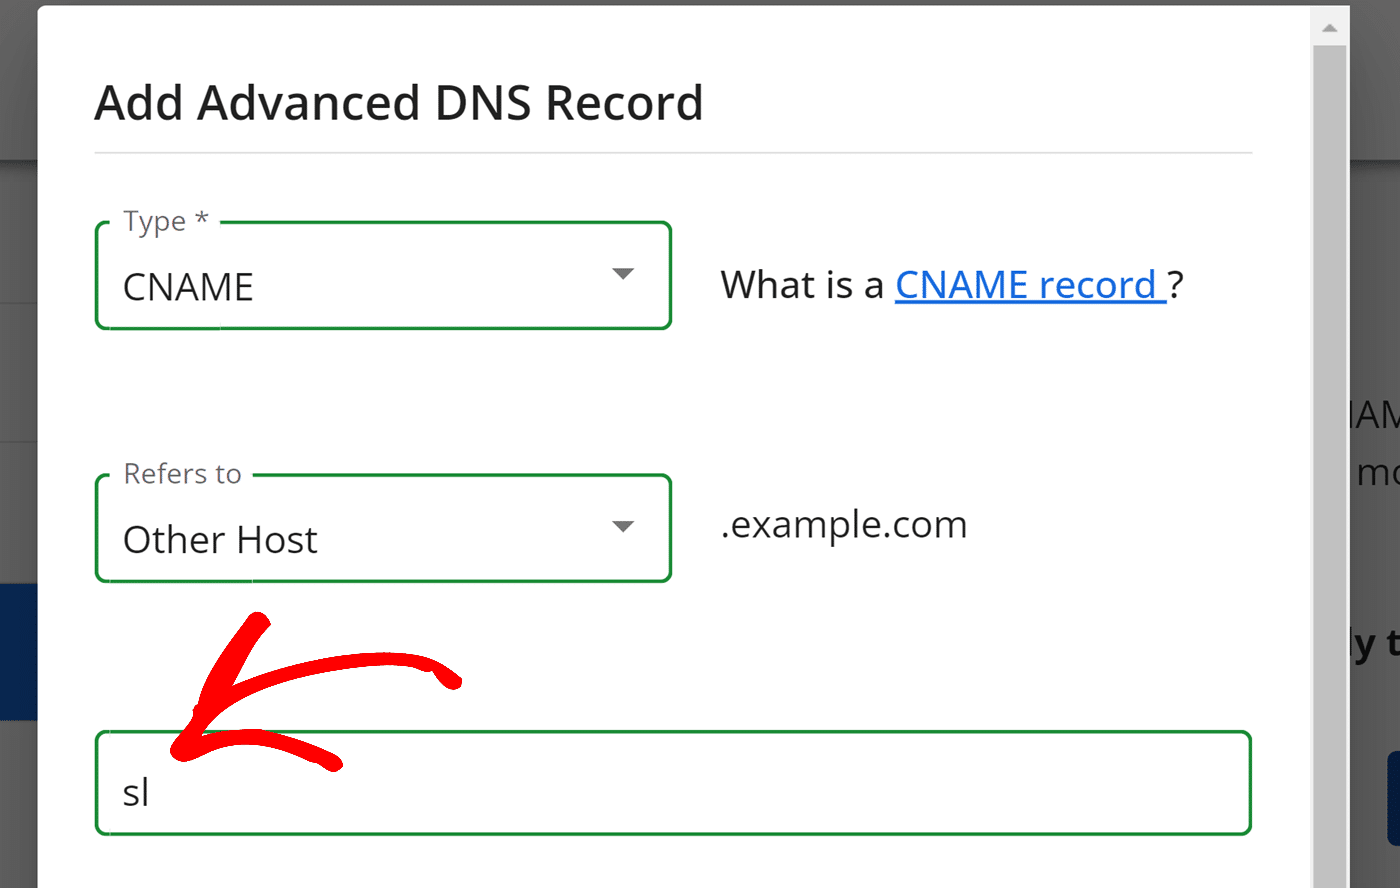
Then, navigate back to your SendLayer account and locate the HOSTNAME. Here you’ll need to copy the sl subdomain.

Next, head back to your Bluehost account and select Other Host from the Refers to dropdown.
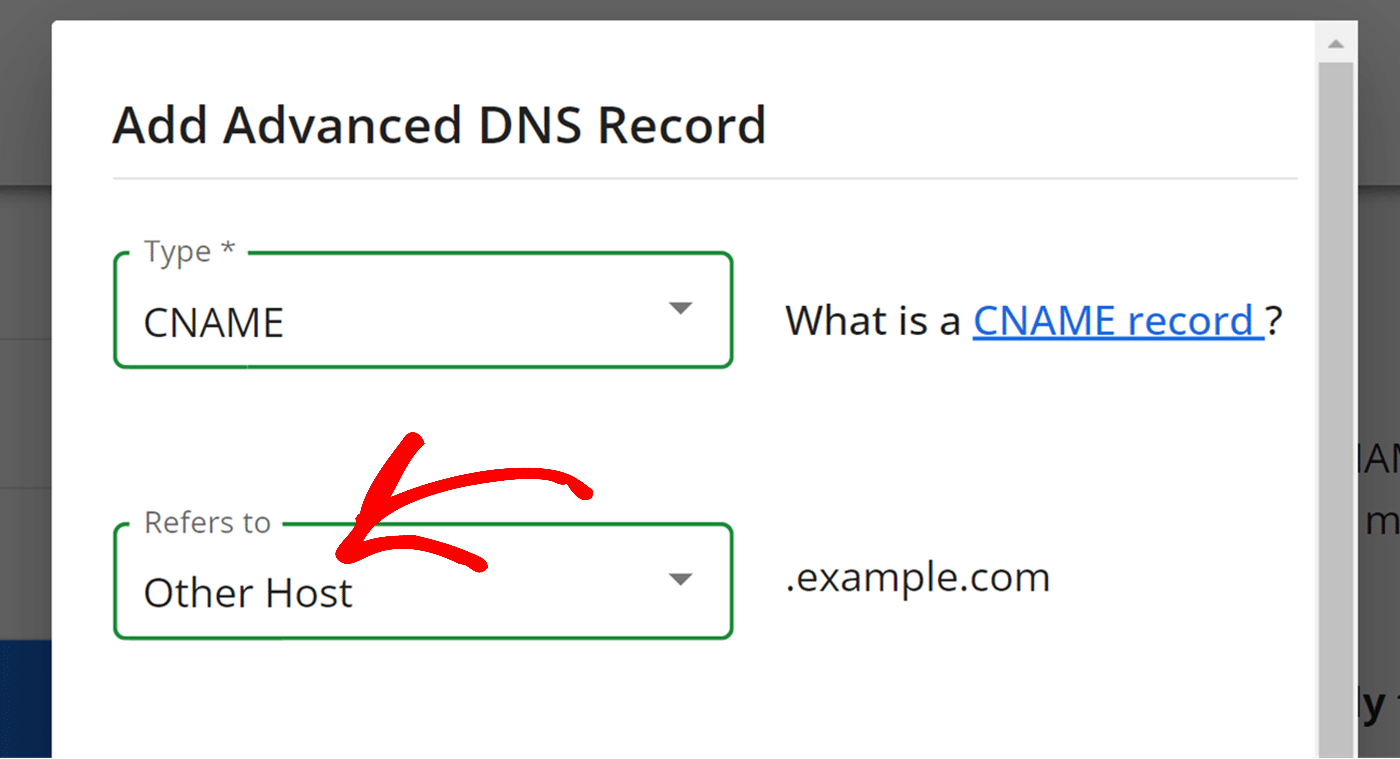
Paste the HOSTNAME from SendLayer into the Host Name field on your Bluehost domain’s DNS settings.
Bluehost will automatically add your domain name to the hostname of the DNS records you add to your account.
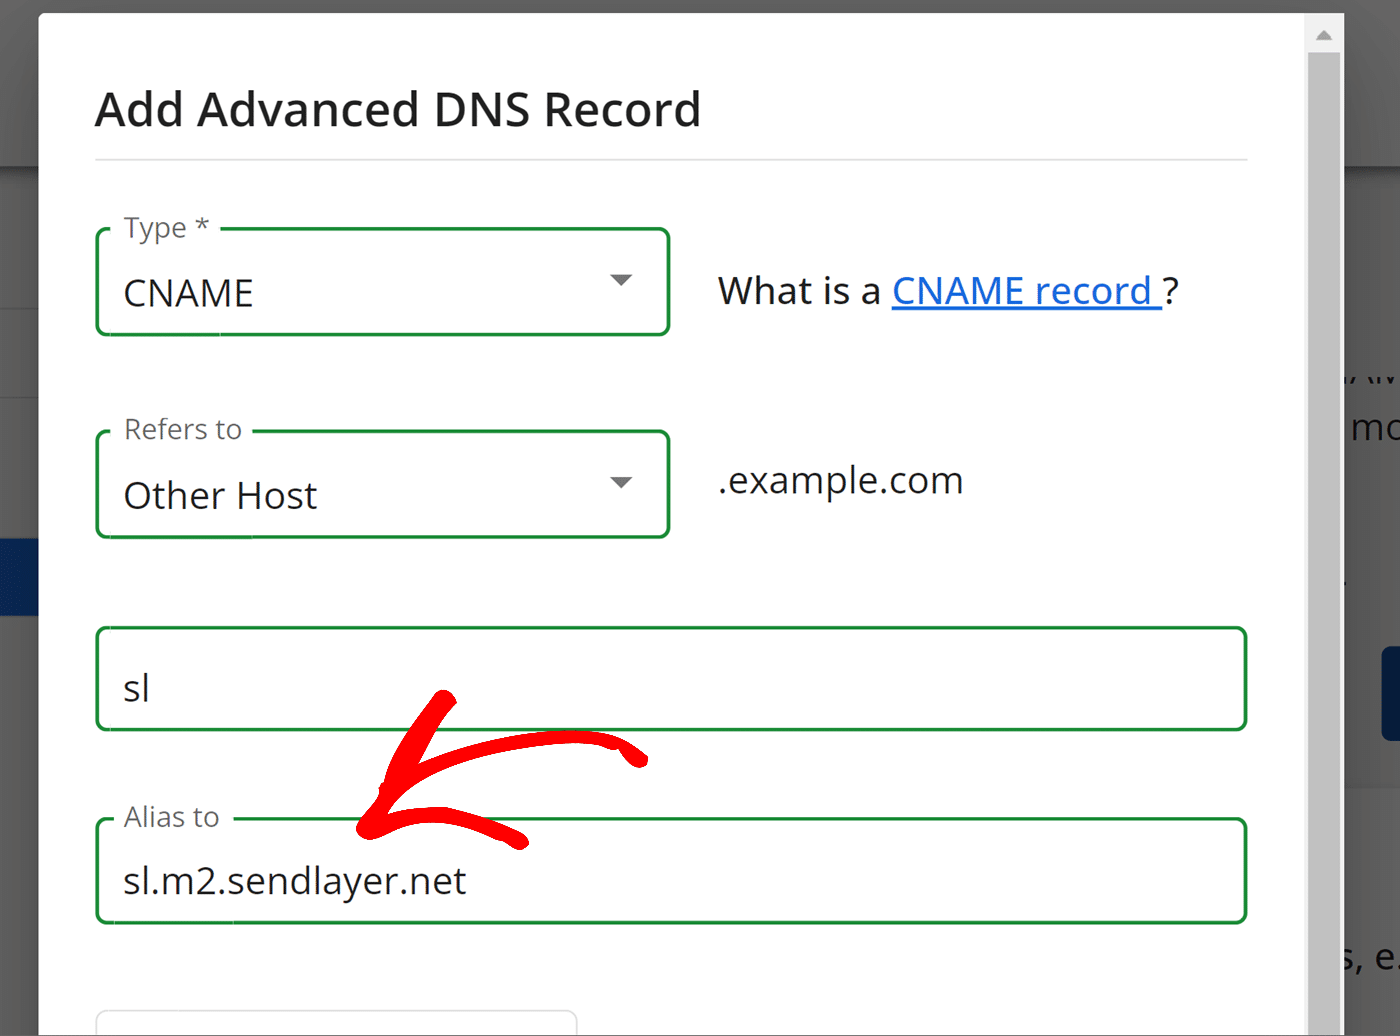
Then, navigate back to your SendLayer account and copy the VALUE by clicking on the copy icon.

Next, head back to Bluehost and paste the VALUE into the Alias to field.
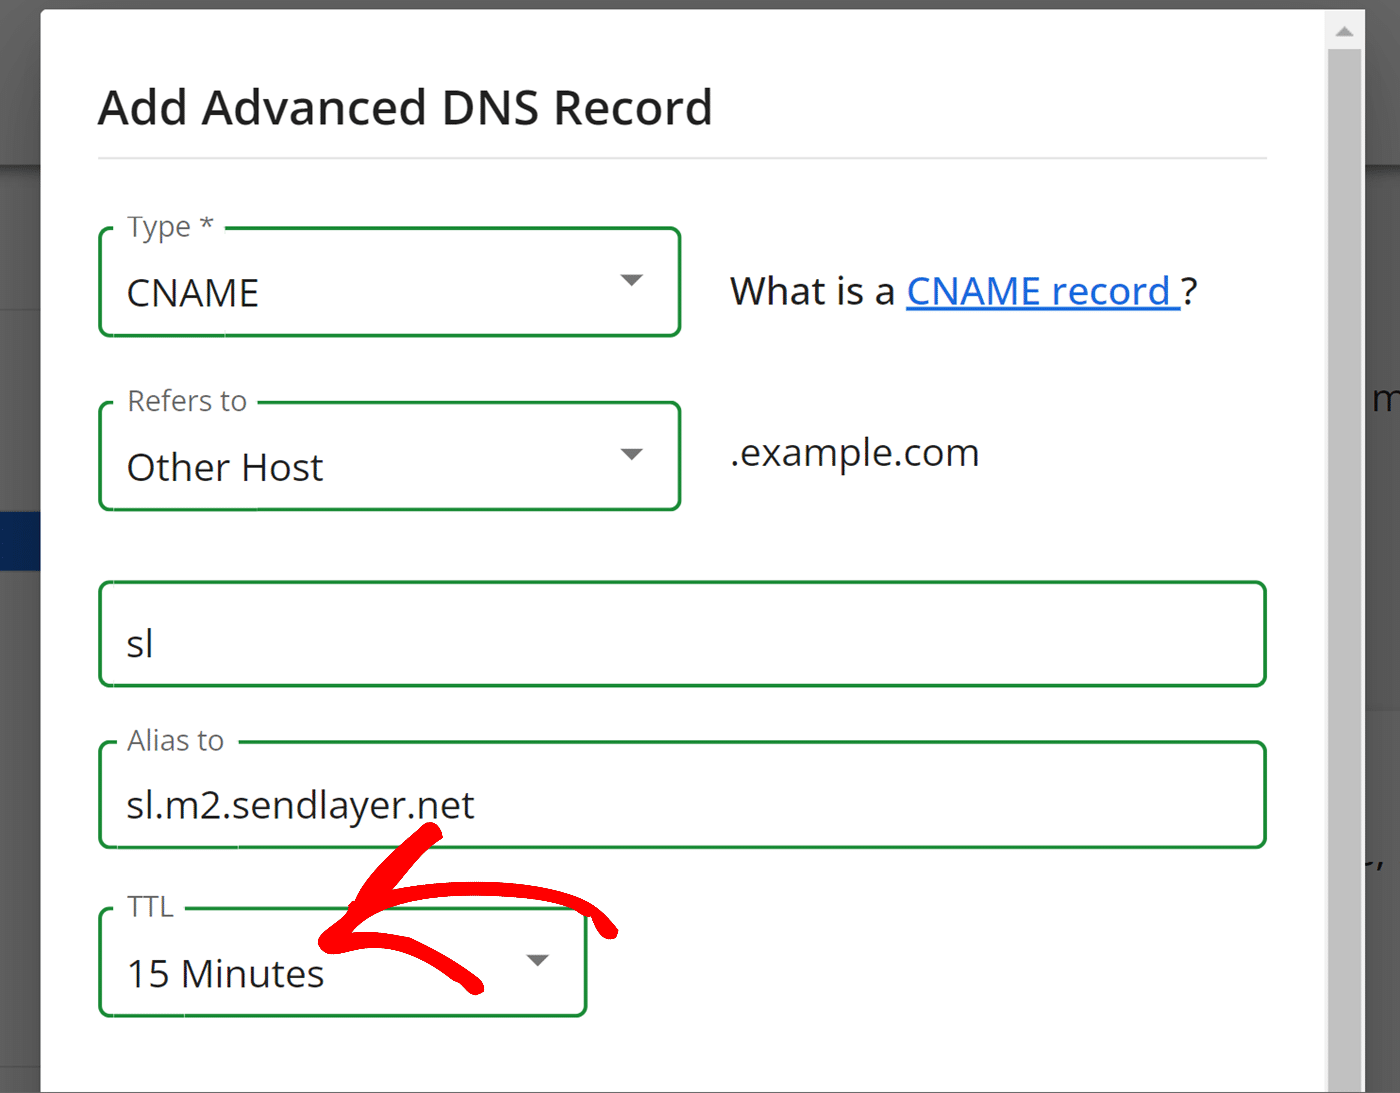
Now, click the TTL dropdown and select 15 min from the list of TTL options.
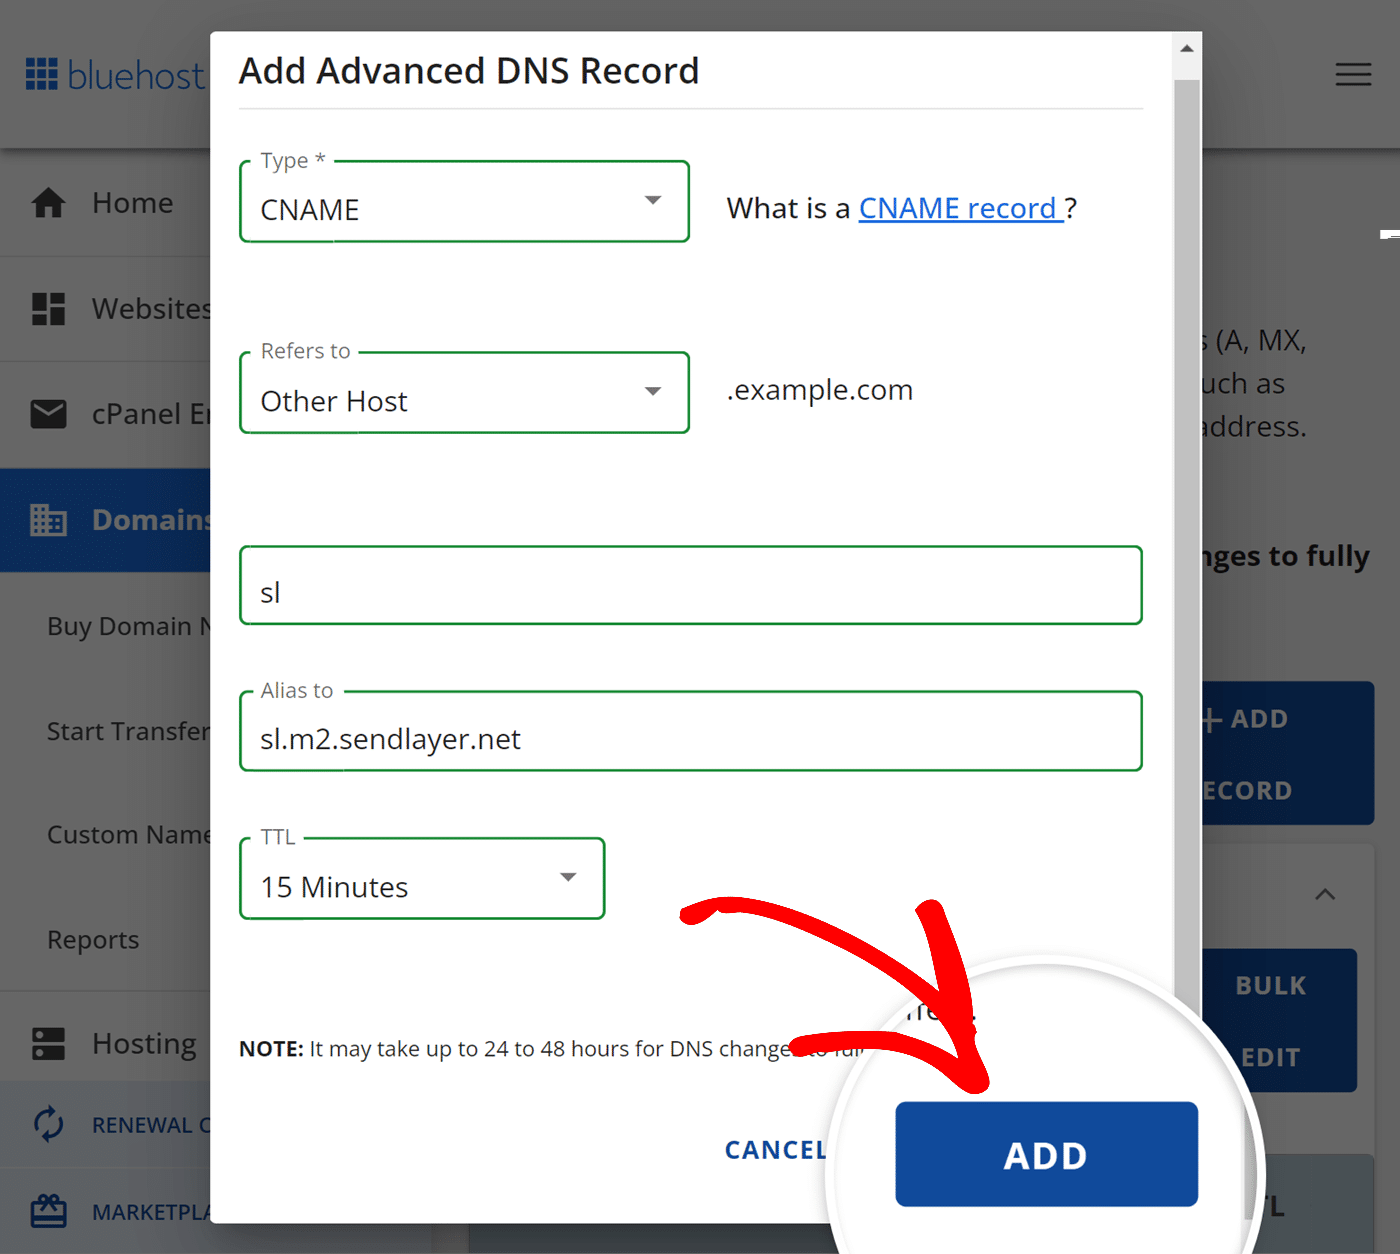
Once you’ve entered the details for your first DNS record, go ahead and click the ADD button.
After adding the first record, repeat the steps above to add the remaining 4 DNS records. When you’re finished, you should have 4 CNAME records and 1 TXT record.
Note: It can take up to 24-48 hours for DNS changes to propagate.
Checking Your Domain Status
After adding the DNS records to your Bluehost account, you can verify they’ve been successfully propagated from within your SendLayer account. It can take up to 48 hours for new or updated DNS records to propagate completely.
If you’d like to know how to check that your DNS records have been successfully added, you can check out our tutorial on checking your domain status in SendLayer.
That’s it! Now you know how to set up SendLayer with your domain on Bluehost.
Next, would you like to learn more about the SendLayer API? Check out our tutorial on the SendLayer API for more information.