Ready to send emails from your domain hosted on DreamHost?
SendLayer’s simple integration process makes it easy to connect your site so you can quickly start sending transactional emails from your DreamHost domain.
In this tutorial, we’ll show you how to set up SendLayer with a site that’s hosted on DreamHost.
Before getting started, be sure to:
Accessing DNS Records in SendLayer
After you add a domain to your SendLayer account, SendLayer will automatically detect your domain host and generate 5 DNS (Domain Name System) records unique to your domain.

If it doesn’t detect the correct domain host, click Change your domain host here to choose your domain registrar.

In the overlay that appears, click the Choose your domain host dropdown and select DreamHost from the available options.

Here are the two different types of DNS records that SendLayer creates for your domain:
Each DNS record type has a HOSTNAME, VALUE, and TTL (time to live) specific to your domain.
To connect your site to SendLayer, You’ll need to add each of the 5 DNS records to your DreamHost account, which we’ll cover in the following steps.
Locating DNS Settings in DreamHost
To locate your site’s DNS settings, start by logging in to your DreamHost account. We recommend keeping your SendLayer and DreamHost accounts open in separate windows or tabs, so you can quickly switch between the two.
Once you’re logged in to your DreamHost account dashboard, click on the Websites tab in the side menu.

Then, select the Manage Websites option from the list of new menu items that appear.
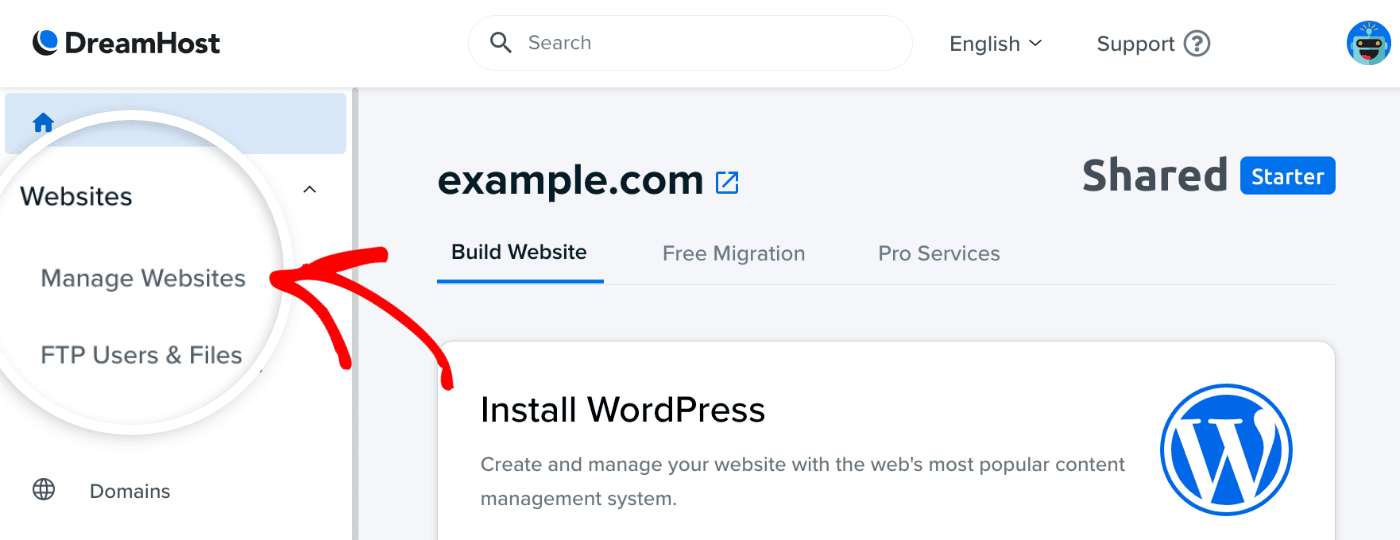
On the next page, you’ll see a list of your websites hosted on DreamHost. Click the three dots menu icon for the domain that you’ve added to SendLayer.
Next, click DNS Settings in the dropdown menu.

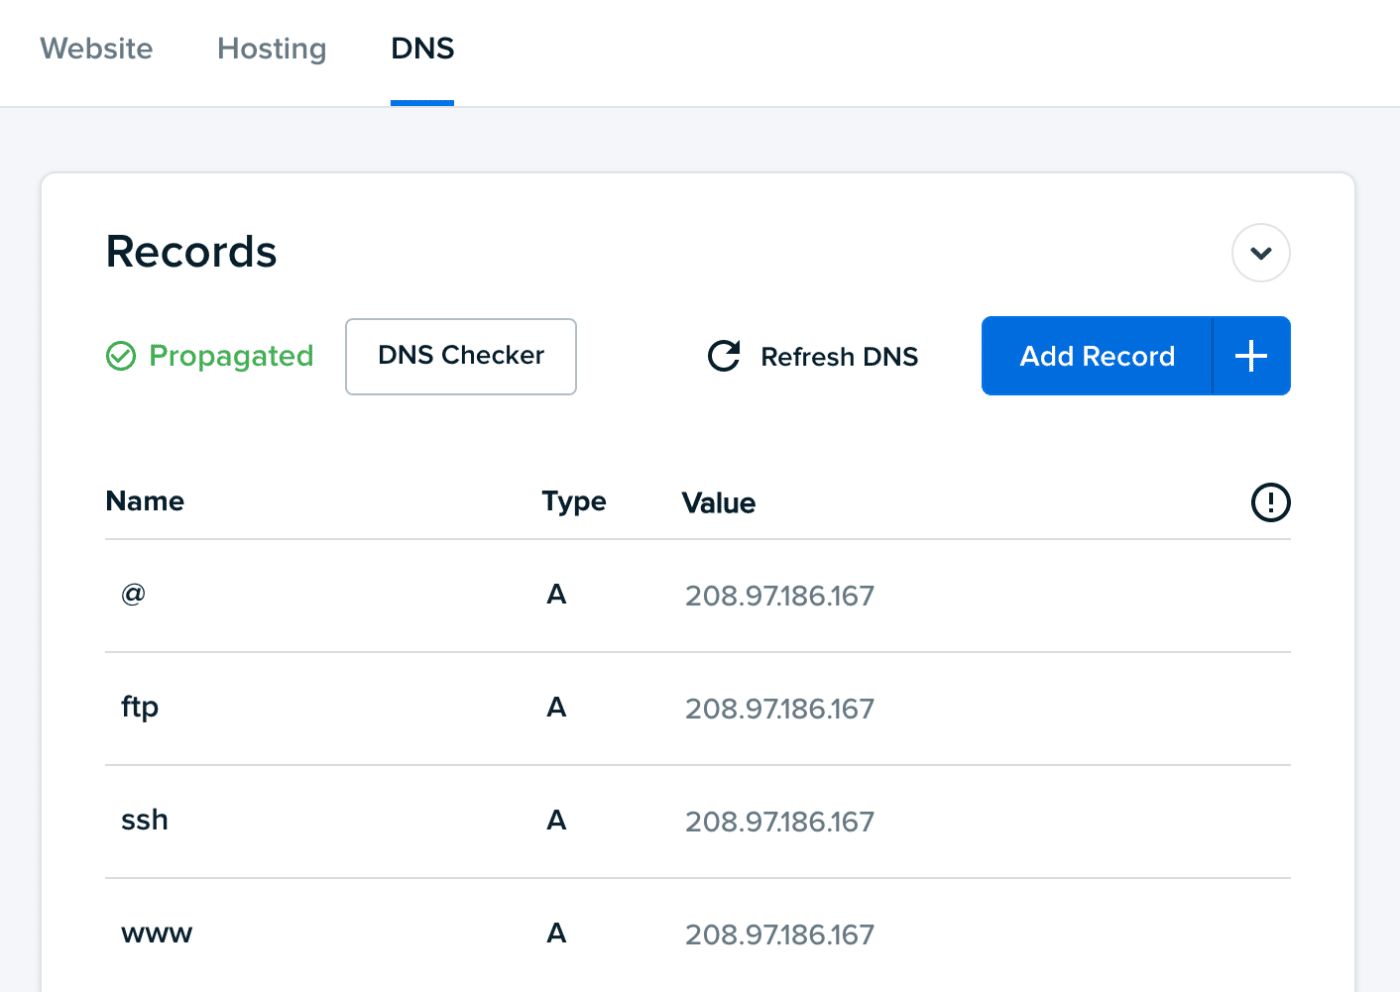
This will take you to the DNS Records page, where you can manage your DNS records.
In the following section, we’ll cover how to add SendLayer DNS records to your DreamHost account.
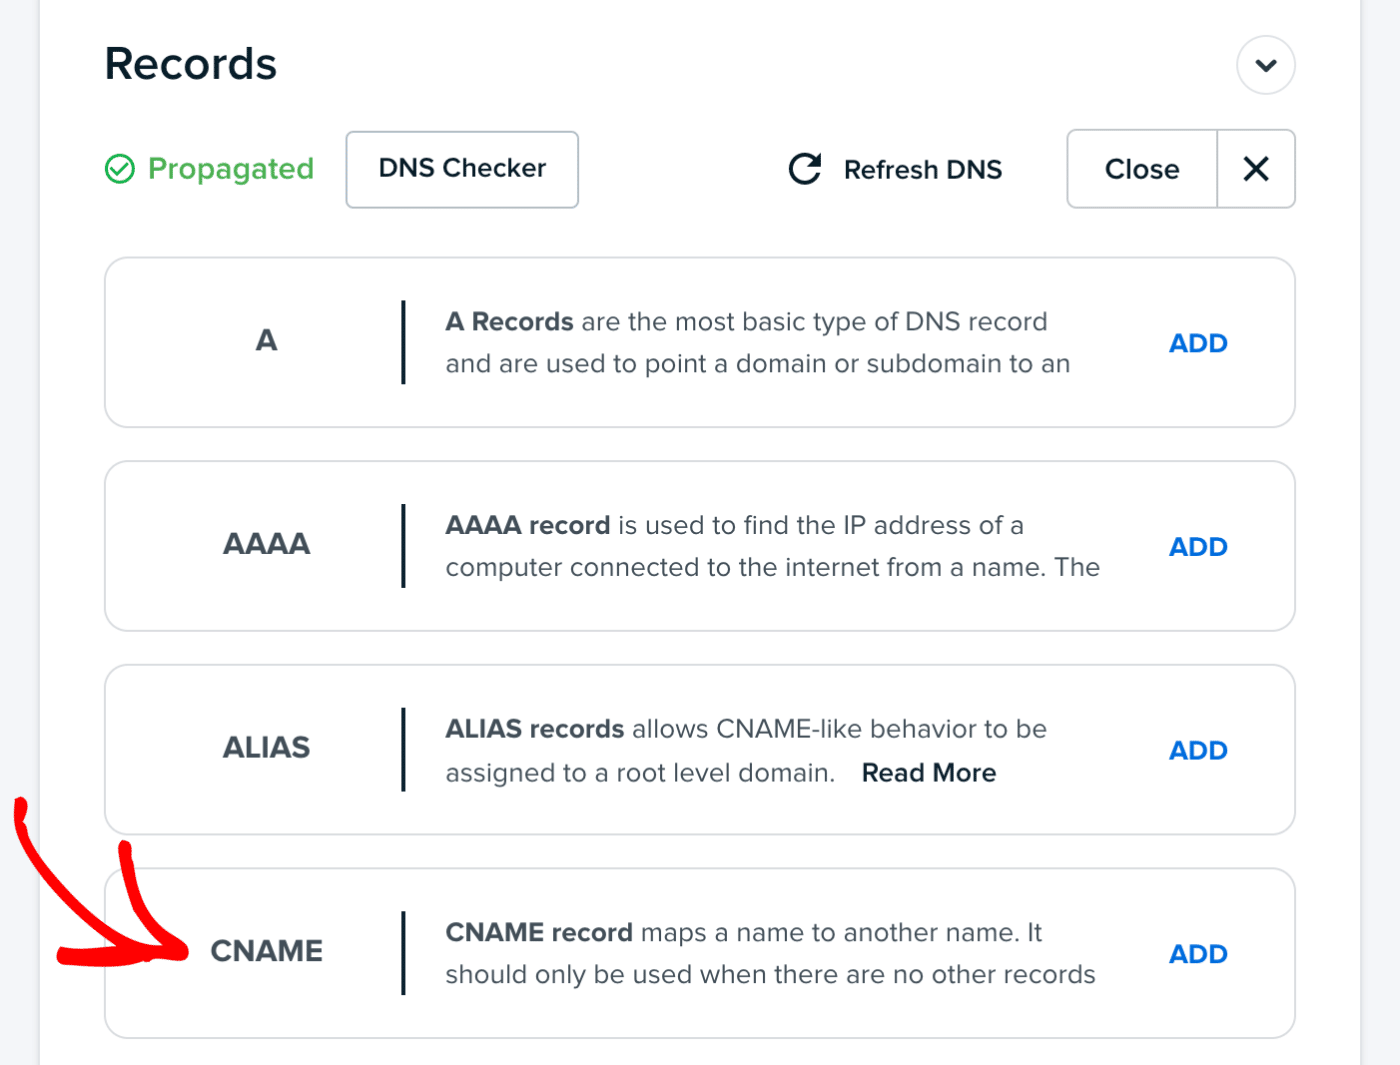
Adding DNS Records to DreamHost
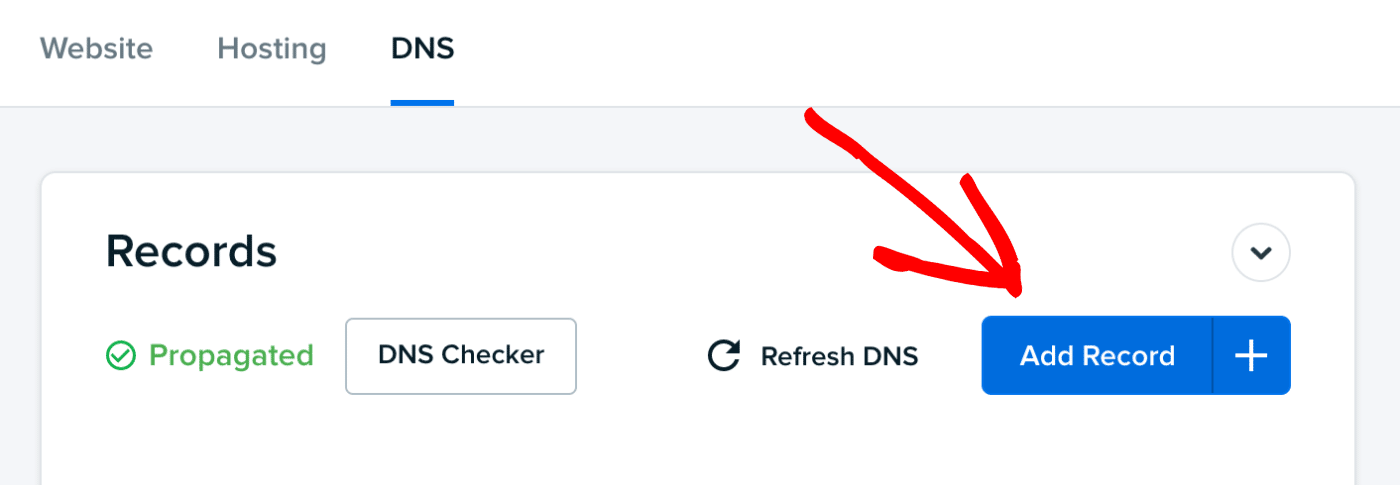
To add a new DNS record to your domain hosted by DreamHost, start by clicking the Add Record button.
Next, you’ll see a list of different DNS record types that you can choose from.
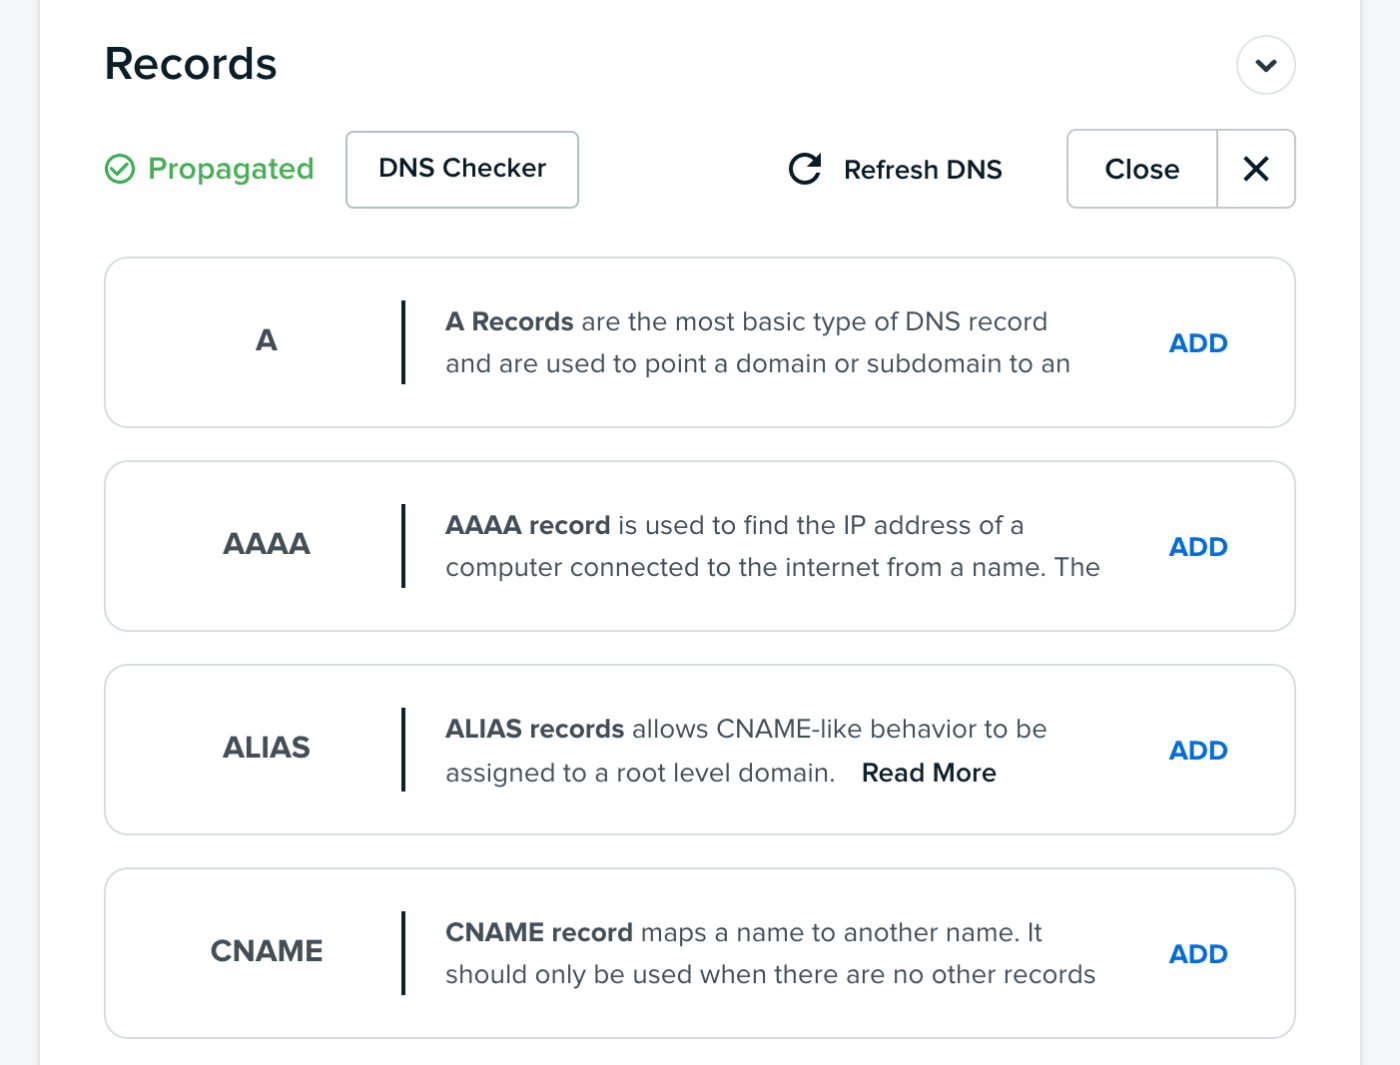
For each of the 5 DNS records that SendLayer provides, you’ll need to select the record TYPE, then add the HOSTNAME and VALUE to the corresponding fields in DreamHost.
As an example, we’ll add our first CNAME record to our DreamHost DNS settings. To do this, you’ll need to select the CNAME record from the list of DNS record types.
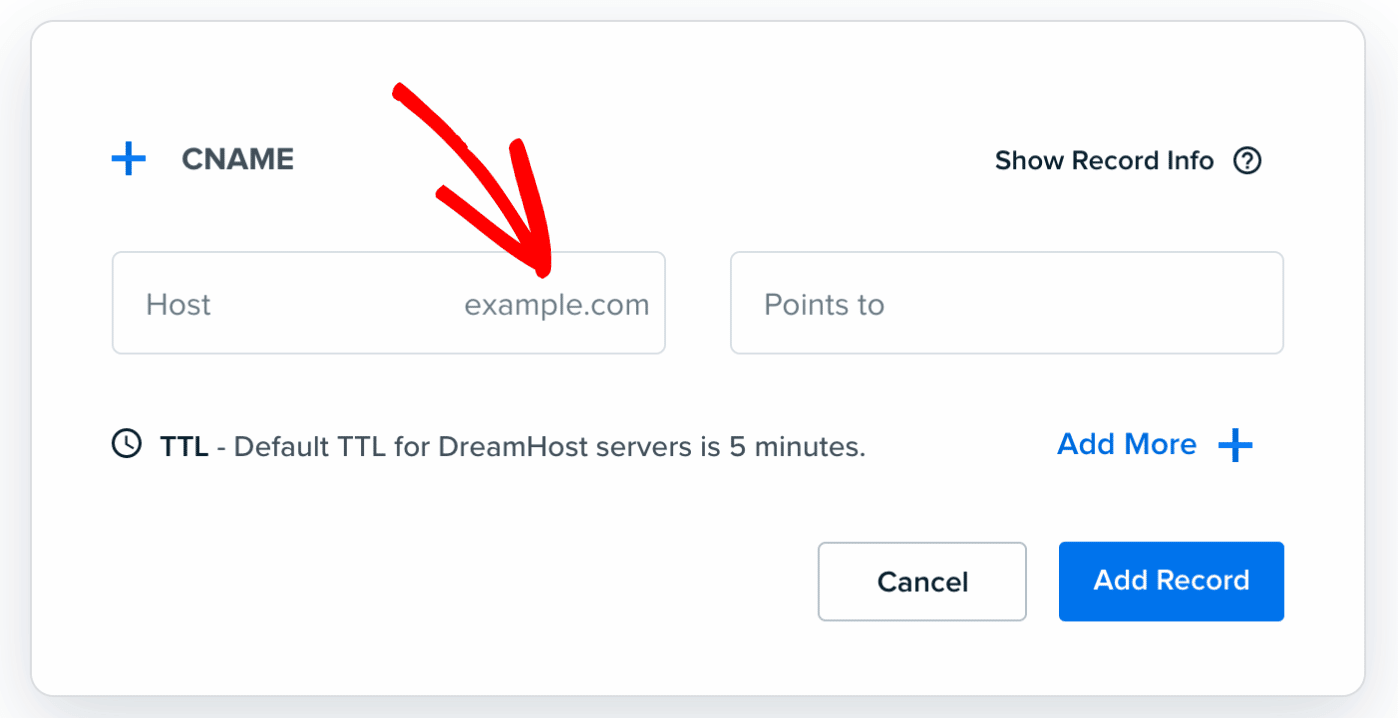
Note: The DNS settings provided in our examples are for demonstration only. Your DNS records will be unique to your domain.
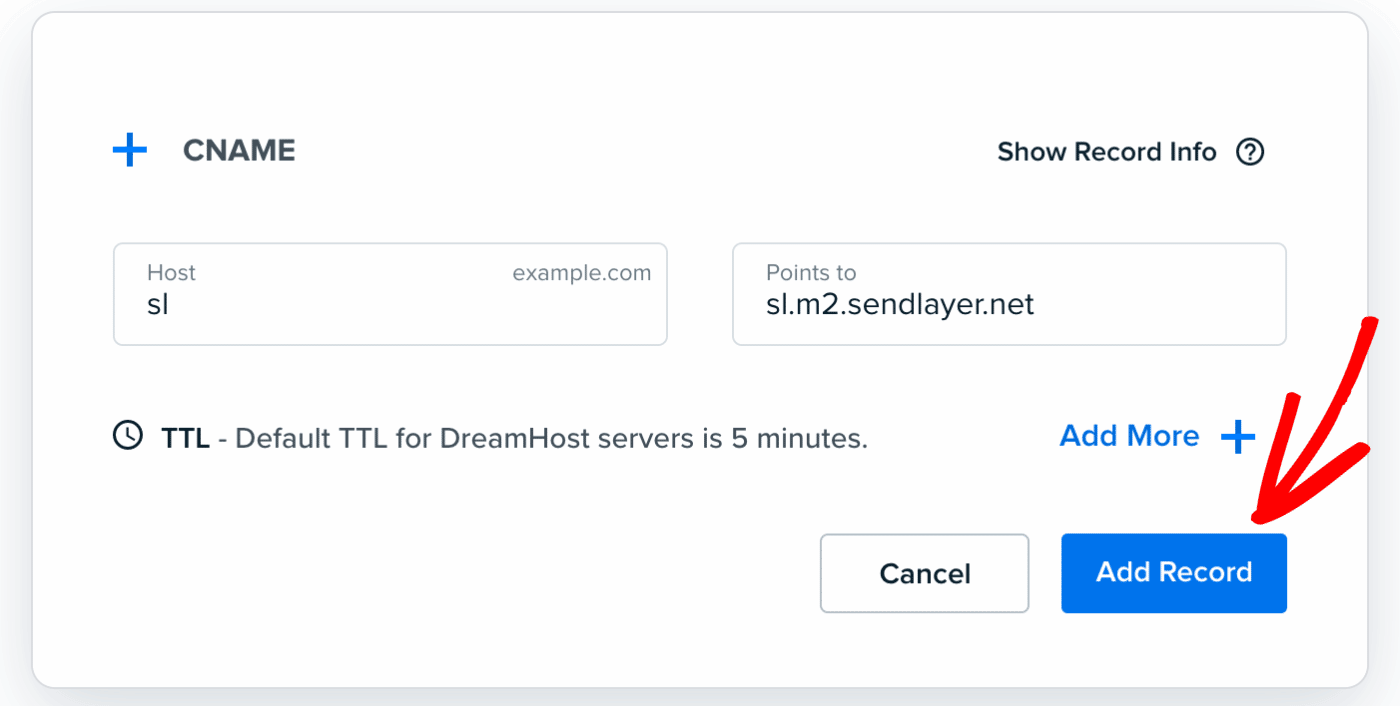
After selecting the CNAME DNS record type, more configuration options will appear. As you can see in the Host field, DreamHost appends your domain to the DNS record for you.
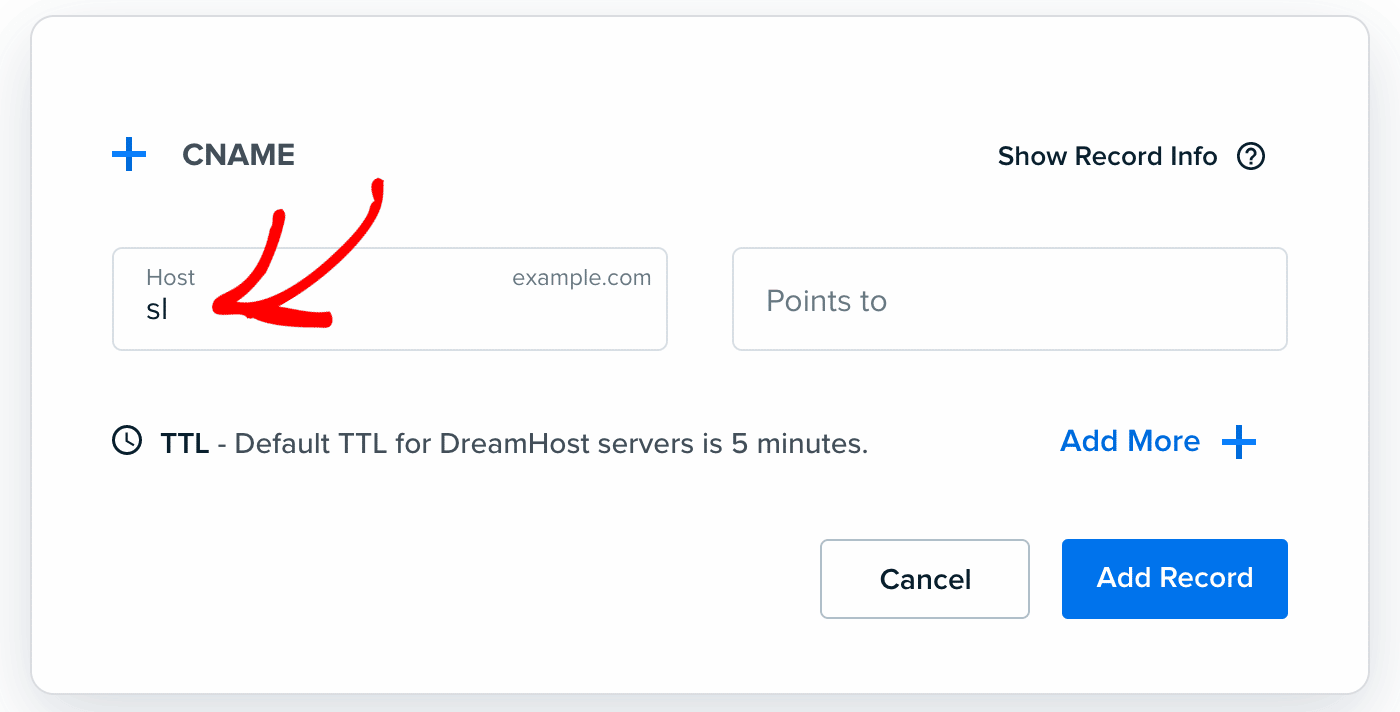
When you’re ready, switch back to your SendLayer account and locate the HOSTNAME. Here you’ll need to copy the sl subdomain.

After that, switch back to your DreamHost account and add the HOSTNAME to the Host field.
Next, return to your SendLayer account and copy the CNAME record’s VALUE by clicking the copy icon.

Then, head back to DreamHost and paste the VALUE in the Points to field.
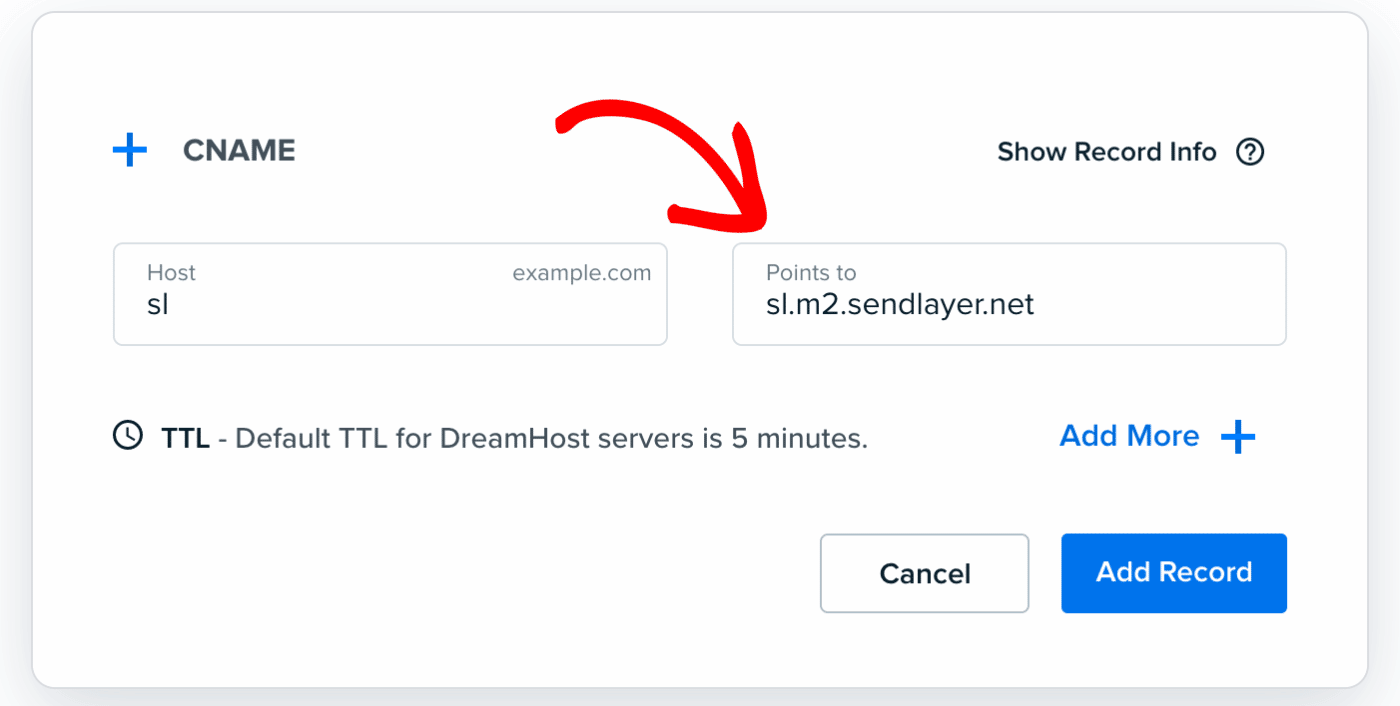
Note: The default TTL for DreamHost servers is 5 minutes and can be left as is.
Once you’ve added the details for the CNAME record, go ahead and click the Add Record button.
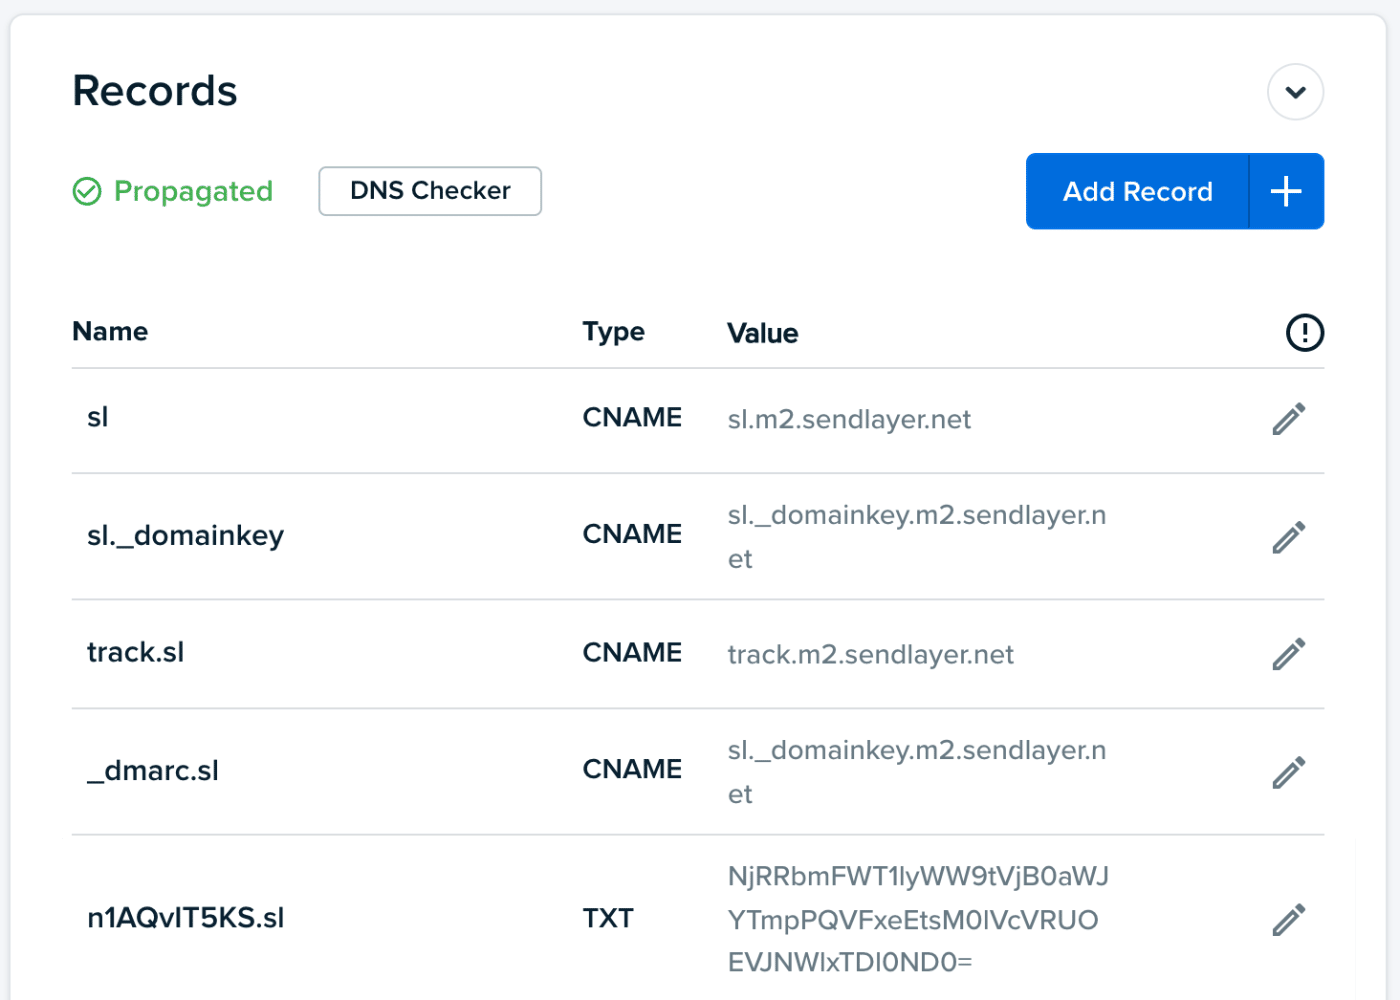
Now that you’ve successfully added your first DNS record, be sure to repeat this process with the remaining DNS records that are in your SendLayer account. You should be adding a total of 4 different CNAME records and 1 TXT record.
After you’ve added all 5 DNS records, you should see them listed in the Records table in your DreamHost account.
Checking Your Domain Status
After you’ve added the DNS records to your DreamHost account, you can check if they’ve successfully propagated right from your SendLayer account dashboard. Remember, it may take up to 24-48 hours for your web hosting account to apply the DNS changes.
To learn how to check if your DNS records have been added successfully, check out our tutorial on checking your domain status.
That’s it! Now you know how to set up SendLayer on DreamHost.
Next, would you like to learn how to tell if someone has opened one of your emails? Check out our tutorial on tracking email opens for more information.