
When you set up a new account with SendLayer, the platform automatically creates a subdomain to send from. If your domain is example.com, SendLayer sends from sl.example.com.
That’s not an accident. After years working in email deliverability, I’ve found that where you send from matters almost as much as how you send. Sending certain emails from a subdomain helps protect your sender reputation and keep your most important messages landing in the inbox.
One thing to get straight early: a subdomain doesn’t make any single email more deliverable on its own. What it does is wall off the reputation of one email stream from another, so a problem in one place can’t drag down the rest.
In this guide, we’ll explain what an email subdomain is, why and when you should use one, when you shouldn’t, and how to set one up with SendLayer.
What Is a Subdomain?
A subdomain is a prefix added to your root domain. In blog.example.com, the blog part is the subdomain and example.com is the root. A single domain can have hundreds of subdomains, each serving a different purpose.
Let’s back up and recap what a domain name is. A domain name is an easy-to-remember text identifier for a website. You could reach any site by typing the IP address of its server, but long strings of numbers are hard to remember. So you type sendlayer.com instead.
Your browser then uses the Domain Name System (DNS) to look up the IP address linked to that name. It’s a bit like your phone turning a contact name into a phone number.
Common Uses for Different Subdomains
Subdomains let you create separate sections of your site, or even completely separate sites with their own design and navigation. For example, you might use store.example.com for your shop or blog.example.com for your blog. Hosted services like WordPress.com use subdomains to give each user an address like mywebsite.wordpress.com.
Some of the most common reasons for setting up a subdomain include:
- Create individual sections of your website for an online store, support hub, blog, or other purposes
- Publish more websites without the need to buy different domains
- Duplicate your main website in another language
- Give multiple users their own sites under the umbrella of your domain
- Create a testing or staging version of your website
- Create a mobile version of your site
But subdomains aren’t only for websites. You can also use them for sending email. Look in your inbox and you’ll probably spot email subdomains already, like [email protected].
How Subdomains Work for Email Reputation
Subdomains have their own entries in the DNS, so they can point at different servers and act as completely separate web properties. Going back to the phone analogy, several companies could share one building (the domain), but each has its own office and phone number.
Mailbox providers like Gmail, Outlook, and Yahoo treat a subdomain as a separate entity with its own reputation. That can make things tricky for SEO, but it’s a real advantage for email.
Alongside the records that point to your website’s IP address, there are DNS records that handle email routing. You can add records that send your outgoing email from a subdomain.

These records hold details about the mail servers used to send and receive your email, and they also authenticate your mail to prevent anyone from forging your domain. Just as website subdomains are treated separately from the main site, an email subdomain keeps your email reputation separate from your website.
You can learn more about email authentication and the different DNS records in our guides to:
Why Send Email From a Subdomain?
The main reason is to protect your root domain’s reputation. Your root domain is tied to your website, your brand, and often your team’s daily email. You don’t want a problem with one batch of email taking all of that down.
Say you send everything from example.com without a separate subdomain. If a lot of recipients mark those emails as spam, your whole domain is at risk.

Mailbox providers track domains that send mail people mark as spam, and they may blocklist them to protect their users. But if you’d sent from a subdomain like mail.example.com, only the subdomain would be blocklisted. Your main domain’s reputation stays protected, and you could spin up another sending subdomain without missing a beat.
Here’s the nuance worth repeating: the subdomain doesn’t make individual emails more deliverable. It isolates reputation so a problem on one stream can’t spread to the others. That’s a reputation-management move, not a magic switch. A fully separate domain gives even more isolation, but it carries none of your brand’s existing trust and is more to manage, so a subdomain is the sweet spot for most senders.
You should never set up a subdomain to send actual spam. But even careful senders get blocklisted by an innocent mistake. Common causes include:
- Poor email hygiene: not keeping your mailing list up to date and sending to inactive subscribers
- High email bounce rate: sending to invalid email addresses
- Too many spam complaints: sending too many sales-focused emails or words that trigger spam filters
When you add a domain to SendLayer, the platform automatically creates a subdomain, like sl.example.com, which protects the reputation of your main domain. If you ever end up on a blocklist or hit another problem, you can switch to a new subdomain without affecting your website or other properties.
When to Use an Email Subdomain
You don’t need a subdomain (or SendLayer) for every email. Regular personal and business email can go from your parent domain without issue. But for these types of email, we recommend a dedicated subdomain:
- Promotional email: marketing messages to a list have a high chance of being marked as spam, so set up a subdomain for sales and campaign email. At high volume, you might even use multiple subdomains for different audiences.
- Outreach emails: PR, guest-posting, and partnership outreach have lower engagement and a higher spam risk, so give them their own subdomain too.
- Transactional emails: order confirmations, account notifications, and password resets absolutely must reach the inbox. A subdomain improves their deliverability and keeps them clear of riskier mail.
The strongest setup separates these streams onto their own subdomains. Send marketing from one (say mail.example.com) and transactional from another (say notify.example.com). It also makes deliverability easier to track, since transactional email almost always engages better than marketing and is worth measuring on its own.
When You Should Not Use a Subdomain
A subdomain isn’t always the right call. Skip it if:
- You send a low or inconsistent volume. A new subdomain starts with no reputation. If you only send occasionally, it never builds enough consistent history for mailbox providers to trust it.
- You only send light transactional email. For a handful of resets and receipts a day, the benefit is small, and SendLayer’s default sending subdomain already covers you.
- You can’t commit to authentication and monitoring. A subdomain needs its own SPF, DKIM, and DMARC records plus a little monitoring. If that’s not realistic right now, keep it simple.
As a rule of thumb, reach for a dedicated subdomain once your email is recurring, customer-facing, and high enough in volume to build steady reputation.
How to Name Your Email Subdomain
There’s no single correct name, but a few conventions are common and trusted:
mail.example.comemail.example.comnotify.example.comort.example.comfor transactional mail
Big senders do exactly this, with names like email.brand.com or news.brand.com. Keep it short, readable, and obviously tied to your brand so recipients still recognize you. When you add a domain to SendLayer, it sets up a sending subdomain (like sl.example.com) for you, so you don’t have to invent one unless you want a custom name.
How to Send Email From a Subdomain
The easiest way to set up a subdomain for transactional email is with SendLayer. It creates the subdomain for you automatically, and it includes features like trackable unsubscribe links and suppression lists to reduce deliverability issues and keep your domain off blocklists.
1. Create a SendLayer Account
Get started by visiting the pricing page and choosing the plan that fits your sending volume. To try the service first, click the free trial link at the bottom of the pricing table.

Fill out your details and check out to create your account.
2. Add Your Domain
After creating your account, log in to your dashboard and click the Add Domain button.

Enter your domain in the form that appears, then click Add Domain.

SendLayer creates five new DNS records for your domain. You’ll notice they all contain “sl.” That’s the subdomain SendLayer sets up for your email automatically.

3. Add DNS Records to Your Web Hosting Account
Copy each DNS record using the clipboard icons and add them to the DNS settings at your web host. Where to find these settings varies by host, so see our guide to completing domain setup for specifics.
Make sure your records stay aligned: the subdomain you send from should match the domain in your SPF and DKIM setup. Alignment is what lets DMARC pass, and it’s what mailbox providers check. When you’ve added all the records, check the I have added these DNS records and am ready to proceed box and click Verify DNS Records.
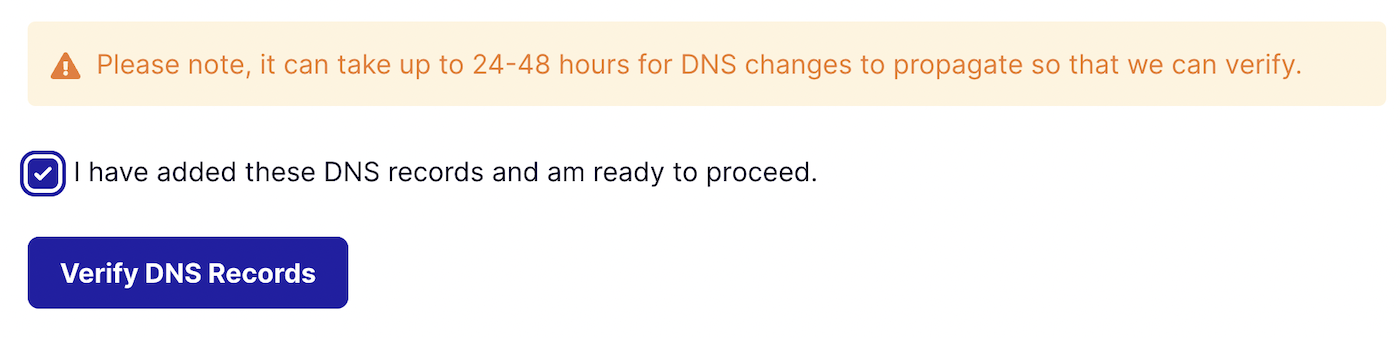
After adding your records, you may need to wait for them to propagate. For many hosts this takes a few minutes, but it can sometimes take 24 hours or more. You’ll know it worked when there’s a green checkmark next to each record.
4. Connect Your Site or App With SendLayer
Your account is now ready to use. There are two ways to connect your site or app: API or SMTP. Read our docs on integrating with SendLayer for help choosing.
As an example, let’s connect a WordPress site to send transactional email. First, you’ll need an SMTP plugin. We recommend Easy WP SMTP because it’s simple to set up and connects to SendLayer in a few clicks.

After you purchase the plugin, download it and find your license key in your dashboard. Enter the key in the plugin settings before you use it. If you need help, there are full steps in this guide.
Once Easy WP SMTP is installed and activated, configure it to use SendLayer. In your WordPress dashboard, go to Easy WP SMTP » Settings, scroll to the Mailer settings, and choose SendLayer as your mailer.

Scroll down and paste in your SendLayer API key. Use the Get API Key link to jump straight to your SendLayer dashboard.

Now enter the rest of your email settings:
- Force From Email: we recommend enabling this so the From Email you set is used by all plugins on your site
- From Name: the name you want to appear as the sender. By default this is your site name, but you can change it.
- Force From Name Replacement: enable this and the sender name you entered will be used by all plugins on your site

Click Save Settings when you’re finished. That’s it. You’ve set up Easy WP SMTP to send your email through SendLayer from a subdomain.
To confirm it works, go to Easy WP SMTP » Send a Test, enter your email, and click Send Test Email. You should receive a message like the one below:

It worked. Your transactional emails are now sending safely from a subdomain, which improves deliverability and protects your main domain’s reputation. One last tip: if you’re moving real volume, warm up the new subdomain. Because it starts with a neutral reputation, ramp up gradually over a few weeks and send to your most engaged contacts first.
Frequently Asked Questions
Does sending from a subdomain improve deliverability?
Not directly. A subdomain isolates the reputation of one email stream from another. It protects your root domain and other streams if one runs into trouble, but it doesn’t make an individual email more likely to reach the inbox on its own.
Should transactional and marketing email use different subdomains?
Yes, if you send enough of both. Marketing mail draws more complaints, so keeping it on a separate subdomain protects the reputation your transactional email depends on.
Is a subdomain better than a completely separate domain?
For most senders, yes. A separate domain gives total isolation but carries none of your brand’s existing trust and is more to manage. A subdomain balances separation with a recognizable brand.
Do I need to warm up a new sending subdomain?
If you send in volume, yes. A new subdomain starts with no reputation, so ramp up gradually over a few weeks and send to engaged contacts first.
What should I name my email subdomain?
Keep it short and brand-recognizable. Common choices are mail., email., news. for newsletters, or notify. for transactional mail.
Does SendLayer set up a subdomain for me?
Yes. When you add a domain, SendLayer creates a sending subdomain (like sl.example.com) automatically, so you’re sending from a subdomain by default.
That’s it! Now you know why you should send email from a subdomain.
Next, would you like to learn more about transactional email? Check out our beginner’s guide to transactional email for more information.
Ready to send your emails in the fastest and most reliable way? Get started today with the most user-friendly and powerful SMTP email delivery service. SendLayer Business includes 5,000 emails a month with premium support.
