Do you want to start using Front customer service and relationship platform to manage your customer conversations?
Front converts your email inbox into a multi-channel platform to respond to customer service requests, collaborate with your team, and automate repetitive tasks, making it quicker and easier to set up and manage your customer help desk.
In this beginner’s guide to Front, we’ll go through everything you need to get started using the platform, from setting up your account to integrating email, working with your team, and more.
What Is Front Customer Service Platform?

Front is a customer communication platform that combines emails, apps, and teammates into a single view. This innovative platform is designed to help teams collaborate more effectively and manage their customer interactions more efficiently.
Front enables businesses to handle their customer communication in a unified workspace, whether it comes through email, social media, chat, or other channels.
Key features of Front include:
- Shared Inbox: Multiple team members can access and manage emails and messages from a single inbox, making it easier to collaborate and respond to customer inquiries quickly.
- Integration with Other Tools: Front integrates with a wide range of other business tools and applications, such as CRM software (like Salesforce), project management tools (like Asana and Trello), and communication platforms (like Slack), allowing teams to access all the information they need in one place.
- Automation and Workflows: The platform offers automation capabilities to help teams manage incoming messages more efficiently. This includes the ability to automatically route messages to the right team member, set up auto-replies, and create custom workflows to streamline operations.
- Analytics and Reporting: Front provides detailed analytics and reporting features, giving businesses insights into their customer service performance. This includes data on response times, team productivity, and customer satisfaction.
- Personalized Communication: Despite being a shared platform, Front allows for personalized responses to customers. Each team member can manage their replies and follow-ups, ensuring that customer interactions are personalized and engaging.
- Omnichannel Support: Front supports various communication channels, allowing teams to manage emails, texts, social media messages, and more, all from a single platform. This omnichannel approach ensures that no customer query goes unanswered, regardless of how they choose to reach out.
Front is particularly beneficial for customer support teams, sales teams, and any other roles that involve significant customer interaction. By centralizing communication and providing tools for collaboration and efficiency, Front helps businesses improve their customer service quality, response times, and overall customer satisfaction.
Step 1: Getting Started With Front
Front offers a 7-day free trial so you can get started and try out the platform without committing to a contract or providing any payment details.
To take advantage of the free trial, head over to the Front signup form and enter your details.

Once you’ve finished filling out the form, click the Sign up for free button to create your account.
Once your Front account is created, you’ll be taken to your dashboard where you can configure your account and access all areas of the platform.

Fron includes a setup guide that will walk you through some information to learn more about Front and the steps to set up your account.
You can start by clicking on the first option in this list, Core capabilities, to see a demo of how Front works.

You can walk through the steps of the demo to get a better understanding of the platform and how to find your way around the dashboard.

The demo is interactive, so you’ll quickly learn how to use Front by sending replies to customers, tagging your teammates, using live chat, viewing analytics, and other actions you’ll perform when you’re using the platform for real.
Team Setup
After you’ve completed the Front demo, you’ll be assisted in adding team members to the account.
First, select the teammate group you want to set up and click the Next button.

Add a name for the shared inbox for this team, and choose a color to represent it.

Choose goals for your new inbox and Front will automatically create workflows for you. For example, if you choose “Ensure timely response to customers” as a goal, Front will automatically trigger alerts if there’s been an SLA breach or your customer service agents are taking too long to respond.

To add team members, navigate to Teammates in the menu, and click Invite.

You can then enter the email addresses of the team members you want to invite to use Front.

After clicking continue, choose the teammate group you want to add them to (you can choose the group you just set up), and select a role for the workspace.

You can then choose the inboxes each member will have access to.

Finally, choose which inboxes will appear in this teammate’s sidebar, before clicking the Add teammate button to send the invitation.
Each team member you invite will receive an email inviting them to join the platform.

After clicking the Join team button in the email, each individual will be asked to create a password, and Front will create an account for them under your company.
Customize Your Profile
After joining, users are encouraged to customize their profiles, including setting up their name and job role.

You can further customize your profile by adding a profile picture.
Click on the icon in the top right corner of your dashboard and select Edit profile.

Here you can upload a new profile image so your teammates can recognize you more easily during conversations. You can also change your username here if you wish.
Now you’ve created a team inbox and added your teammates, it’s time to set up your communication channels.
Step 2: Connect Your Communication Channels
With Front, you can connect various communication channels to your team inbox and manage customer messages in one place.
Navigate to Channels in your dashboard menu to choose which communication channels you want to integrate with your Front account.

Front offers the following integrations:
- Email: You can integrate Google and Microsoft email accounts directly or forward emails from any other service
- SMS: Twilio, WhatsApp, Dialpad, Yalo, Talkdesk, or JustCall
- Messaging: Various instant messaging services including Front Chat, Twitter, Telegram, Facebook, Slack, and more
- Other: Connect forms from your website and other custom channels.
Email Integration
To forward your emails to your Front shared inbox, choose Other emails from the Channel setup screen and click the Connect button.
Enter the email address for the mailbox you want to forward mail from and click Continue.

Choose the inbox you want to forward emails to and click the Save button.

Set up email forwarding according to your email provider’s instructions to the provided email address.

Once you’ve set up forwarding, click the Test setup button to ensure the emails are reaching your Front shared inbox.
Custom SMTP Configuration
For outgoing emails, you have the choice between sending emails via Front’s email server or using custom SMTP.
Using a custom SMTP server instead of relying on Front’s default email servers offers several advantages.
One of the primary benefits of using a custom SMTP server is the enhanced control over email deliverability. By using a dedicated SMTP email provider that creates SPF, DKIM, and DMARC records, you can maximize your email deliverability and sender reputation.
This helps ensure that your emails are less likely to be marked as spam by recipients’ email services, thereby increasing the likelihood that your messages reach your customers’ inboxes.
Improving Front Email Deliverability With SendLayer
To improve deliverability and have full control over your email, it’s recommended to use a custom SMTP email service like SendLayer.
SendLayer authenticates your domain as a reputable email sender and sends your outgoing emails through infrastructure designed for optimal speed and reliability.
When it comes to email deliverability, not all email providers are equal. You can think of choosing an SMTP provider as being similar to choosing a courier for sending a package.
You have a multiple choice of providers, each of which differs in terms of deliverability time, and reliability. SendLayer is essentially a premium email “courier” that will ensure your messages reach the inbox quickly and reliably, every time.
You can also view metrics about all the email you send on your SendLayer dashboard, so you can instantly spot any deliverability issues and keep track of how many of your emails are being opened and clicked.

As well as integrating with Front, you can use SendLayer for sending any kind of transactional emails, including account notifications, order confirmations, password resets, and more.
Create a SendLayer Account
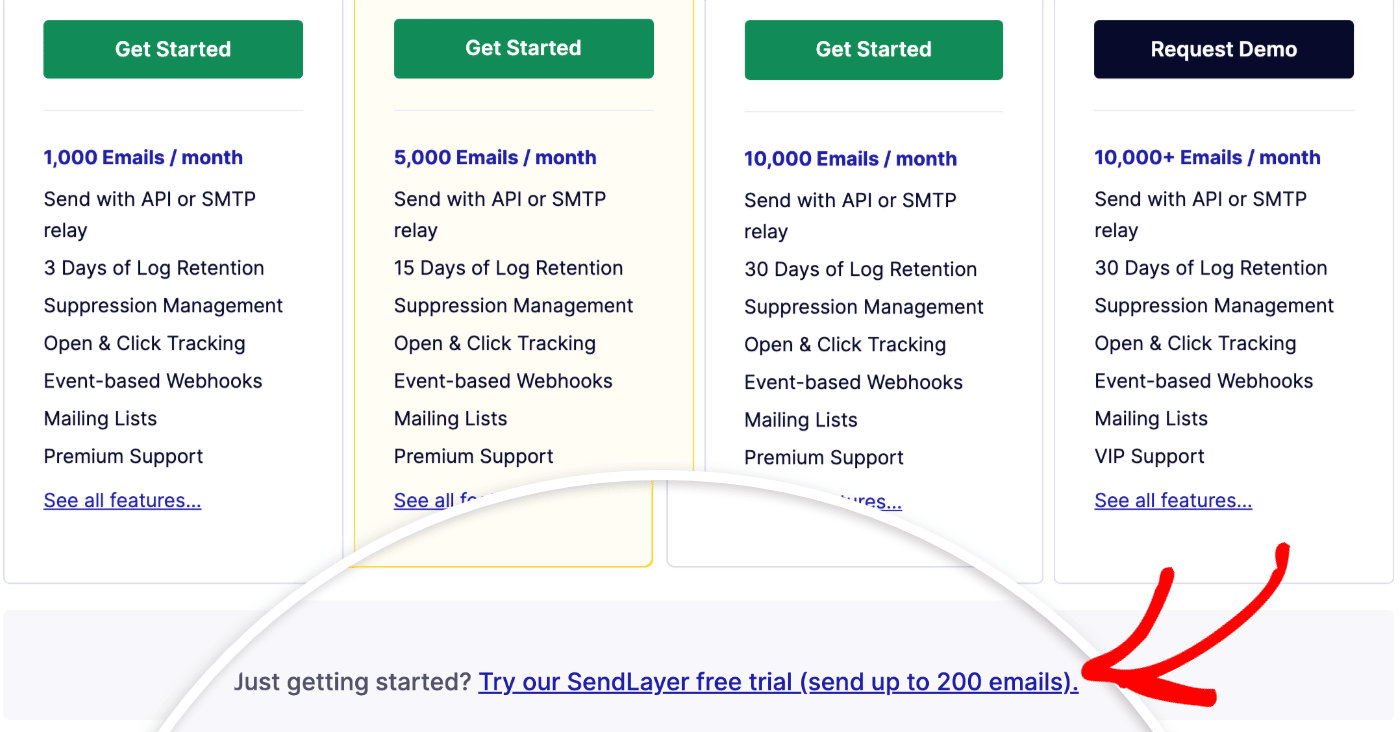
To start sending your email with SendLayer, visit the pricing page, choose your plan, and click Get Started.
You can also try out SendLayer for free by clicking the link for the free trial at the bottom of the pricing table.
Once you’ve created your SendLayer account, log into your dashboard.
Adding and Authorizing Your Domain
Before you can use SendLayer to send your Front emails, you need to add the domain you’ll be sending support emails from. Click the Add Domain button to configure your domain settings.

Type in your domain name and click Add Domain.

SendLayer will create 5 new DNS records to authorize your domain for sending email. You’ll need to add these DNS records in your hosting or domain control panel. You can follow our domain setup guide for more help with this.

After you’ve added these DNS records to your domain, finish setting up your SendLayer account by ticking the box, I have added these DNS records and am ready to proceed, and clicking the Verify DNS Records button.

You can check the status of the domain verification process by clicking on Settings in the sidebar menu of your SendLayer dashboard and scrolling down to the DNS Records & Settings section.
Once your domain’s DNS records are verified, you should see a green checkmark in the Status column.

Note: changes to your domain DNS settings can take up to 48 hours, but is usually complete within an hour or two.
Connecting to the SendLayer SMTP Server
All the information you need for connecting SendLayer with Fron is located in your SendLayer dashboard on the Settings page, under SMTP credentials.

You’ll need this information to set up custom SMTP in Front.
Setting Up Custom SMTP in Front
Click on the Settings tab in the Channels setup screen, scroll down, and expand the Custom SMTP submenu and toggle Enable to on.
Once you enable custom SMTP, you’ll see more settings. You can fill out this information from your SendLayer account credentials.
Fill out the following data for the SMTP settings:
- Host: smtp.sendlayer.net
- Port: 587
- Login: Copy and paste the username from your SendLayer dashboard
- Password: Copy and paste the password from your SendLayer dashboard

Toggle the Connect with SSL/TLS encryption option to on and click the Test connection button.
If you entered everything correctly, you should see a green Connection successful! Alert.

Now your email is set up and you can send messages in the confidence that they won’t go to the spam folder, you can continue to set up integrations with social media and other messaging channels.
Integrating Social Media and Other Channels
To forward messages from social media channels like Facebook Messenger to your Front account, choose the channel you want to set up from the Channels page and click Connect.

When you click the button to connect to your chosen platform, log into your account and follow the instructions to complete the integration.

Step 3: Organize Your Inbox
After setting up your account and integrating your communication channels, the next crucial step is to organize your inbox. A well-organized inbox ensures that your team can prioritize and respond to messages efficiently.
Creating Tags for Easy Categorization
Tags in Front act as labels that help you categorize conversations based on criteria such as topic, urgency, customer type, or any other system that suits your team’s needs.
By using tags, you can quickly filter and sort conversations, making it easier to prioritize responses and keep track of ongoing issues.
To create a new tag, navigate to Tags in your workspace menu. Here you can review all your current tags and add new ones.

Click Add a tag to create a new tag.
First, enter a name for your tag.
Then, select a color or emoji for your tag. Different colors can help you visually distinguish between categories at a glance, making it easier to prioritize and organize conversations.
If your organization uses a hierarchical tagging system, you may wish to assign your new tag as a subtag under a parent tag. This is useful for creating a structured tagging system (e.g., having a parent tag “Product Feedback” with subtags for specific products).
Click the Create button to add your new tag to the workspace.

To tag a conversation, open it and look for the tag icon. Click on it, then select the appropriate tag(s) from the list that appears. You can apply multiple tags to a single conversation.

You can also set up rules that automatically apply tags based on specific triggers, like keywords in the message, the sender’s email domain, or the conversation’s channel. This can save time and ensure consistency in how conversations are categorized.
Setting Up Rules
Rules in Front are powerful automation tools that can perform actions on your conversations based on specific conditions or triggers.
By setting up rules, you can automate repetitive tasks such as sorting emails into folders, tagging conversations, assigning messages to team members, and more.
This automation not only saves time but also ensures consistency and accuracy in managing customer interactions.
To view rules you’ve already set up and add new ones, click on Rules in your workspace menu.

Click Add a rule to create a new rule.
Front comes with rule templates that help you to set up the workflow for each rule. You can edit this templates or create your own rules from scratch.

Once you know how to keep messages organized in your inbox, you can start to explore the collaboration features that Front offers.
Step 4: Collaborate with Your Team
Front’s platform is designed to enhance team collaboration by providing tools and features that facilitate seamless communication and coordination among team members.
Assigning Conversations
Assigning conversations to specific team members or teams ensures that every customer query is attended to by the most appropriate person, enhancing response quality and efficiency.
You can manually assign conversations to a team member by selecting the conversation and using the assign option to choose the responsible individual.

You can also use rules to automate the assignment process based on specific triggers, such as keywords, sender information, or conversation volume, to evenly distribute the workload among team members.
Using @Mentions for Internal Communication
Within any conversation, team members can use @mentions to tag colleagues, ask for input, or hand off conversations. This feature keeps internal communications tied to customer interactions, making it easier to track decisions and actions.

You can use @mentions to seek advice or a second opinion without leaving the conversation thread or to notify teammates of urgent issues and escalate conversations when necessary.
Step 5: Track and Analyze Performance
Front provides powerful analytics and reporting tools that give insights into various aspects of your team’s performance and customer interactions.
To access analytics, just click the analytics icon at the top of your dashboard.

You can also schedule recurring email reports that are sent out to members of your team automatically.

By monitoring your analytics, you can keep an eye on important metrics like reply time so your team can improve the level of service and customer satisfaction over time.
That’s it! Now you know how to use Front to manage your customer communications more efficiently and collaboratively.
Are you researching different customer service platforms? Check out our tutorial on how to set up a help desk in Help Scout for an alternative to Front.
0 comment on "Getting Started With Front Customer Service Platform"