Setting up custom SMTP for your Freshdesk email support ensures better email deliverability, security, and control over your customer support emails.
Freshdesk offers its own default email service, but using a dedicated transactional email provider like SendLayer can significantly improve the reliability of your outgoing emails and the performance of your customer support communications.
In this tutorial, I’ll walk you through the steps of configuring Freshdesk email support with custom SMTP and some additional Freshdesk email setup tips to help you optimize for greater efficiency, security, and scalability.
Why Not Use Gmail or Free Email Accounts for Freshdesk Email?
While it might be tempting to use Gmail or the email account provided by your hosting service to handle Freshdesk support emails, this often leads to limitations and issues that can impact your customer experience:
- Deliverability Problems: Free services like Gmail are not designed for high-volume email sending, so emails sent through them can often land in your customers’ spam folders.
- Lack of Control: Gmail and hosting email services typically offer limited control over your email settings. This means you can’t fully customize or optimize your email for support interactions.
- Scalability Issues: As your business grows, you’ll likely find the email sending limits of these services too restrictive. You may also encounter delays or even blocks on your outgoing emails, which can frustrate customers waiting for support responses.
- Professionalism: Using a generic email like [email protected] can appear unprofessional, especially when compared to a custom domain tied to a dedicated SMTP service.
For businesses that want reliable, scalable, and professional email handling, services like SendLayer are a much better fit. SendLayer is designed to handle high-volume email traffic with excellent deliverability, all while providing advanced features like email tracking, authentication (SPF, DKIM, DMARC), and encryption for better security.
Plus, it’s affordable, making it a great option for businesses looking to upgrade their email support without breaking the bank.
With SendLayer, you get the benefits of a professional SMTP service at a price point that works for businesses of all sizes—whether you’re just starting out or managing a large support team.
Step 1: Find Your SMTP Credentials
Before you can configure custom SMTP in Freshdesk, you’ll need to find your account credentials including SMTP server, username, and password.
These credentials should be available in your email management dashboard. If you’re having trouble locating them, you can contact your email provider for assistance.
If you don’t yet have a suitable SMTP email provider you can sign up for a free trial with SendLayer, which allows you to send up to 200 emails.
Just head over to the SendLayer pricing page, choose a plan to suit your needs, starting from $5 a month, or click the link for the free trial and sign up for an account.
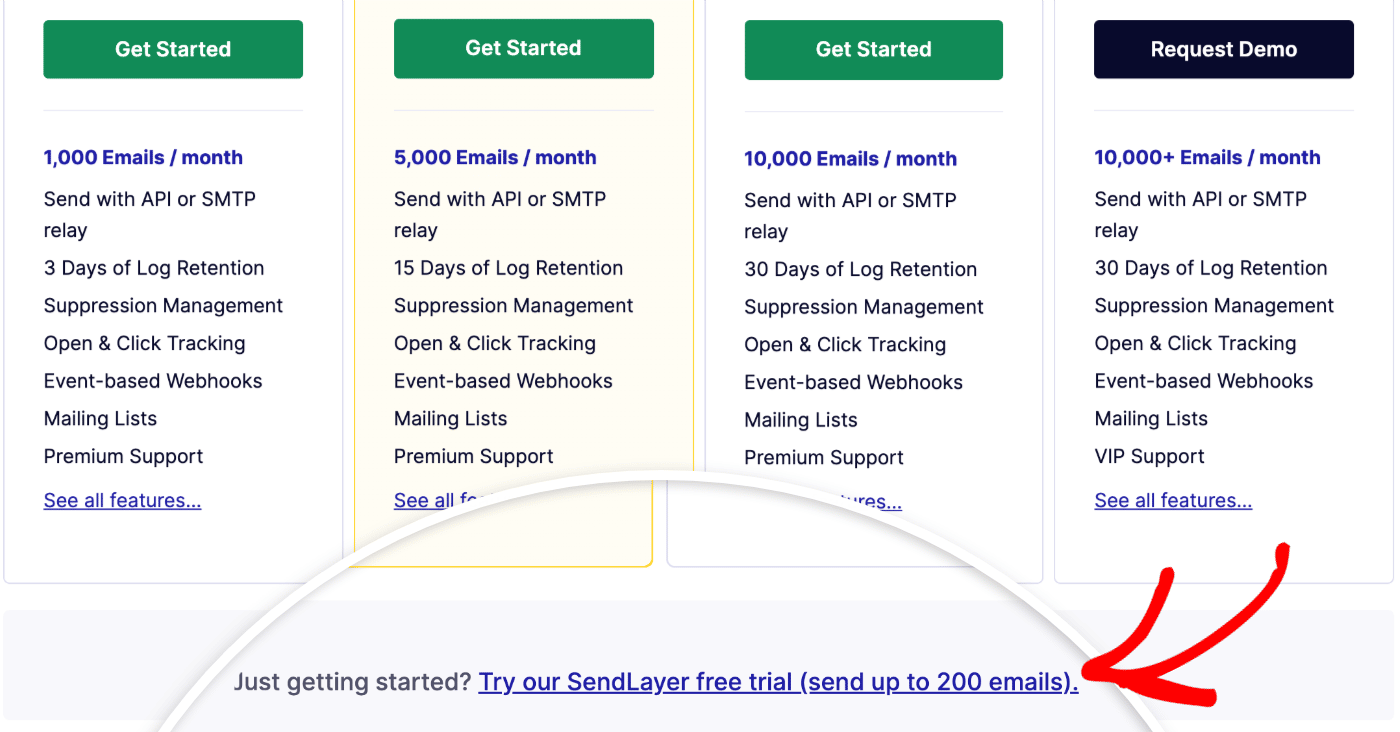
Once you’ve completed account registration, you’ll need to add the domain you want to send emails from and add authentication records to your DNS records. This improves the deliverability of your emails by authenticating your domain for sending email.
This setup is a one-off process and a lot simpler than it sounds! You can find full step-by-step instructions in the SendLayer documentation.
After setting up your account and authorizing your domain, you can find the SMTP credentials you need to complete Freshdesk email setup on your dashboard by navigating to Settings » SMTP Credentials.
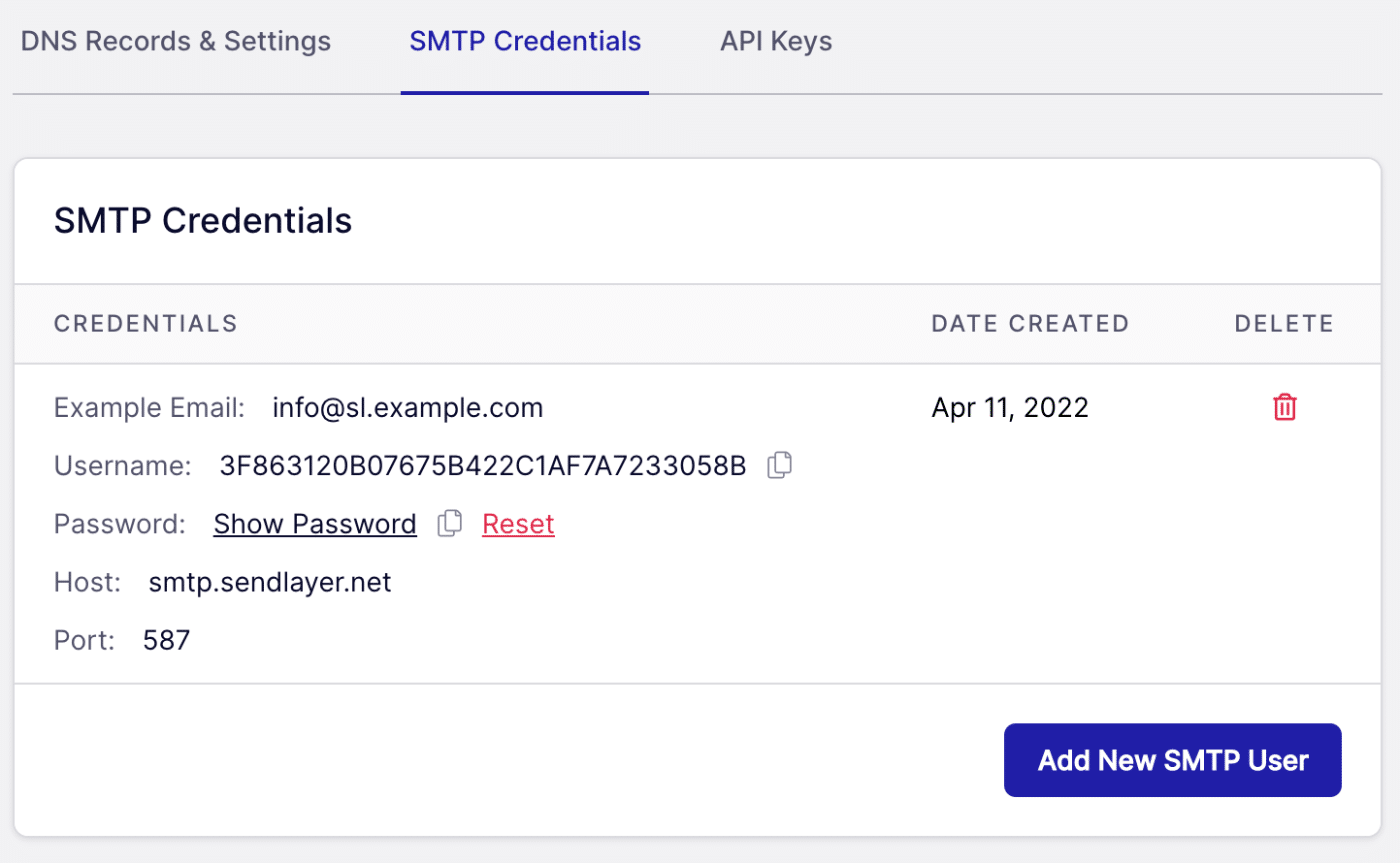
You can keep this page open in a separate browser tab while you set up Freshdesk, as you’ll need to copy and paste the credentials later.
Step 2: Configure Freshbooks SMTP
Next, you’ll configure Freshdesk to use your custom SMTP credentials for outgoing emails.
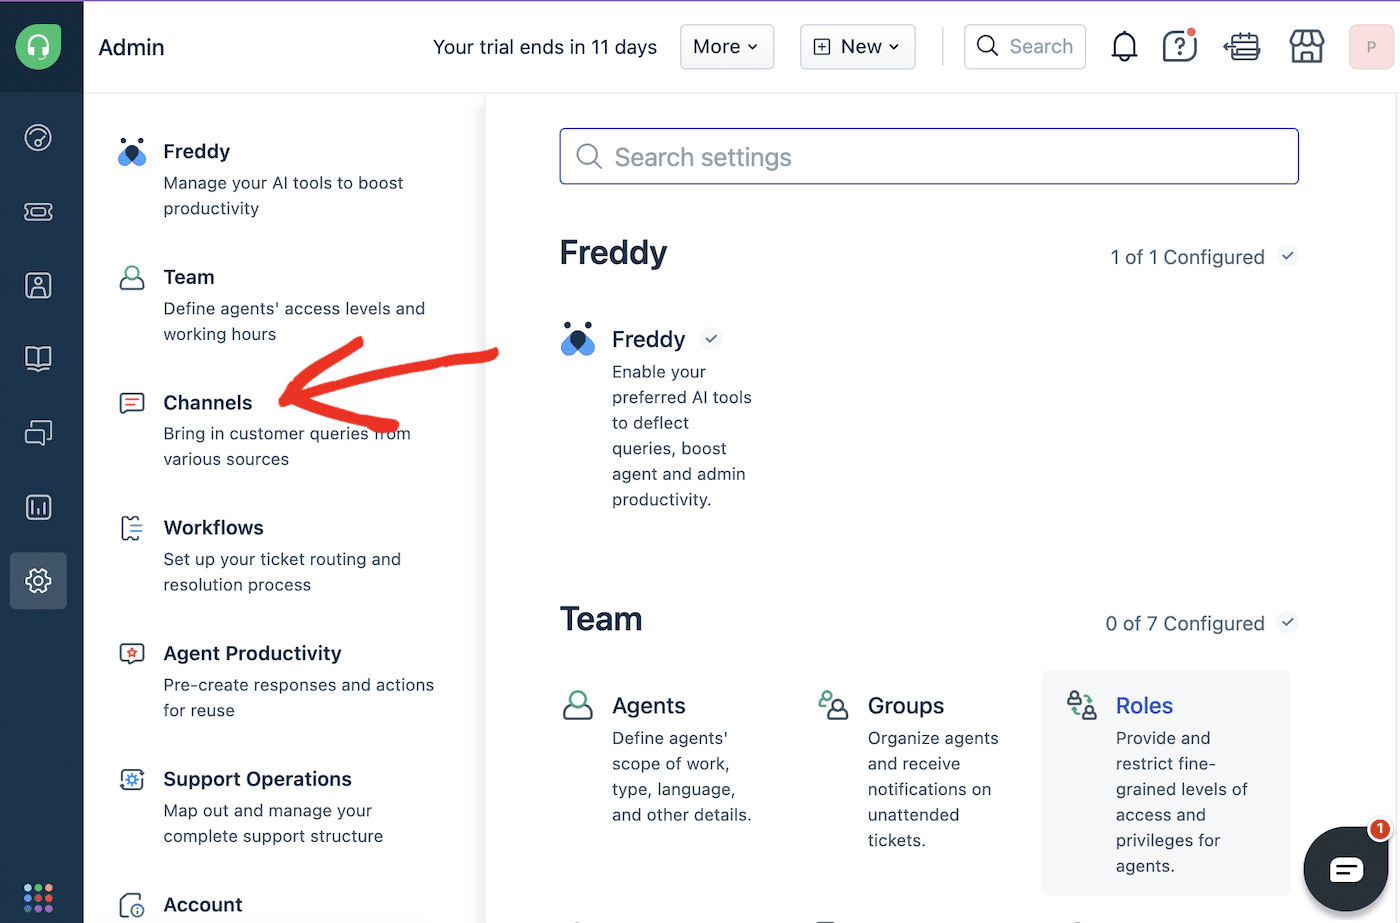
Log in to your Freshdesk account and click on the Admin icon (a gear symbol) at the bottom left corner.
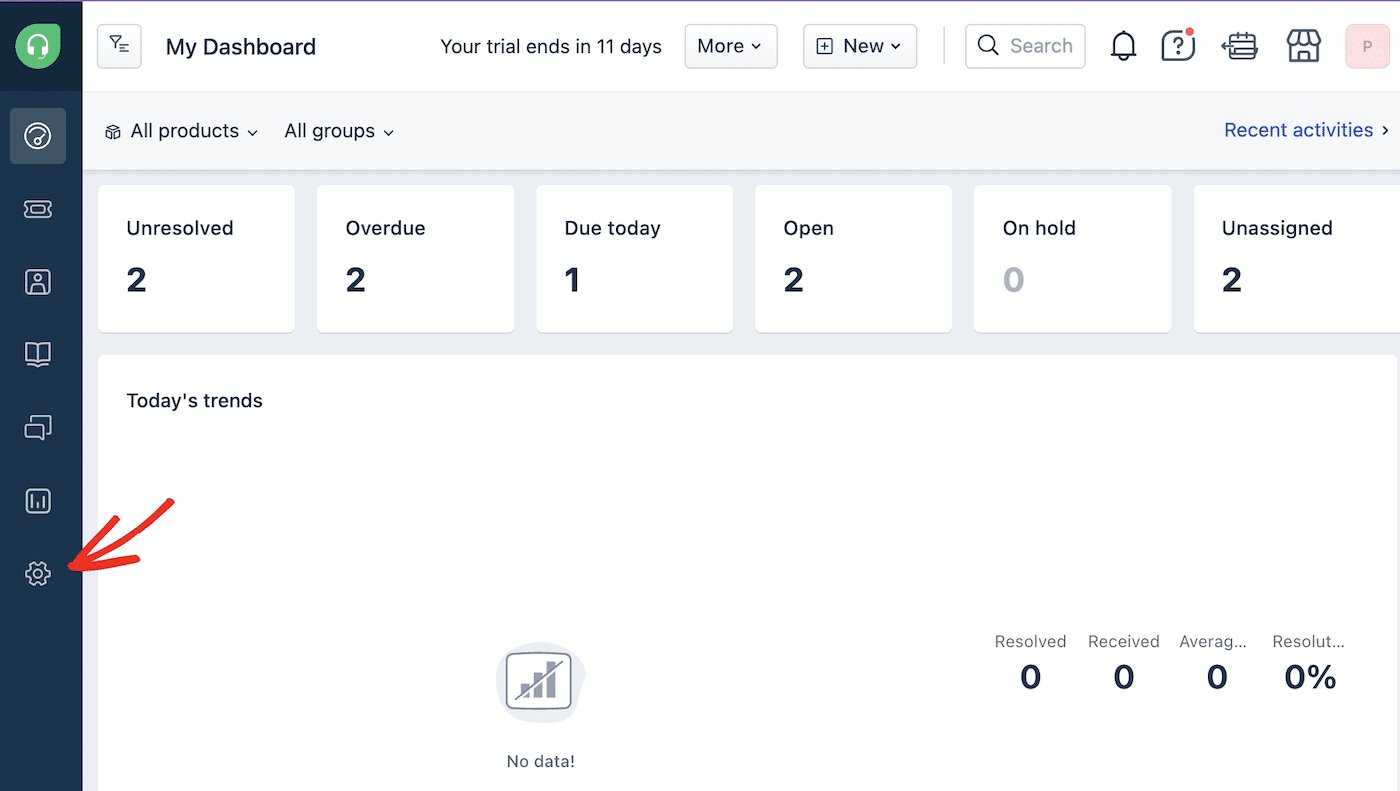
Next, click Channels.
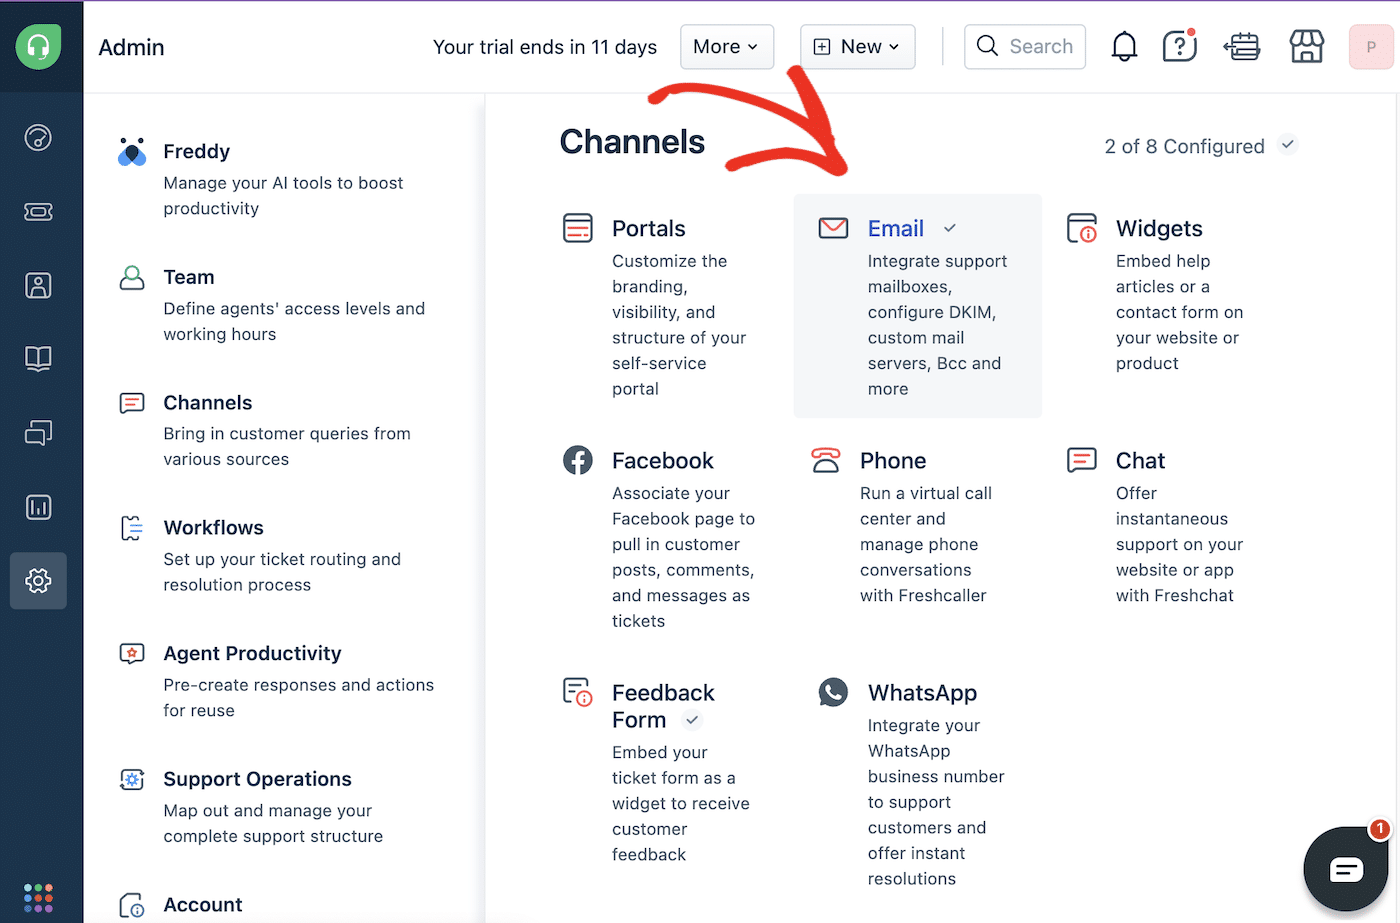
Finally select Email to access custom SMTP email settings.
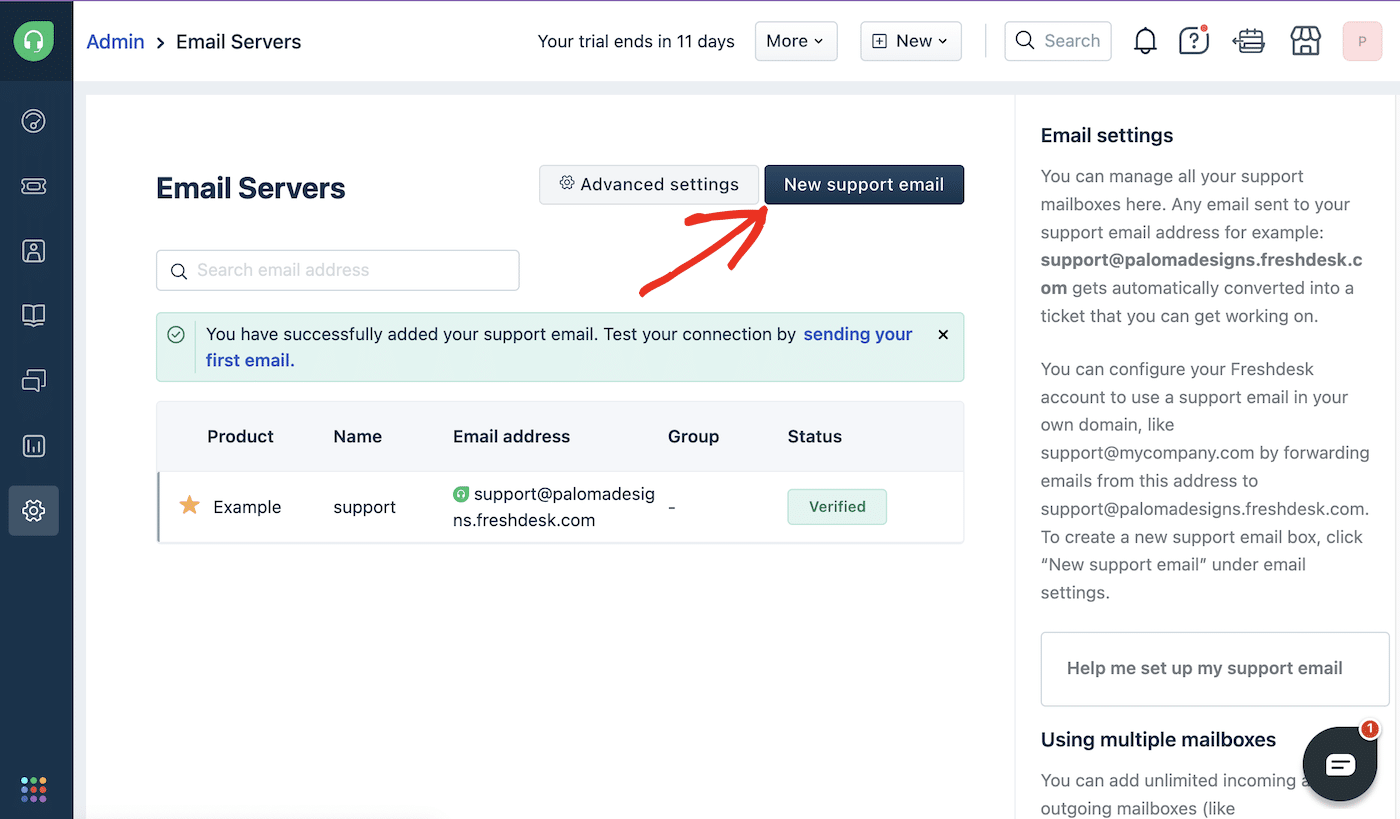
Here you can set up your Freshdesk support email addresses, manage your mailboxes, and set up custom SMTP email. Click the new support email button to add a new email address
Next, fill out the name you want to appear as the From email on your support messages and the email address you want to use. This email should match the domain you already set up in SendLayer or other SMTP provider.
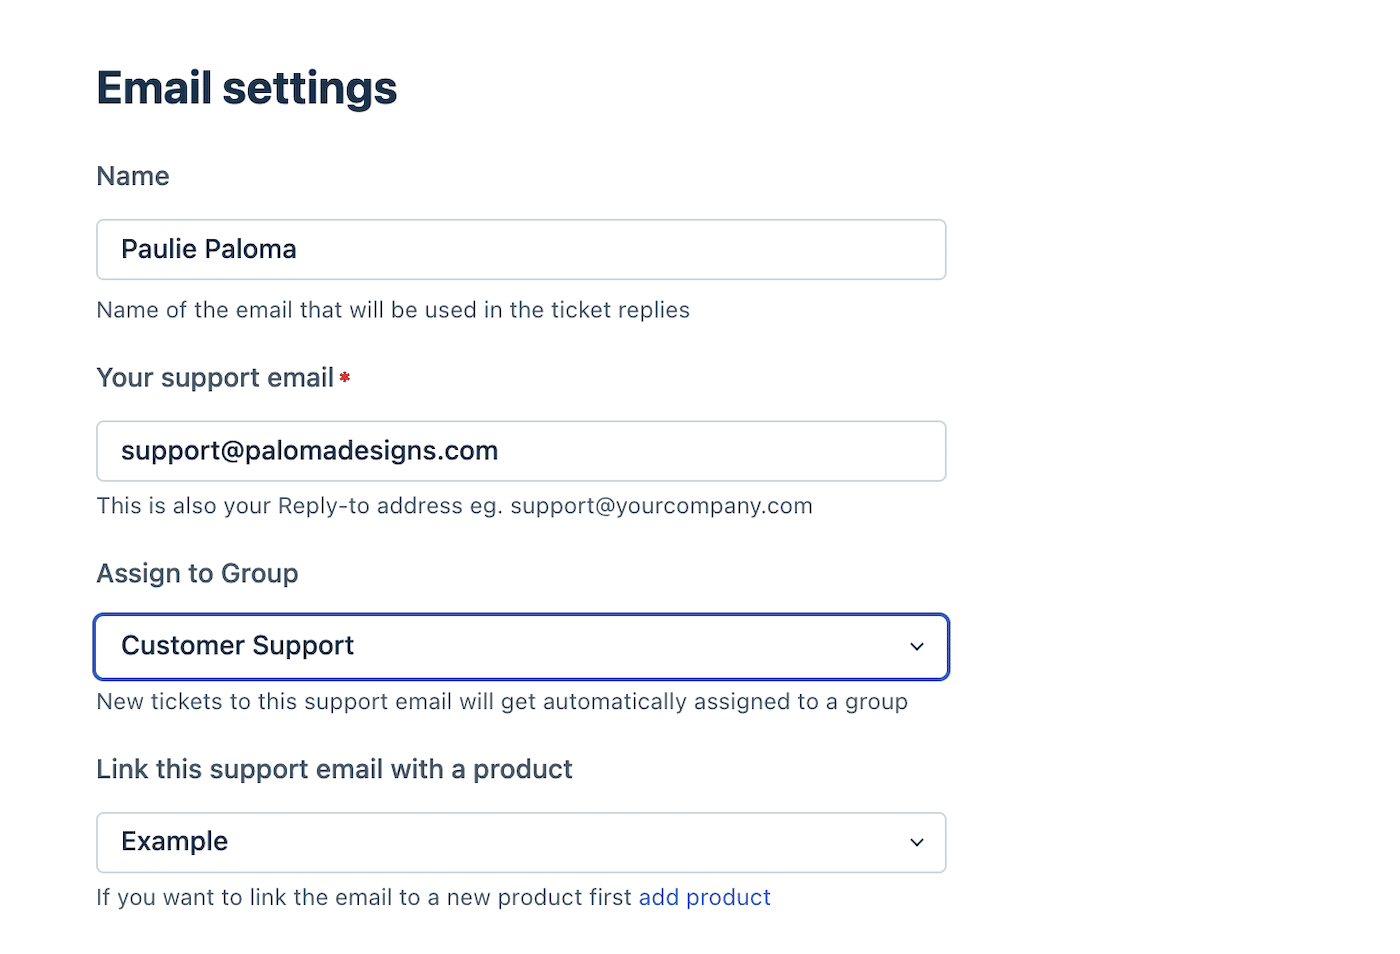
If you want, you can automatically assign tickets sent to this email to a group, and you can also link the email with a product if you wish.
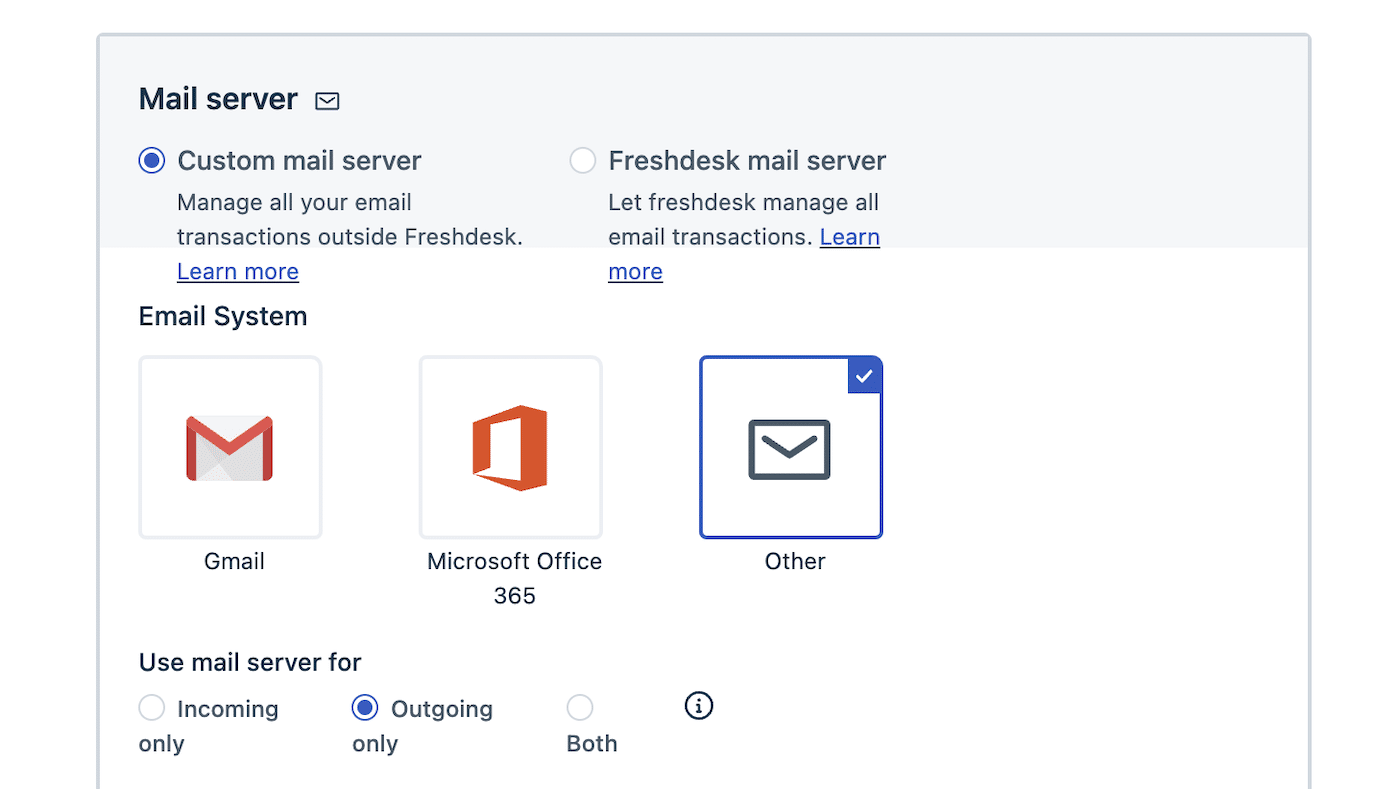
Scroll down to the Mail Server section and select Custom mail server.
Choose Other for your Email System and select to use it for Outgoing only emails.
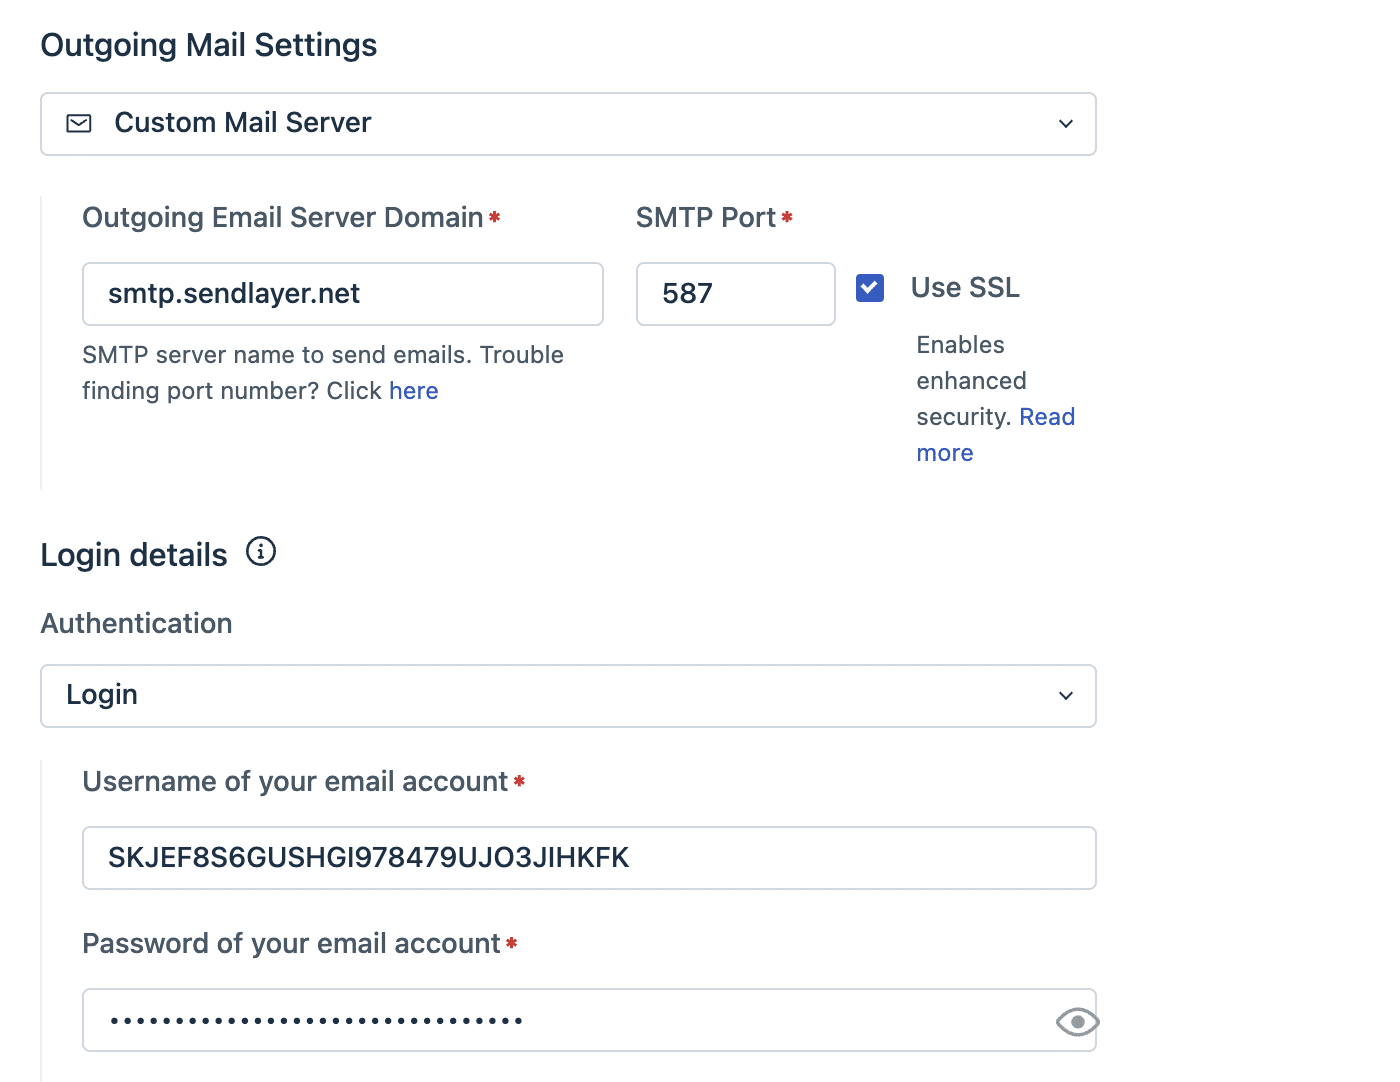
Next, you can copy and paste the SMTP credentials from your SendLayer dashboard. Fill out the settings as follows:
- Outgoing Email Server Domain: smtp.sendlayer.net
- SMTP Port: 587
- Use SSL: Make sure this is checked
- Authentication: Login
- Username: Copy and paste the username from your SendLayer dashboard
- Password: Copy and paste the password from your SendLayer dashboard
Note: If you want to also use this email for incoming messages (recommended so that customers can send email to your branded support email instead of the Freshdesk default support email) you’ll also need to add incoming email server details. You’ll need the IMAP server, port, and your email login and password, which you should be able to get from your email provider.
When you’re finished, scroll to the bottom of the page and click the Save button to save your settings.
You should see a message that your mailbox has been created successfully.
Step 3: Test Freshdesk Email Configuration
Before you can start using your new support email, you’ll need to test and verify the email address.
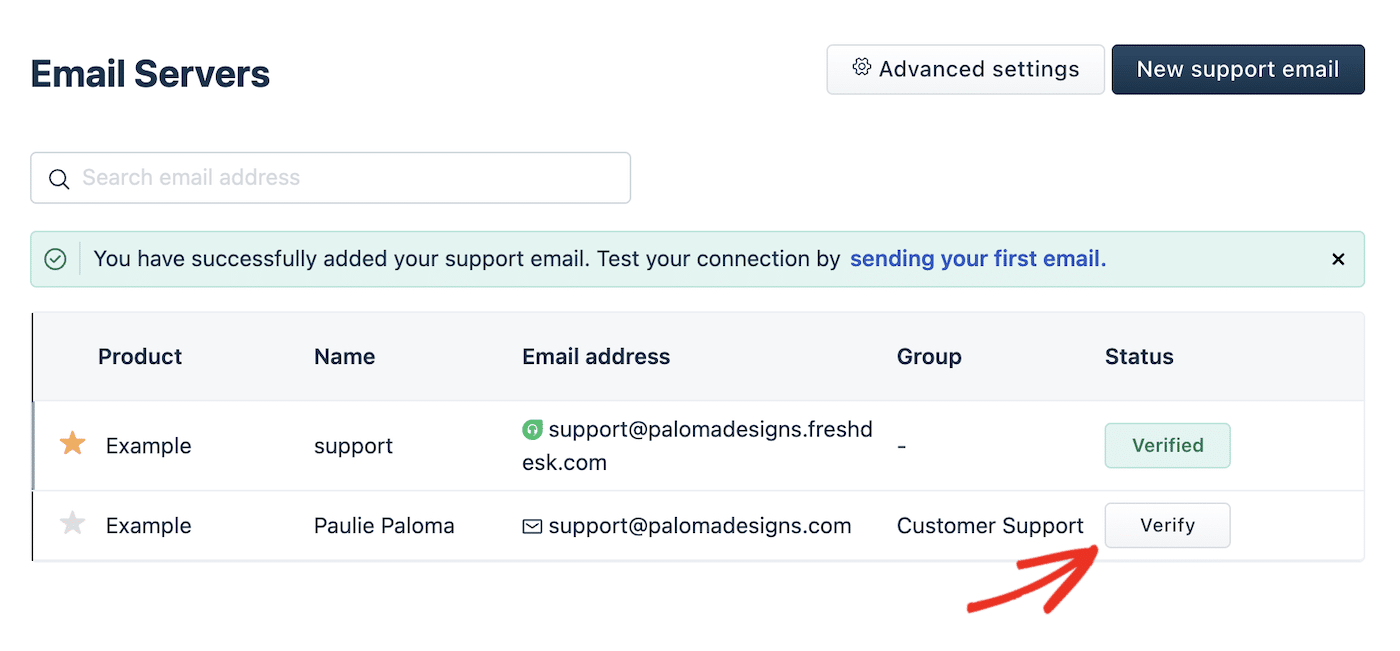
Click the Verify button next to the email address you just set up.
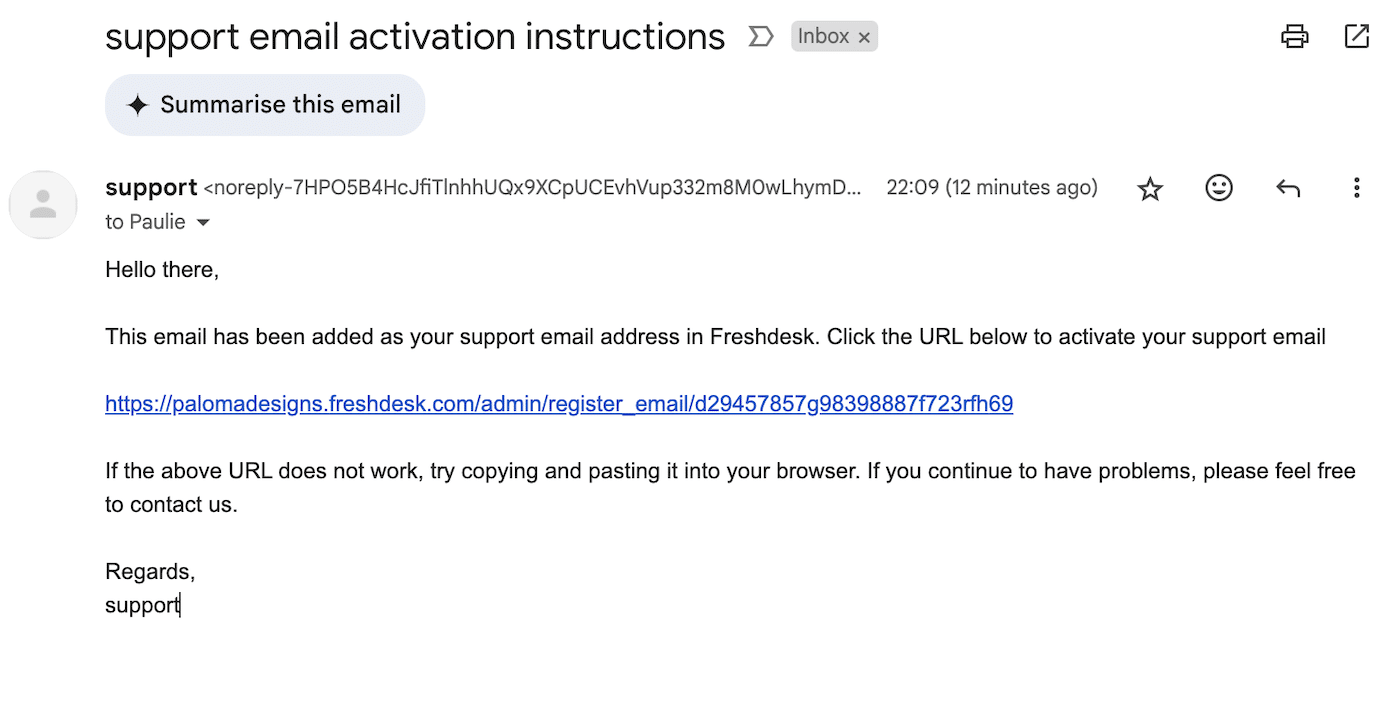
You’ll receive a verification email from Freshdesk. Click the link in the email to verify your account.
After verifying your email, the verified button should change to green, indicating it’s been verified.
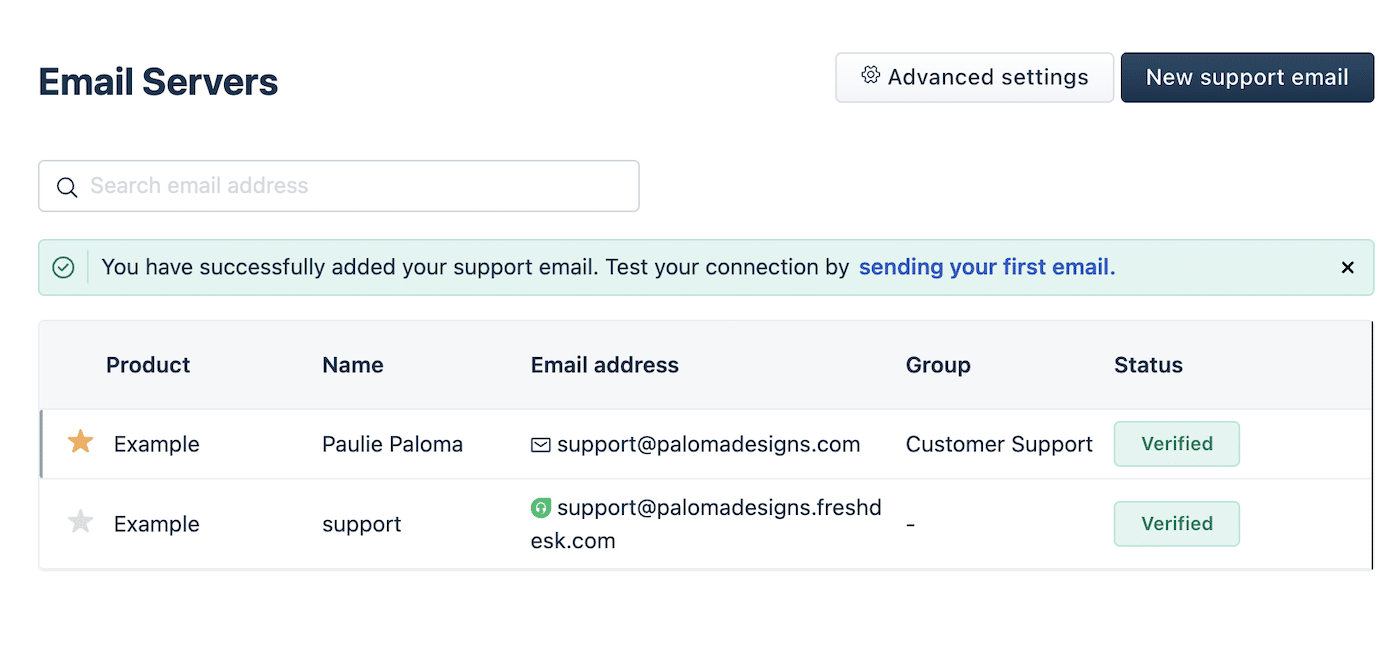
You can now test your email setup by sending an email to your support email, which should appear in your Tickets.
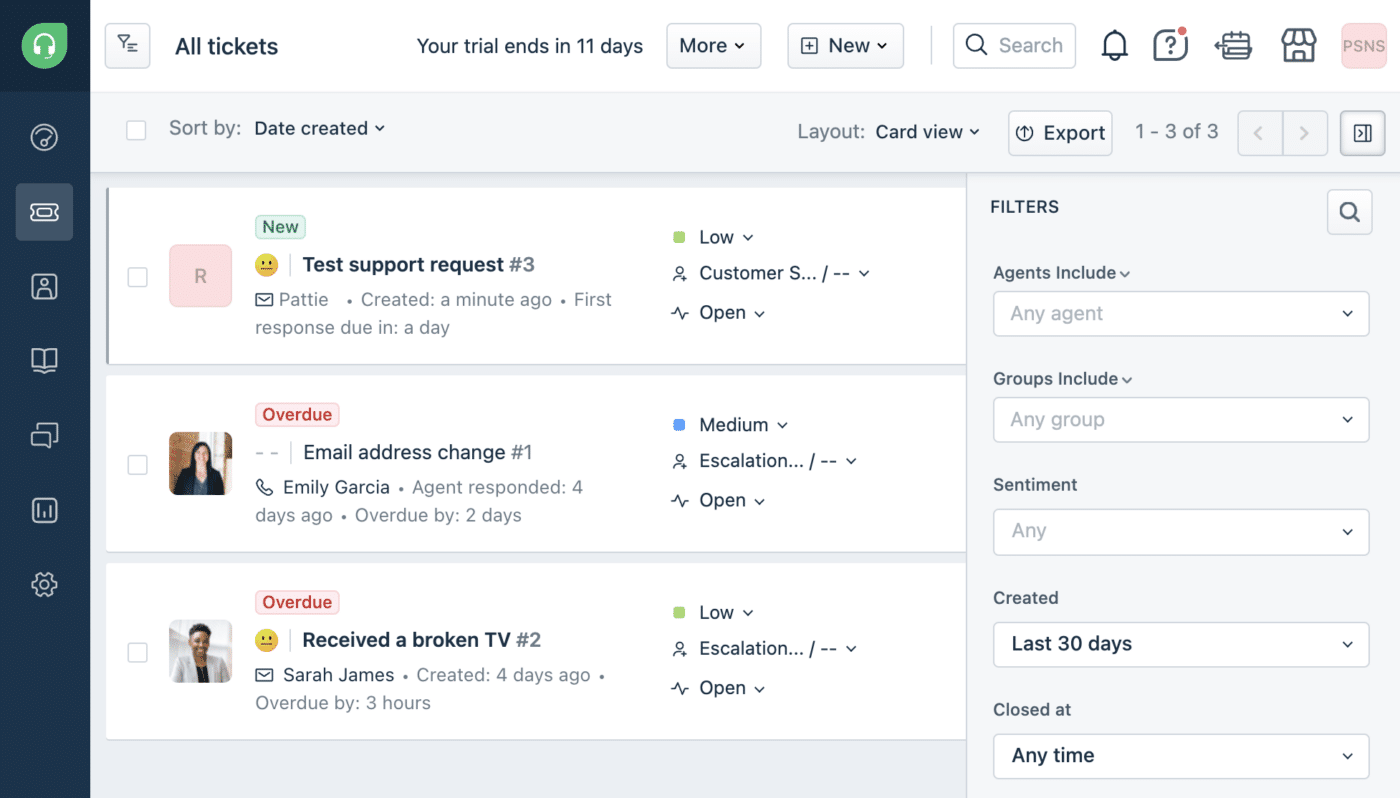
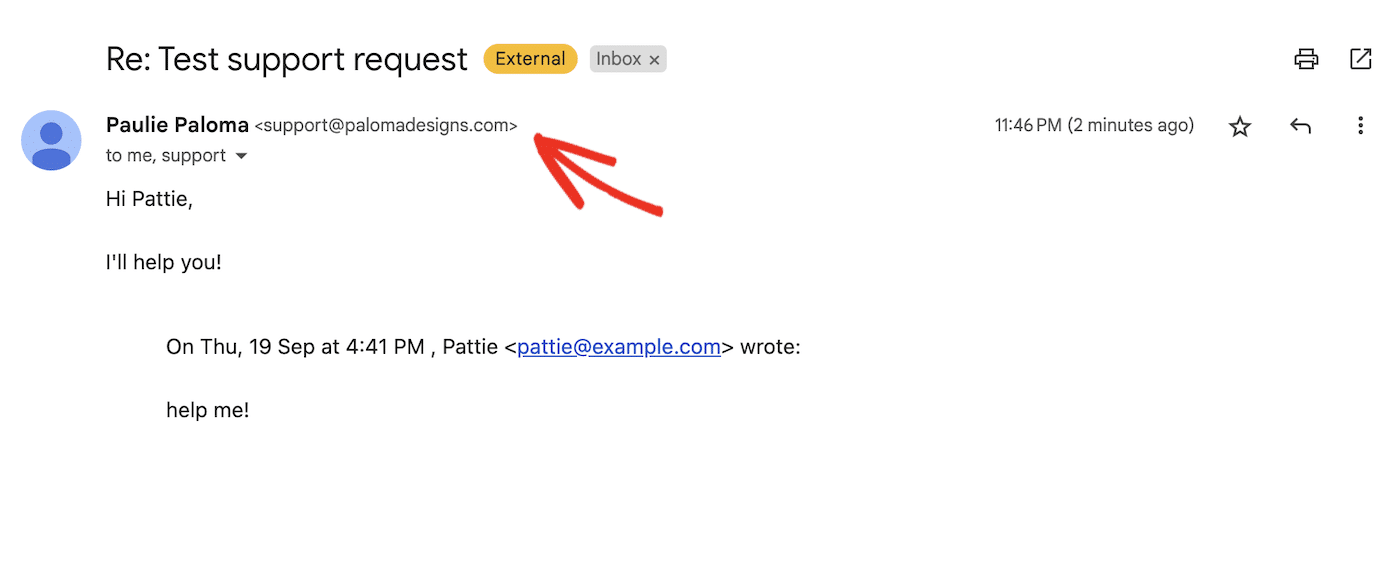
Reply to the ticket and check your inbox for the reply.
You should see the support ticket reply and that it came from your custom domain support email.
You can continue the above steps to set up multiple support email addresses for sales, finance, and other departments.
Step 4: Further Freshdesk Email Setup
You’ve now successfully set up custom SMTP email in Freshdesk so you can send replies to support tickets from your branded domain support email address – hurray!
There are several other email settings available in Freshdesk to help you optimize your workflow.
Advanced Email Settings
You may have noticed an Advanced settings button on the email setup screen. If you click this button, you can access additional settings that affect the way your support email works.
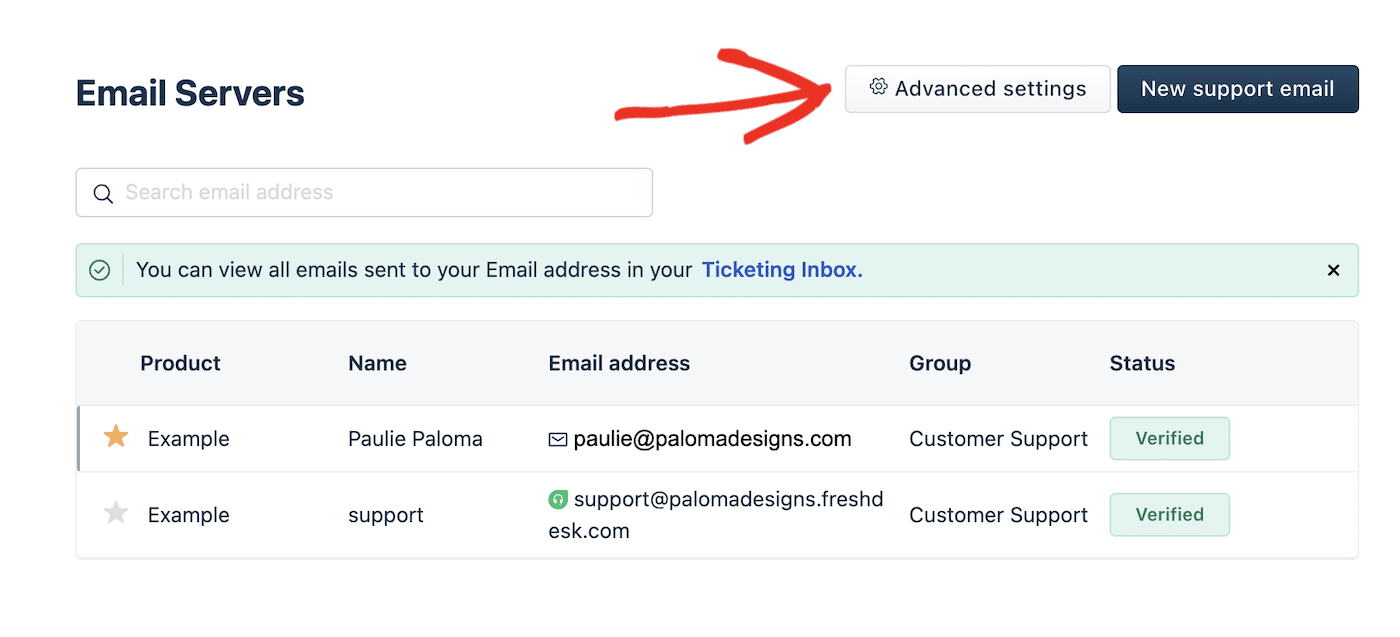
Here you can adjust several settings including:
- Add DKIM records to digitally sign your support emails
- Set an automatic BCC email address for all tickets
- Add a prefix to ticket IDs
- Allow agents to use their own sender name in replies
- Detect automated replies
- Create a new ticket automatically when the subject line changes
- And more.
Set Up Email Notifications
In the Admin screen, scroll down to Workflows and click on Email Notifications.
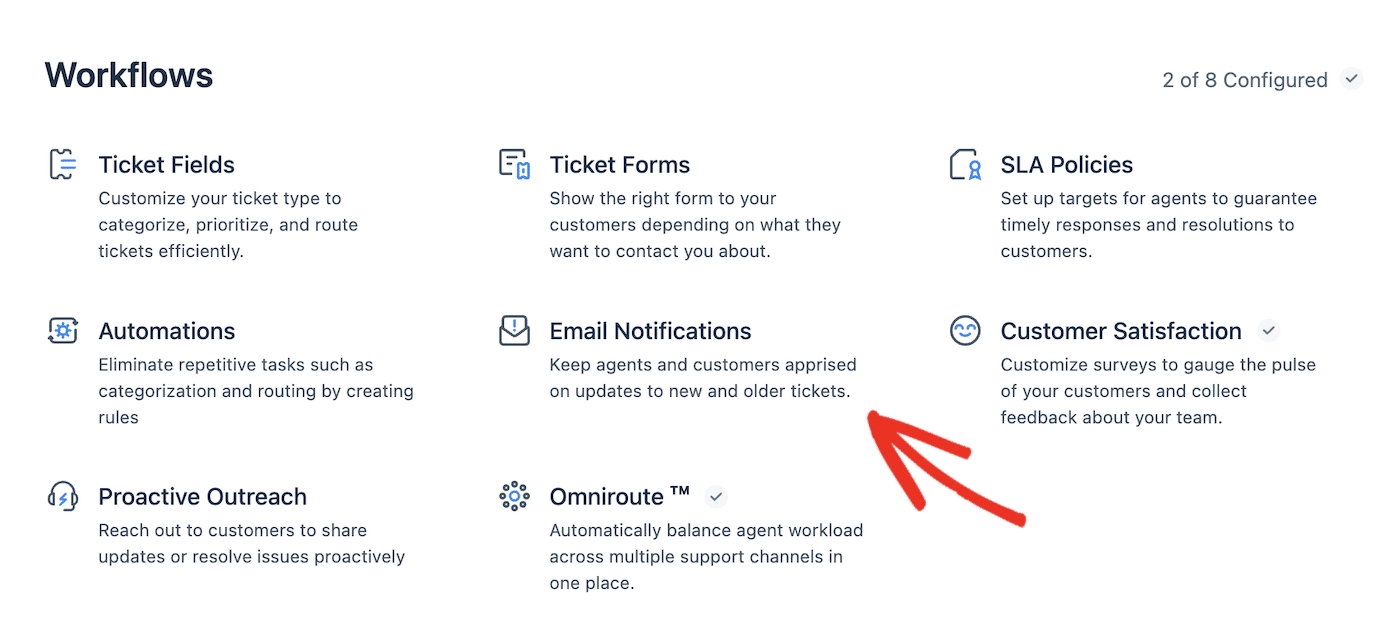
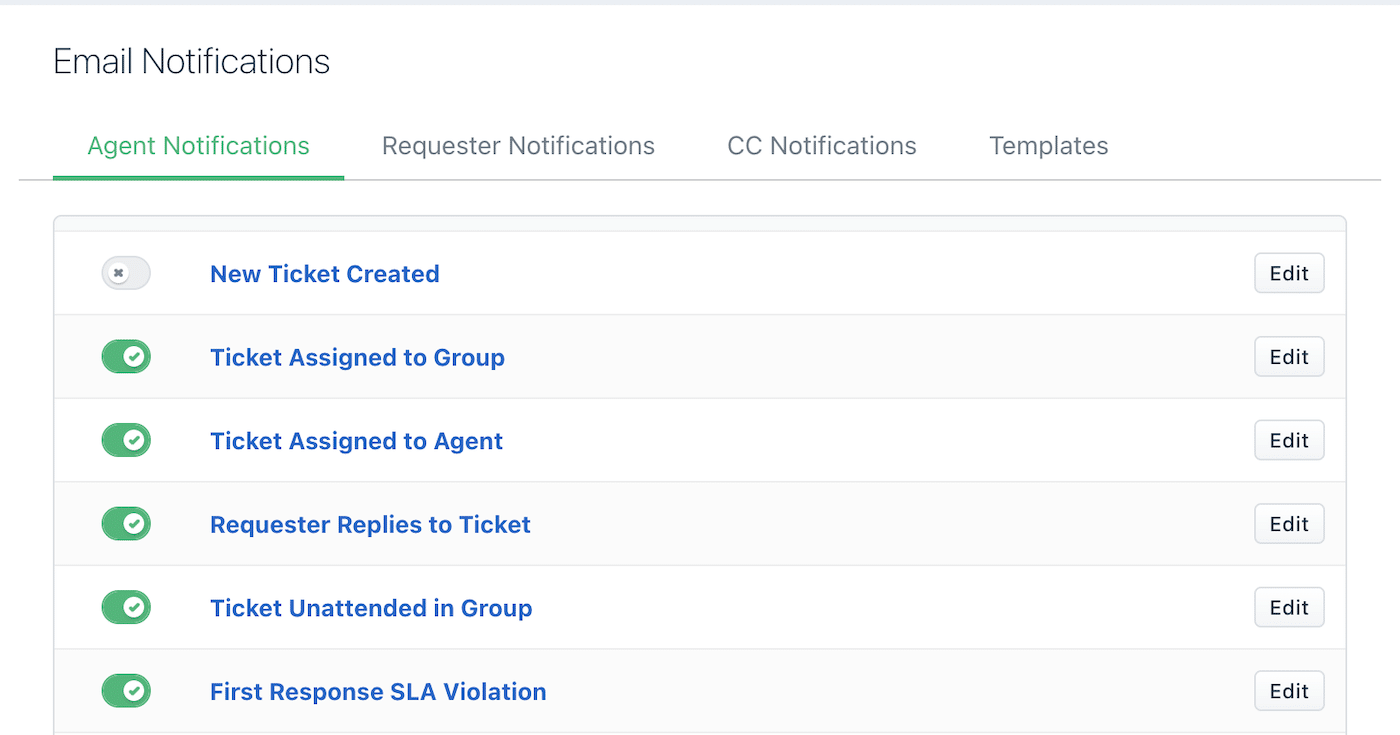
Here you can configure automatic agent notifications for various use cases such as new ticket creation, ticket assigned, SLA violation, note added to ticket, and more.
Create Canned Responses
Click on the Canned Responses link on the Admin page to create canned responses for frequently asked questions or common issues. This helps your support agents to reply quickly and consistently.
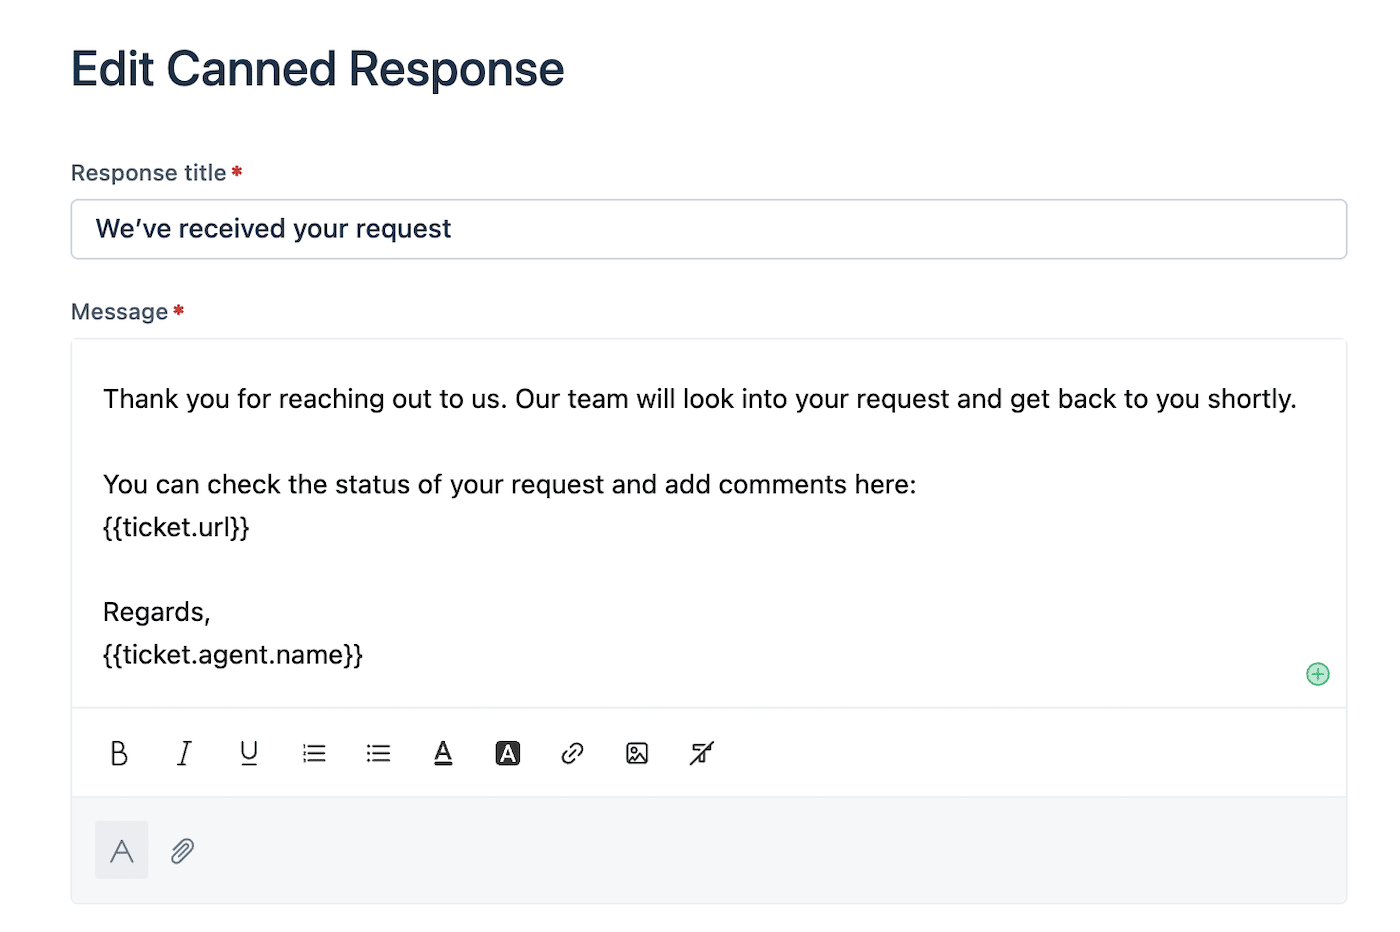
You can create custom templates for common issues (e.g., “How to reset a password”). Agents can then insert these responses into emails with a single click, saving time and ensuring uniformity in support responses.
Customizing Email Templates
Freshdesk allows you to set up ticket templates that allow agents to log new tickets faster by using pre-filled forms for common issues.
You can find Ticket Templates on the Admin screen under Agent Productivity.
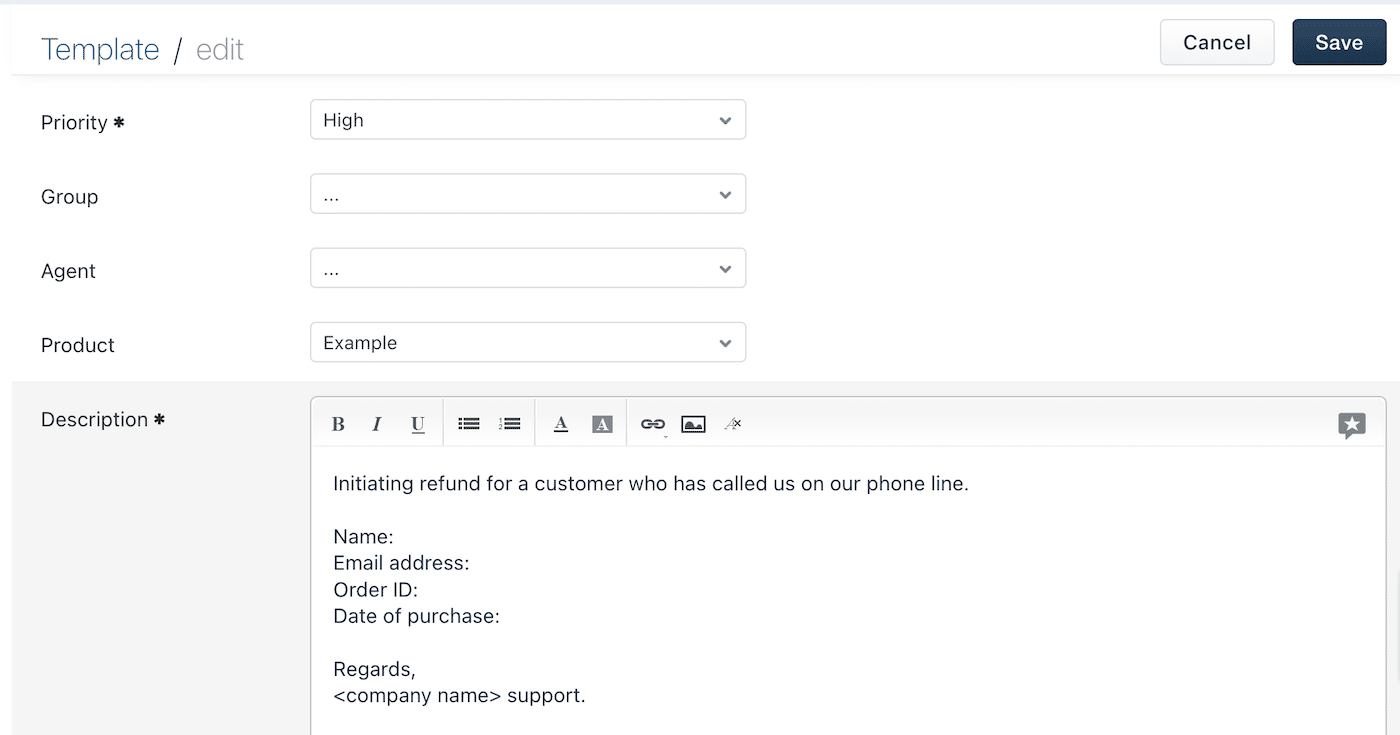
Here you can add new templates or edit existing ones.
That’s it! Now you know how to set up Freshdesk email support with custom SMTP.
Next, would you like to like to send better welcome emails to new customers? Take a look at our roundup of welcome email examples for some ideas and inspiration.
