Are you looking for a step-by-step guide to take you through the setup of the latest Metabase download?
Metabase is a free, open-source business intelligence (BI) tool that makes it easy to analyze your data and present the information in easy-to-understand visuals.
While Metabase has a user-friendly interface, it can be a little overwhelming to set up if you’re not familiar with it already.
We’ve put together this beginner’s guide so you can install Metabase from scratch and get useful insights from your data as quickly as possible.
What is Metabase?
Metabase is a data visualization tool with a user-friendly interface that enables organizations to extract insights from their data.
Users can create various dashboards to run reports on different data, track metrics, and visualize trends in formats such as bar charts, pie charts, scatter plots, and other visualizations.
No SQL knowledge is required to use Metabase, but more advanced users have the option to write SQL queries.
As it runs on Java, and the graphical user interface is accessible via most modern web browsers, you can install Metabase on the main computer operating systems, including Windows, MacOS, and Linux systems.
Metabase supports popular databases, including MySQL, PostgreSQL, MongoDB, Oracle, and others.
Metabase Download and Installation
Metabase is available in three versions:
- A self-hosted open-source plan
- A cloud-hosted plan
- An enterprise plan
While the cloud-hosted version gives you access to Metabase without any of the setup, it does incur a monthly subscription fee.
So for this tutorial, we’ll be going through the setup of the self-hosted software, which is completely free and supports unlimited charts, unlimited dashboards, and over 15 visualizations.
To get started, make sure you have the latest version of the Metabase download, which you can get from the Metabase website.
Head over to Metabase Open Source Edition and click the get started button.
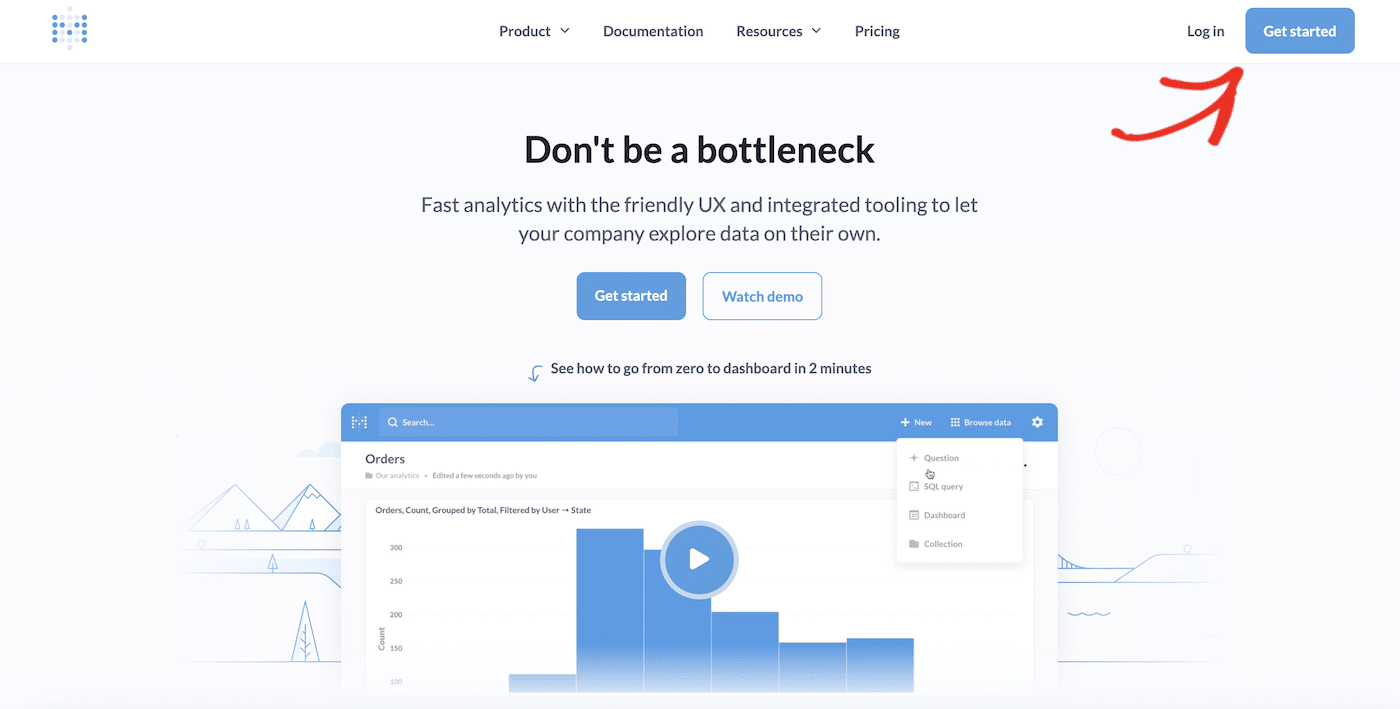
There are various ways to install Metabase. The most popular and easiest options are to run Metabase either as a Docker image or on Java with a pre-built JAR file.
If you have Docker installed, you can start a container running Metabase with the following command:
docker run -d -p 3000:3000 --name metabase metabase/metabaseThere are detailed instructions for running Metabase on Docker on the Metabase site.
If you’re not already using Docker, you’ll probably want to run Metabase as a JAR file.
If Java isn’t installed on your machine, you’ll need to install it first.
You can check if Java is installed by opening the Terminal app (you can find it by searching for “terminal” in Launchpad on Mac or finding “Windows Terminal” in your app list in the Start Menu in Windows.
Once you have Terminal open, type the following command and press return:
java -versionIf Java is running, Terminal will report the version of Java you have installed. If it finds no Java installed on your computer, download and install Java before continuing.
Download the JAR file for Metabase and move it from your downloads folder into a new directory.
In your terminal window, change into the directory you put the Metabase jar file in and run the following command:
java -jar metabase.jarYou’ll see the progress of the Metabase installation in your terminal window. If all is successful, you’ll see the confirmation message: “Metabase Initialization COMPLETE”
If you run into any problems during the installation, check the Metabase troubleshooting guide for help.
You can access your new Metabase server by opening a web browser and visiting the following address: http://localhost:3000
You should see the Metabase welcome message:
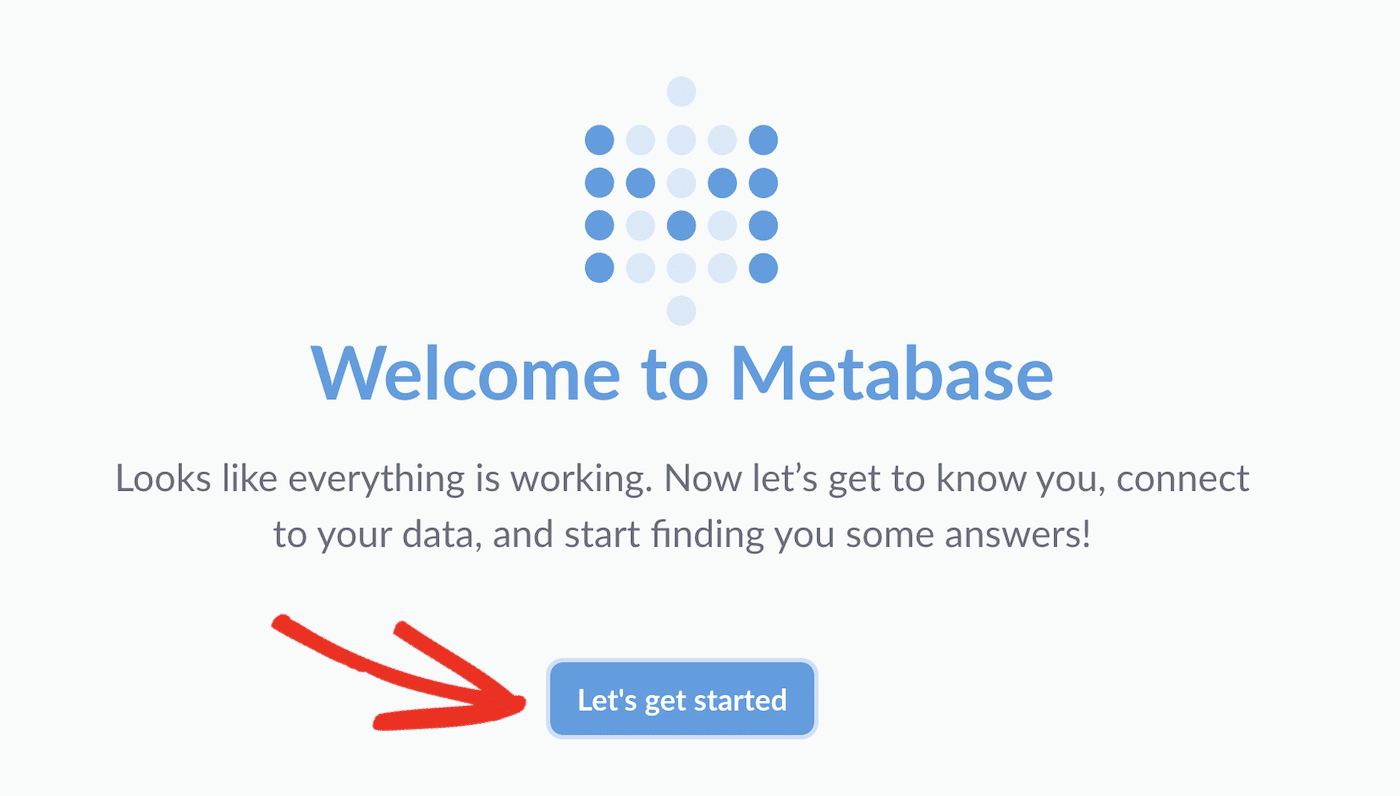
Click the Let’s get started button to continue with setup.
Choose the language you want to use Metabase in and click the Next button.

Next, you need to fill out your name, and the name of your company or team and set a password.
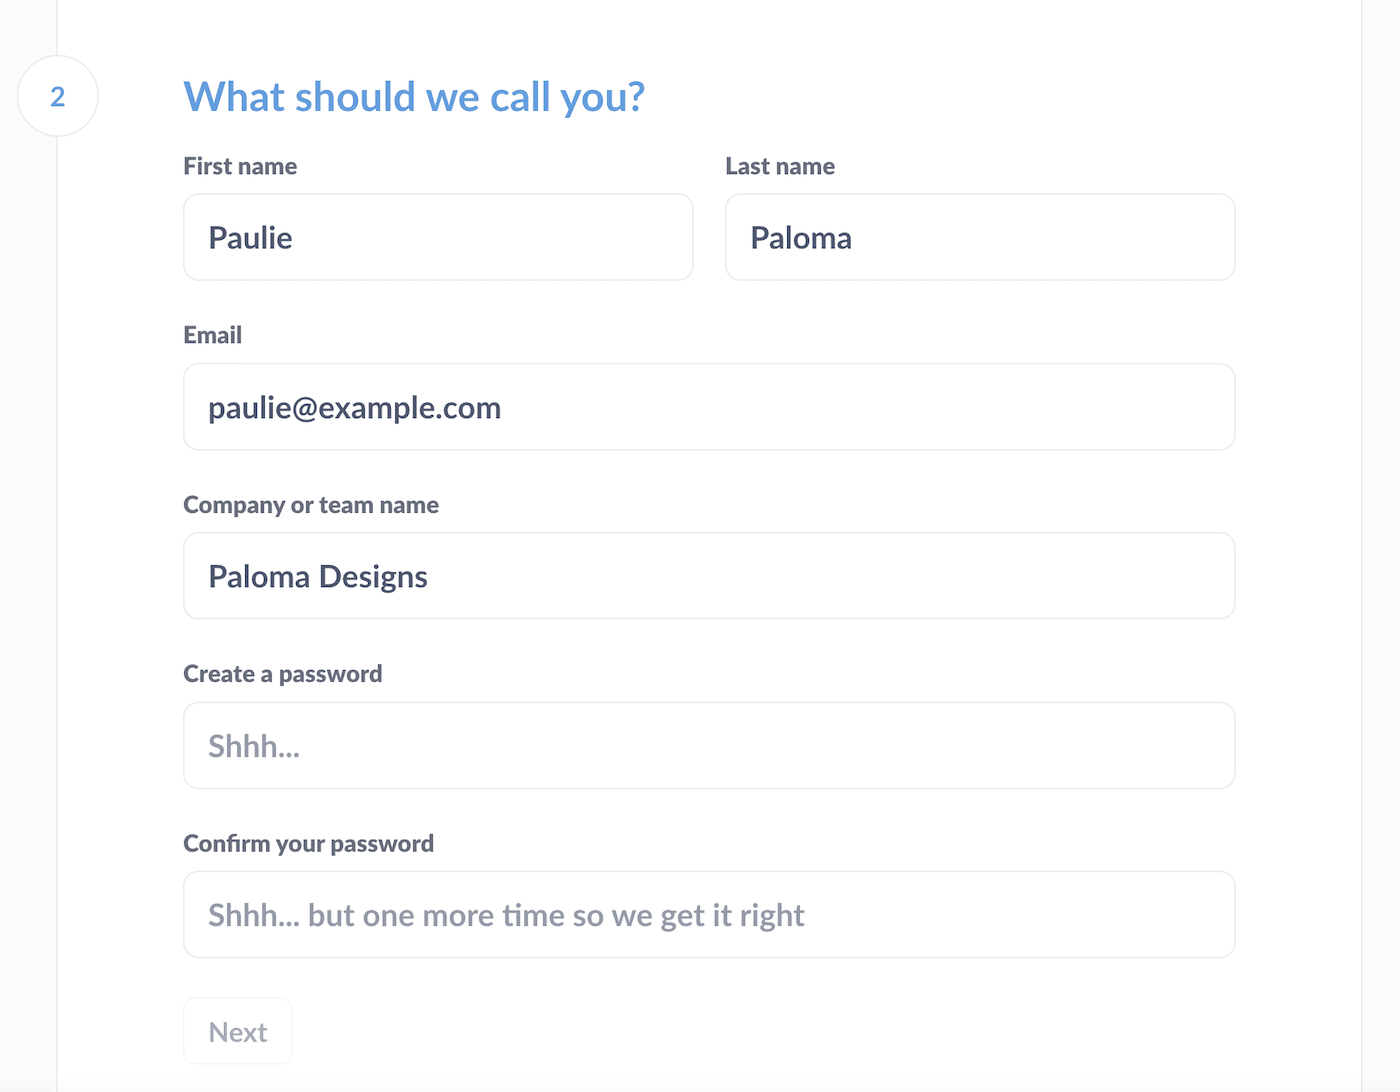
Click the Next button when you’ve filled out all the info.
In the next step, you can connect to your database. If you want to do this, you can choose your database type and connect to your database. You’ll need:
- The hostname of the server where your database is installed
- The port the database server uses
- The database name
- The database username
- The database password
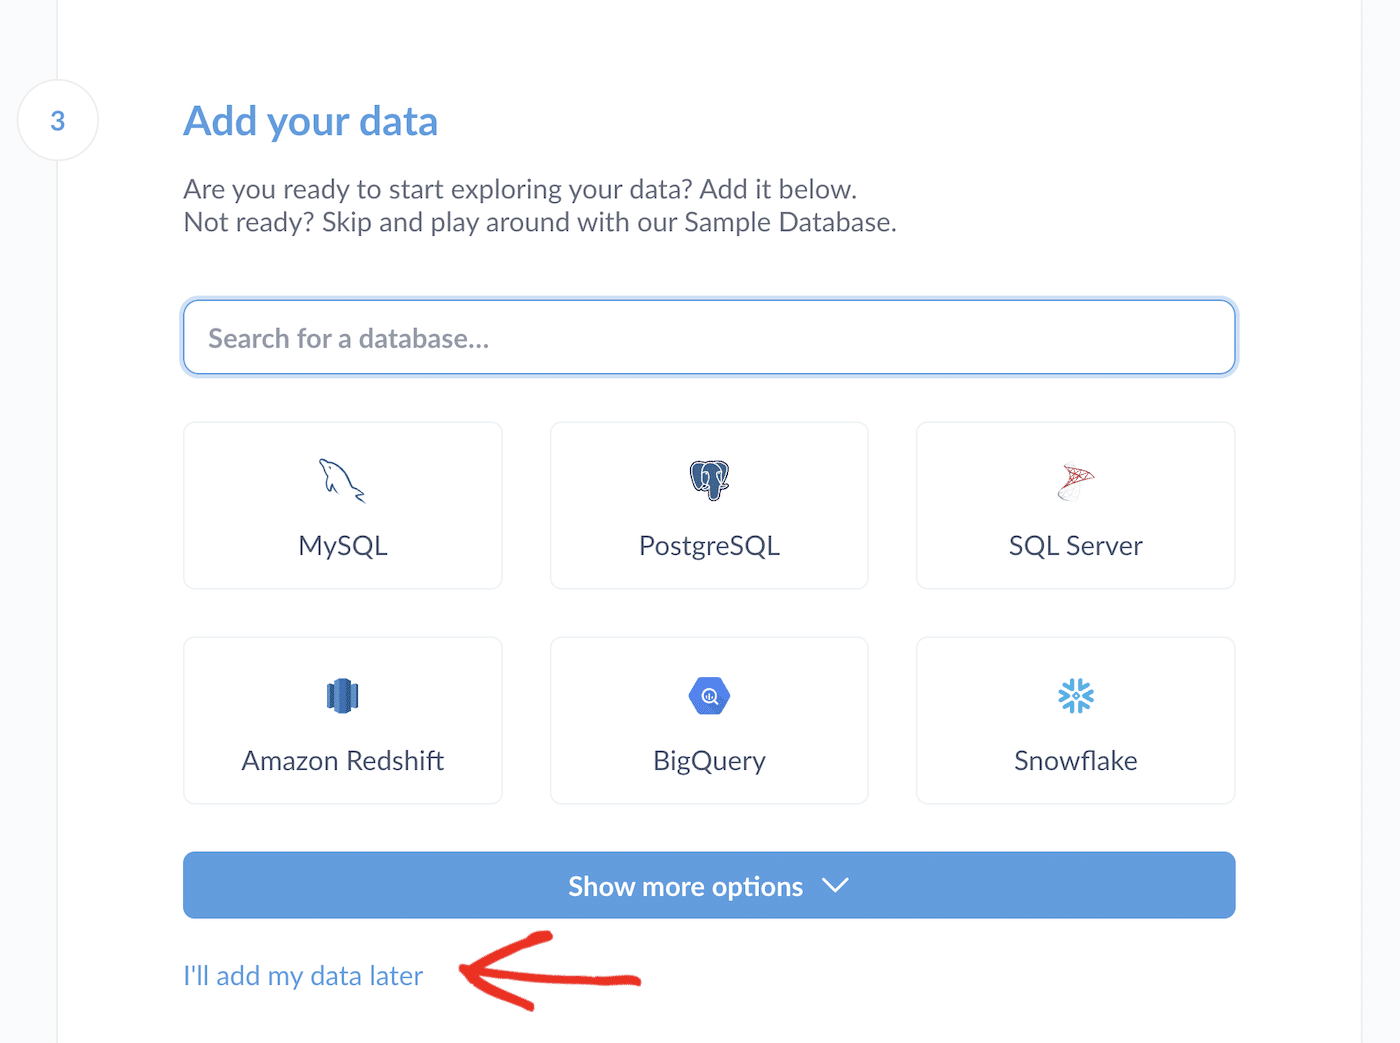
Alternatively, Metabase comes with an application database with sample data you can use to try it out. If you want to use the sample database for now (and connect to your database later), click the I’ll add my data later link.
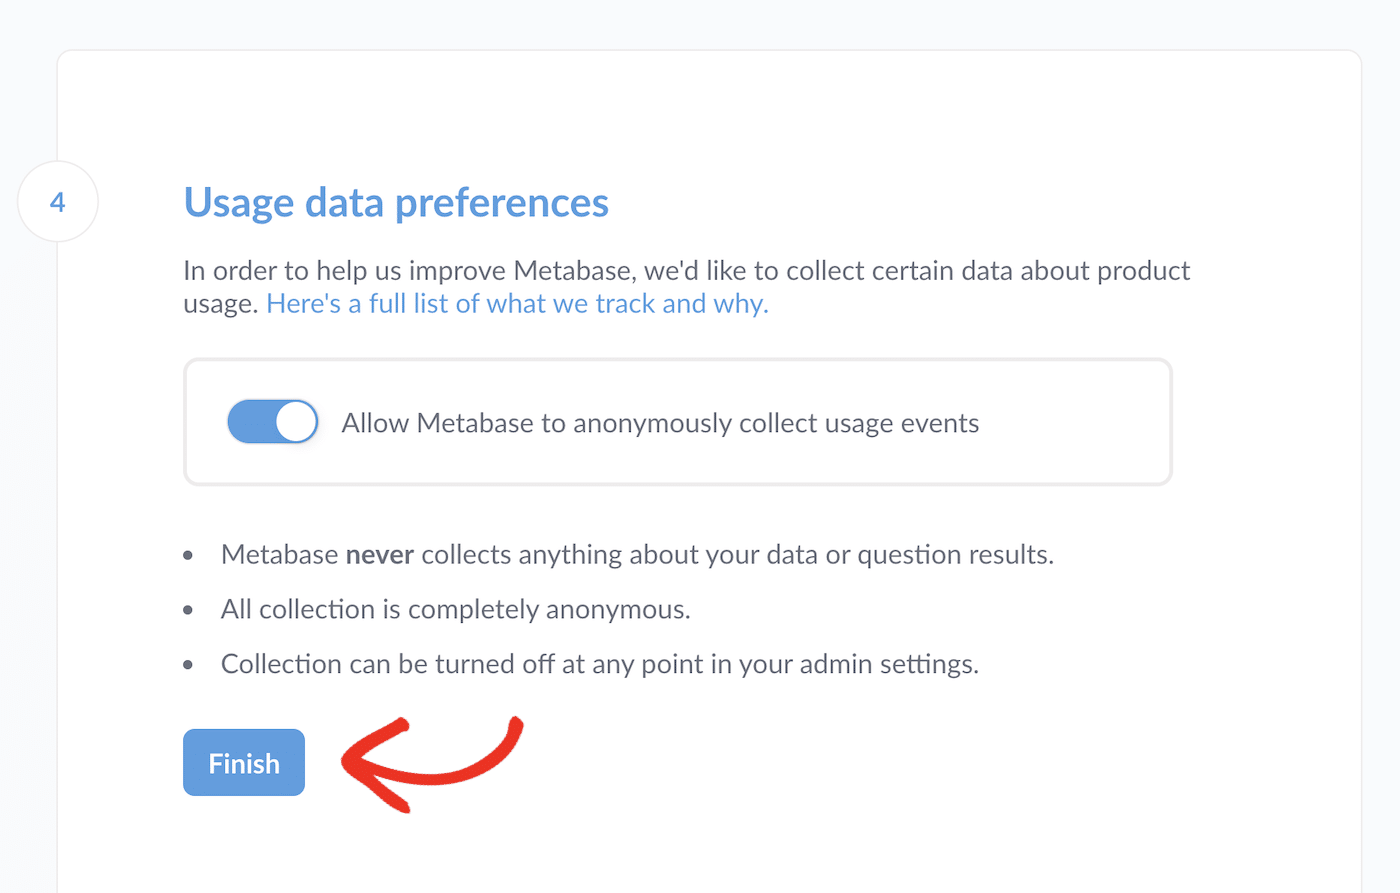
Decide whether or not you want Metabase to collect anonymous information about how you use the platform, and click the Finish button.
You can enter your email address if you wish to receive emails from Metabase.
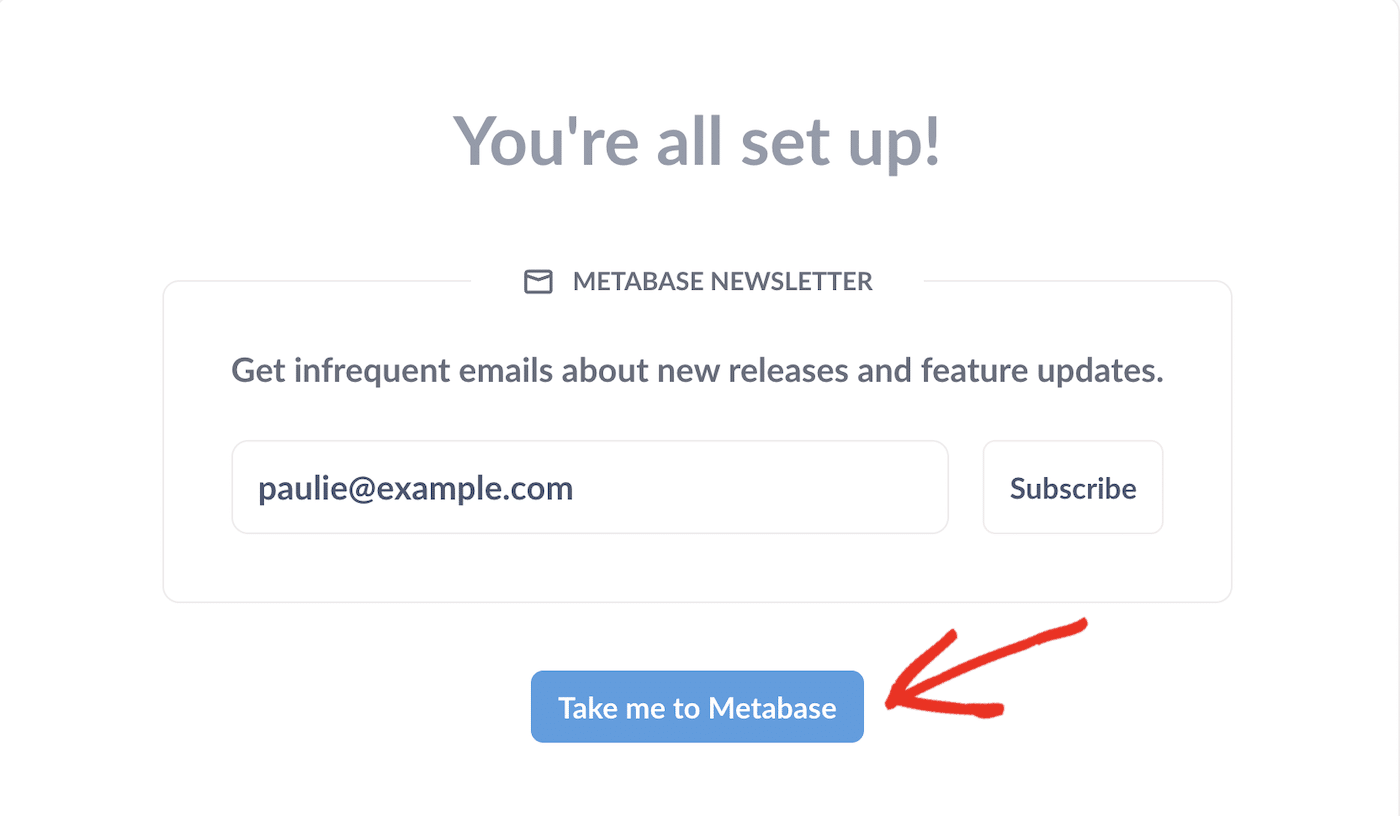
And that’s it! Your Metabase is installed, and you can start exploring. Click the Take me to Metabase button to go to your Metabase homepage.
Before you start using Metabase, there are a few more things to set up to make sure the platform works correctly for all users.
Configuring Metabase Email Settings
You should add email server information to Metabase so that it can send password reset links, onboarding messages, and other important system notifications.
You’ll need to use an SMTP email service for Metabase to generate and send these emails.
SendLayer is a fast, reliable, and scalable SMTP service that will ensure your transactional emails from Metabase get delivered.
To get started using SendLayer’s SMTP servers, you can follow our guide to creating a SendLayer account.
Once you’ve signed up for a SendLayer account, you’ll need to add and authorize the domain you’ll be using to send emails from Metabase. For example, if you want to send emails from [email protected], you’ll need to add the domain example.com to your SendLayer account.
Log into your SendLayer dashboard to continue with the setup.
Adding and Authorizing Your Domain in SendLayer
Click the Add Domain button in the top right to get started.
Type in your domain and click the Add Domain button.
SendLayer will create DNS records for domain authorization. You’ll need to add these DNS records to your domain DNS settings. You can follow our domain setup guide for more help with this.
Once you’ve added all 5 DNS records to your domain, go back to SendLayer, tick the box, I have added these DNS records and am ready to proceed, and click the Verify DNS Records button.
Before you can use SendLayer as your SMTP service and add the credentials to Metabase, make sure your domain has been authorized.
You can see the status of your domain by clicking on Settings in the sidebar menu of your SendLayer dashboard and scrolling down to the DNS Records & Settings section.
Note: changes to your domain DNS settings can take time to propagate across the internet. You may need to wait up to 48 hours until SendLayer can verify your DNS settings.
If SendLayer has verified your domain’s DNS records, you should see a green checkmark in the Status column.
Adding SendLayer SMTP Credentials to Metabase
Once all your DNS records have been verified and SendLayer has authorized your domain, you can go ahead and copy the SMTP credentials to paste into your Metabase email settings page.
All the information you need is on your SendLayer Settings page, under SMTP credentials.
Now, all you need to do is copy and paste the credentials from your SendLayer settings into your Metabase email settings.
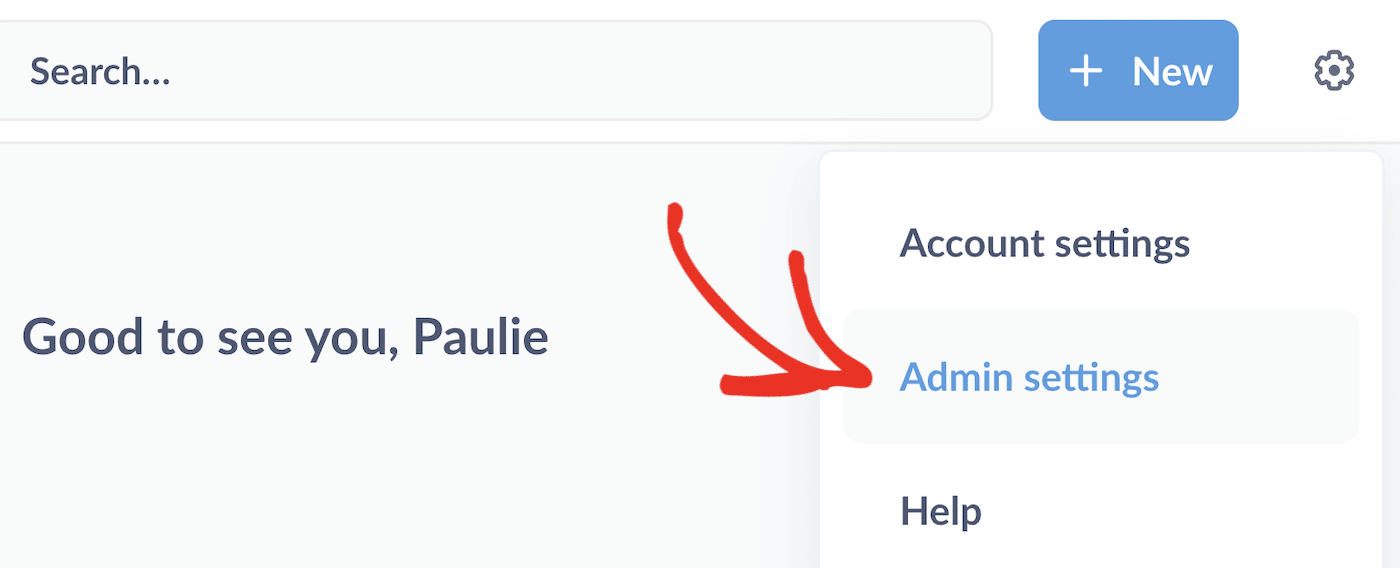
To access your email settings in Metabase, click the cog icon in the top right corner and select Admin settings.
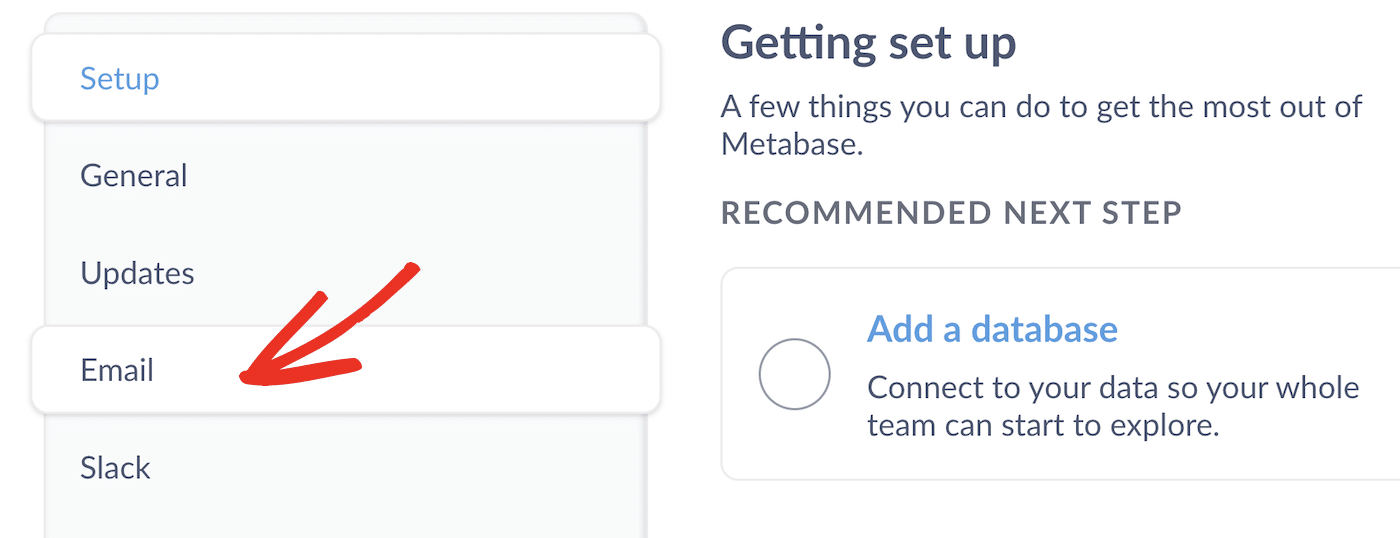
Select Email from the Setup menu.
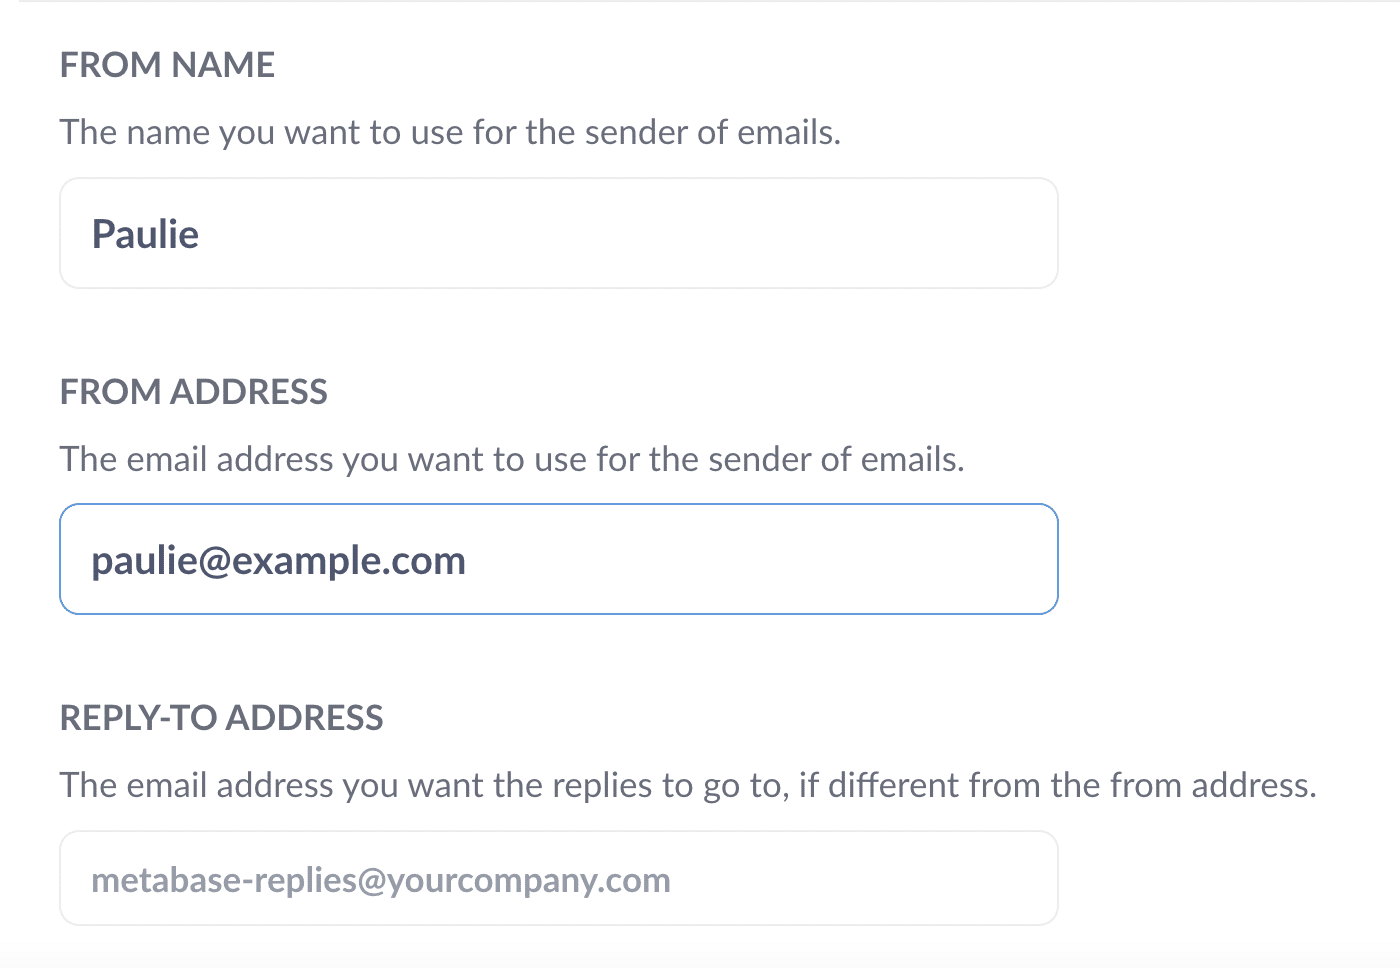
Enter the name want to use as the sender for emails from your Metabase and the email address to set as the From address (this should be the same domain as you have set up on SendLayer.) You can also enter a different reply-to email address if you want.
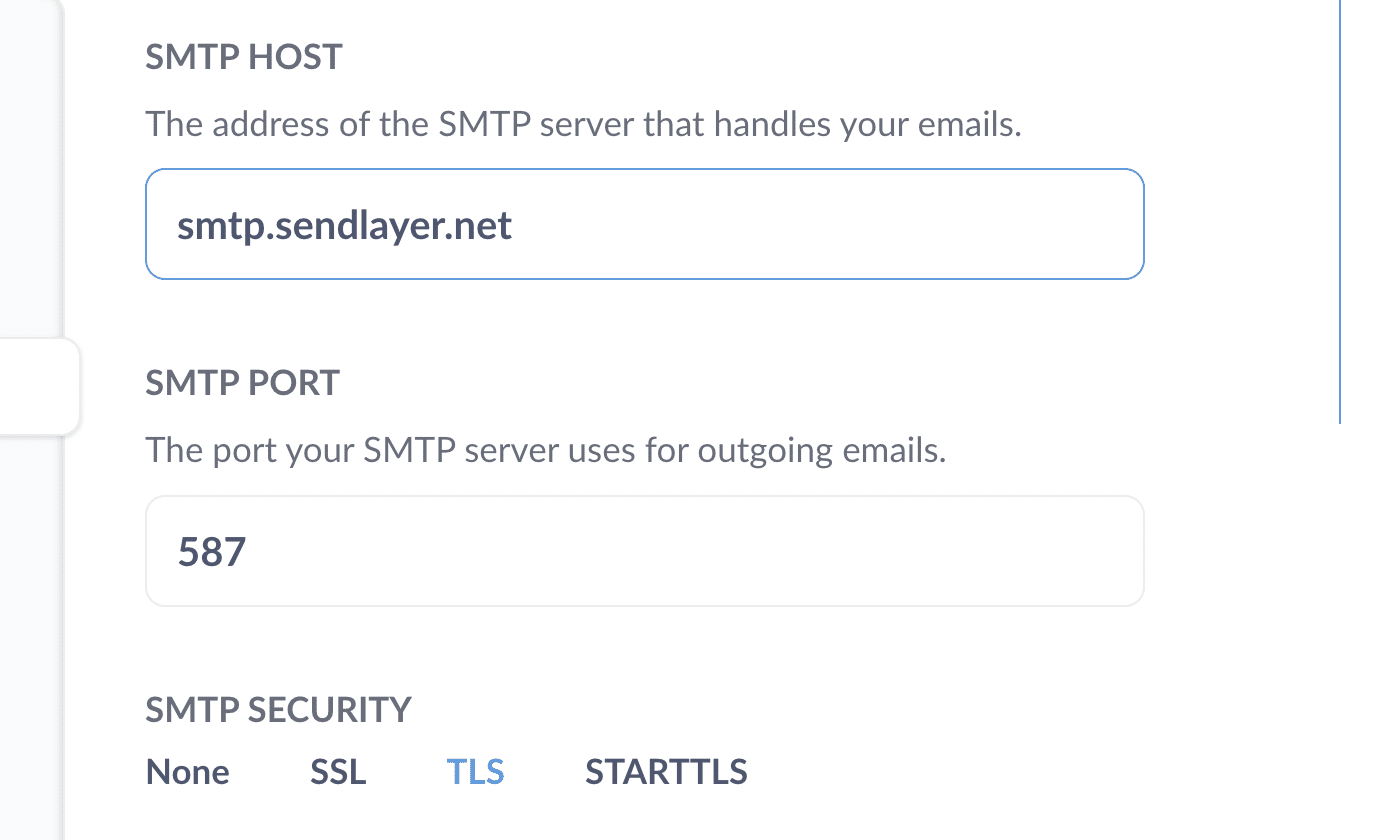
Next, scroll up and enter the SendLayer SMTP details:
- SMTP Host: smtp.sendlayer.net
- SMTP Port: 587
- SMTP Security: The security protocol you want to use (we recommend TLS)
Finally, copy and paste your SMTP username and password from your SendLayer dashboard.
Click the Save changes button to save your SMTP credentials.
You will see a new button appear to Send test email. Click this button to ensure you’ve set everything up correctly.

If the email is sent successfully, the button will turn green and change to “Sent!”

Check the mailbox for the email address you used to set up Metabase. You should see the test email has arrived successfully.

You’ve now successfully set up your Metabase email, so all your team members and other users in your company will be able to receive important messages generated by SendLayer.
If you want to, you can also set up Slack notifications in your admin settings, as well as configuring other settings such as public sharing, user authentication, and the URL of your Metabase site.
Invite Team Members
Currently, you have only a single admin account for your Metabase, but you can add as many people as you want to have their own login.
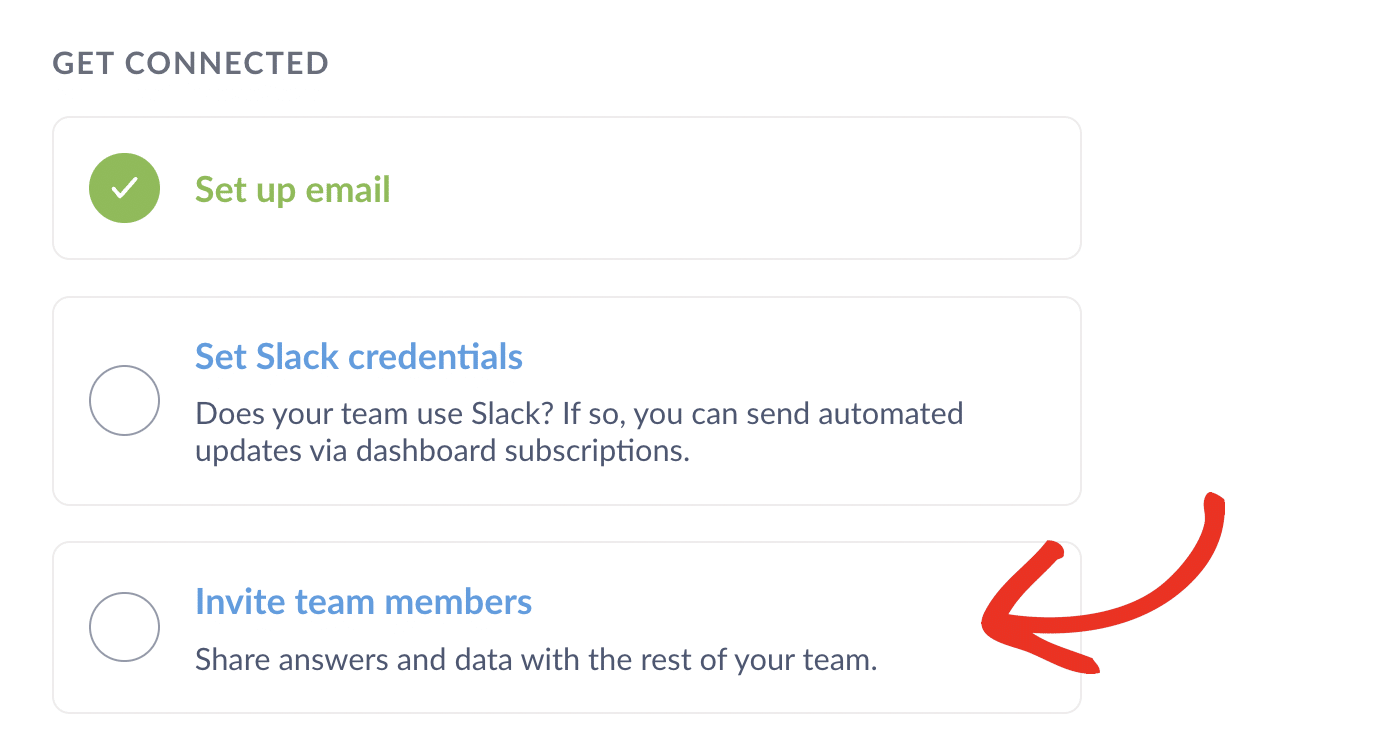
Return to the setup homepage and click the link to Invite team members.
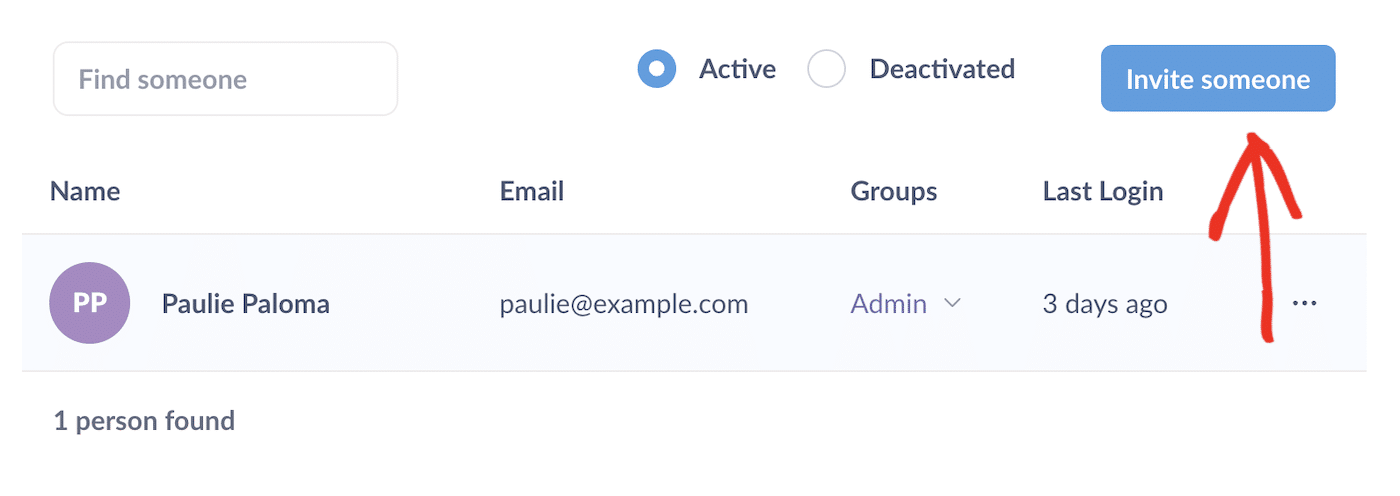
Click the Invite someone button.
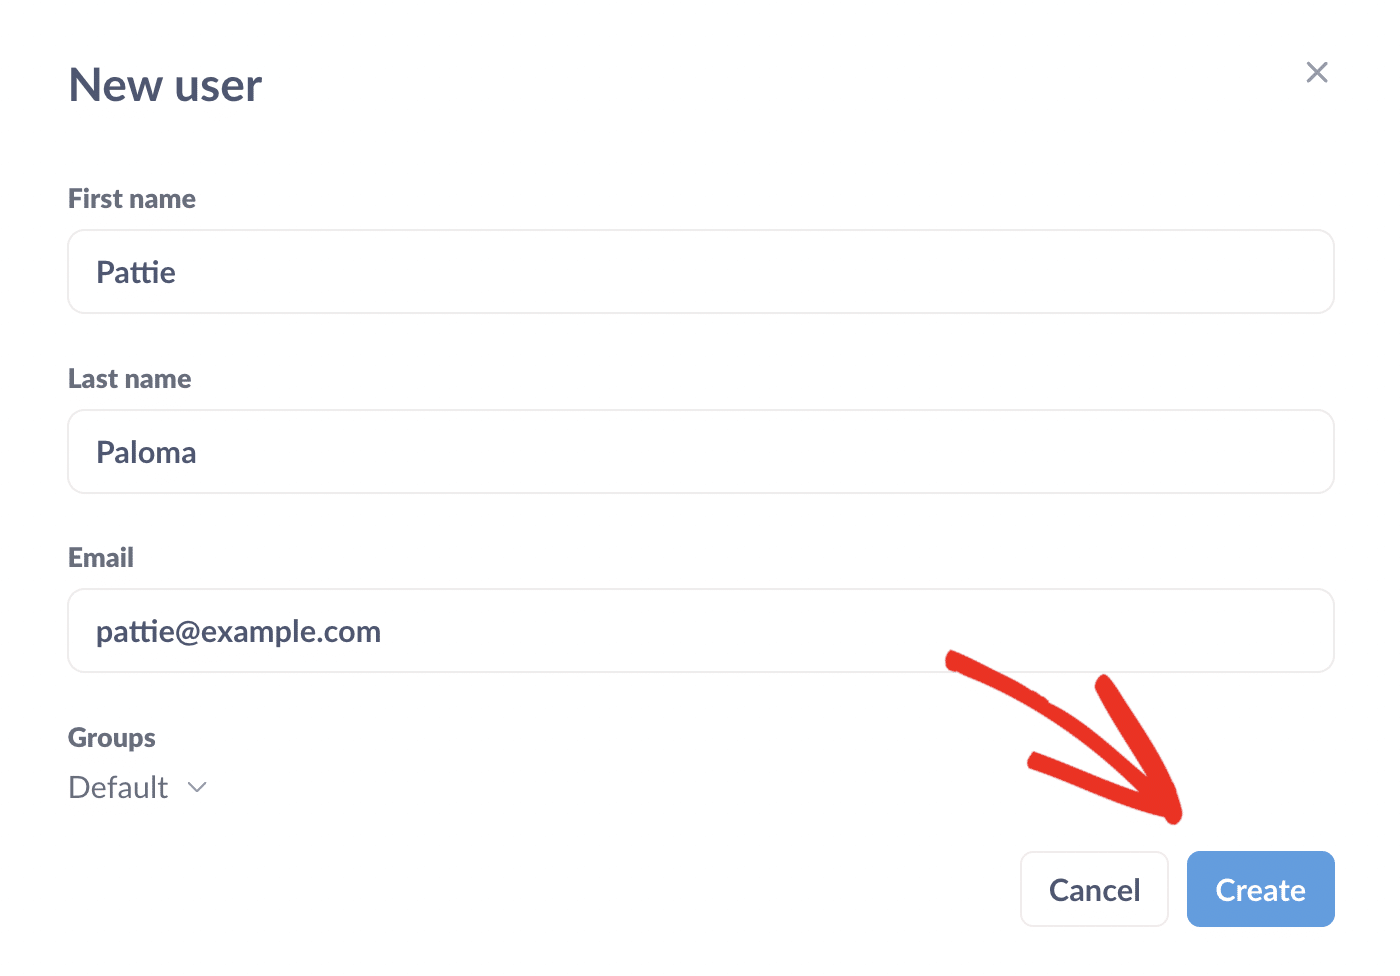
Fill out the details of the team member you want to invite and click the Create button.
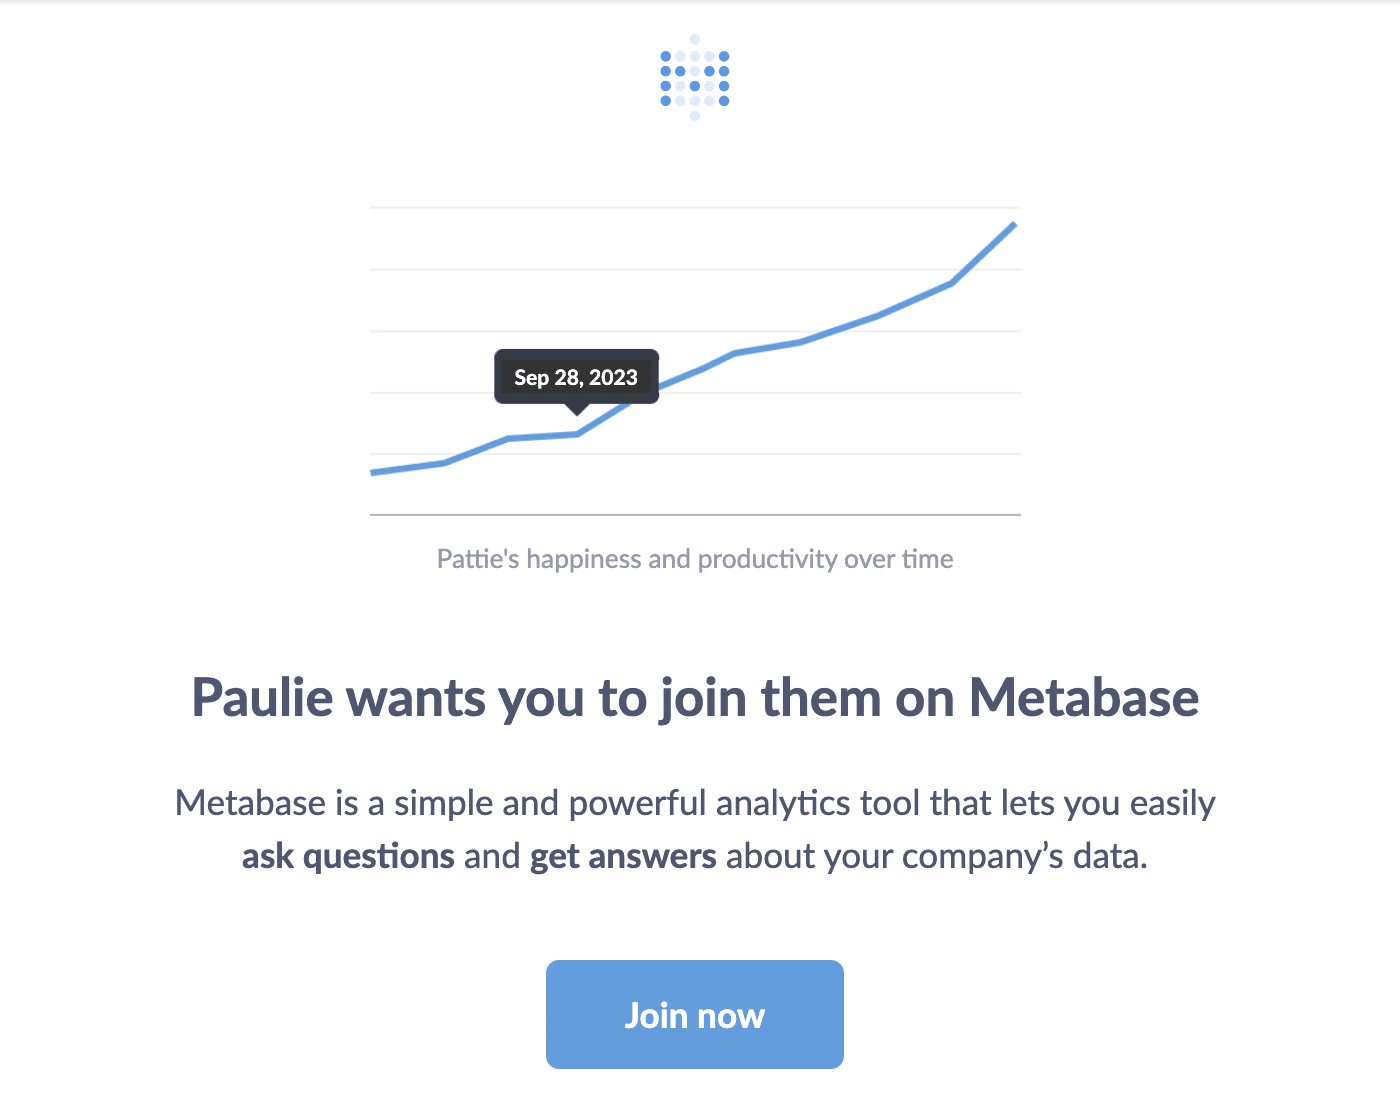
The user will be emailed an invitation to create a Metabase password and should then be able to log onto the platform.
You can set user permissions by creating a group and adding users to the group. To see your groups and create new ones, navigate to Groups in the menu.
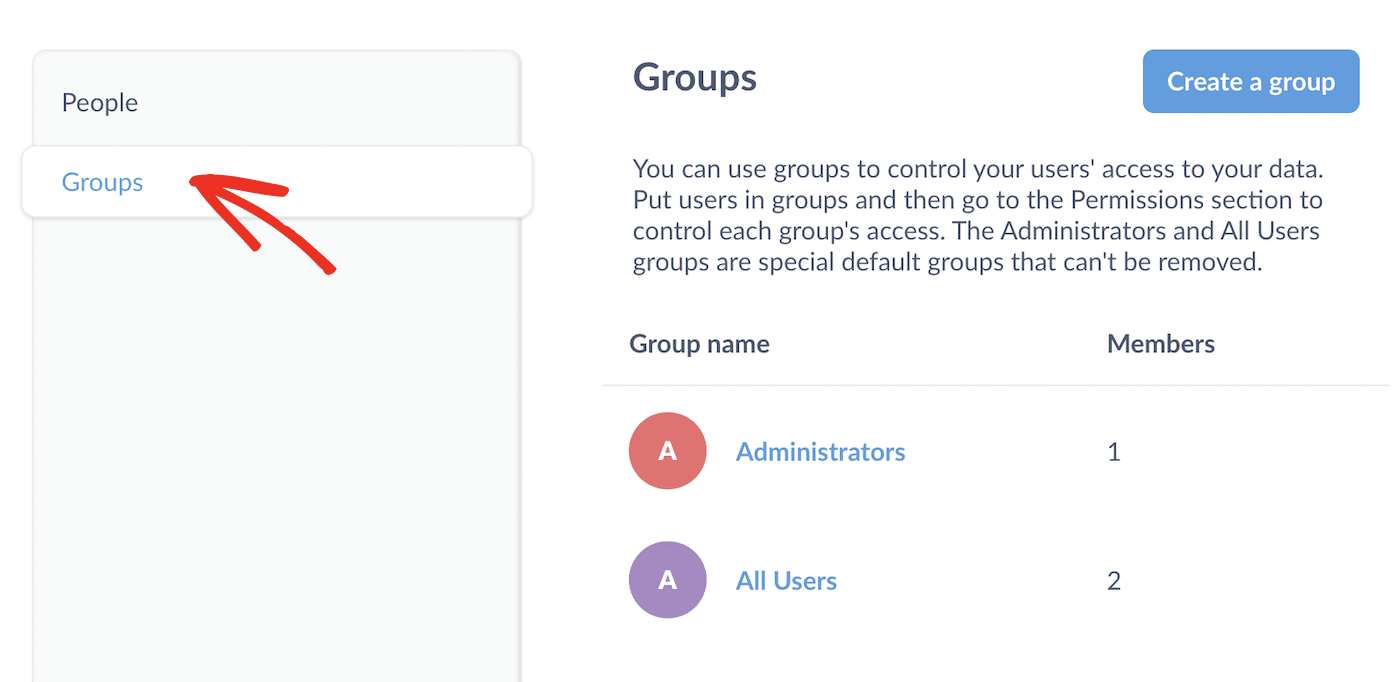
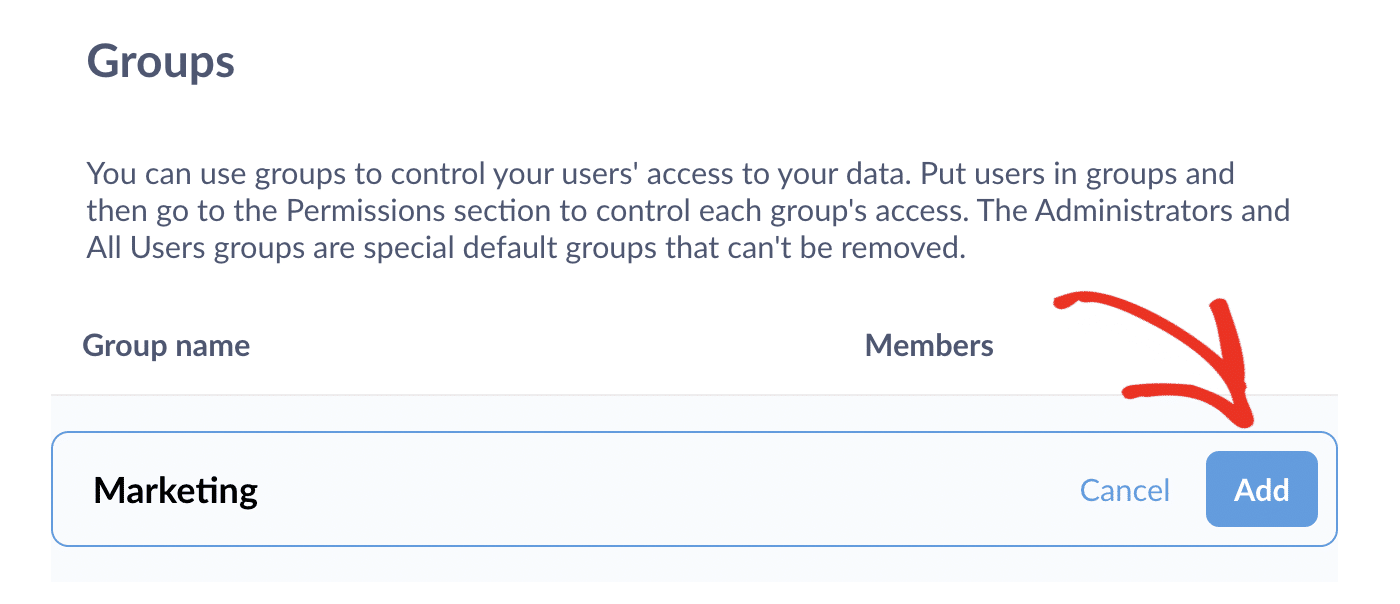
To create a new group, click the Create a group button, enter a name for your group, and click the Add button.
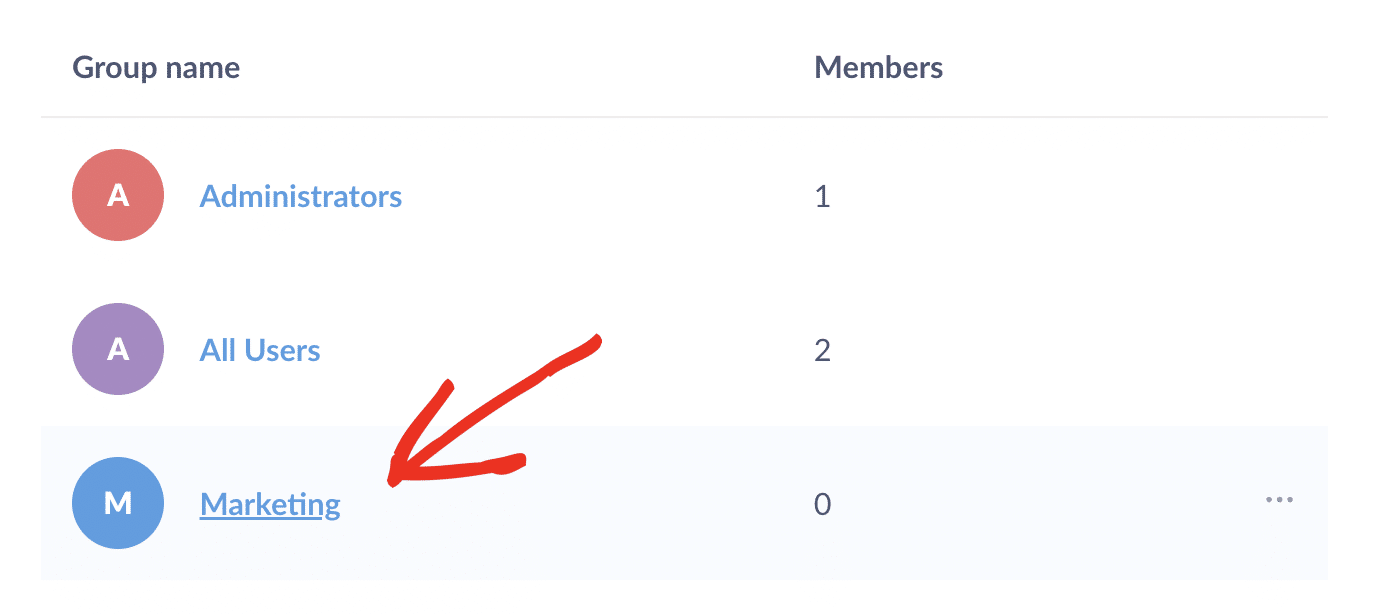
Click on the name of the group you just created to set up permissions.
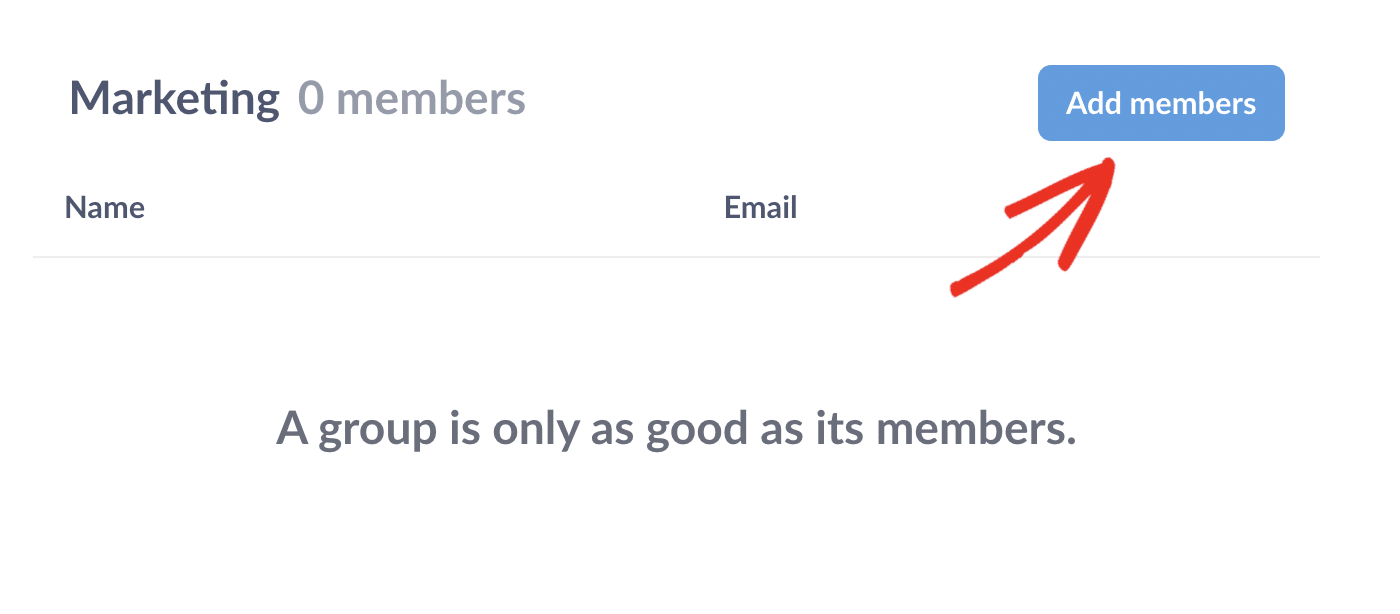
You need to add at least one user to the group before you can edit the permissions. Click the Add members button to add users to the group.
Enter the names of the users you want to add to the group and click the Add button.

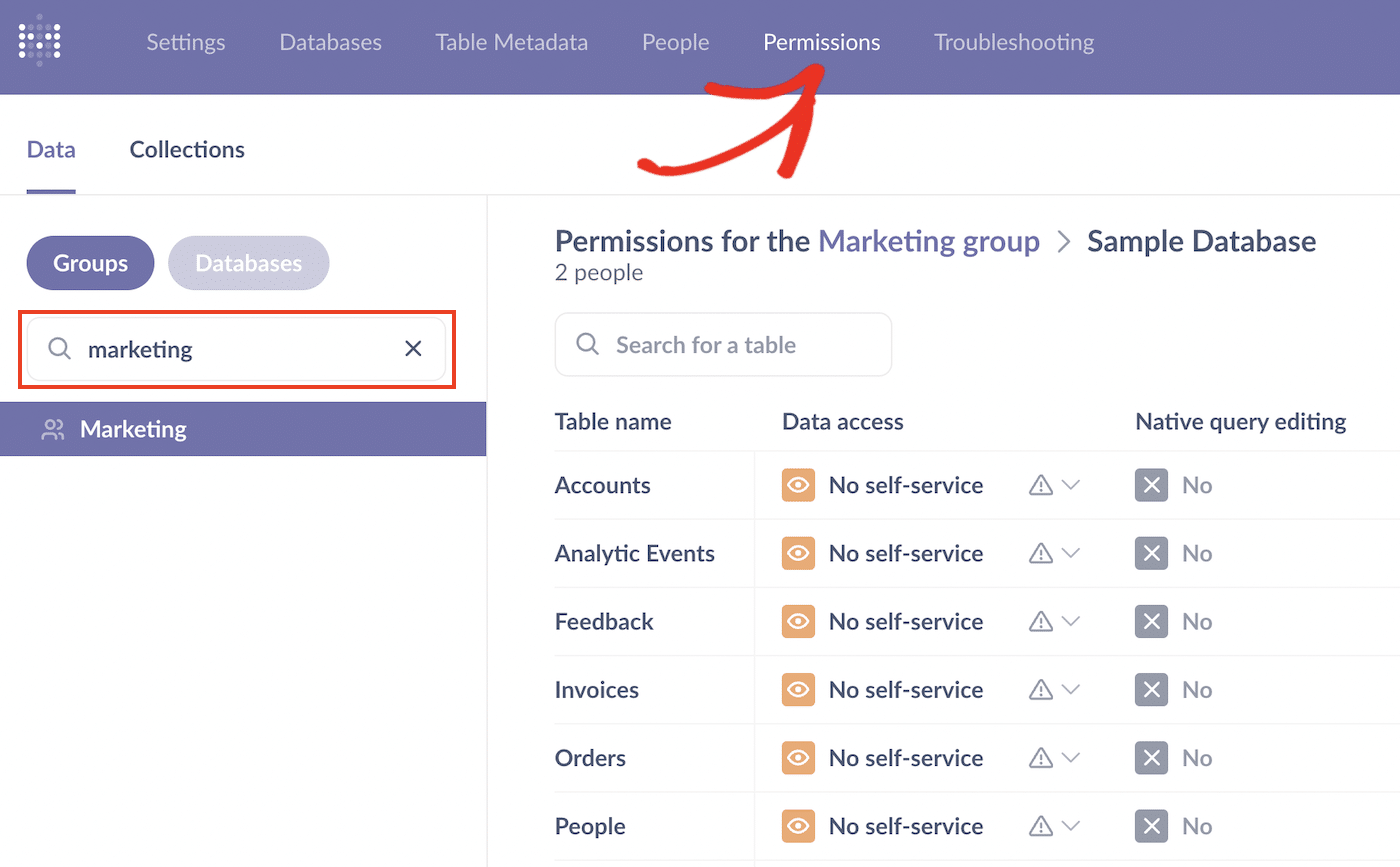
To set permissions for the group, navigate to Admin » Permissions » Groups and search for the group you created.
On this page, you can set permissions or restrict access to specific tables in your database.
Exploring the Metabase Homepage
Let’s go back to the homepage and take a look at how to navigate around Metabase. Click the Exit admin button in the top right corner to close the settings page.

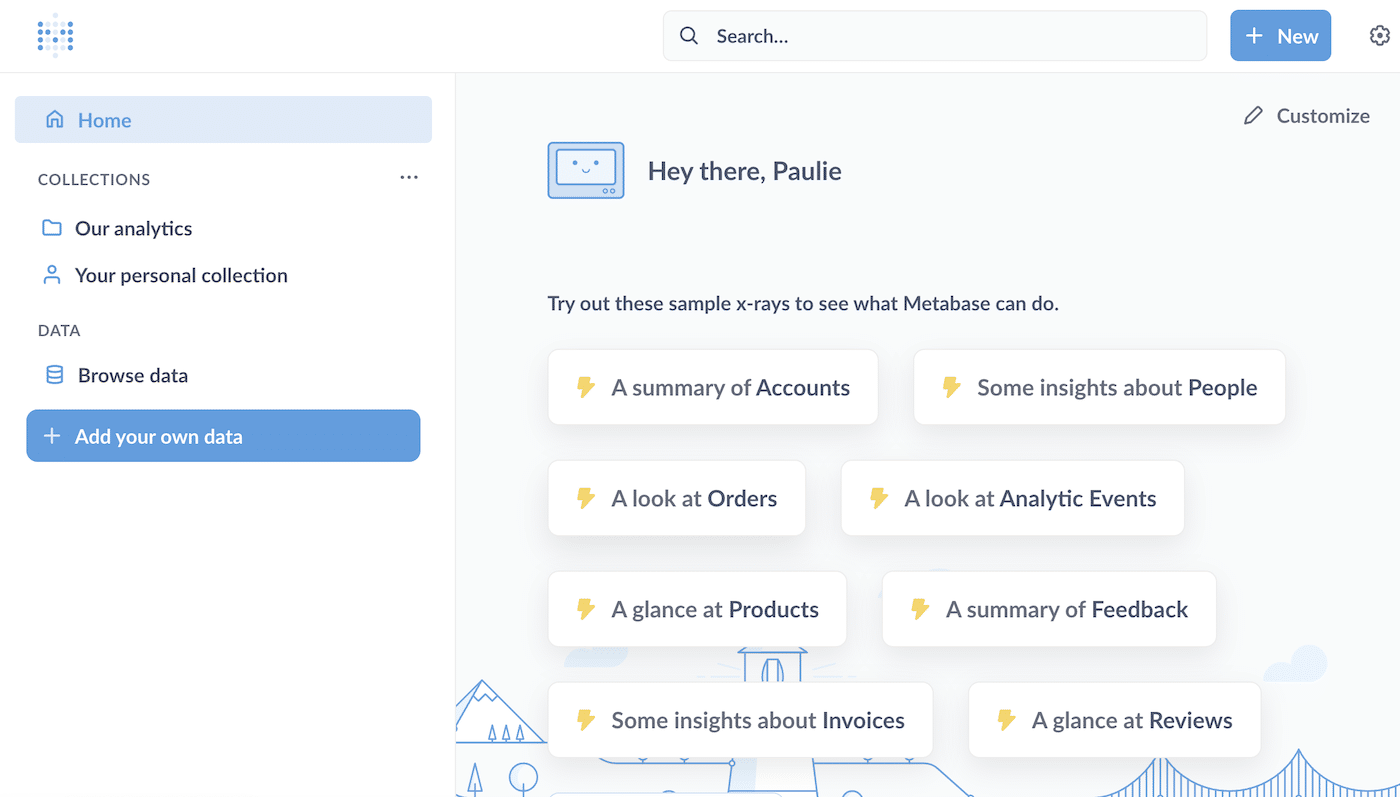
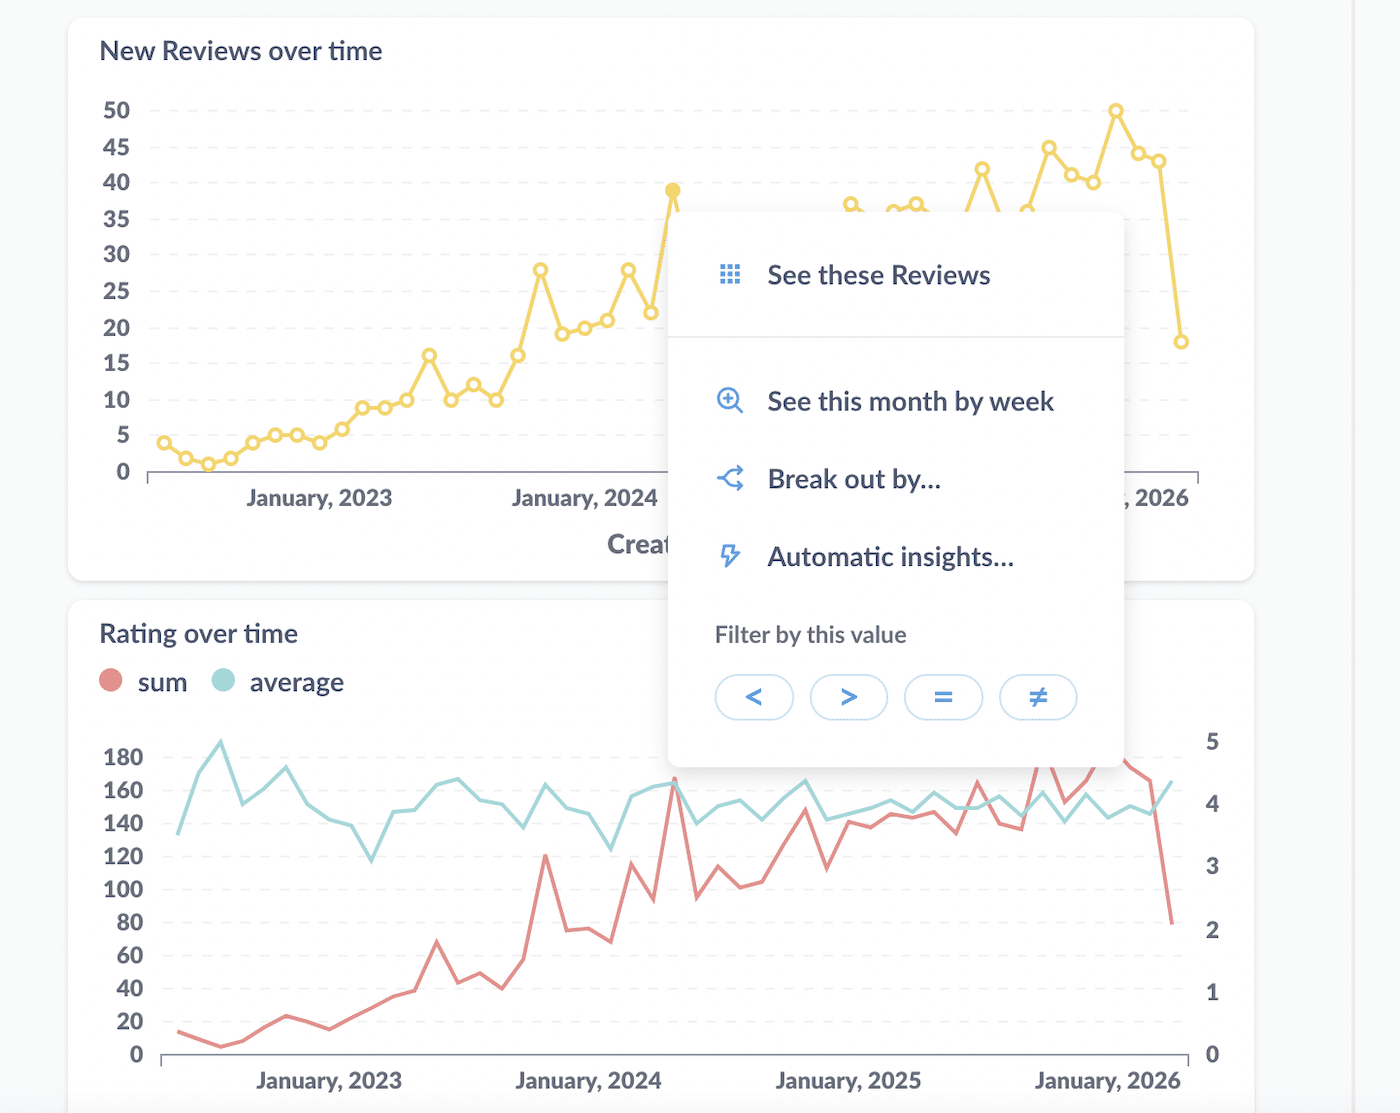
Metabase shows some sample “x-rays” on the homepage, which are automatic data summaries that give instant insights into your data.
Alongside the x-rays, there’s also a link to Metabase tips, which gives you handy access to a library of tutorials, docs, guides, and mini-courses on working with data, building queries, creating dashboards and visualizations, data modeling, and more.
You can click on any of the sample x-rays to get an idea of what’s possible with Metabase.

After choosing one of these x-rays, scroll through the graphs representing different insights from the data to see what Metabase can do.
You can dig deeper by clicking on a point of interest on a graph and choosing another x-ray to explore.
There’s also a navigation menu on the homepage with which you can navigate to other parts of your Metabase site:
- Home
- Collections: These act like folders for you to organize and easily access your questions (queries), dashboards, and models.
- Data: This gives you direct access to the data tables in your database and a quick link to connect to another database.
If you click Browse data and select the Sample Database, you can choose any table to view the data.

When you click on the table you want to view, you can see the raw data in the table in a user-friendly format.
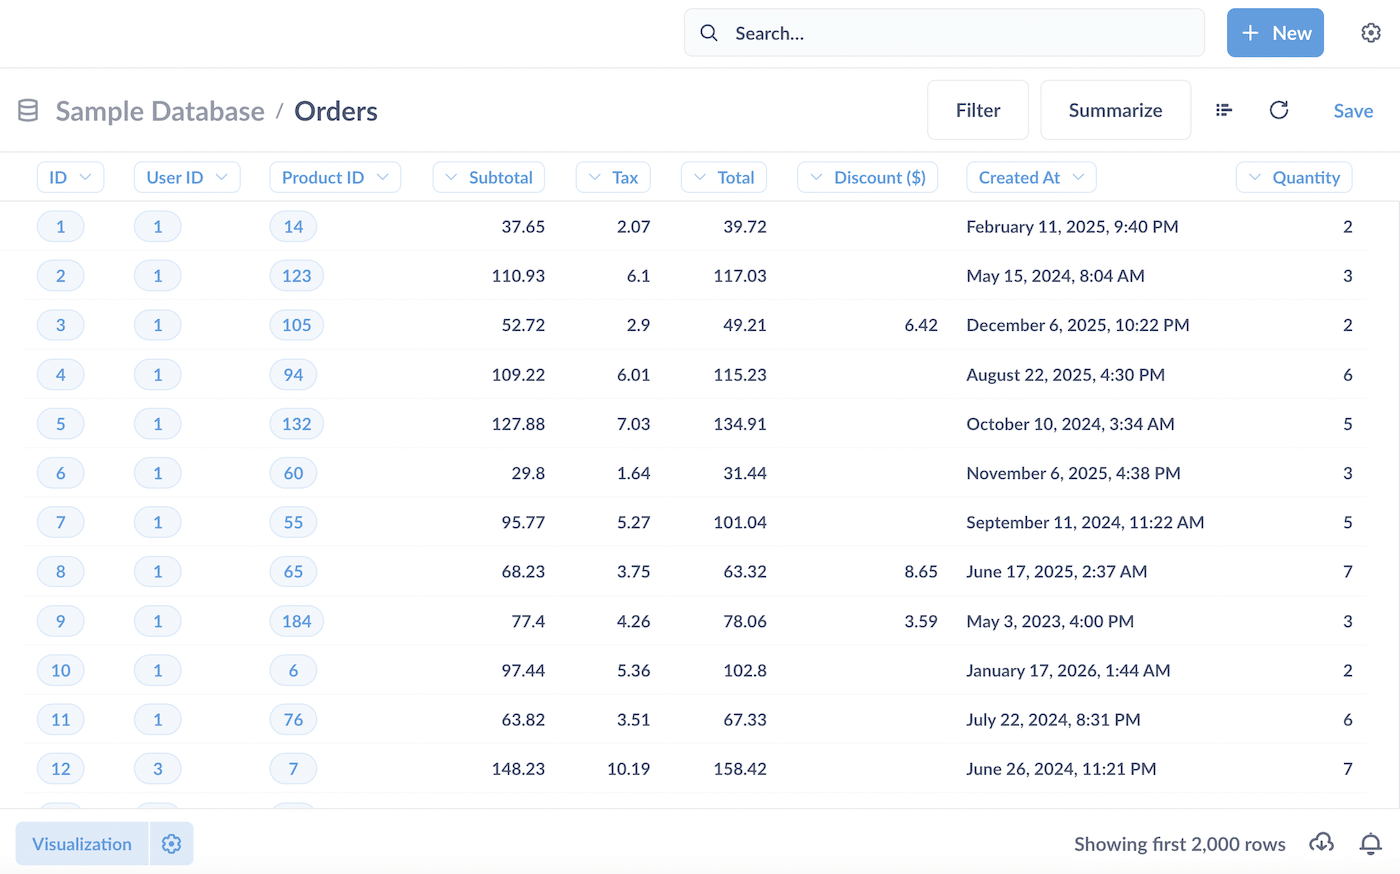
You can sort and filter the data by any column. There’s also a Visualization button, which allows you to create your own charts and graphs from the data.
Asking Questions (Running Queries in Metabase)
A question in Metabase is a database query, the results of the query, and the accompanying visualization.
You can ask questions in Metabase by using the visual query builder or using the native query editor to write queries in text as SQL.
Access the query builder from the data browser by clicking Browse data from your homepage menu and choosing the database and table you want to query. Click the Show editor button to bring up the query builder.
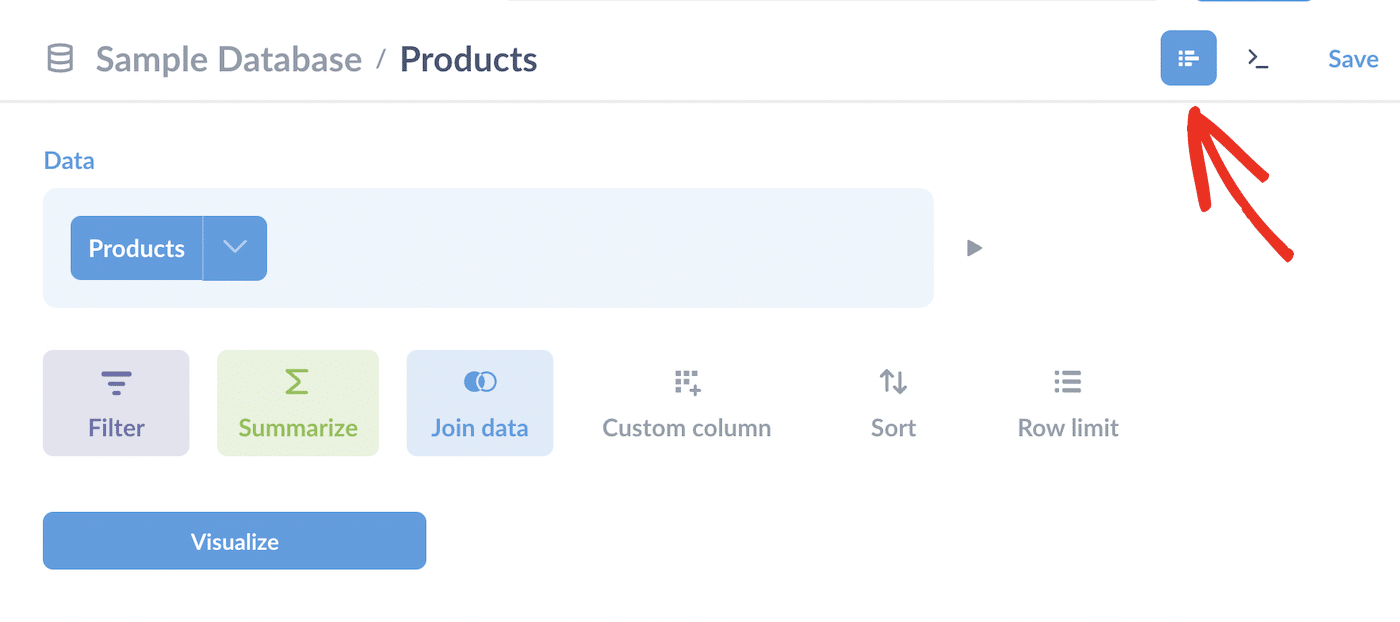
For example, let’s say we want to query the Products table to return all products priced over 50 and with a rating of 4 or above.
You can easily use the Filter option to create the query, which will look like this:
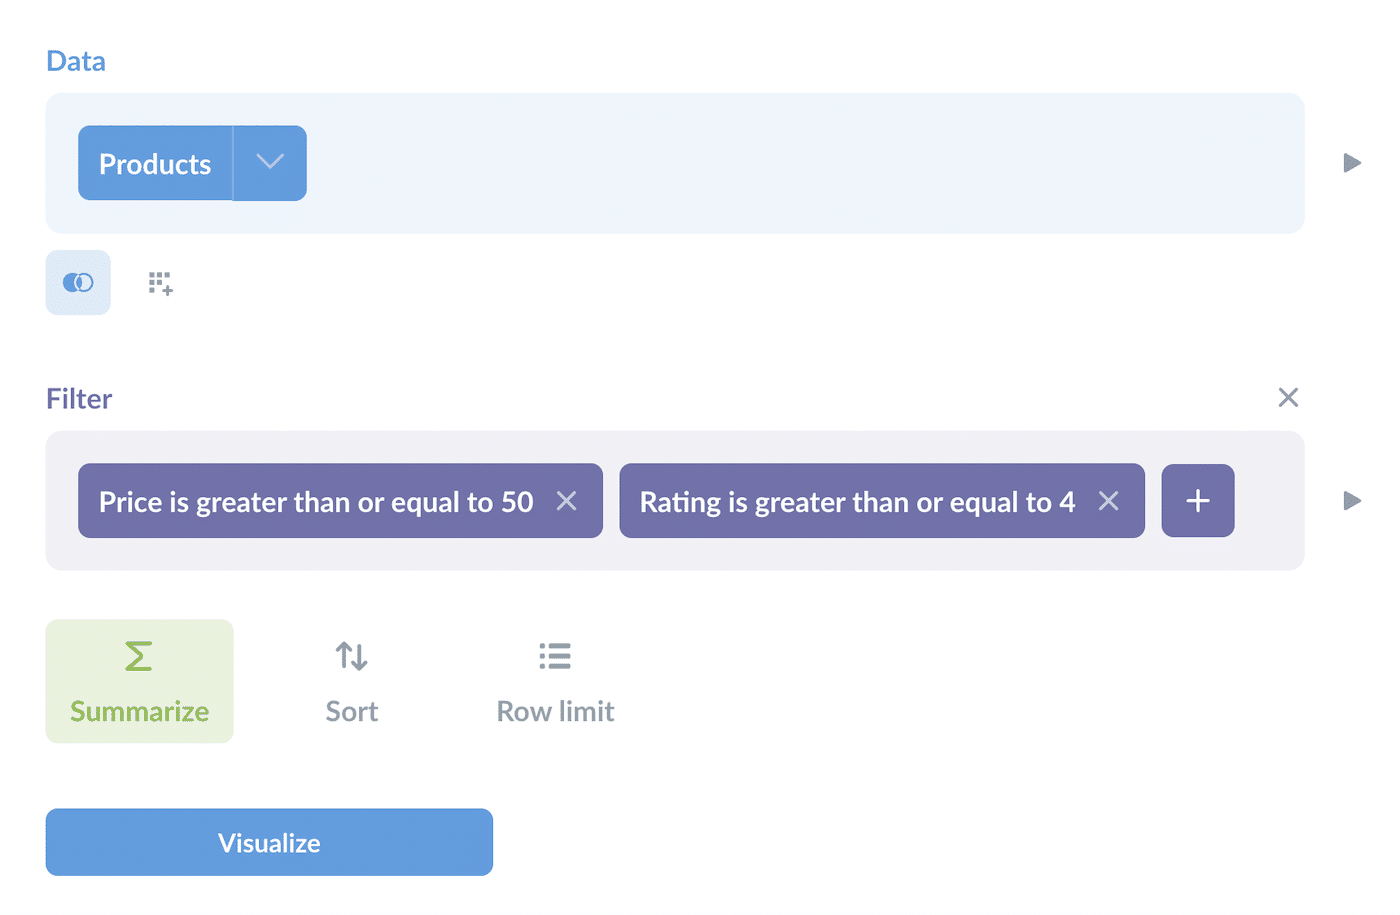
If you want to see what the query looks like as SQL, you can click the View SQL button.

You’ll then see the entire SQL query and convert your question to an SQL query if you wish.

When you click the Visualize button, you’ll see the results of your query.
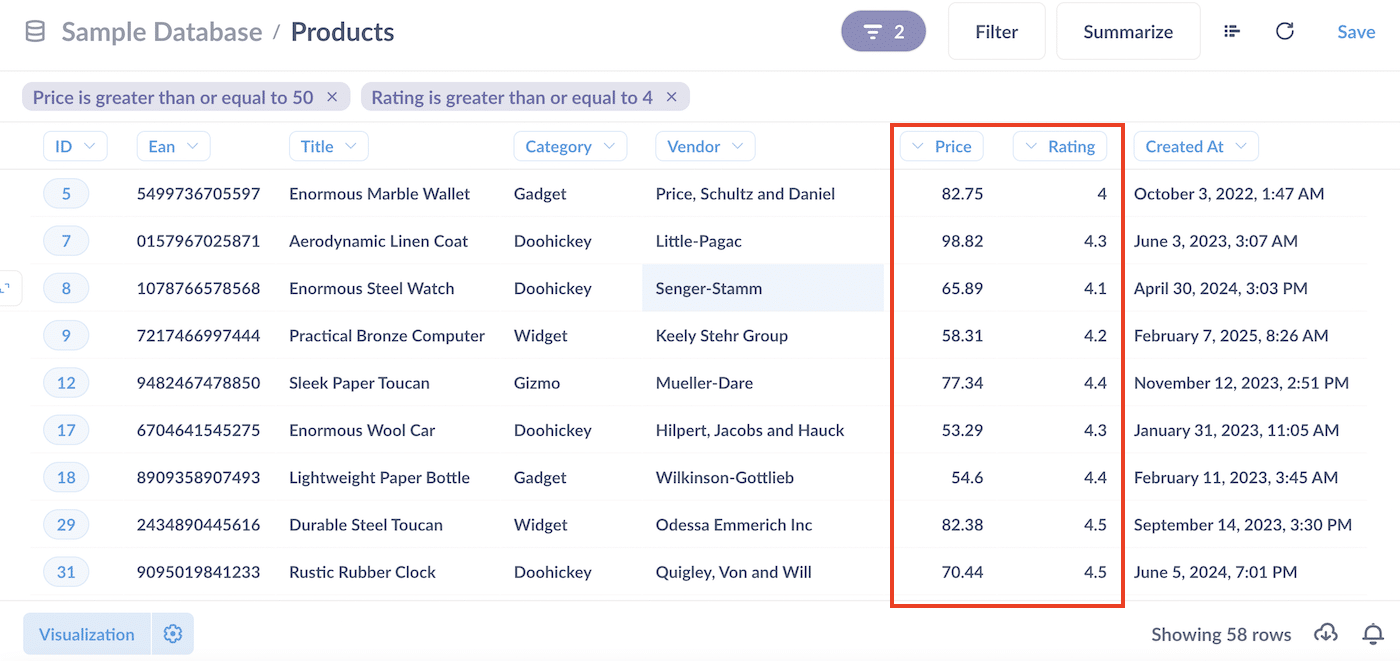
You can click the Visualization button to view this data in a chart of your choice.
Once you’ve created a question, you can save it to a collection, add it to a dashboard, send the results of the question to people on your team, export the results of the question, and convert the question to a model.
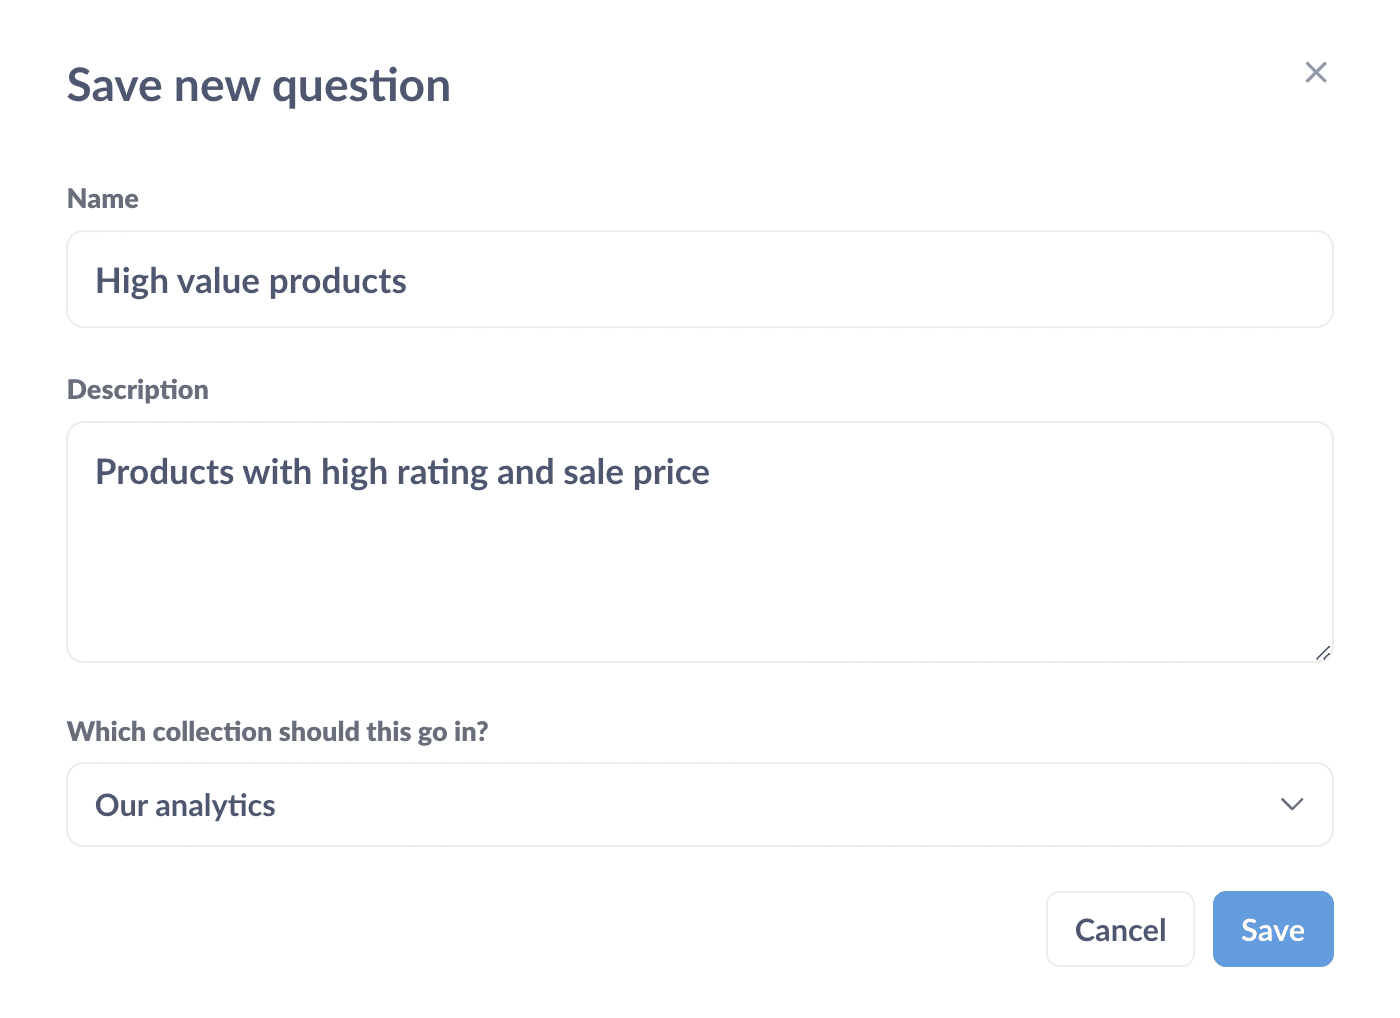
To save your question, click the Save button in the top right and enter a name and description. You can choose a collection to add your question to and optionally add it to a dashboard.
Creating Dashboards
Metabase dashboards are a way to group questions and present the insights from the questions in a user-friendly way as a report.
Dashboards consist of a set of cards that may include text, charts, tables, and maps.
You can create as many dashboards as you want to in Metabase.
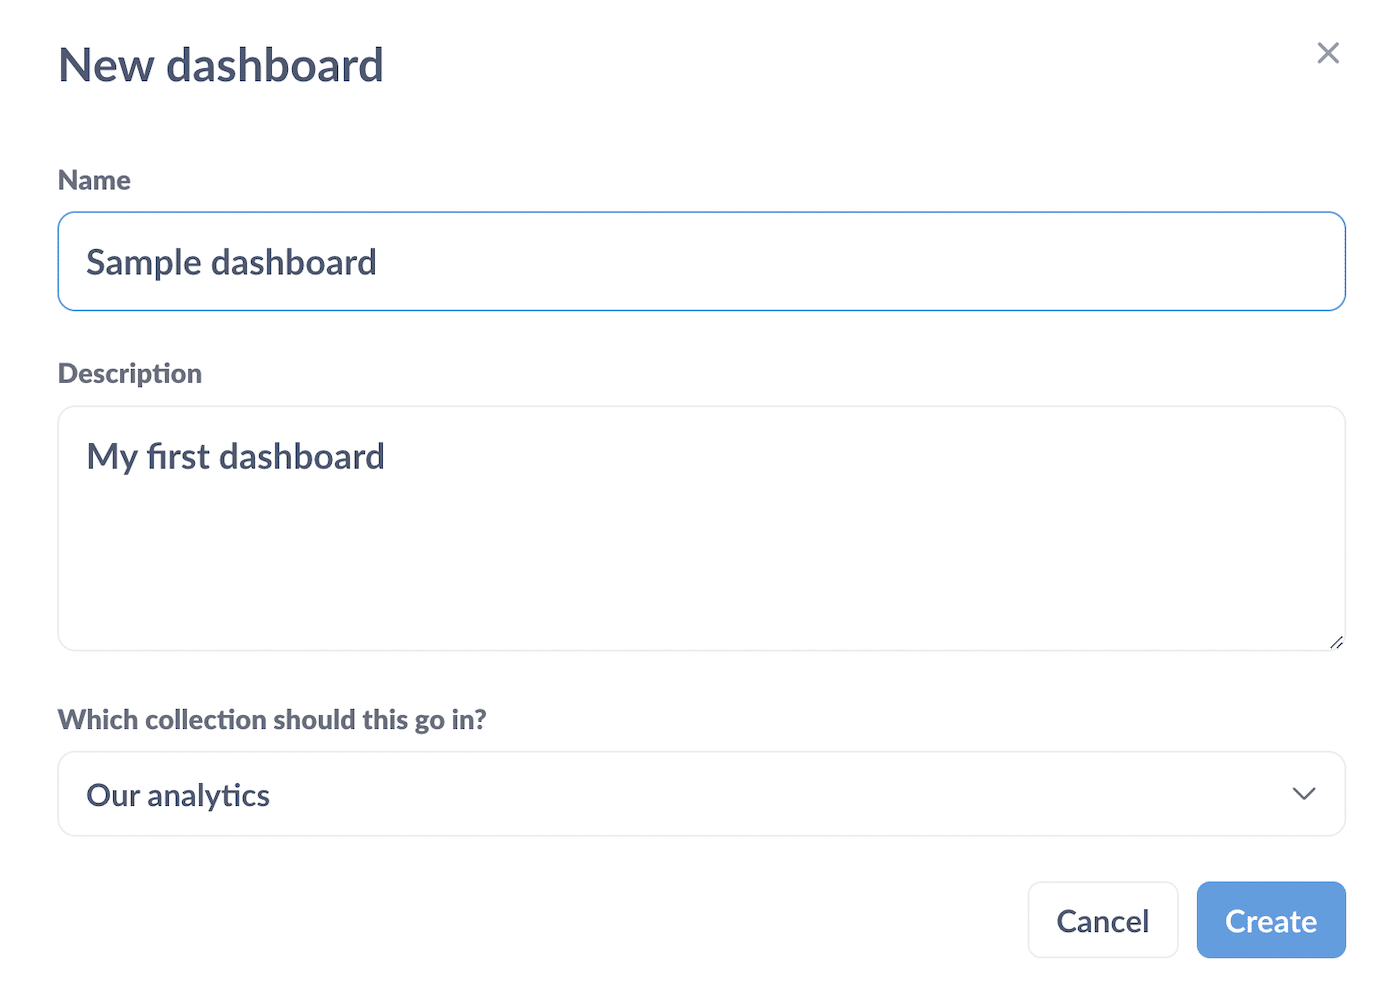
To create a new dashboard, click the + New button in the top right corner of your Metabase homepage and select Dashboard from the dropdown menu.

Enter a name and description for your dashboard, choose a collection to add it to, and click the Create button.
Click the + button to add a question to your new dashboard.
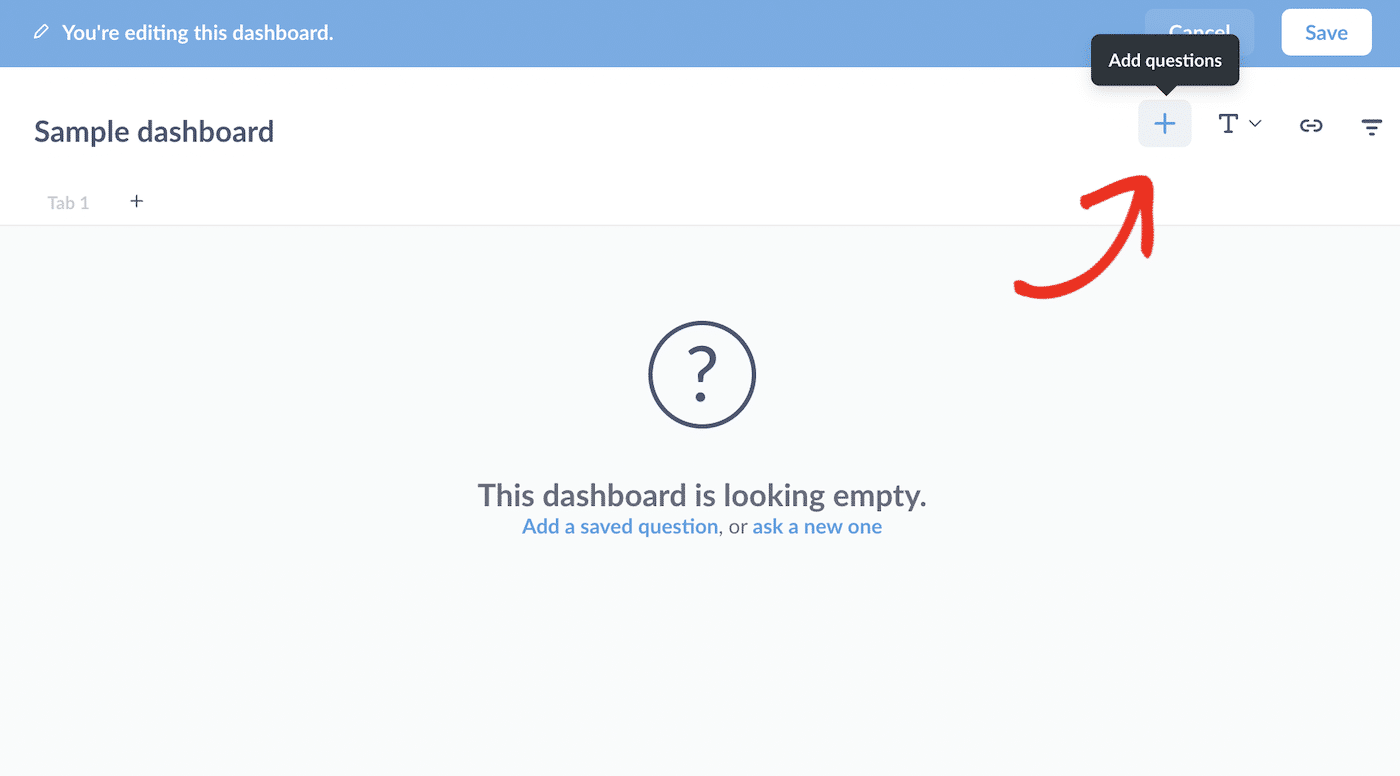
Here you can add your saved questions or add a new one. you can also add text boxes, headings, links, and filters from the edit menu.
After you’ve added the cards you want to display on your dashboard, you can drag them into position and resize each card until your dashboard looks the way you want.
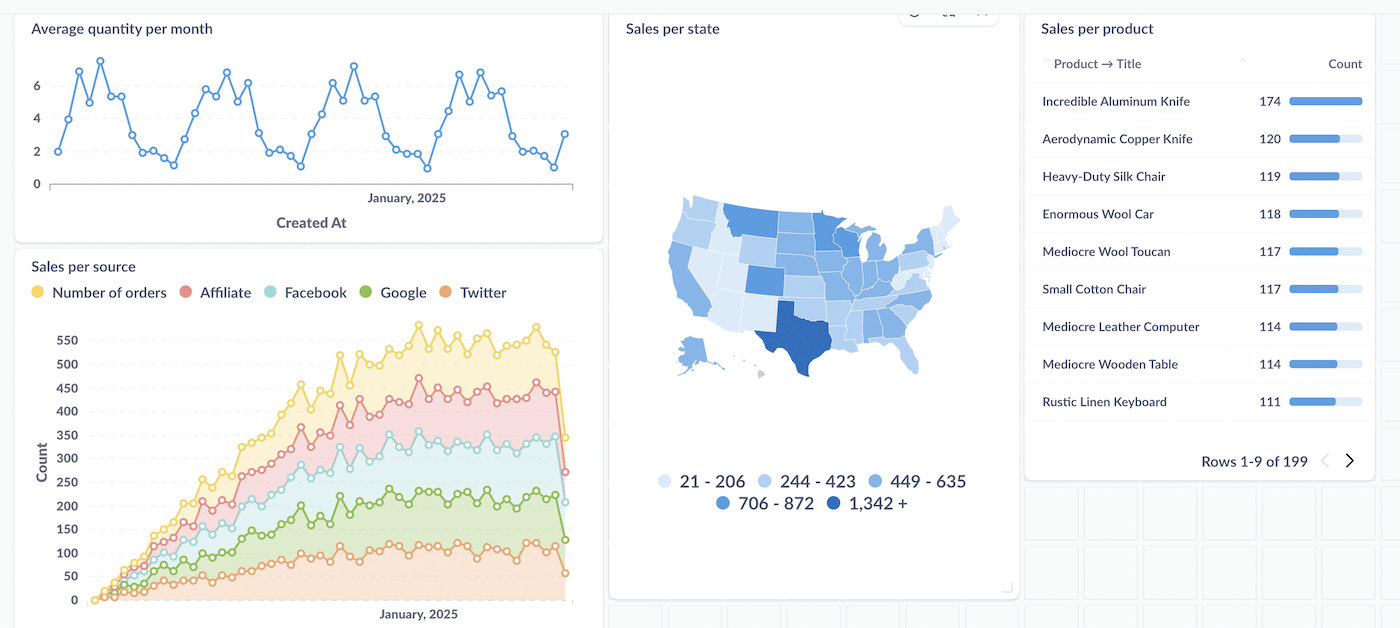
Once you’re finished editing, click the Save button to save your dashboard.
If you want to make your dashboard public, you can click on the Sharing icon (Note: this option will only be visible if Public Sharing is activated in the Admin settings.)

You can then enable sharing and use the public link to access your dashboard or embed it in a web page. This will enable people who don’t have a Metabase account to view your dashboard.
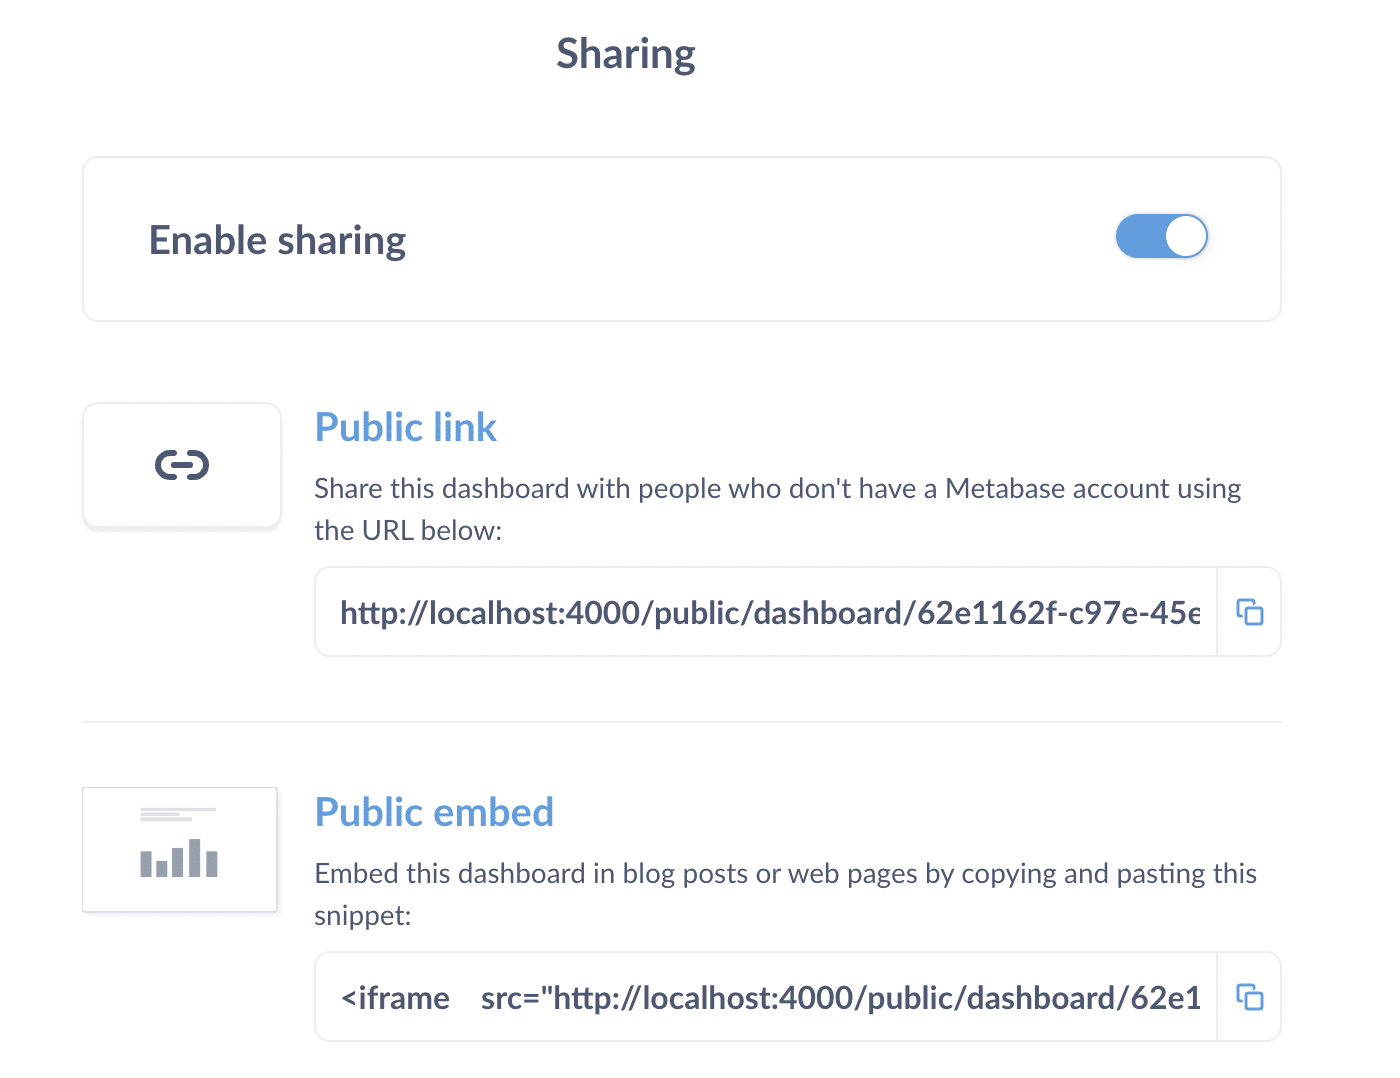
You can also export the dashboard as a PDF to send to clients or other members of your organization.
Adding and Managing Databases
Now you have a general overview of how to set up and use Metabase, take some time to explore the platform and try creating some questions and dashboards of your own.
Once you’ve got the hang of using Metabase, you can connect it to your organization’s database to work with your own data.
To add a database, click the Add your own data in the homepage menu. Fill out the details of your database and click the Save button to save the connection.
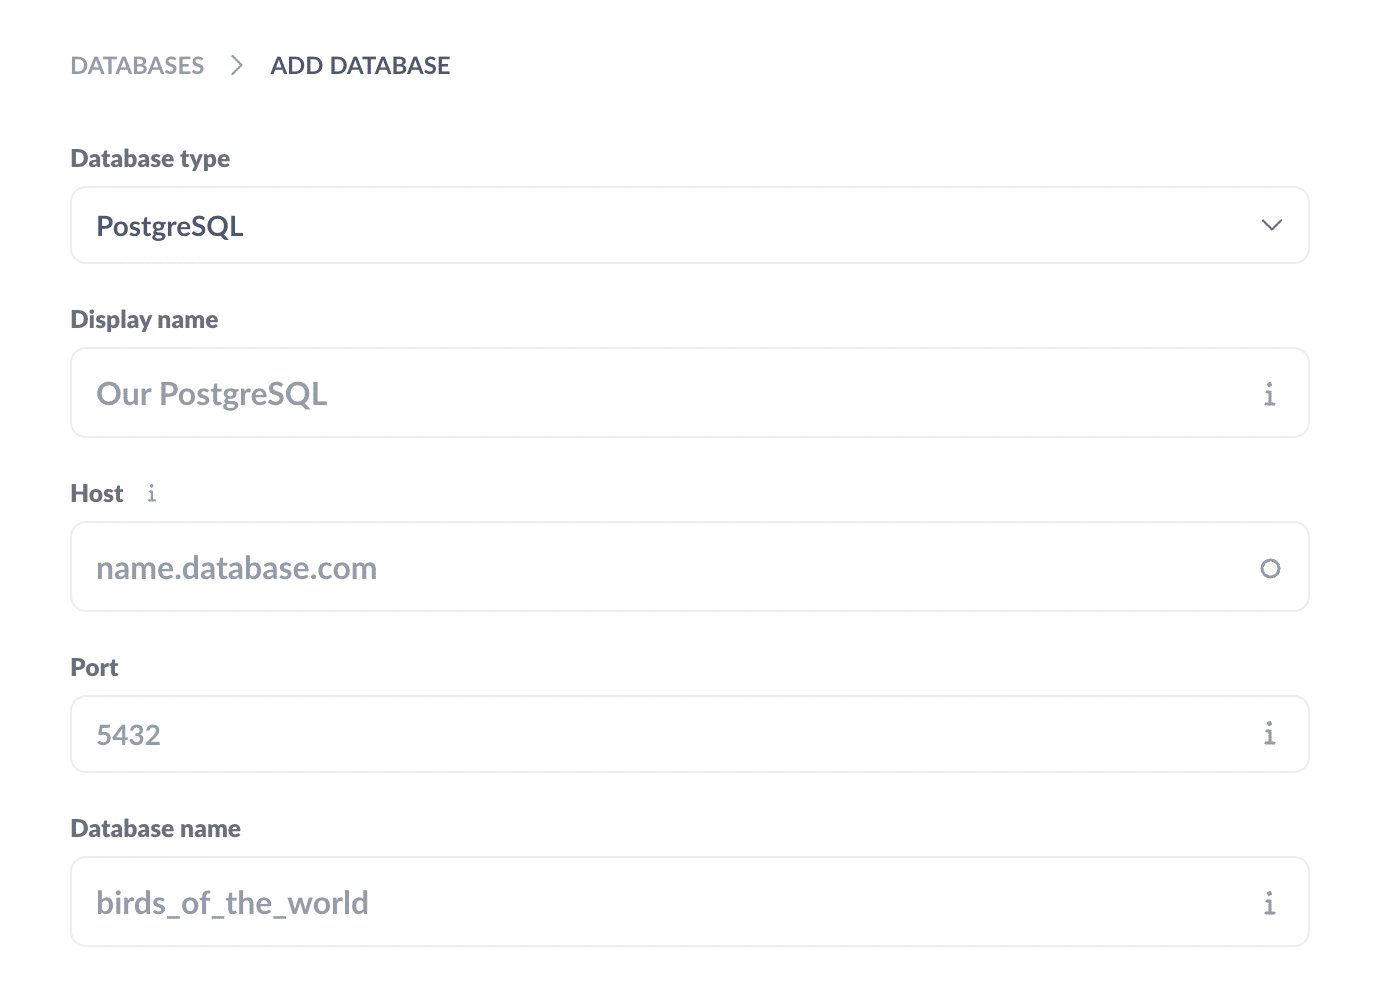
Your database should now be accessible from your Metabase homepage, and you can create useful data-driven insights for your team, organization, and clients.
FAQs
If you have any problems setting up SendLayer SMTP service with Metabase, our support team is available to help and answer your questions. Some of the most common questions we’re asked about Metabase are below:
Is Metabase free?
Metabase is available as a free, open-source, self-hosted platform. There are also Pro, Enterprise edition, and cloud-hosted versions of Metabase, with pricing starting from $85 a month.
How do I run Metabase on Windows?
To run Metabase on Windows, you’ll need to download and extract the JAR file. Follow the instructions above to download and install Metabase.
How to install Metabase on Ubuntu?
The installation process for Metabase on Ubuntu and other Linux systems follows the same basic process as running it on Windows. You’ll need to install the latest Java versions and download and run the JAR file available on the Metabase website.
How do I run Metabase on Mac
You can run Metabase on Mac from the Terminal app. You’ll first need to install Java on your machine and download the latest JAR file from Metabase.com Follow the detailed instructions at the start of this guide to get started.
What is the purpose of Metabase?
Metabase is a business intelligence tool that provides a user-friendly interface for data visualization and querying. Metabase enables users to create visual reports and interactive dashboards displaying data without technical skills or SQL.
That’s it! Now you know how to set up Metabase.
Next, would you like to find out more about why Gmail might be blocking your emails? Check out our tutorial on Gmail email deliverability for more information.
