Do you need help with setting up Drupal?
Drupal is a free, open-source CMS that’s known for it’s security, flexibility, and scalability. However, it’s not as user-friendly to install and configure as some other platforms like WordPress.
If you want to build a site in Drupal or you’re investigating CMS options and just want to try it out, you’re in the right place!
I went through every step of installing and setting up Drupal from the ground up to compile this beginner’s guide, ensuring you can sidestep the challenges and issues I encountered along the way.
Step 1: Installing Drupal
Your first decision will be choosing a web hosting environment to install Drupal.
Many web hosts offer Drupal via one-click installation. Alternatively, you can install Drupal locally in a Docker container or by installing PHP, setting up a webserver and database, and installing it manually.
While one-click installation of Drupal is easiest, there are some limitations to running the CMS on a shared hosting environment. I decided to use Docker for an easy setup while still offering full flexibility and control over the process.
If you need help with the installation process, refer to the documentation at Drupal.org. Once you’ve downloaded Drupal to your web server, use your web browser to access and run the installation script.
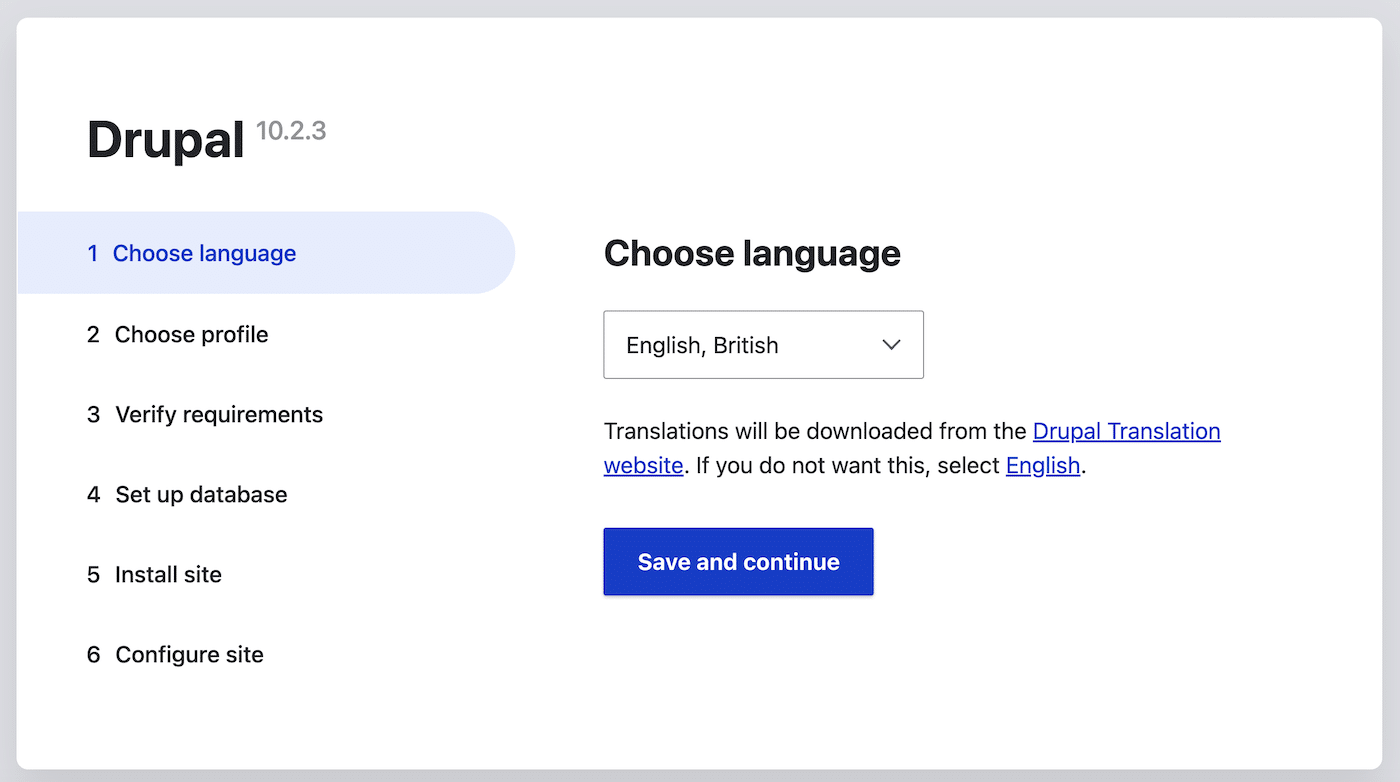
Click the Save and continue button and choose an installation profile. We’ll choose the Standard option and click Save and continue again.
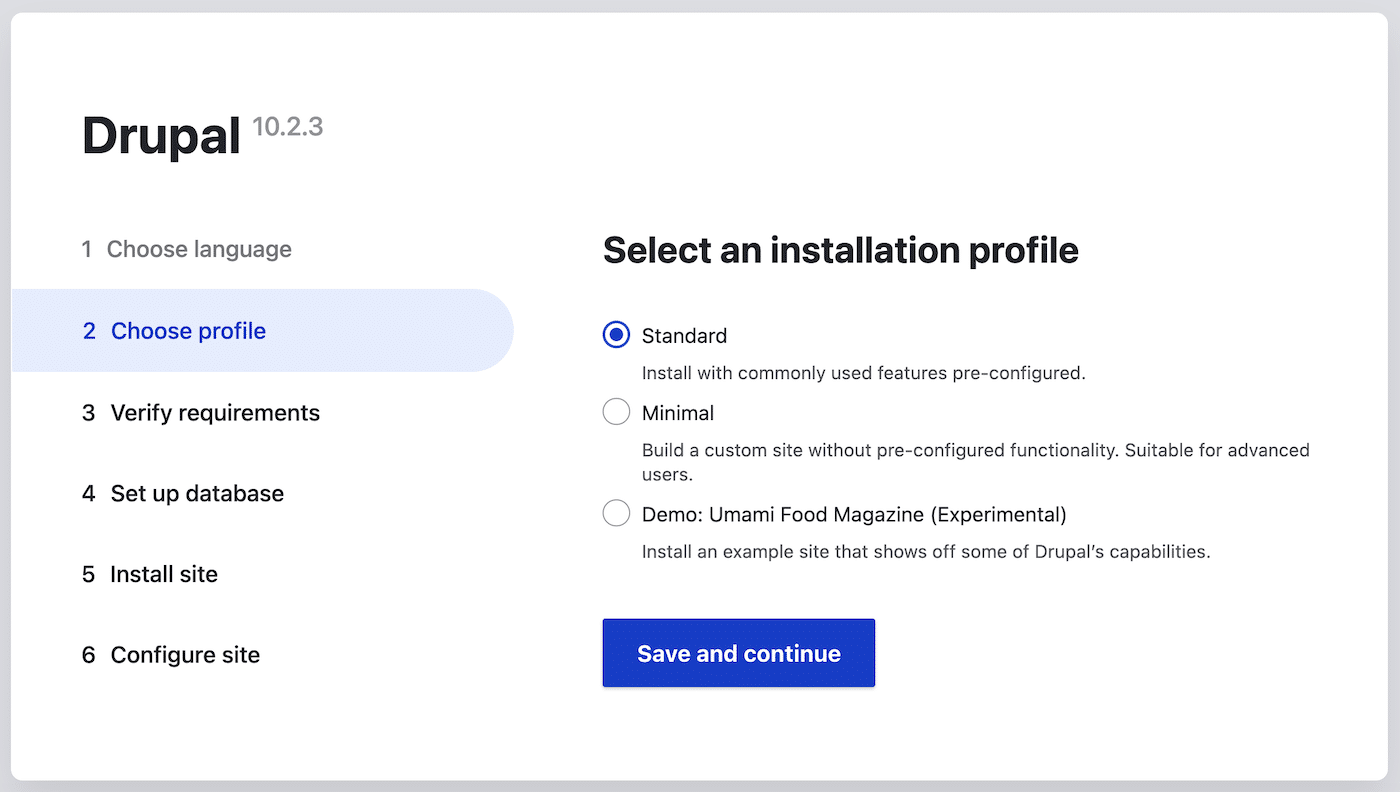
Next, you’ll need to add some database details. You can name your database anything you wish – it will be created automatically.
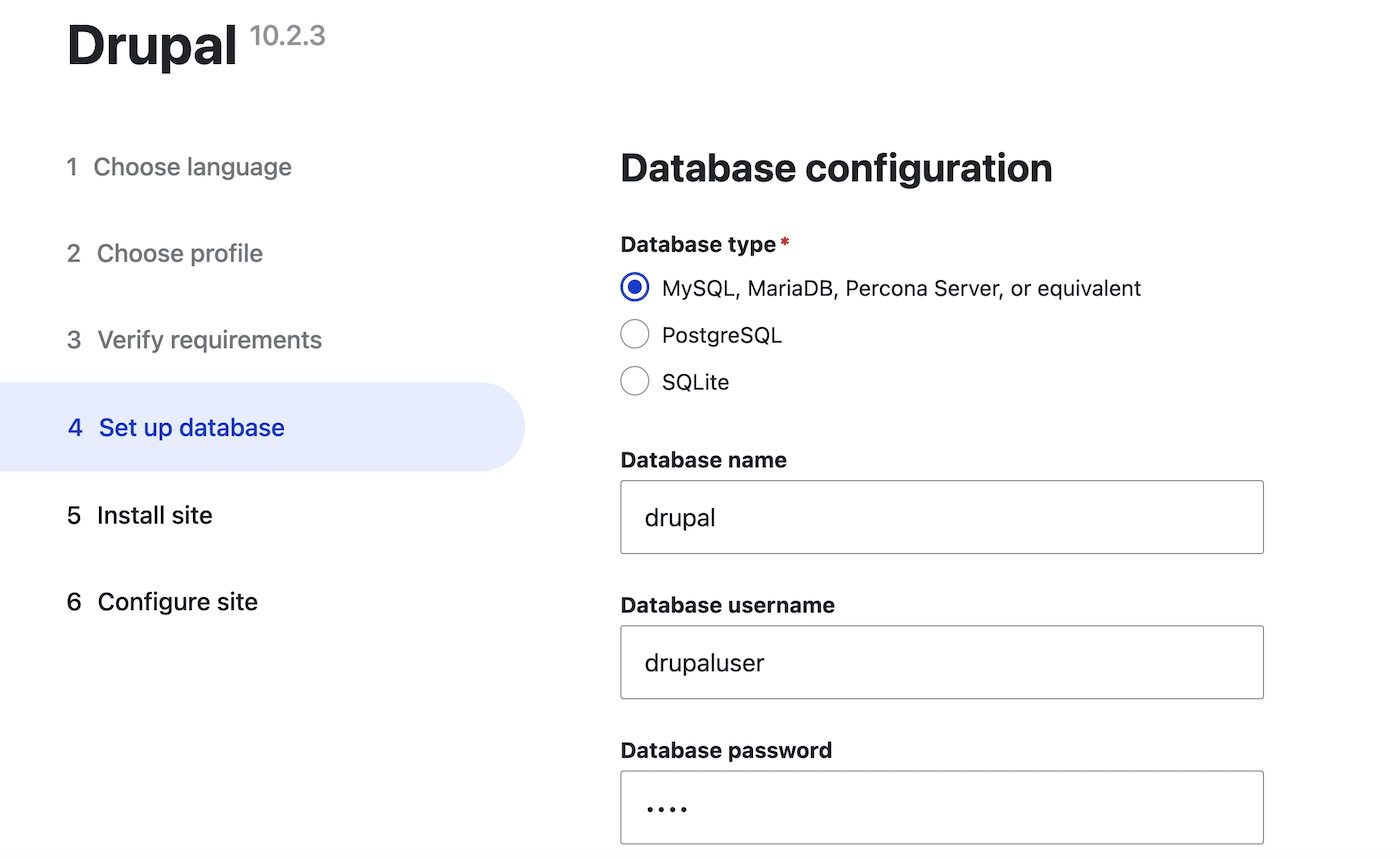
Click the advanced options dropdown and adjust the settings here if necessary. If you’re using Docker be sure to set your MySQL container name under the Host field.
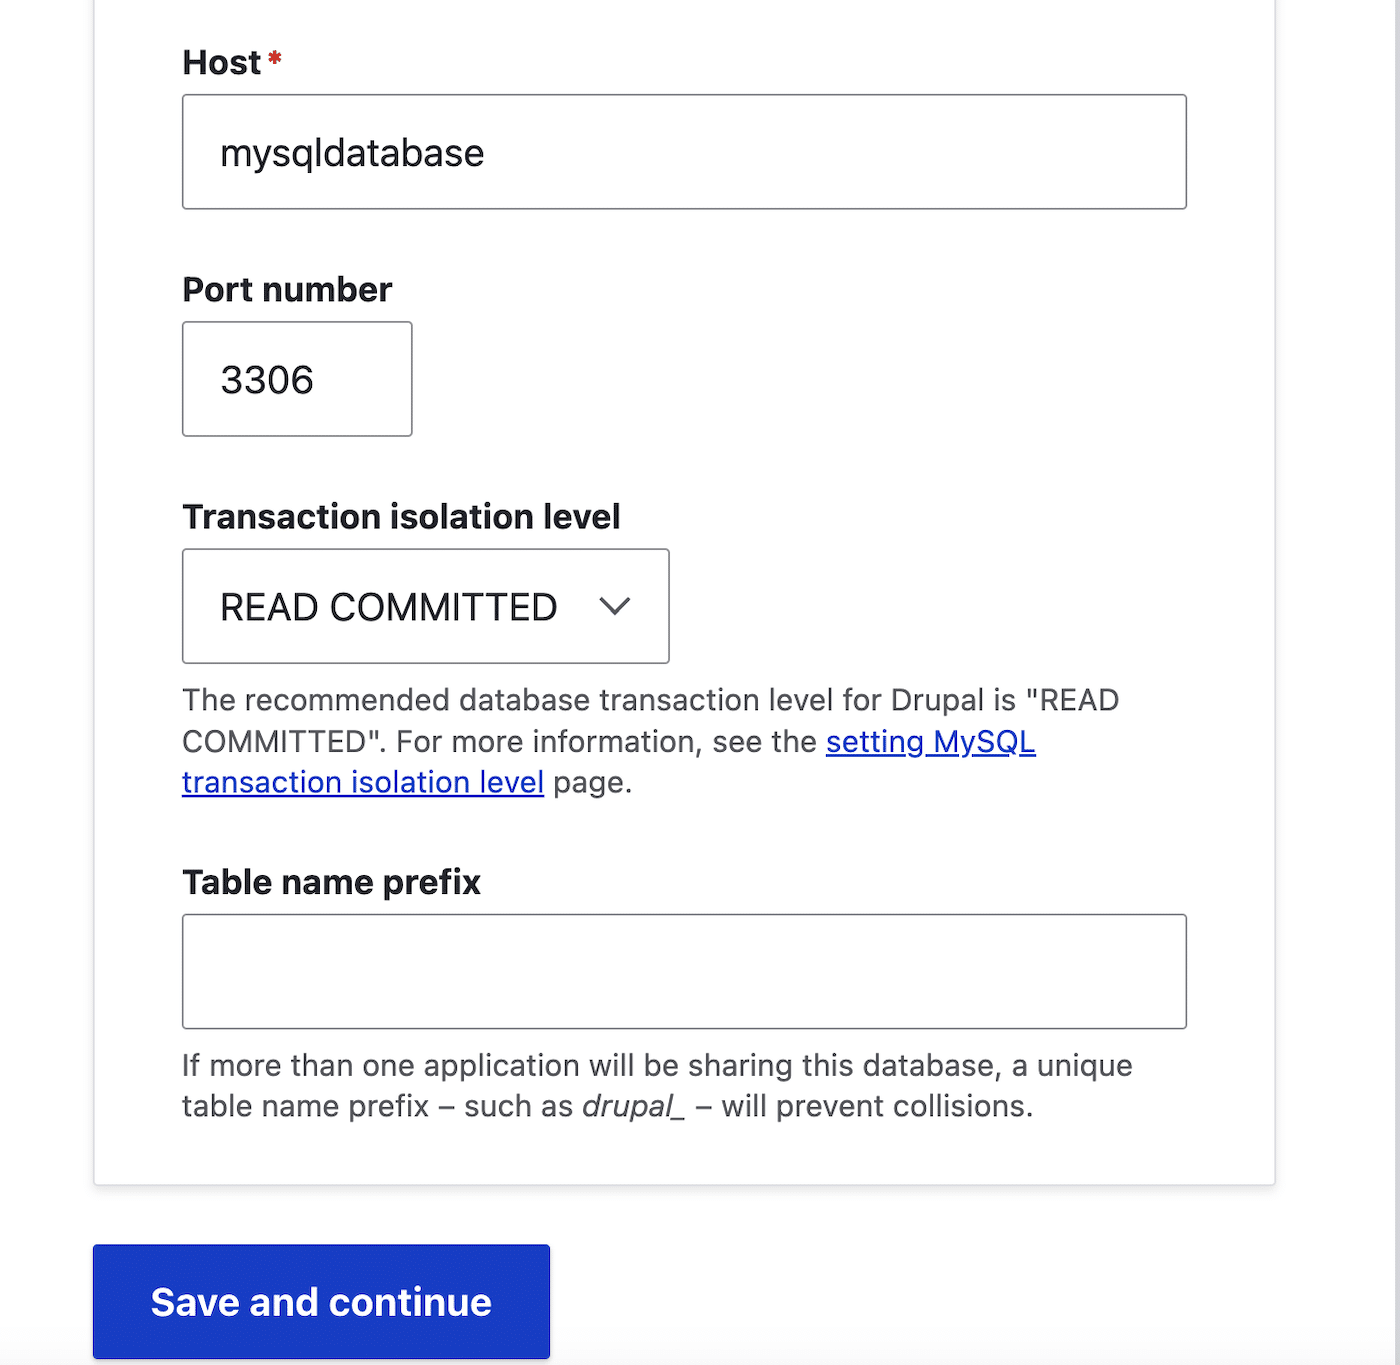
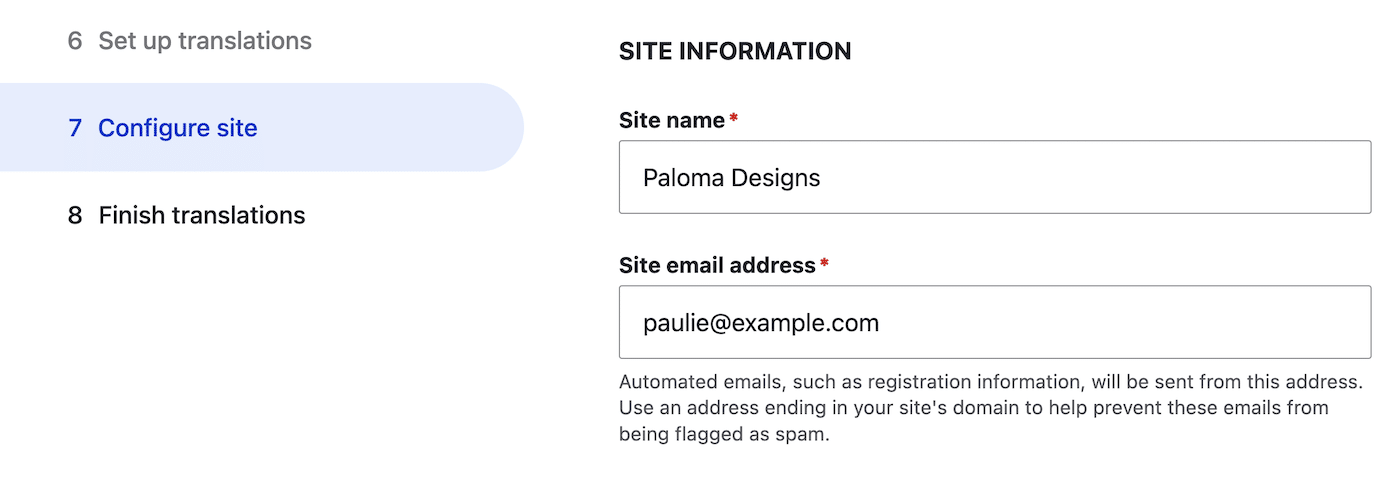
The installer will run for a few moments. When it’s completed, enter a name for your site and the email address you want to use for emails sent from your site.
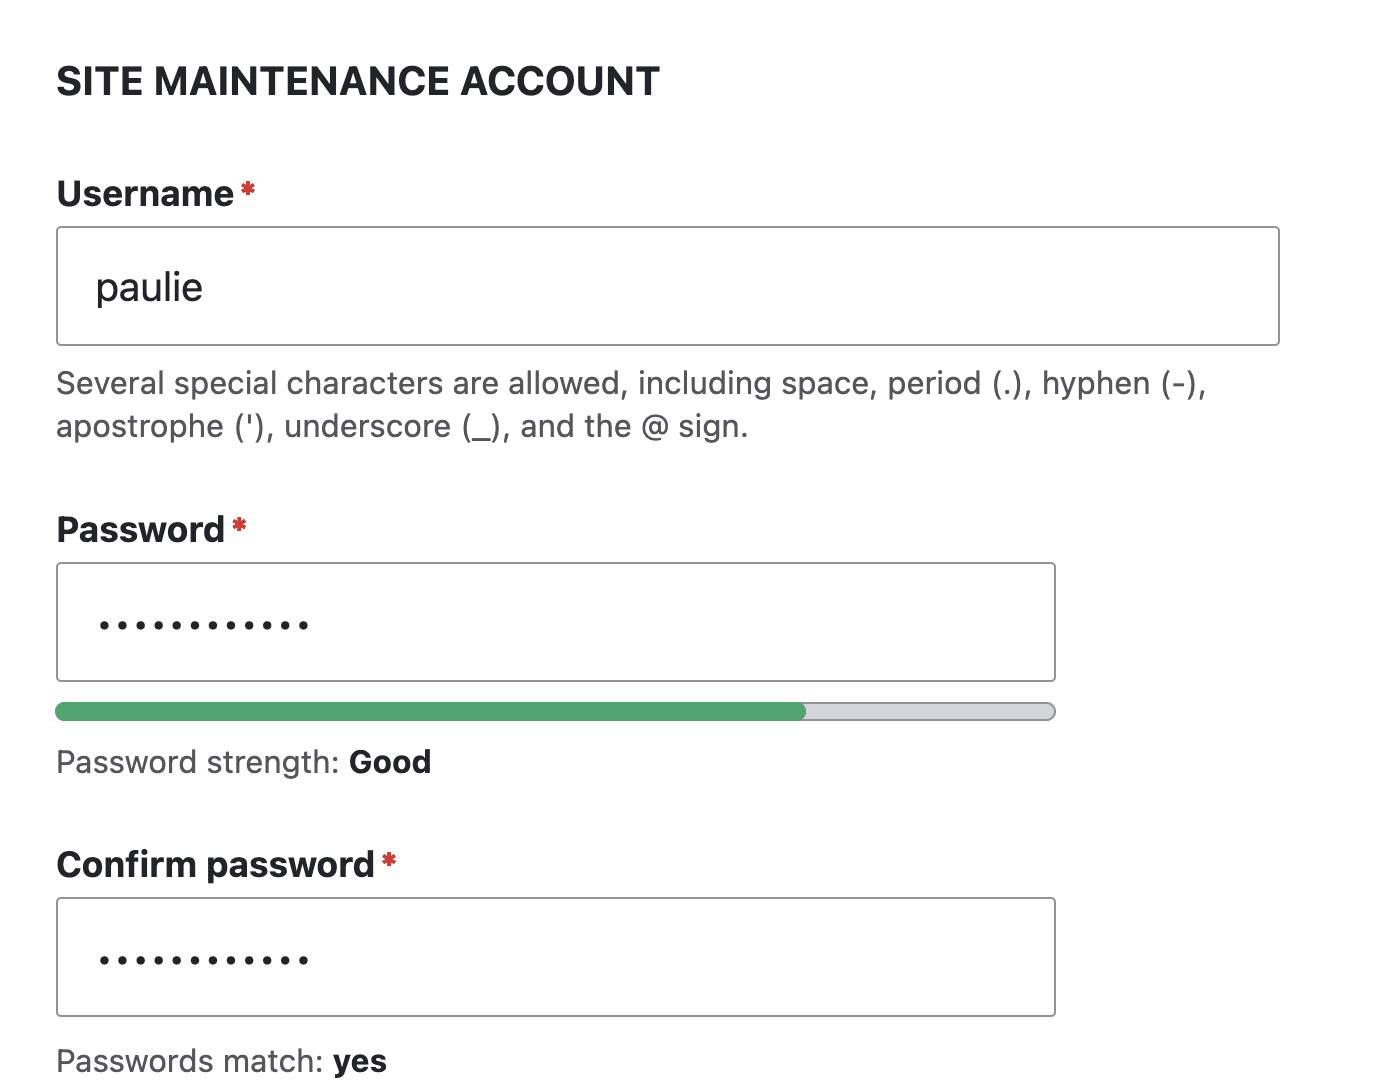
Add a username and password for admin access to your Drupal site.
You can also change some other site settings on this screen such as your country, timezone, and whether you want to enable automatic updates or not. Click the Save and continue button when you’re finished configuring your site.
Wait a few moments for your site configuration to complete. Congratulations! You’ve just created your own Drupal website. You’ll be taken straight to your admin dashboard where you can continue with site setup.
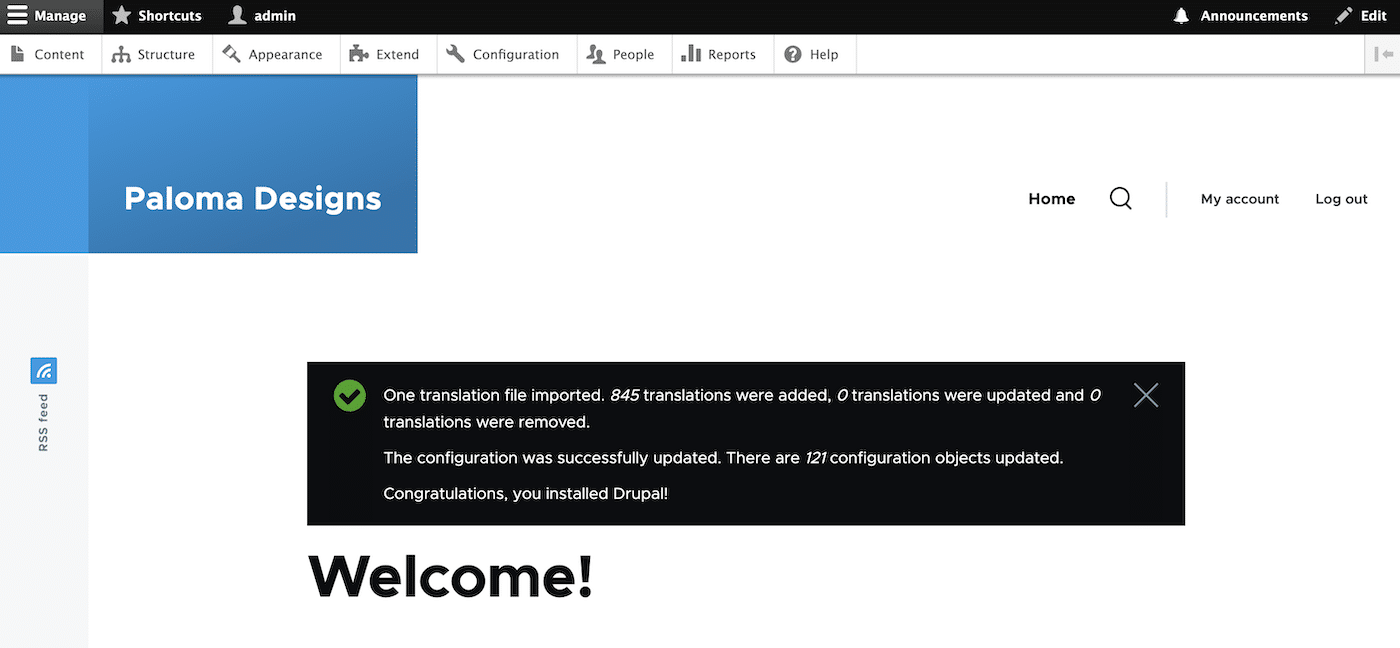
Feel free to click through some of the menu options to get an idea for how everything is organized in the backend of Drupal before continuing onto the next steps.
Step 2: Configuring Your Drupal Website
Now your Drupal site is up and running, you should take the time to run through some basic settings to ensure everything works the way you want it to.
Let’s start with configuring your email settings. This is important because Drupal sends many automatic emails such as account information, password reminders, and form notifications.
By default, Drupal uses the PHP mail() function to send emails directly from your web server. However, I recommend using an external SMTP service to handle your site emails. This is a lot more reliable than the PHP mail function and will reduce the load on your server if your site is generating a lot of emails.
Choosing an SMTP Service
To use SMTP email in Drupal, you can ask your existing mail provider for their SMTP details.
Alternatively, you can opt for a dedicated SMTP mail service like SendLayer. SendLayer is built on a platform designed for maximum speed and deliverability so your Drupal site emails will always hit the inbox in record time.
The platform also includes tools for open and click analytics and protects your domain reputation to ensure your message won’t be marked as spam.
If you’d like to give SendLayer a go, you can sign up for a free trial and send up to 200 emails free of charge. Paid plans start from just $5 a month.
To get started, follow our guides to creating your account and authorizing your domain. Once you’ve completed SendLayer setup, access your SMTP credentials in your SendLayer dashboard to continue setting up SMTP email in Drupal.
Setting Up Drupal Site Email
To send email via SMTP, you’ll need to install an additional module to Drupal. To do this, click on the Extend tab in the menu.
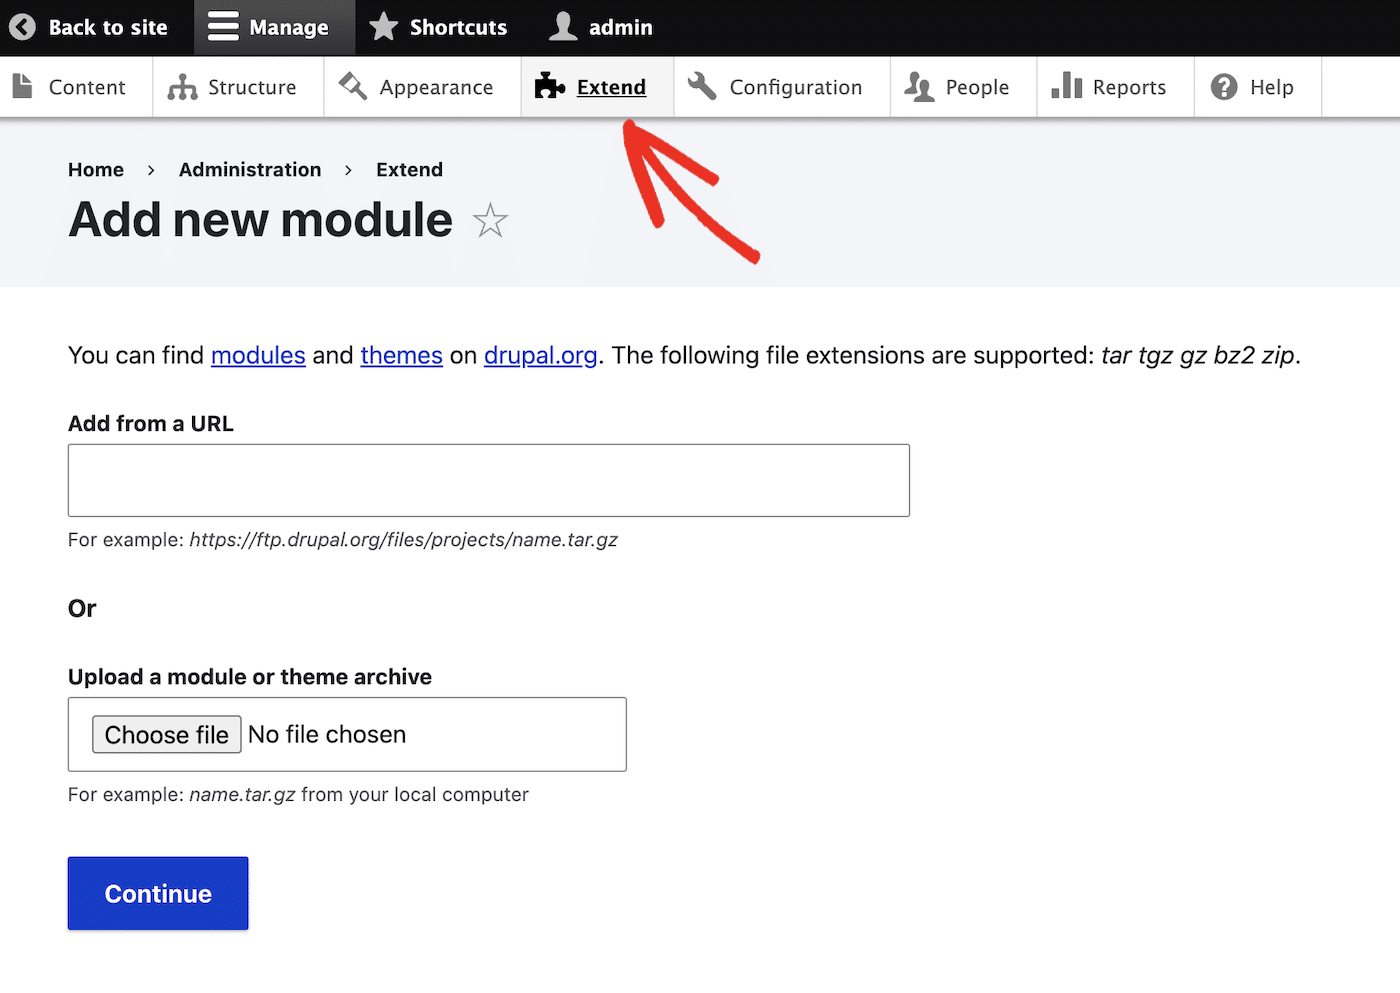
You can download modules at drupal.org. Search for “SMTP” and look for “SMTP Authentication Support” in the results.
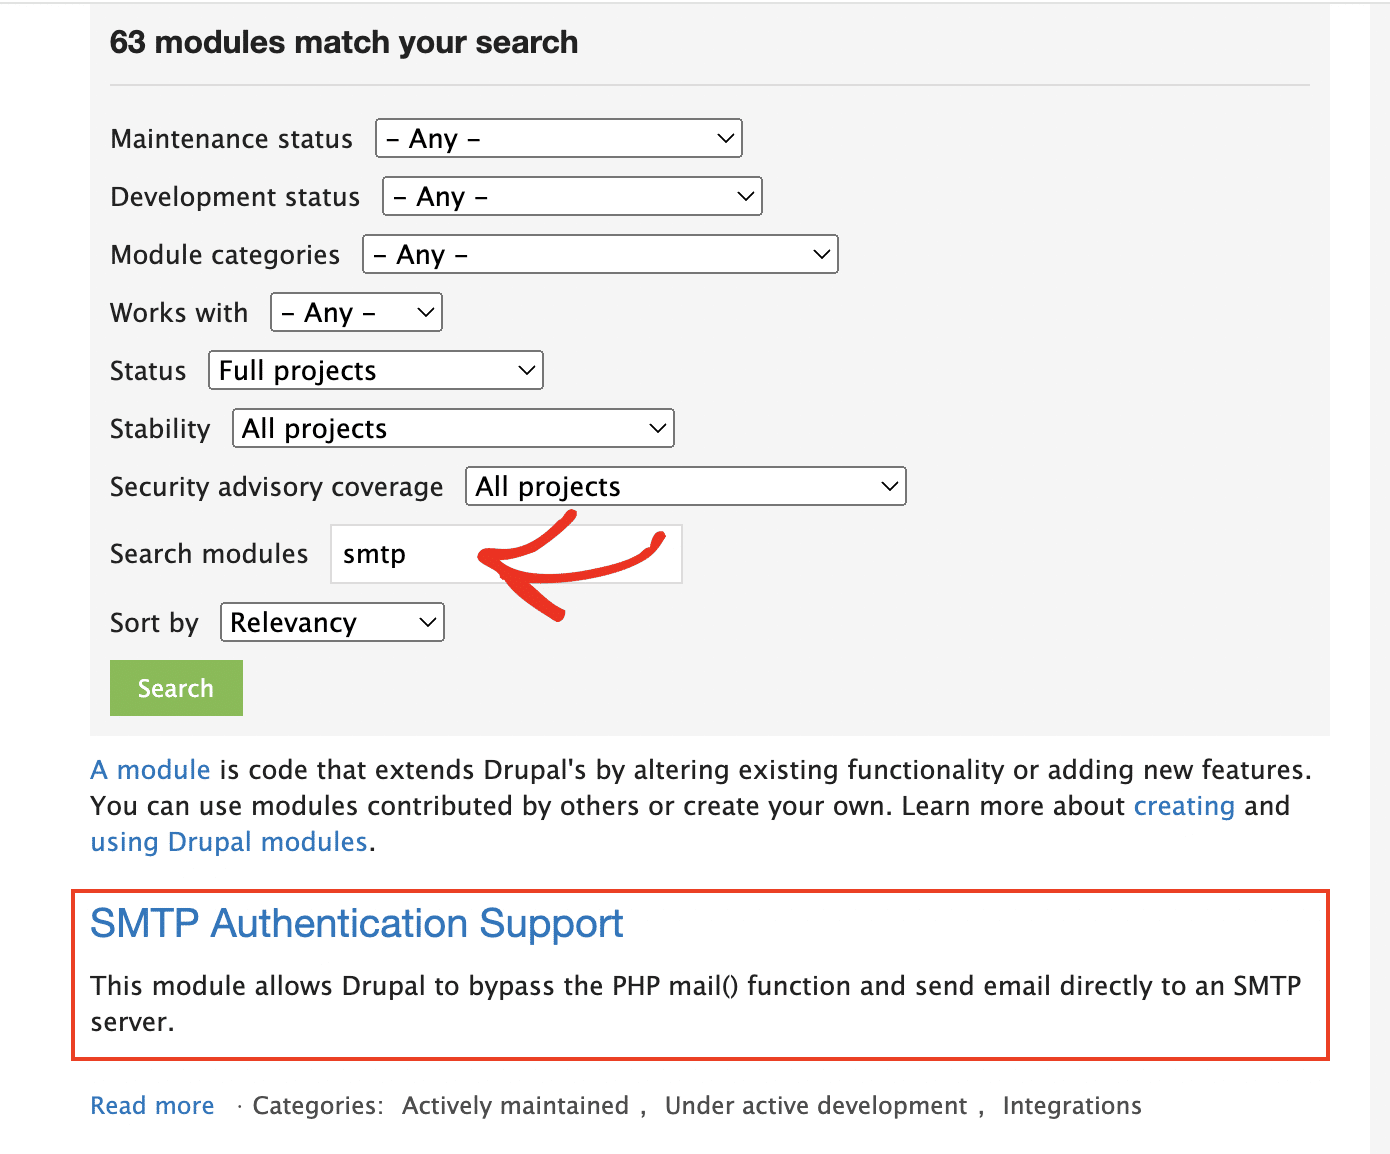
Scroll down and click on the name of the latest release to access the module files.
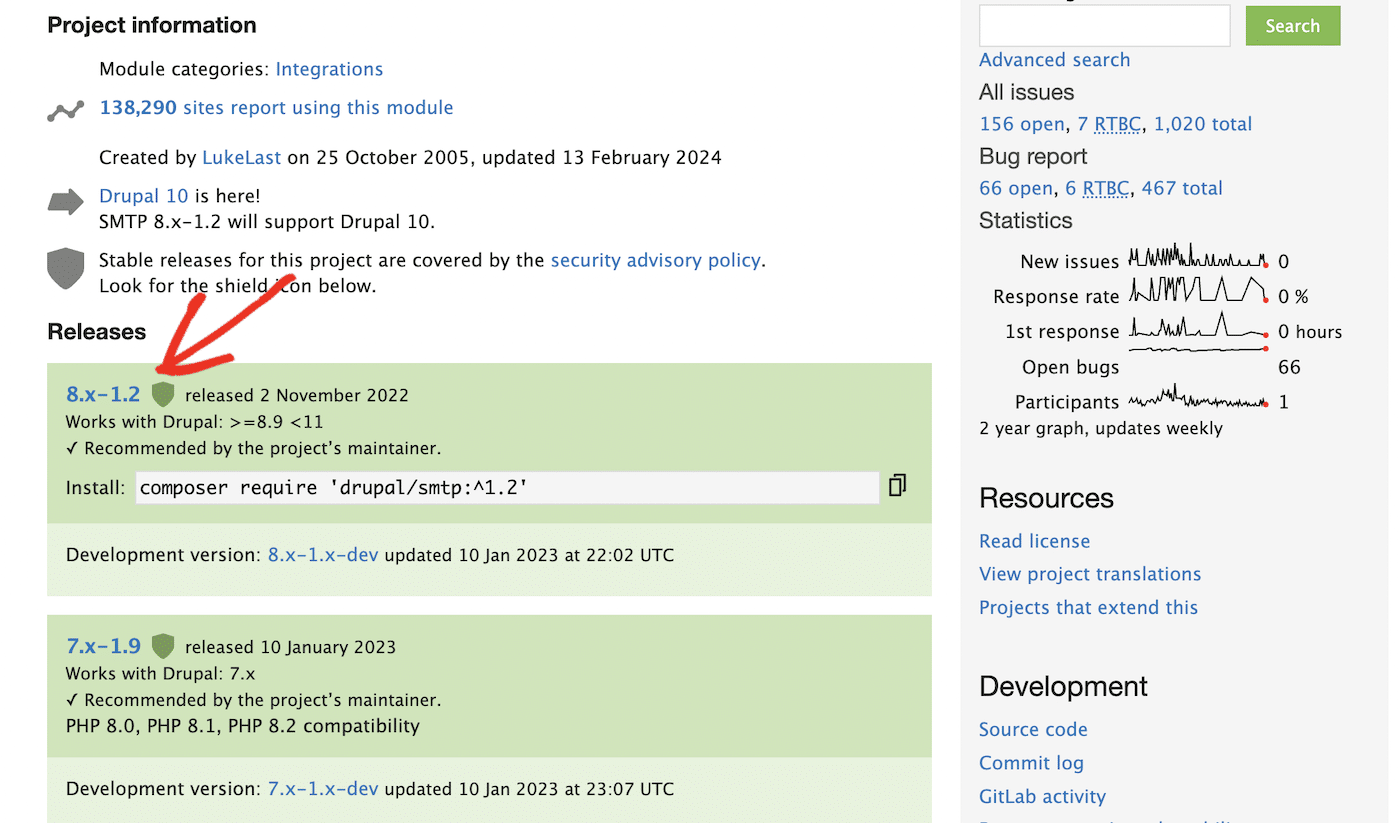
If you installed Drupal manually on your local server, you can install modules via Composer. Or you can download the module files or provide the URL to the installation files on drupal.org.
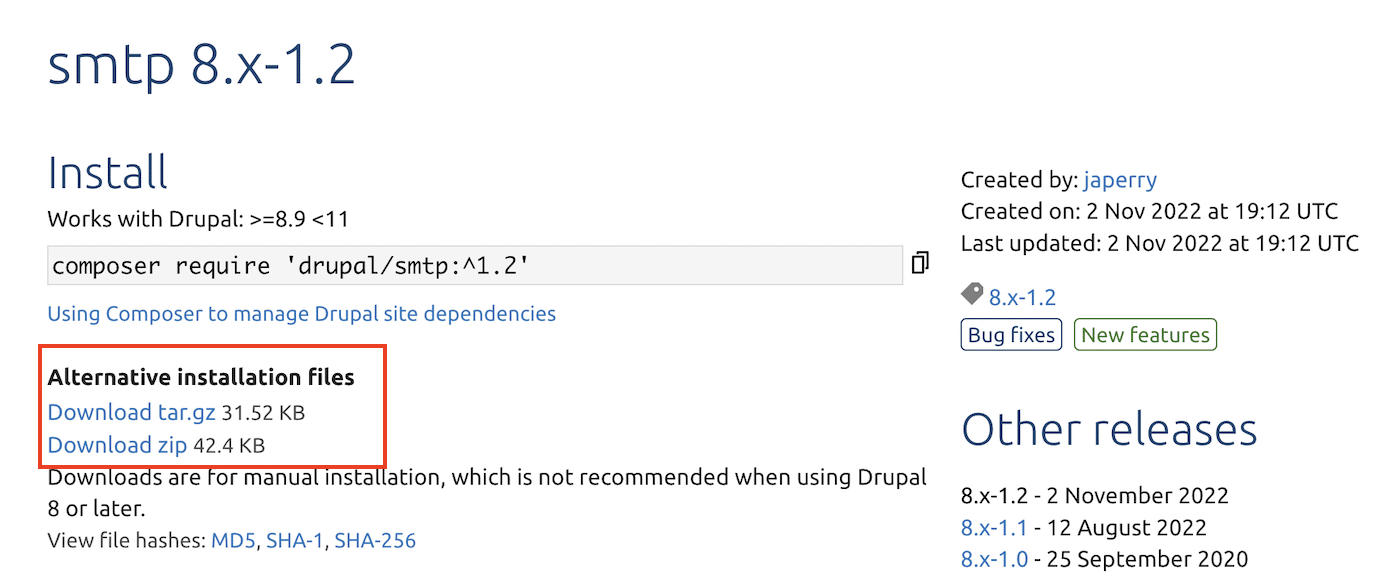
Right-click on the installation file, copy the URL, and paste it into the Add from URL field in your Drupal dashboard, then click the Continue button.
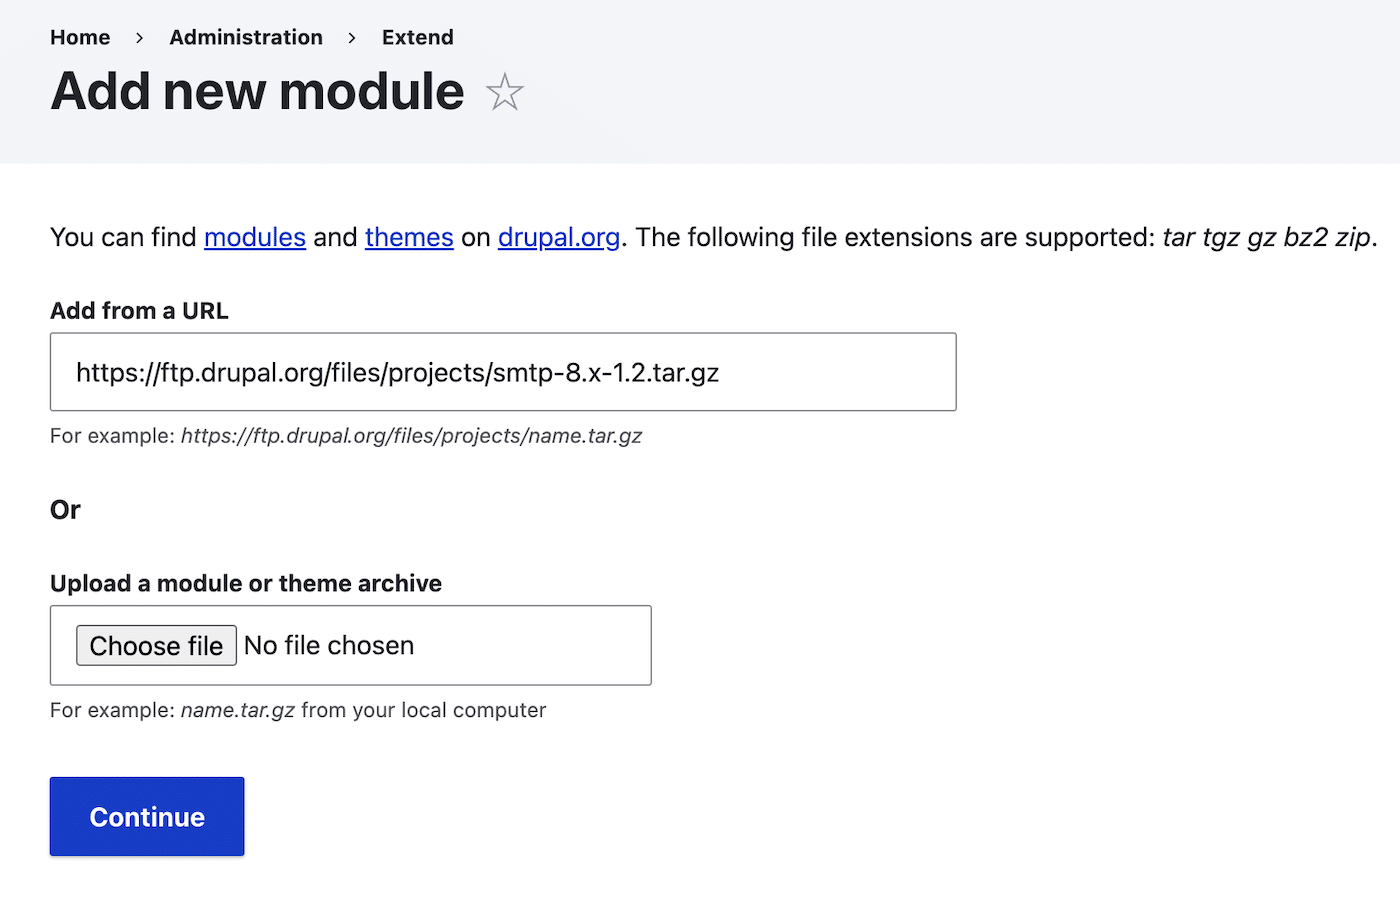
You should get a message that the module files have been added to your Drupal site successfully.
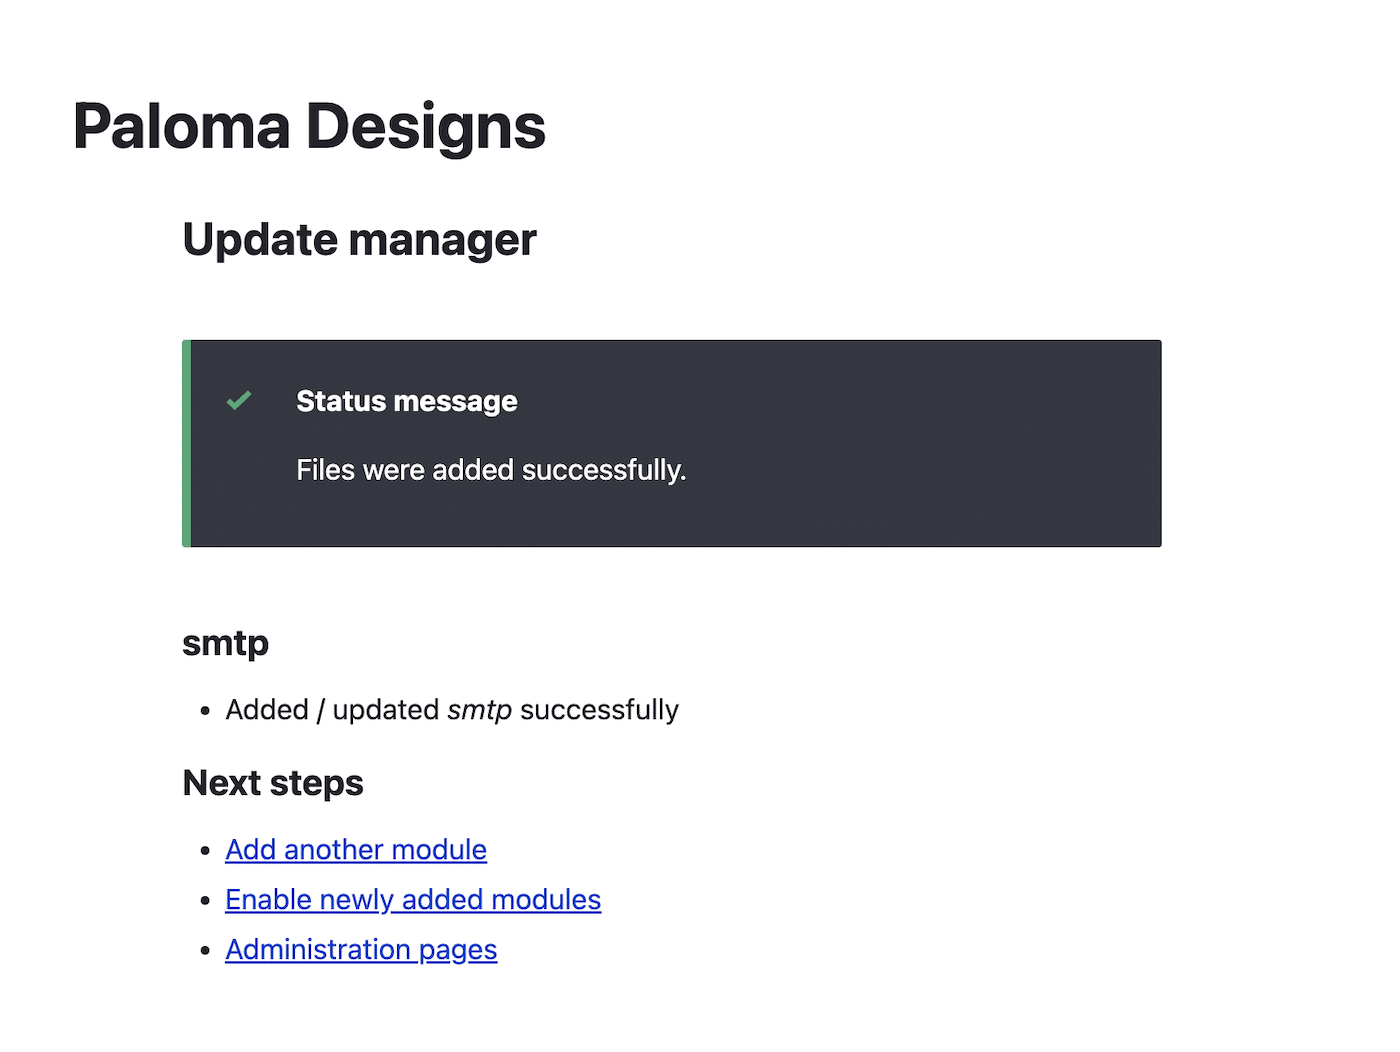
However, before you can use this SMTP module, you’ll also need to install the Mail System module. Click the link to Add another module and repeat the steps to find the link for the latest Mail System installation file and install the module to your site,
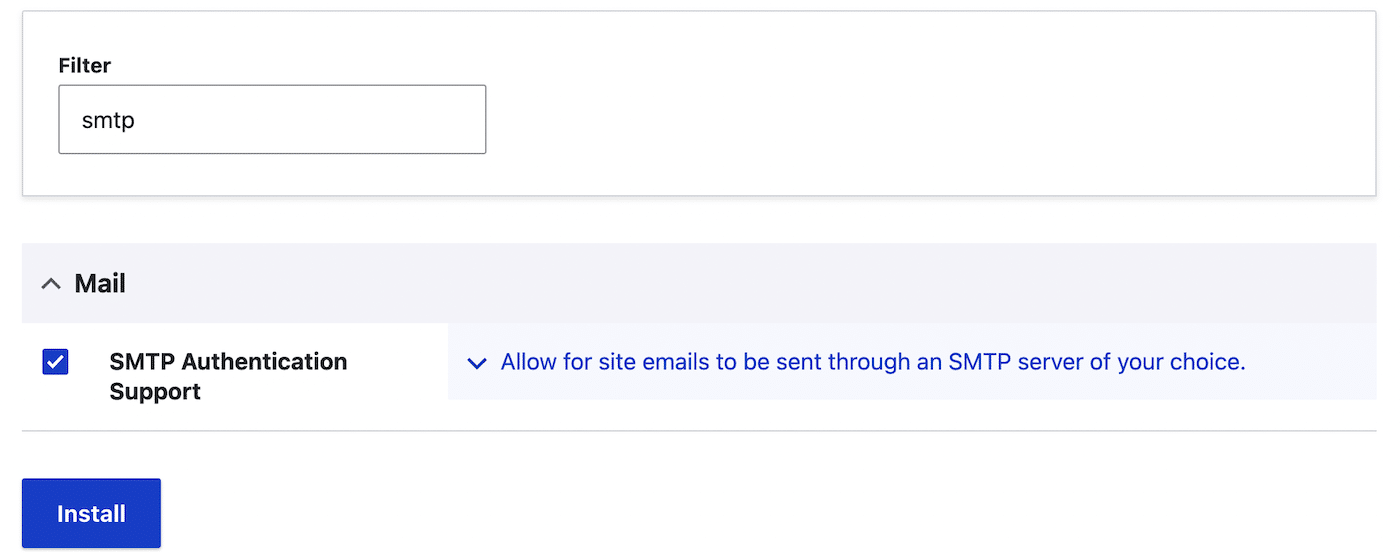
Now, click the link to Enable newly added modules. This will take you to a page which lists all the modules installed on your site.
Search for “SMTP” to find the SMTP Authentication Support module, click on the checkbox to activate it, and click the Install button.
You should see a message that the module has been installed successfully.
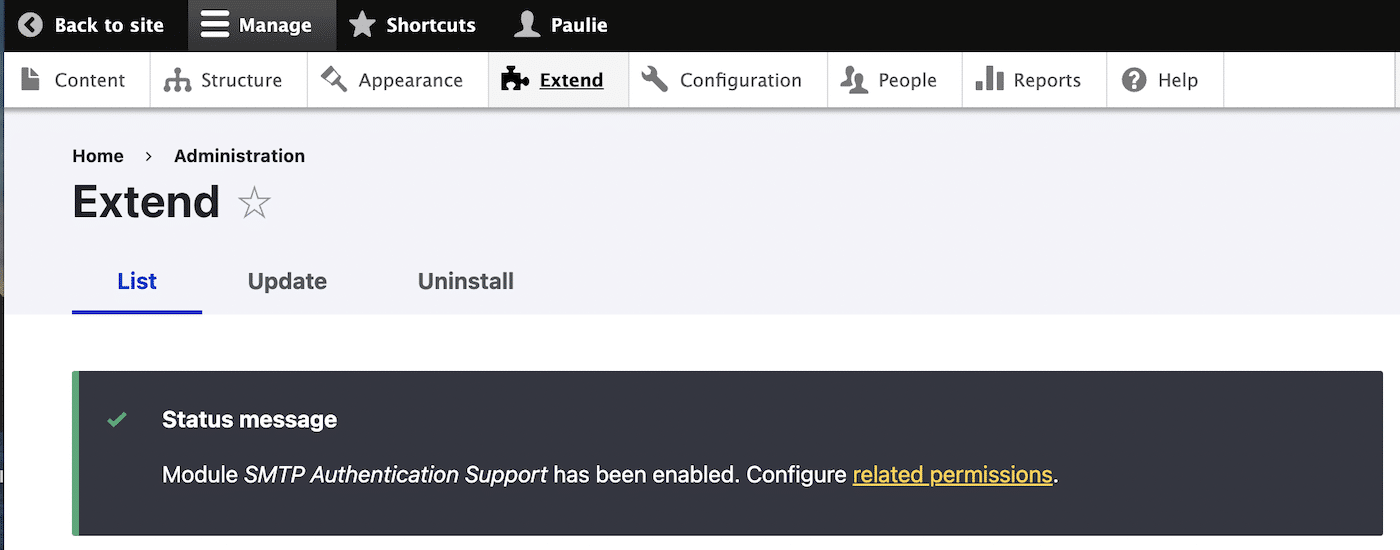
Repeat this step for the Mail System module.
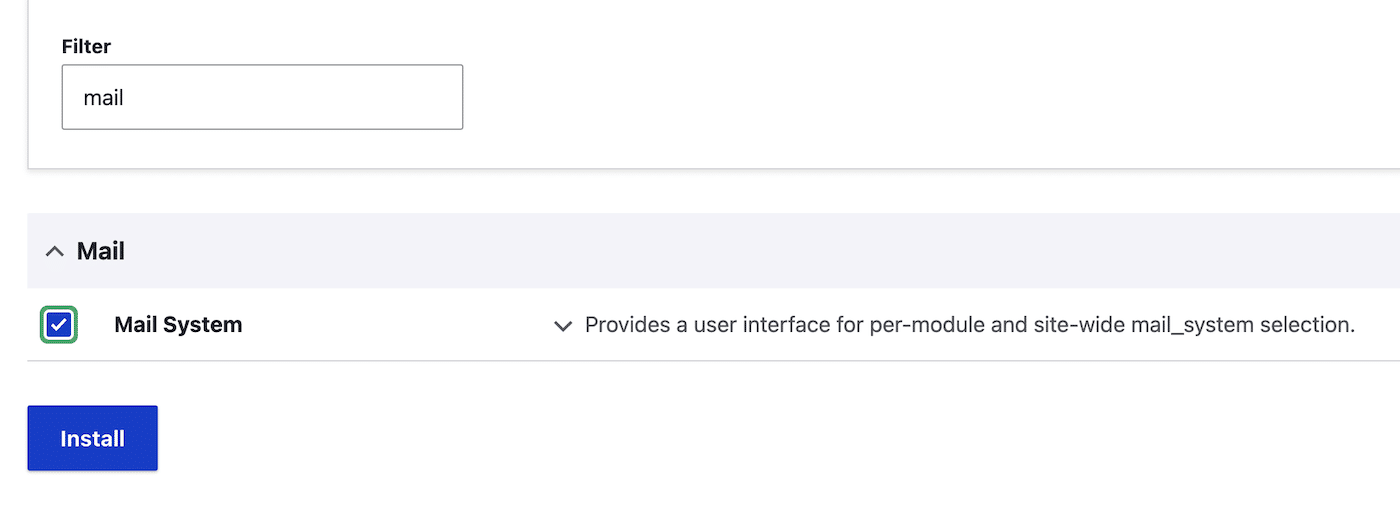
Now the modules you need for sending email are activated, all you need to do is add your SMTP credentials .
Setting Up SMTP Email in Drupal
After installing the Mail System and SMTP Authentication Support modules in Drupal, you’ll now have two new links under the Configuration tab.
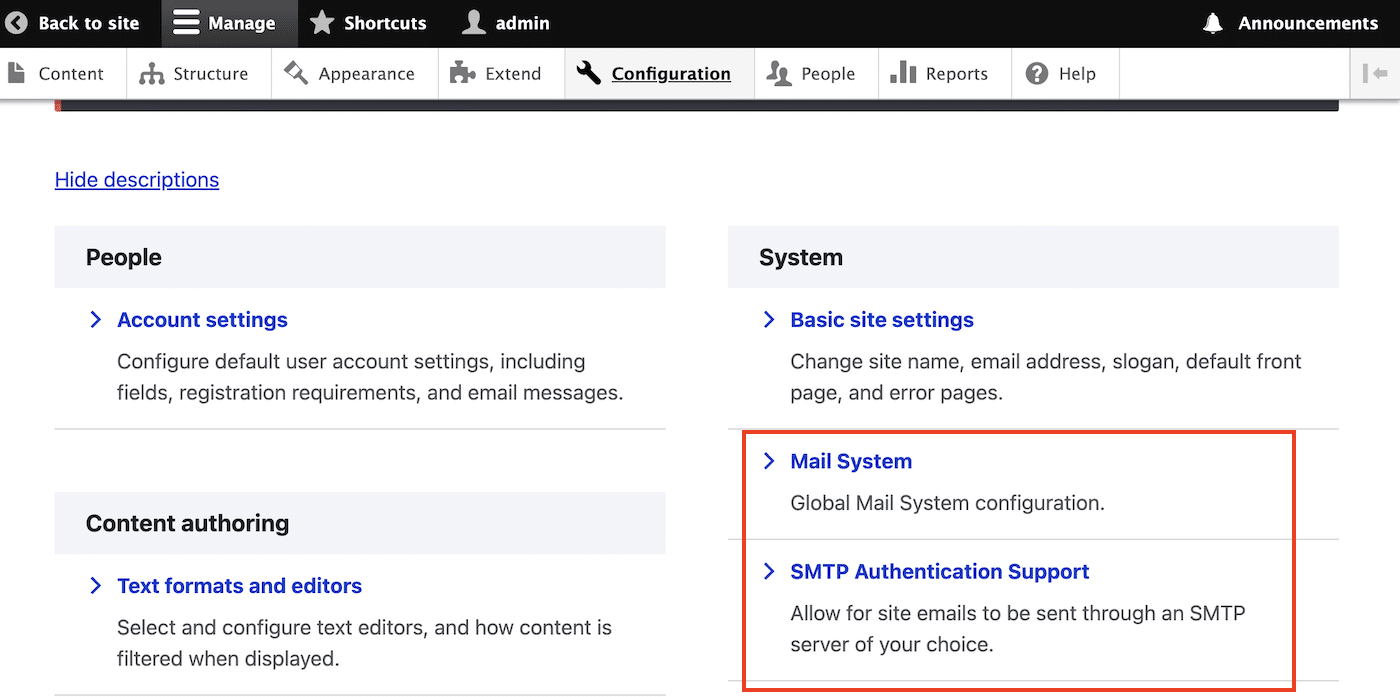
First, click on the Mail System link. Here you can choose whether to use PHP mail or SMTP mail to handle your email. Choose SMTP Mailer from the Formatter and Sender dropdown fields.
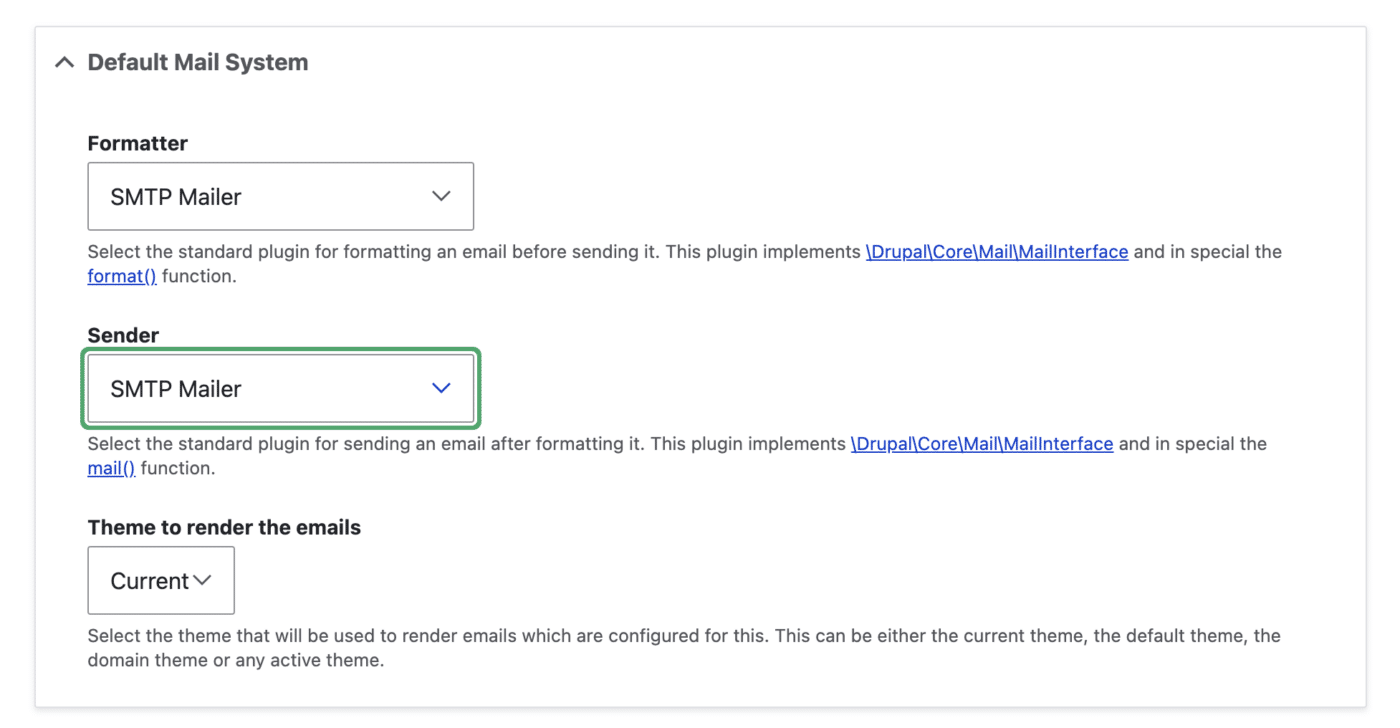
Leave the rest of the settings as they are, scroll down to the bottom of the page,and click the Save configuration button.
Now, return to the Configuration page and click the SMTP Authentication Support link.
On this page you can fill out your SMTP Server Settings as follows (or use the credentials provided by your SMTP provider if you’re not using SendLayer):
- SMTP Server: smtp.sendlayer.net
- SMTP backup server: Leave blank
- SMTP Port: 587
- Use encrypted protocol: Use TLS
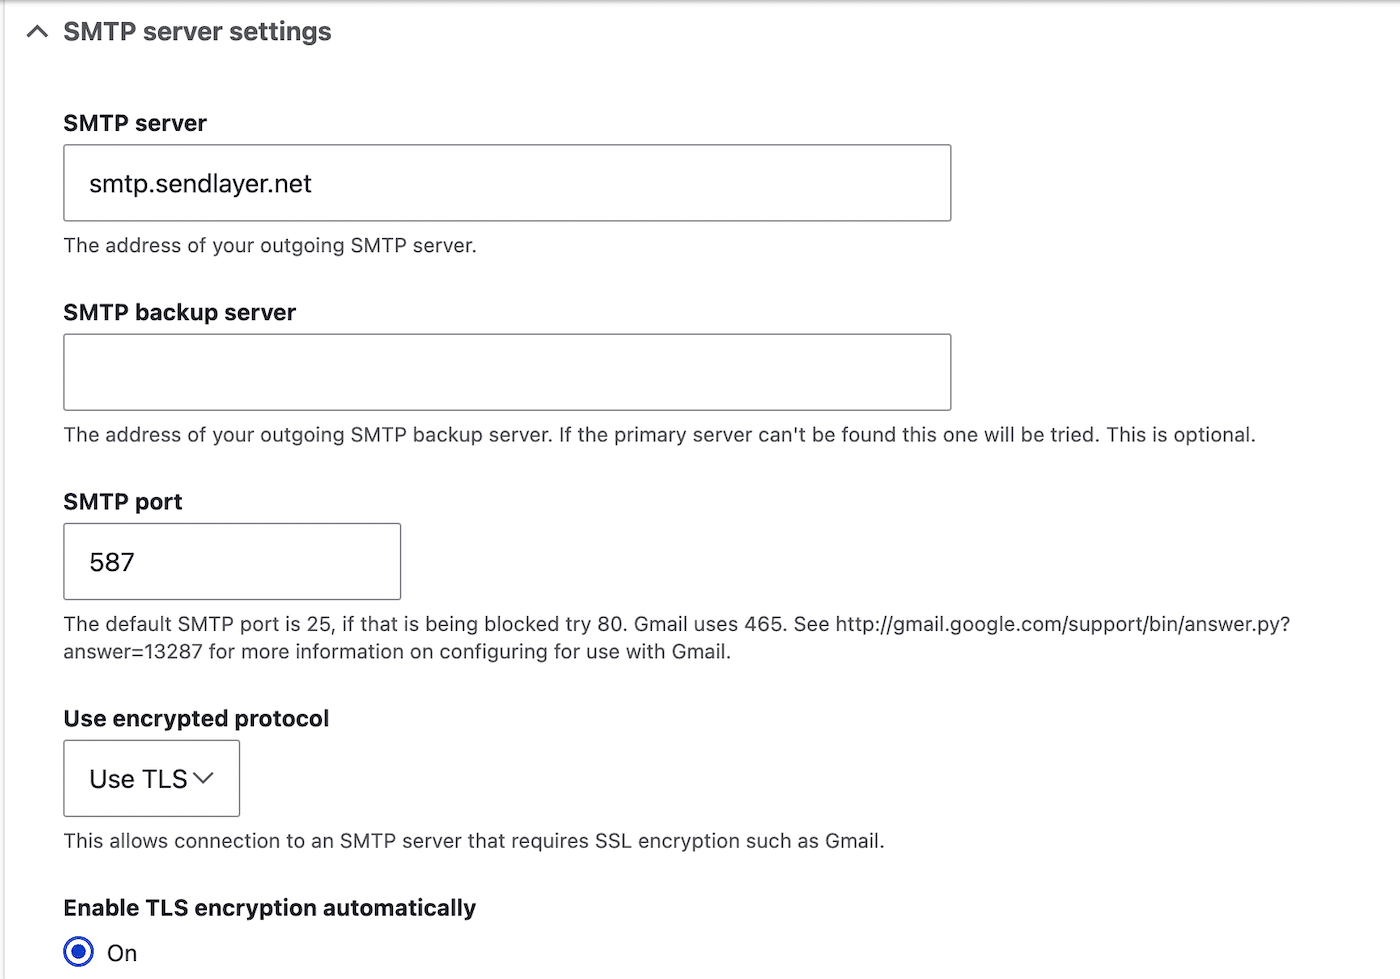
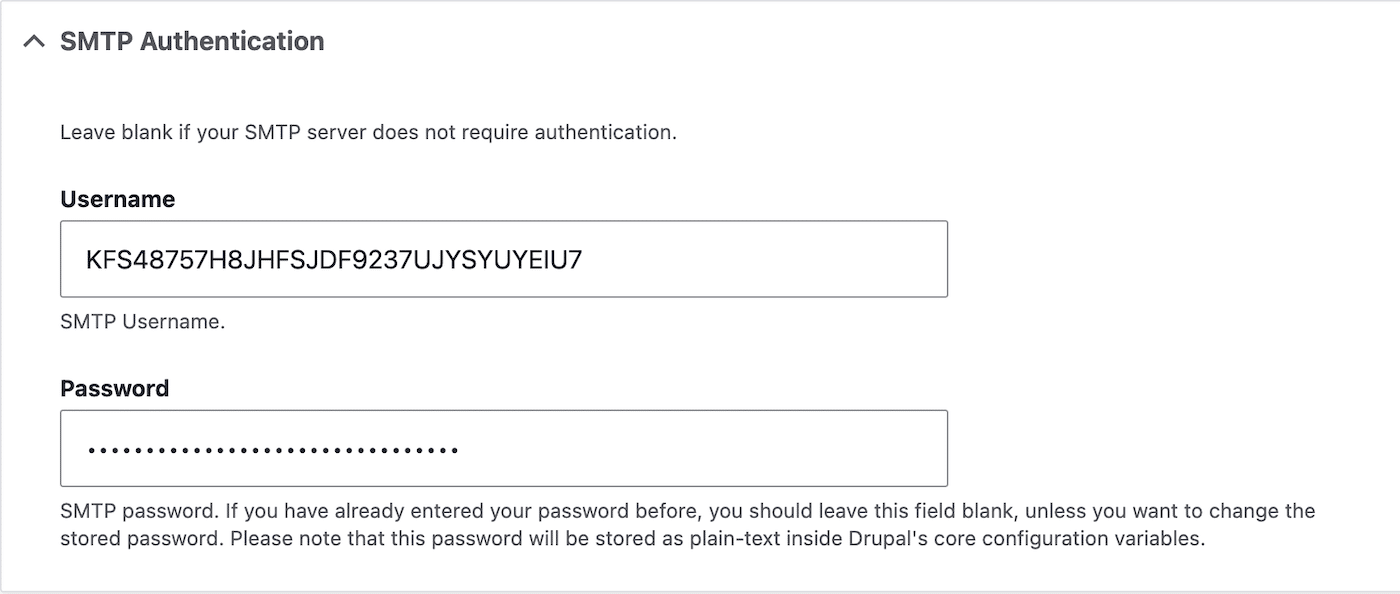
In the SMTP Authentication section, fill out the following details:
- Username: Copy and paste the username from your SendLayer dashboard
- Password: Copy and paste the password from your SendLayer dashboard
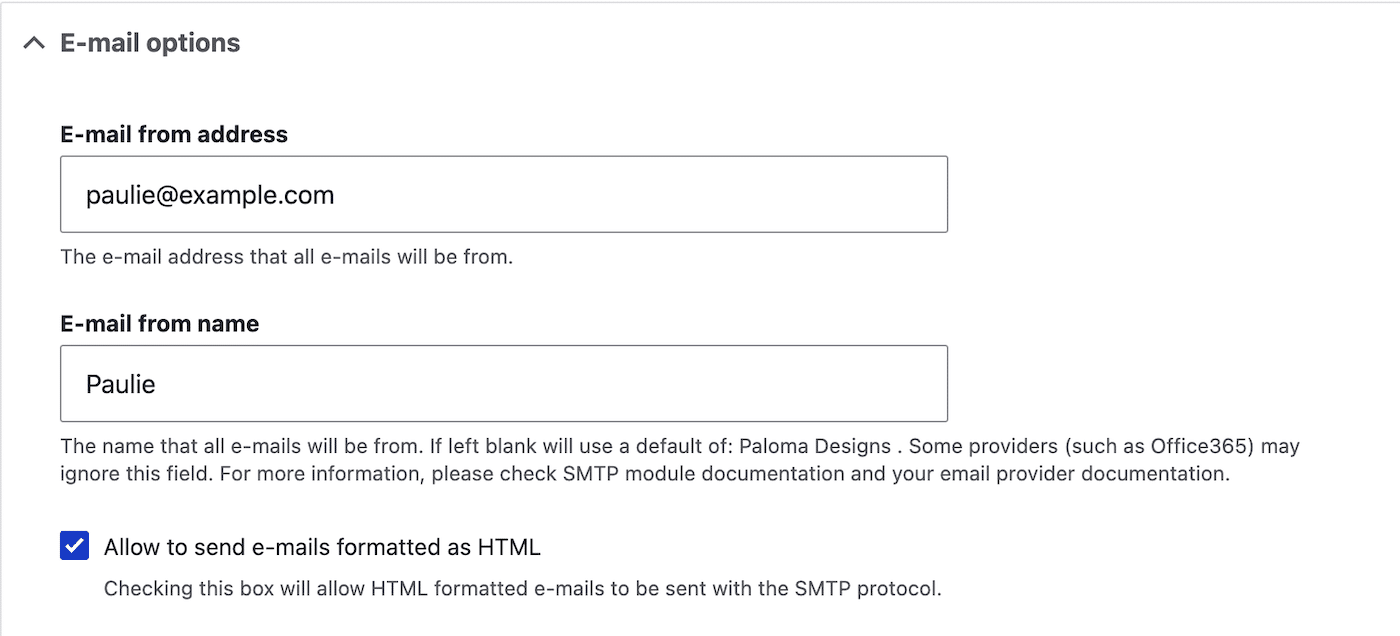
In the Email Options section, fill out the name and email address you want emails from your site to come from. You can also choose whether you want to allow HTML emails or not.
Finally, enter an email address to send a test email to. This ensures that all your mail settings are configured correctly. Click the Save configuration button when you’re done.
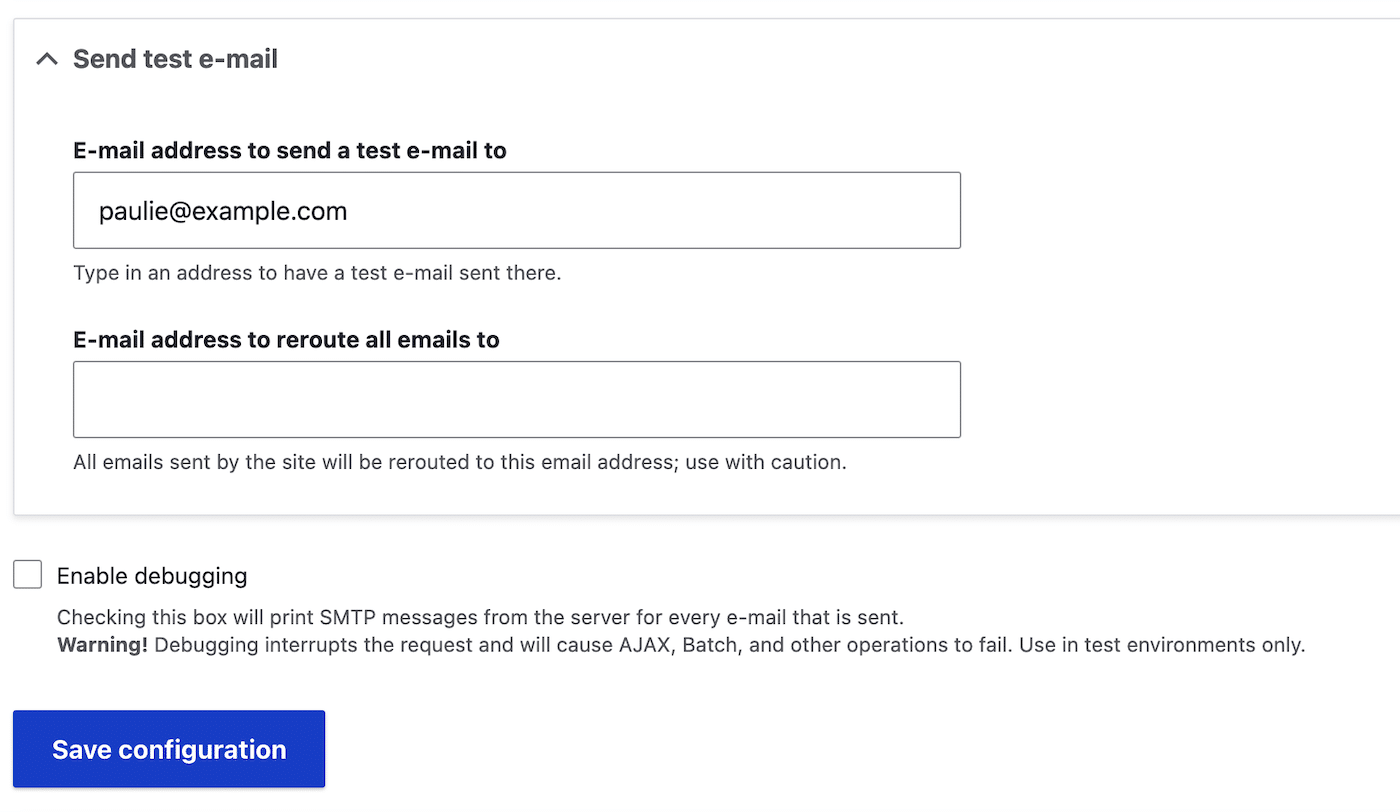
And that’s it! You’re now all set to start sending emails from your Drupal site.
Adding Users and Configuring Permissions
Drupal allows you to create different roles for users, such as “administrator,” “content editor,” and “authenticated user.”
To manage roles, go to the People section and click on the Roles tab. Here, you can create new roles and define specific permissions for each role.
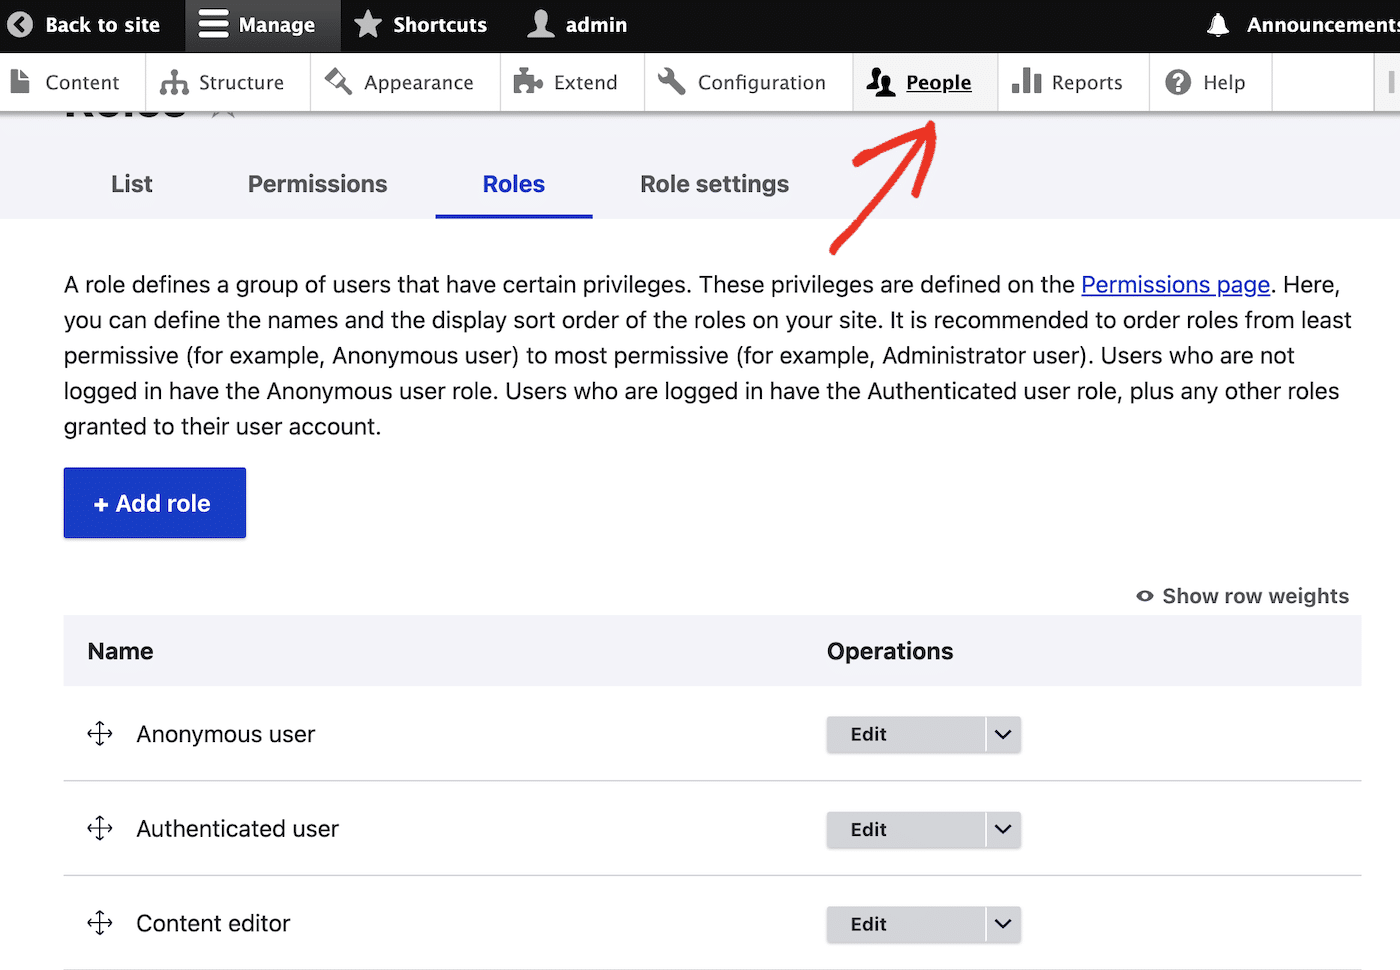
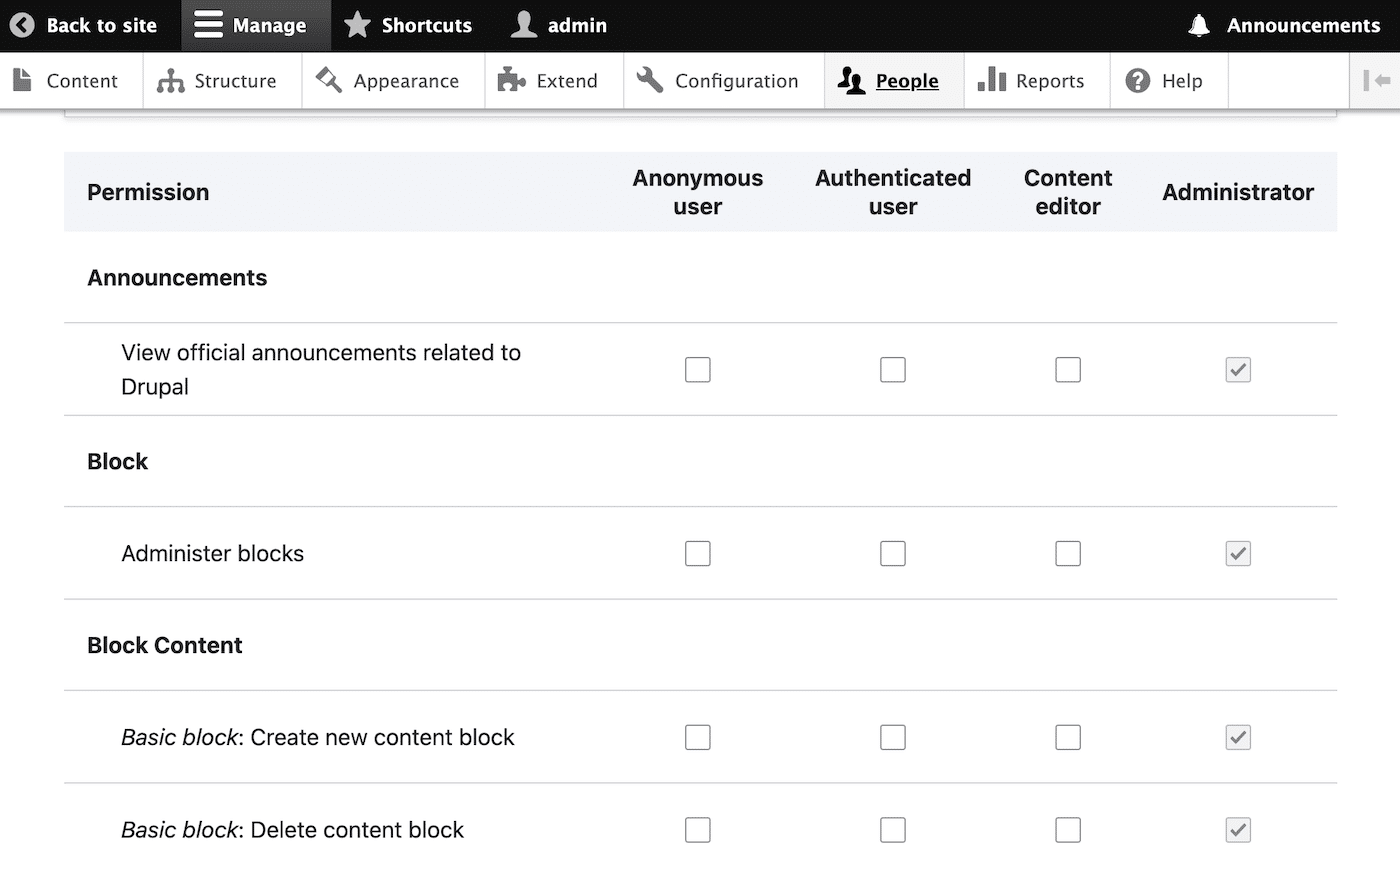
Permissions determine what each user role can and cannot do on your site. To configure permissions, navigate to the “Permissions” tab within the “People” section.
Carefully review and assign permissions to each role, ensuring that users have the appropriate level of access to site features.
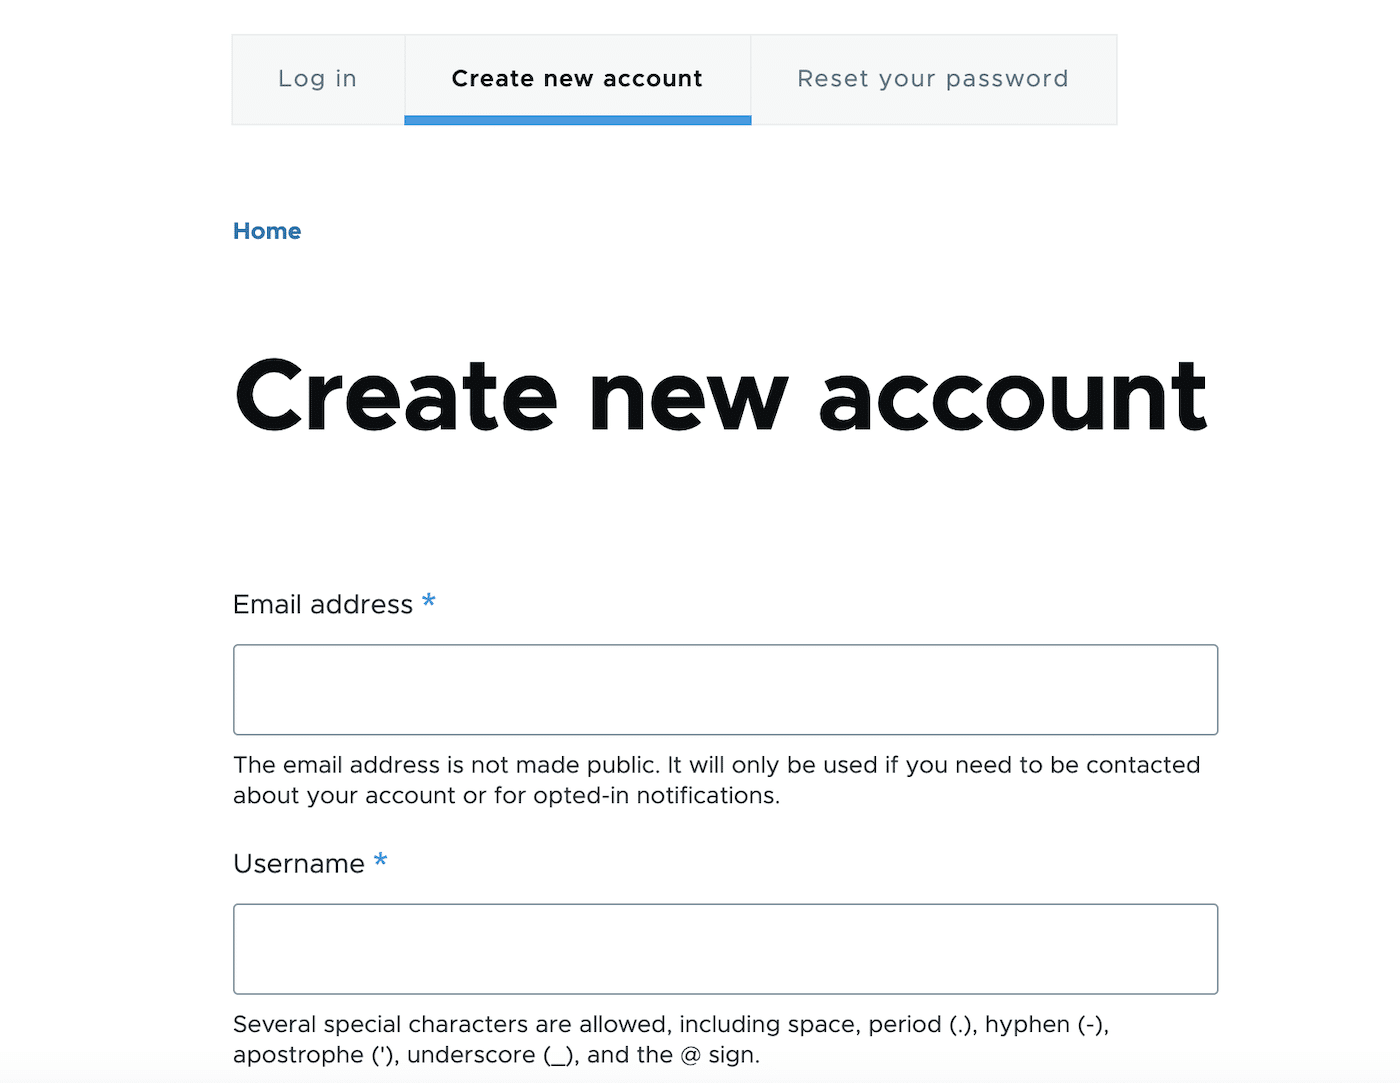
New users can sign up from the login link on your homepage. Here, users can add their email, desired username and an optional picture to create a new account.
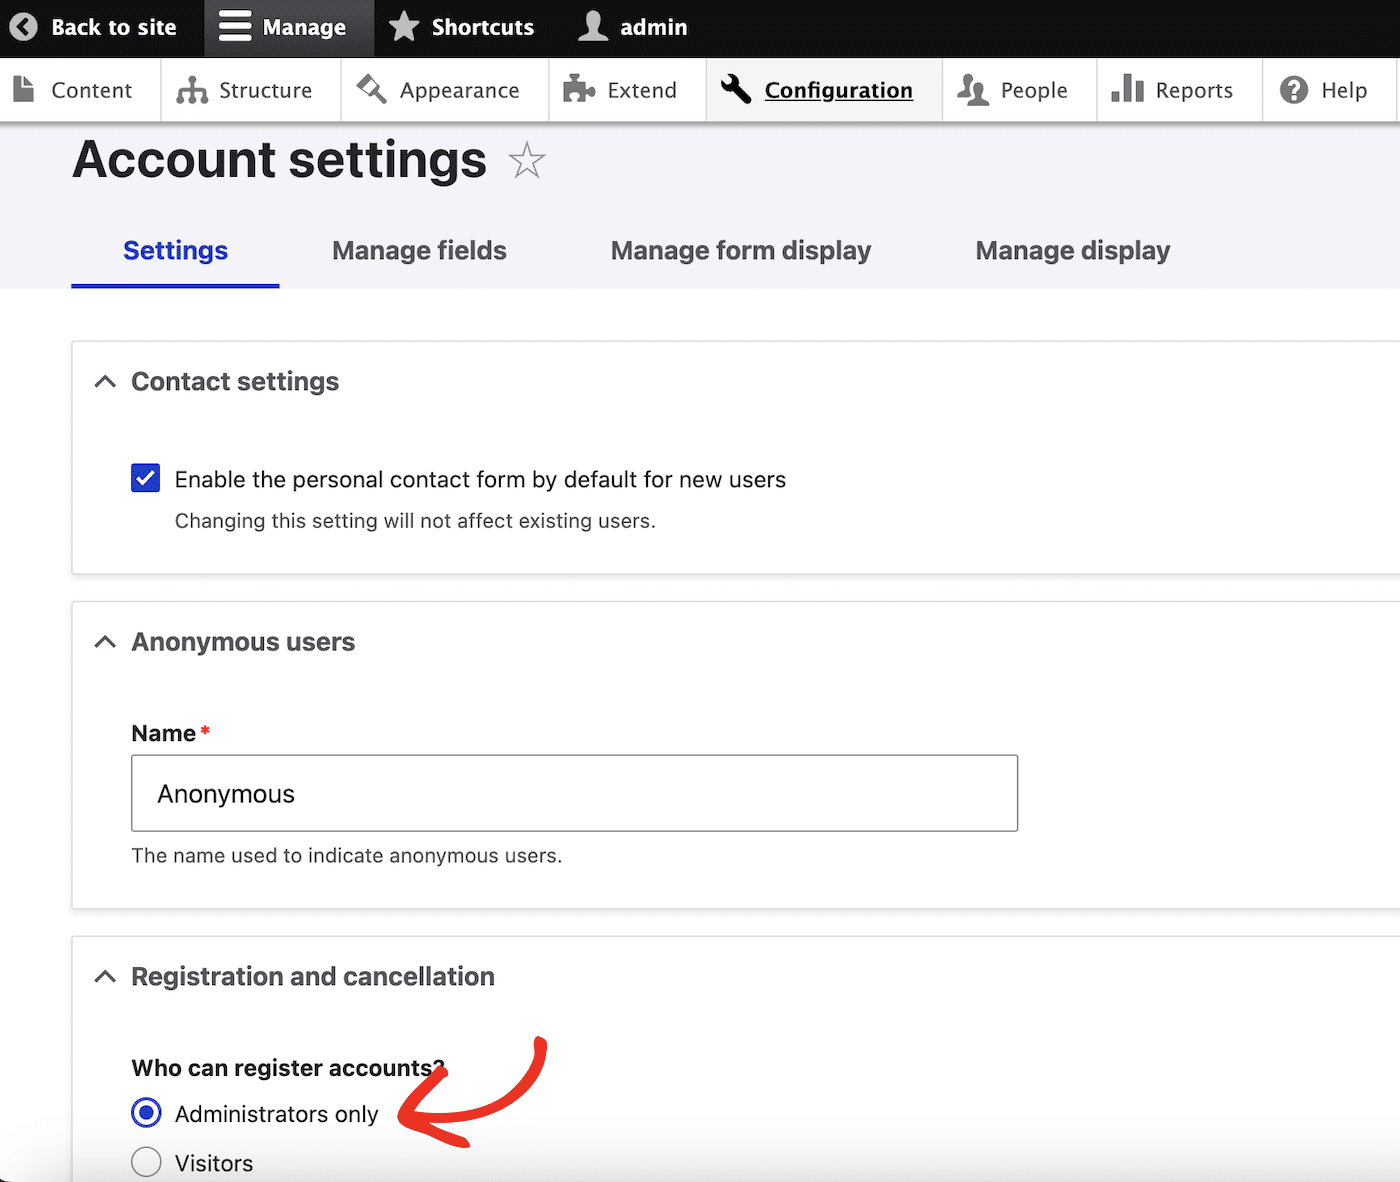
If you don’t want to allow users to create their own accounts, click the Account Settings link on the Configuration page and set the option to only allow administrators to create accounts.
You can then adjust their user role and finetune permissions from your admin dashboard.
Setting Up Drupal Content Types and Taxonomy
Drupal allows you to create different types of content, such as articles, blog posts, and product pages.
To manage content types, go to the Structure menu and select Content types.
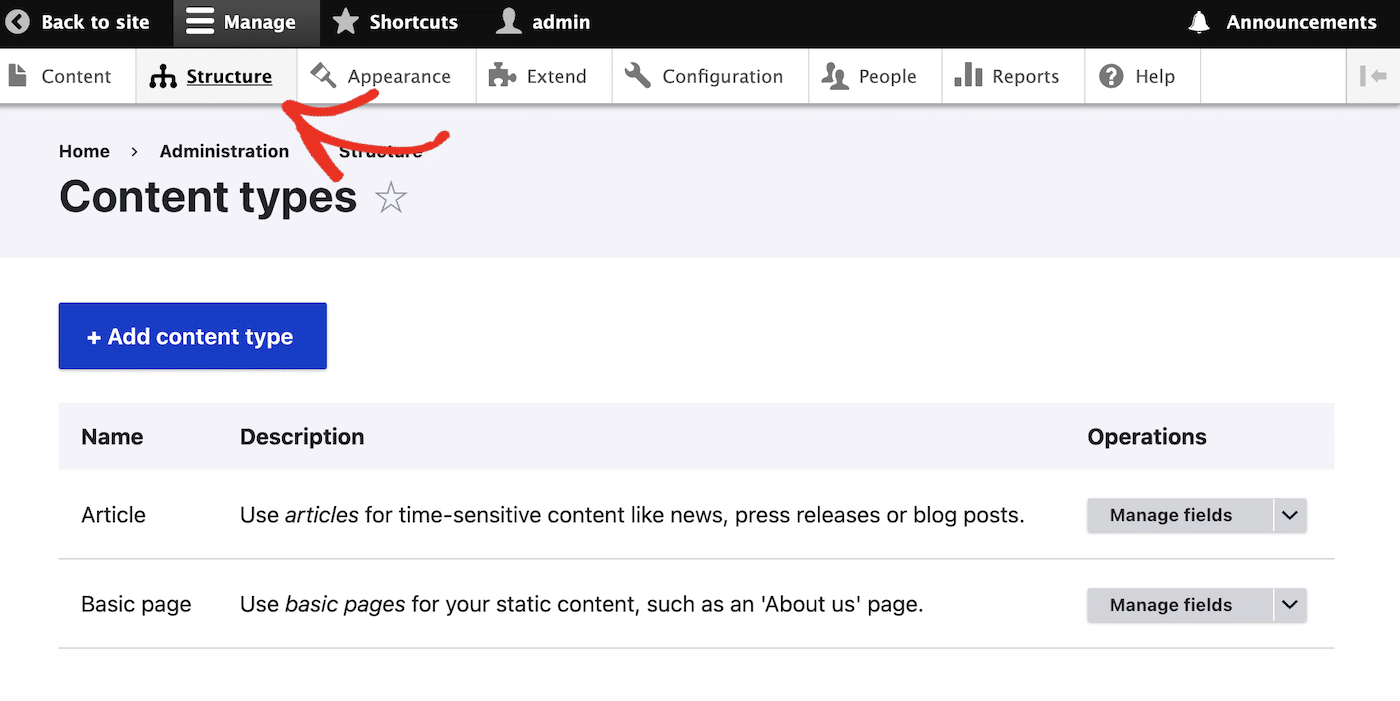
Here, you can customize existing content types or create new ones, defining specific fields and settings for each type.
Taxonomy in Drupal is used to organize content. Access the Taxonomy option under the Structure menu to create vocabularies (categories) and terms (tags).
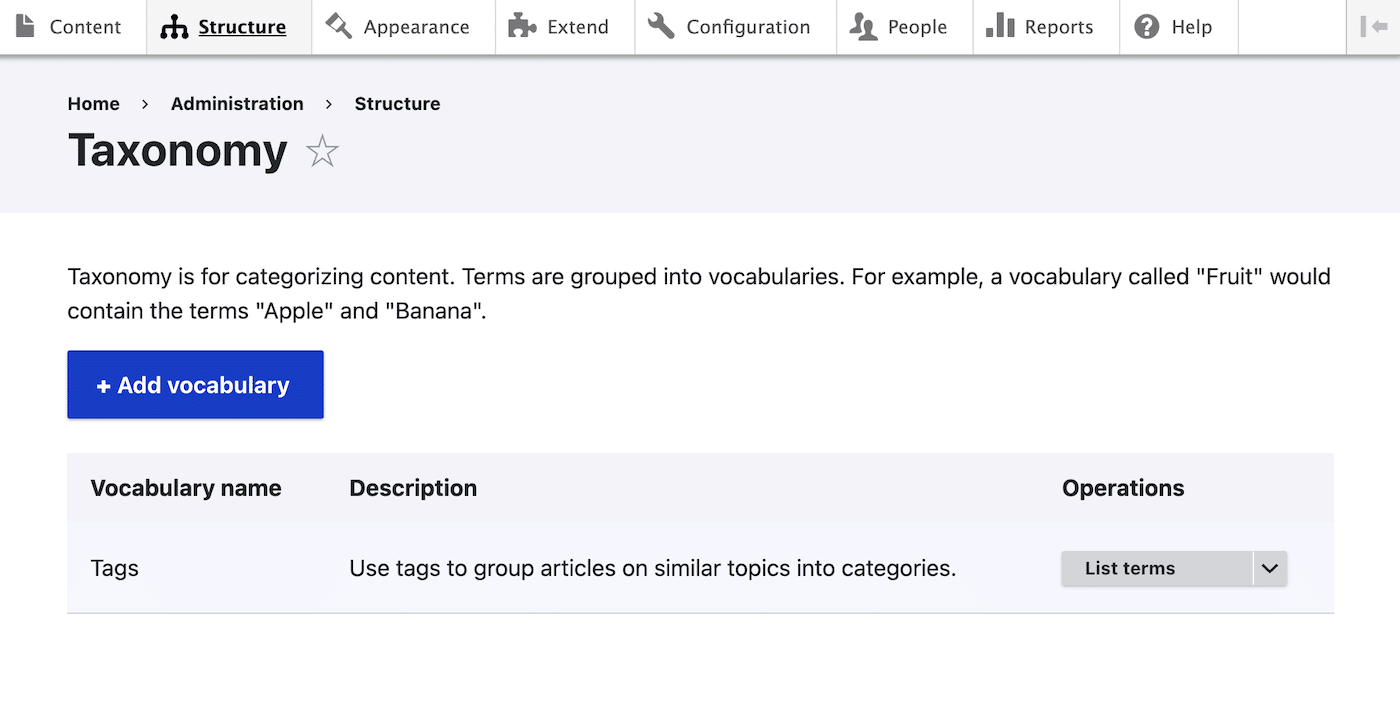
Assigning these to your content helps users find related information easily and improves content discoverability on your site.
Creating Menus and Blocks
Menus are crucial for site navigation. To manage menus, visit the Structure menu and select Menus.
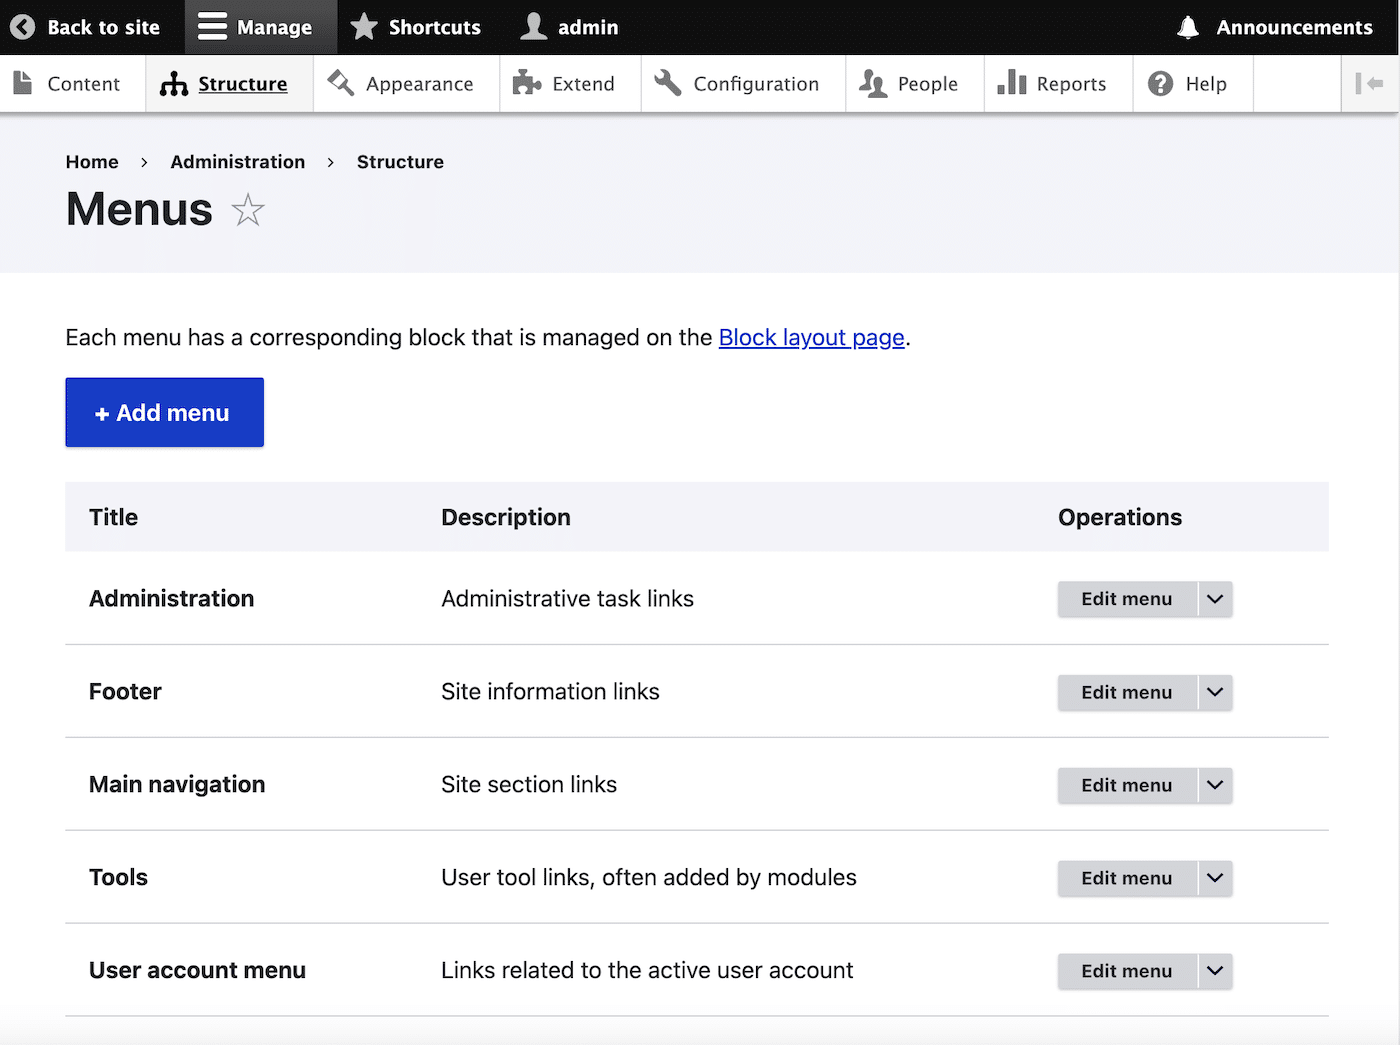
Here, you can edit existing menus like the main navigation or create new custom menus. Add links to important pages, categories, or external sites to enhance site navigation.
Blocks are used for placing content and widgets in various regions of your site, like sidebars or footers.
To manage blocks, go to the Structure menu and choose Block layout. Here, you can assign and configure blocks to appear on specific pages or sections, customizing your site’s layout.
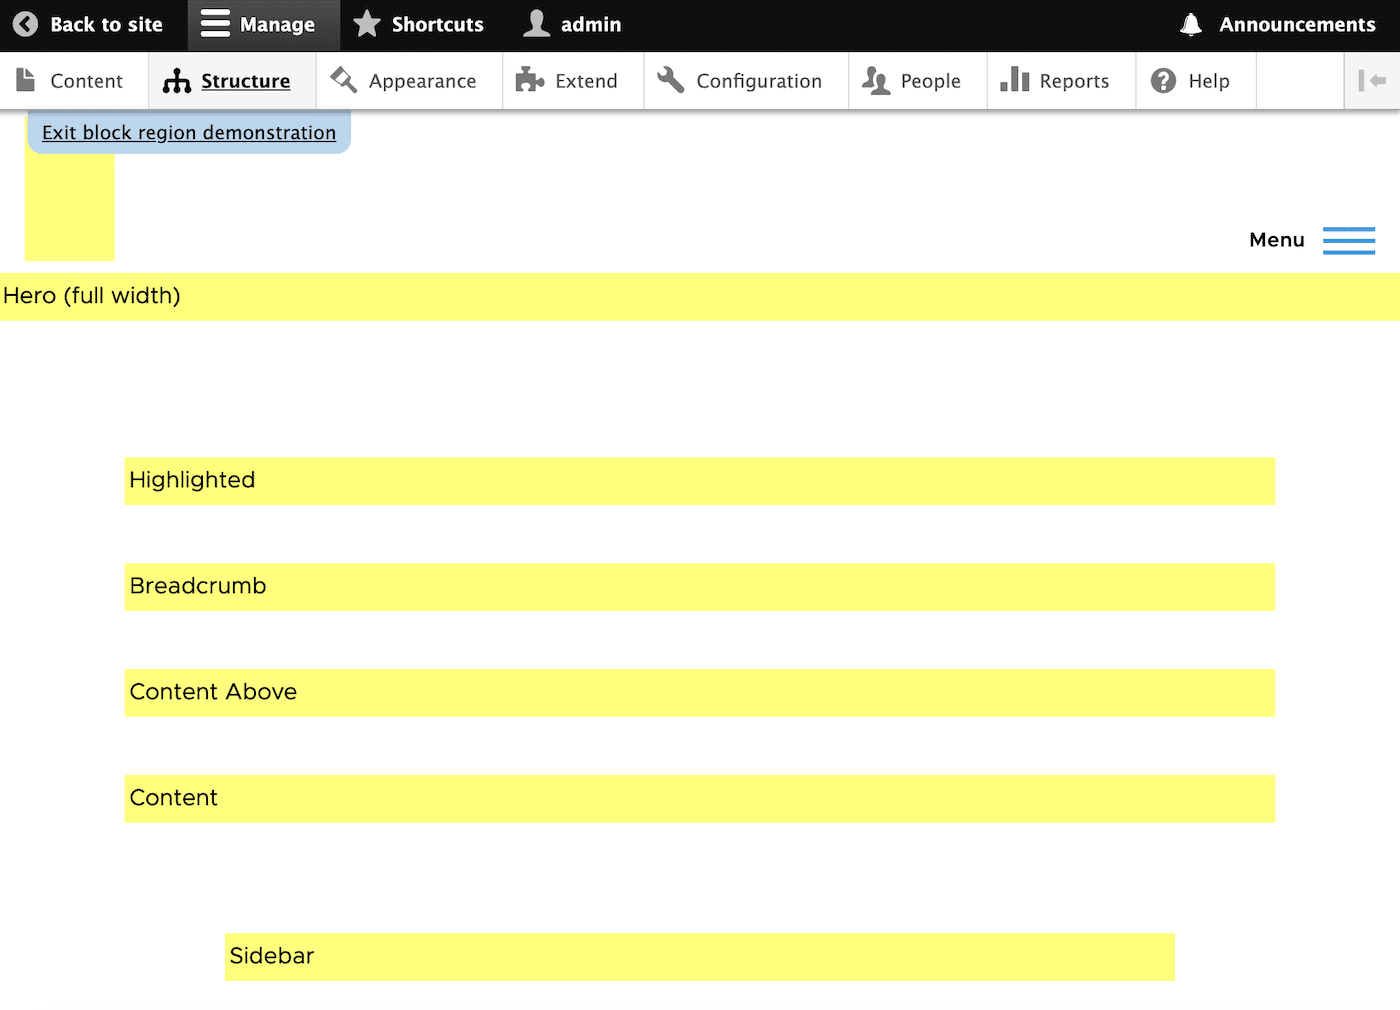
Once you’ve gone through all these steps, your site should be functional and structured the way you want but it still won’t look like much!
The next step is to choose a theme for your site so it looks as great as it works.
Step 3: Choosing a Theme and Customizing Site Design
Drupal offers thousands of themes, both free and premium, designed for different needs and design preferences.
The official Drupal themes directory on Drupal.org is a good place to start looking for themes.
Once you’ve chosen a theme, it’s time to install it. You can install themes directly through the Drupal admin interface by navigating to Appearance and clicking the Install new theme button.
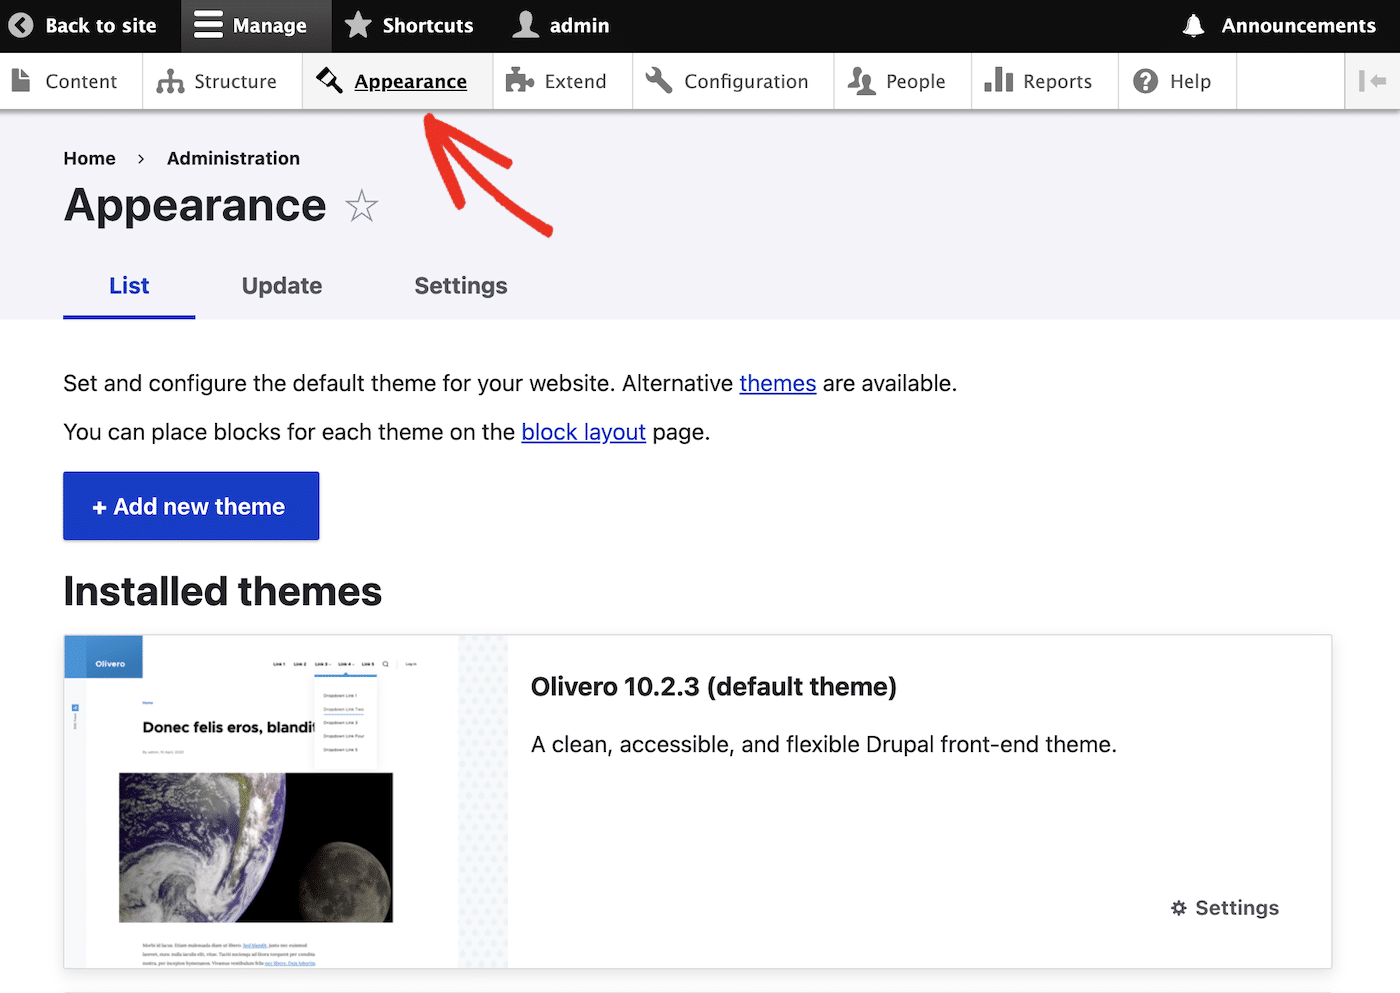
You can upload the theme if you’ve downloaded it as a .zip file or provide the URL to the theme’s archive.
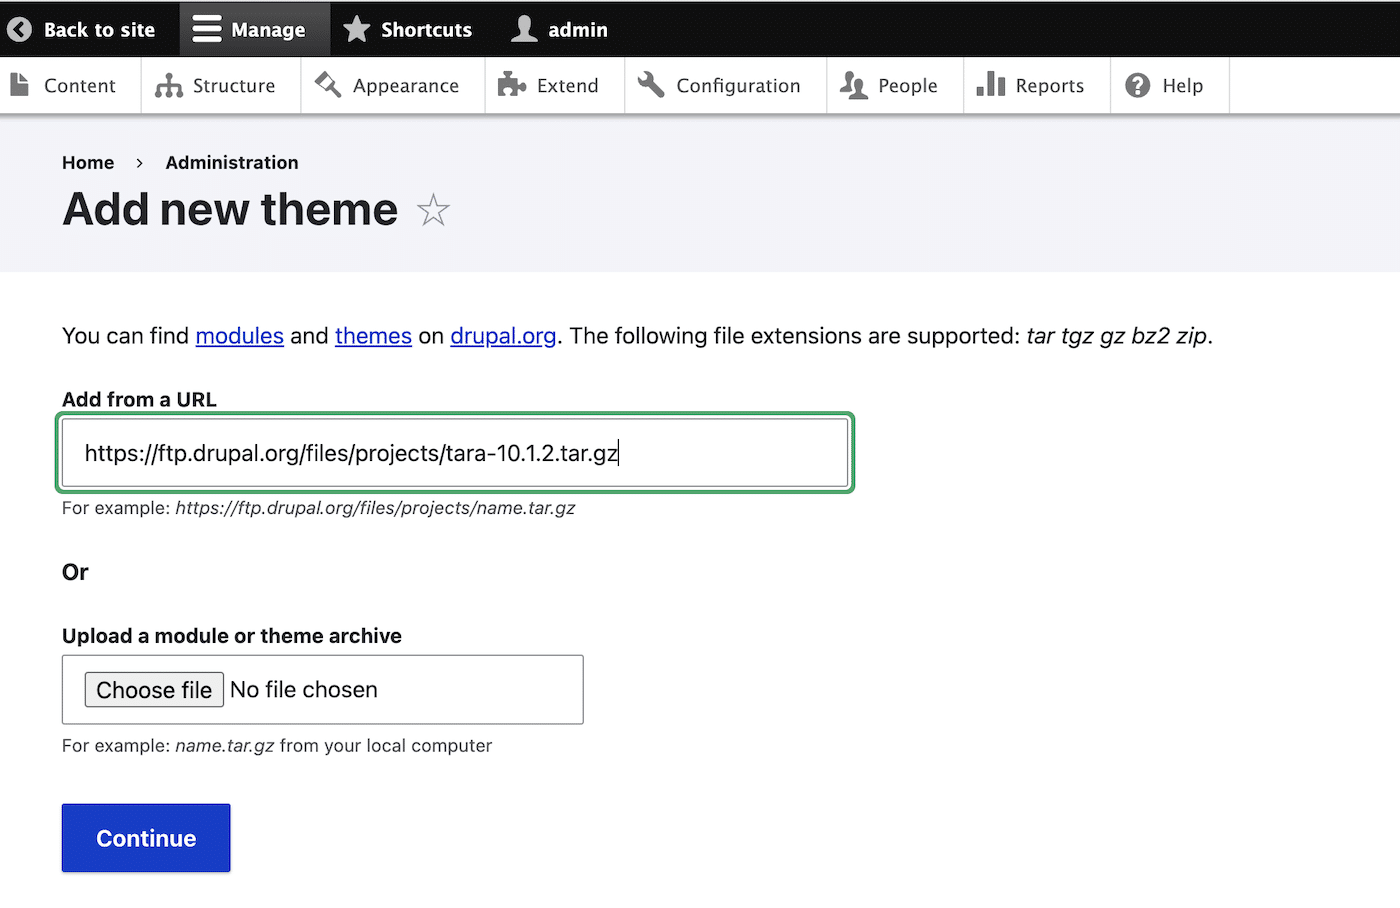
When you click the Continue button, the theme will be downloaded to your site. You can then install it on the Appearance page. Don’t forget to visit the frontend of your site to see how your new theme looks!
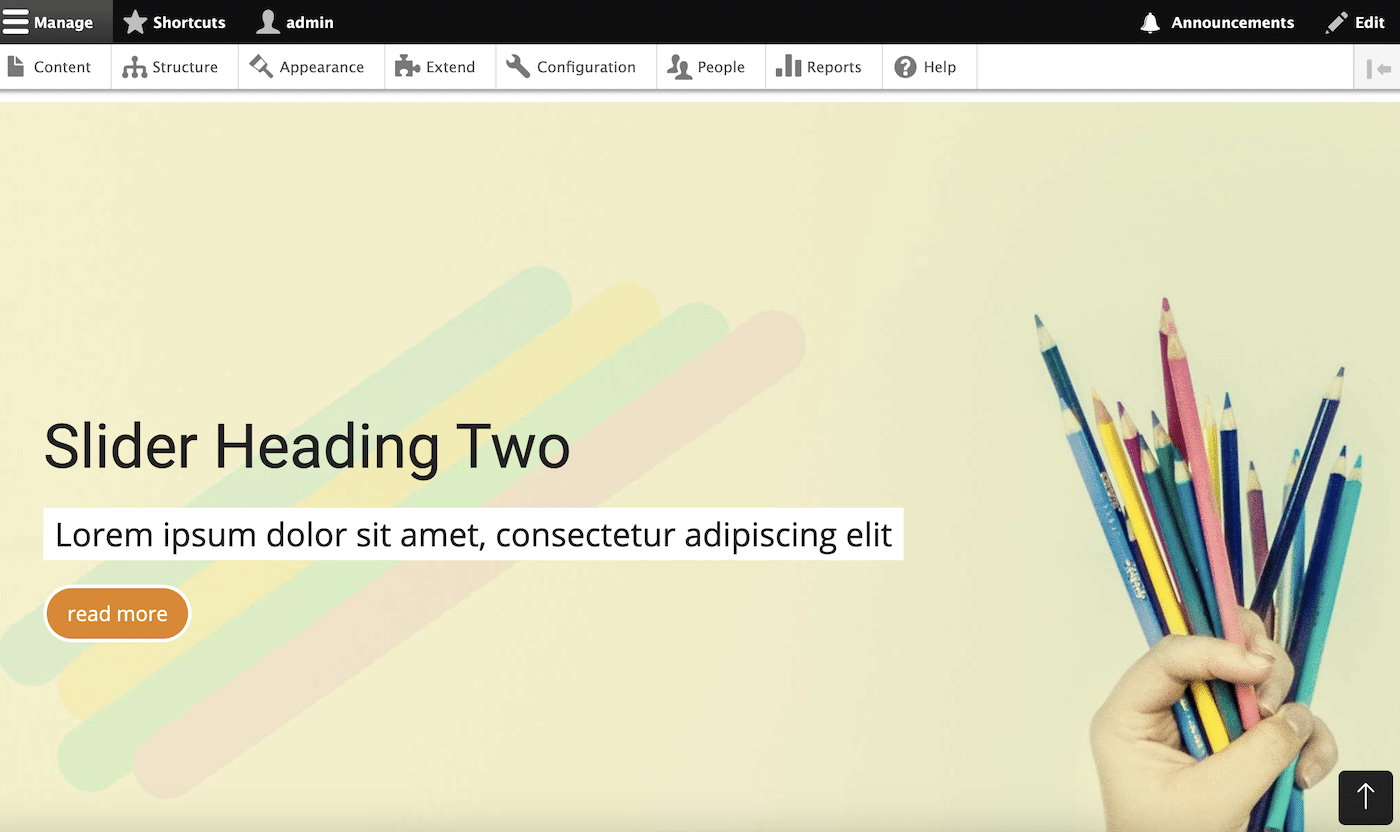
Customizing Your Theme
Many Drupal themes come with their own set of customizable options accessible via Appearance » Settings next to your active theme.
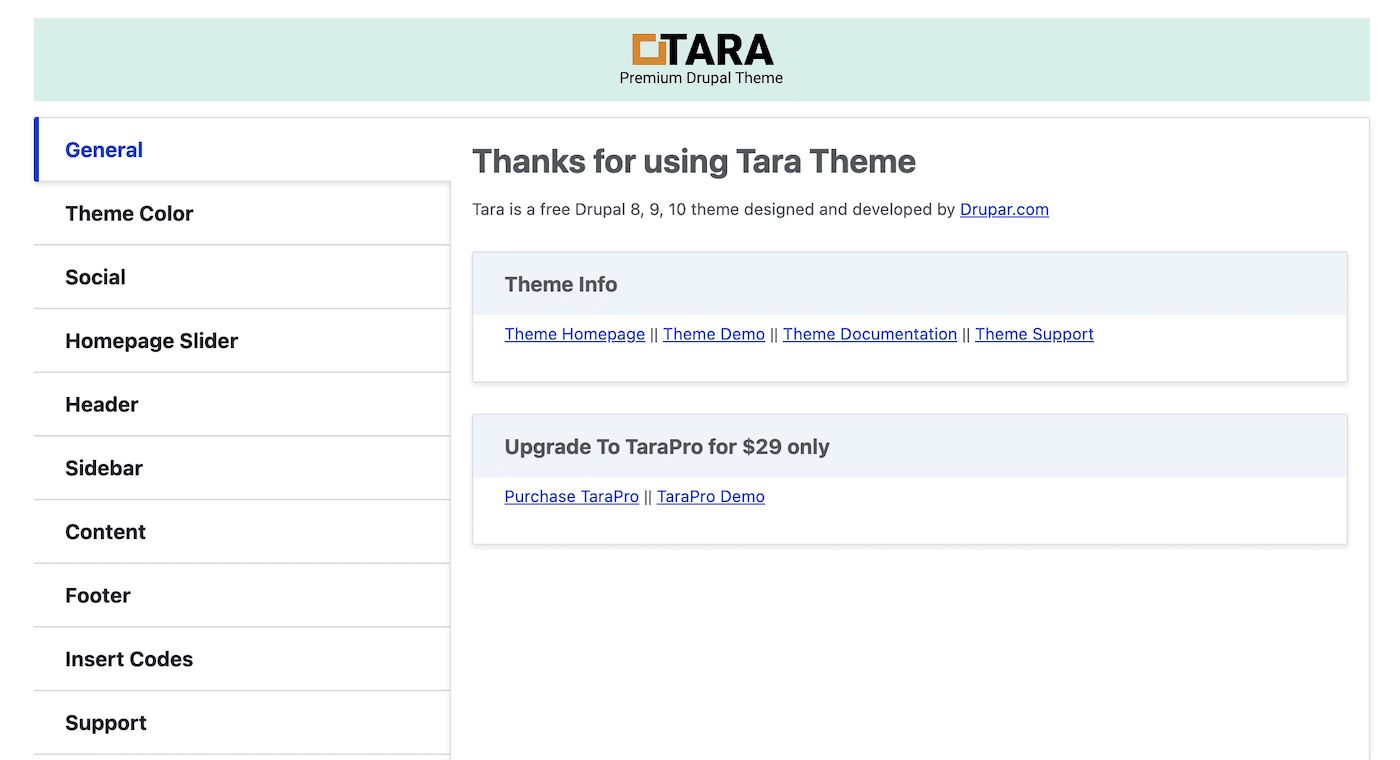
These settings can include logo customization, color schemes, font choices, and more. You can use these options to customize the theme to your liking.
Step 4: Adding Content to Your Drupal Site
Drupal comes with two default content types: Articles and Basic Pages. Articles are timely pieces of content like blog posts or news articles, while Basic Pages are for static content such as ‘About Us’ or ‘Contact’ pages.
If you’re familiar with WordPress, Articles are the equivalent of posts and Basic Pages are essentially the same as WordPress pages.
To add a new piece of content, navigate to Content, click the Add content button, and select the type of content you want to create.
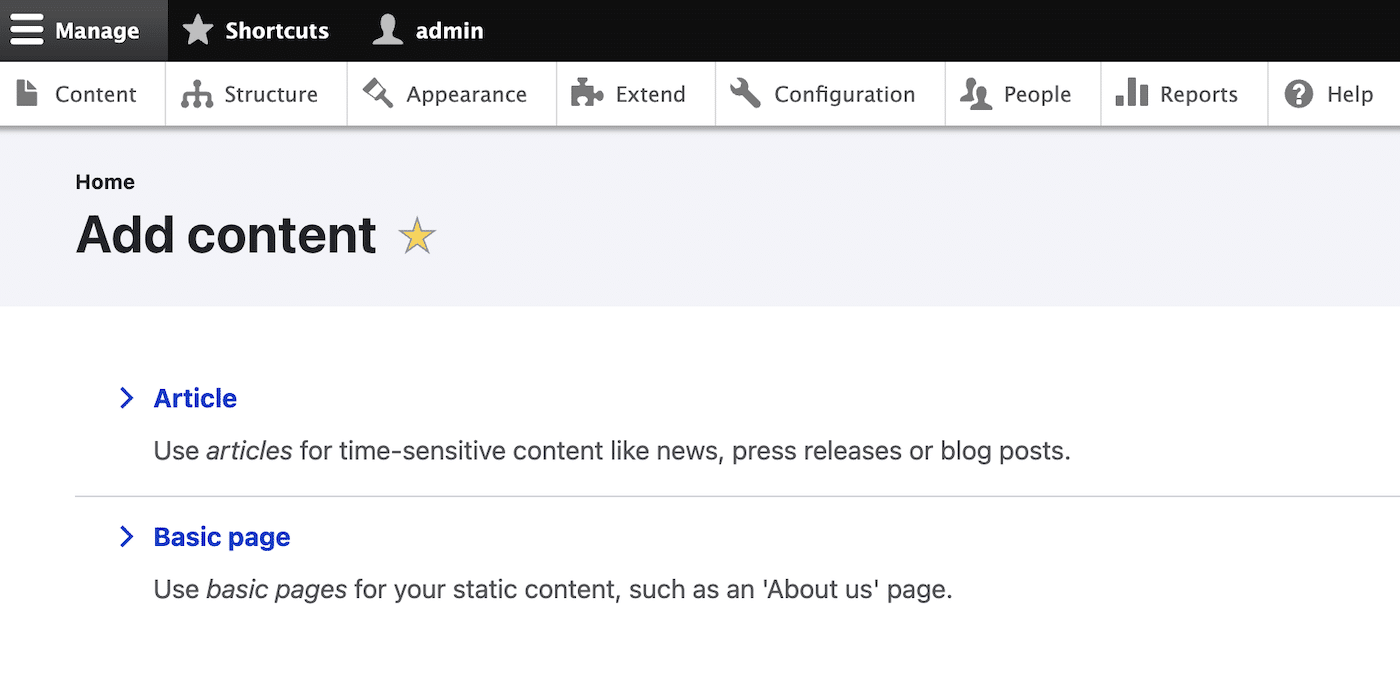
Here, you can fill out a title for your content, add an image, write the body of your content, and set tags and menus.
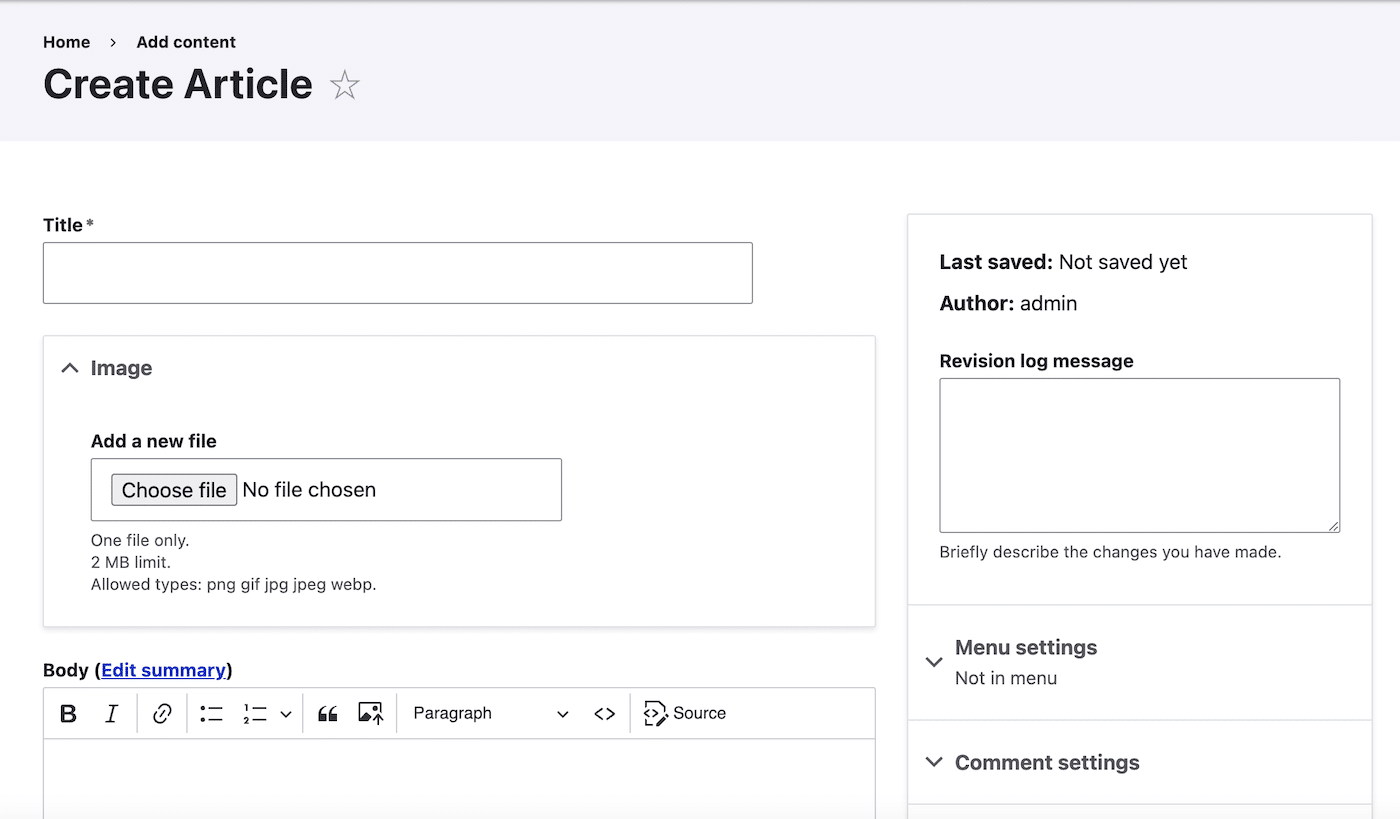
For more complex websites, the default content types may not suffice. Drupal allows you to create custom content types with fields tailored to your content’s needs, such as product listings, customer testimonials, or portfolio entries.
Step 5: Extending Drupal with Modules
After setting up your Drupal site and adding content, you might find the need to extend its functionality to meet specific requirements.
Drupal’s modular architecture allows you to do just that, with thousands of modules available for various features and integrations.
We’ve already added modules for sending email so you know how to find and install modules.
Drupal offers a wide range of modules covering everything from security and performance to eCommerce, SEO, and marketing.
At this stage in your Drupal journey, you might like to go back to the official Drupal.org modules directory and have a browse to see what’s available.
For now, give yourself a pat on the back for setting up your first Drupal site!
That’s it! Now you know how to set up Drupal
Next, would you like to try out a different CMS? Check out our tutorial on setting up Joomla and see how it compares!
