Are you looking for a step-by-step guide on how to set up Joomla?
In this tutorial, we’ll take you through the steps of installing and setting up Joomla for the first time so you can quickly and easily build your own Joomla website with no web development experience.
Step 1: How To Install Joomla
The easiest way to install Joomla is by using the one-click installation script offered by most popular web hosting companies.
One-Click Joomla Installation
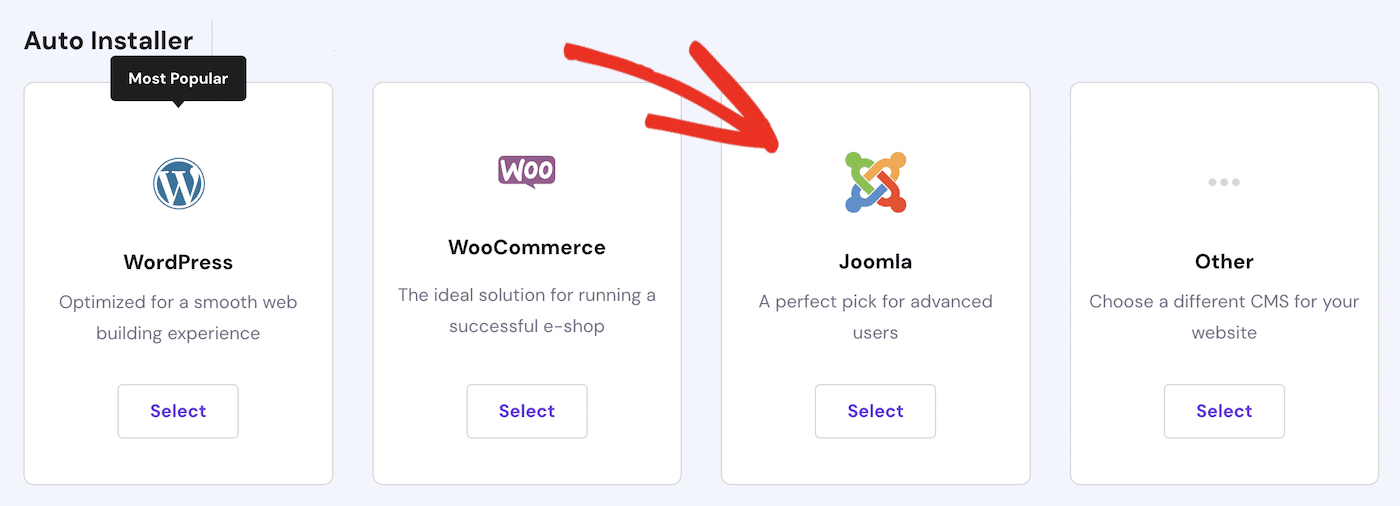
To get started, log into the control panel of your web hosting account and locate the auto-installer or one-click installer to create a new website.
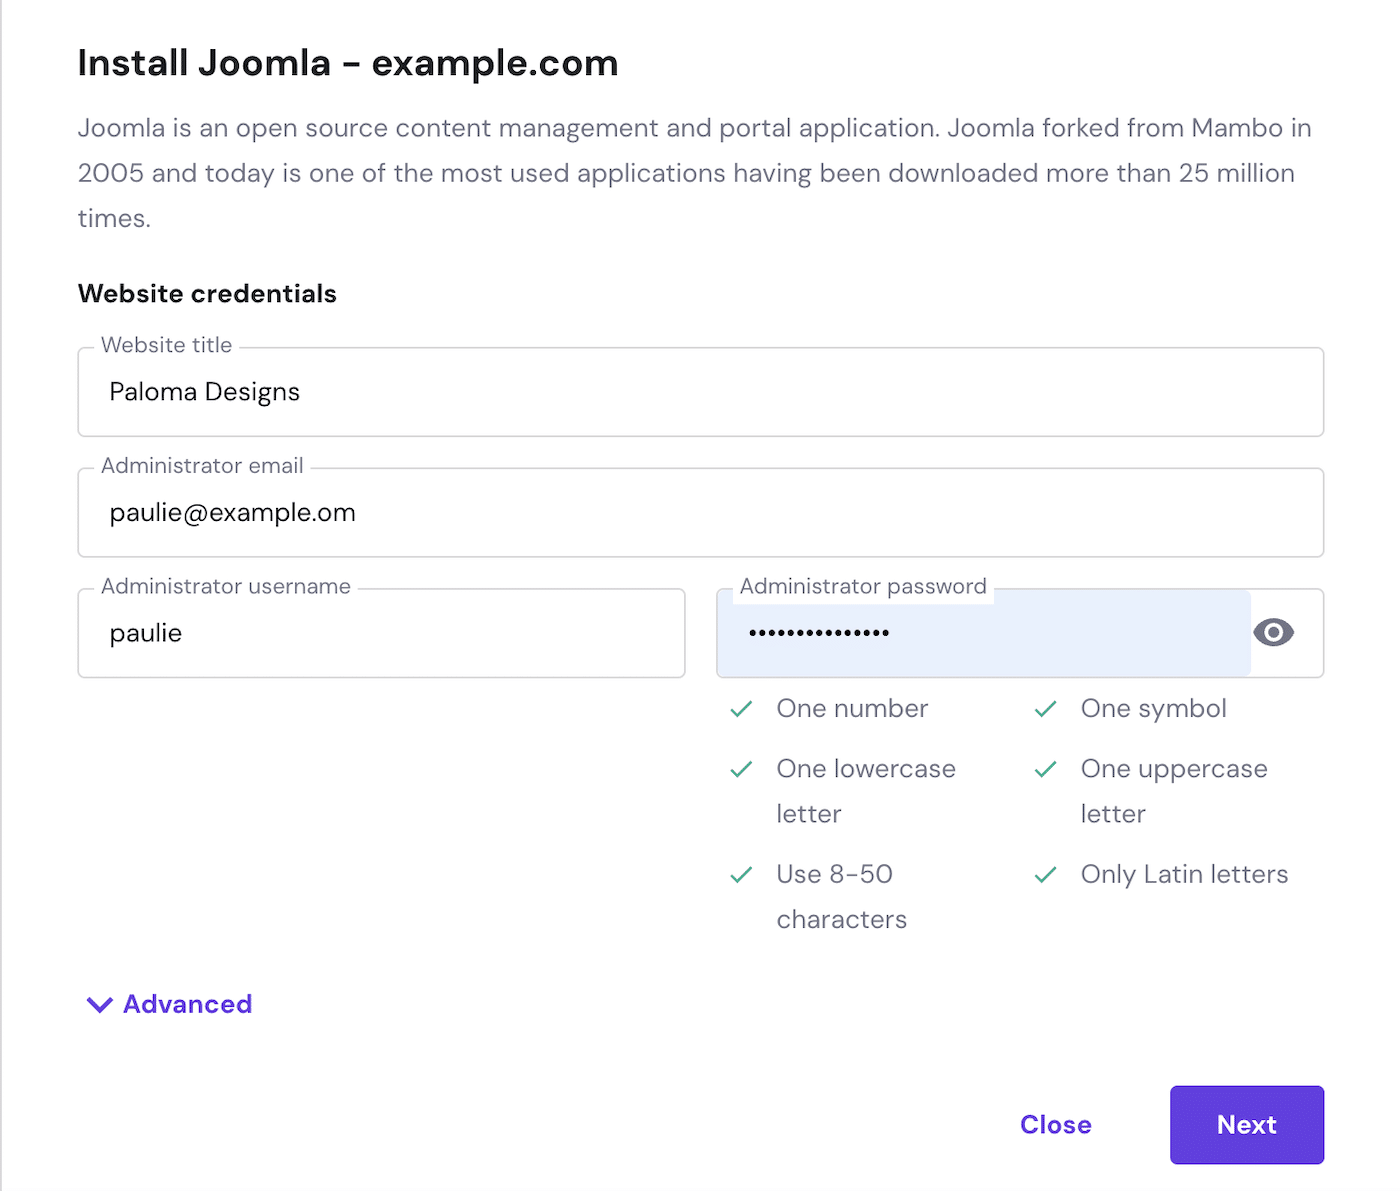
Depending on your web host, the installation process may look slightly different. But fill out the fields to provide a name for your site, and an administrator email address, username, and password.
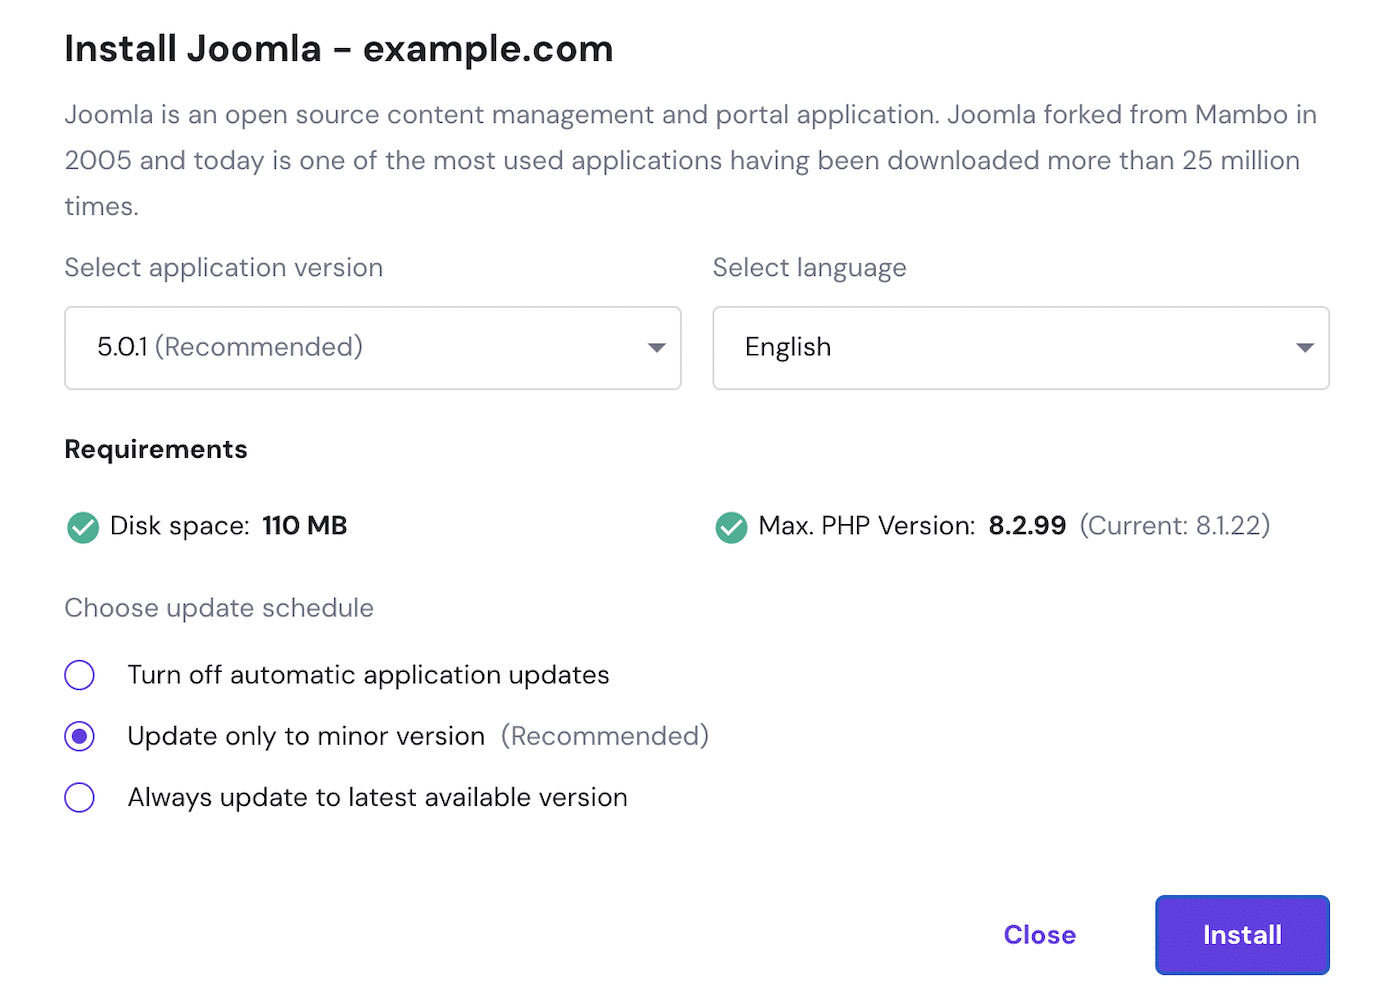
You will also need to choose the version of Joomla you want to install and choose whether or not to activate automatic updates.
After a few moments, the Joomla installation process will be complete.
Manual Joomla Installation
If your web host doesn’t offer a one-click installation, you want to install Joomla to localhost, or you prefer to have more control over the installation process, you can install Joomla manually.
To install Joomla, you will need access to a web server with a PHP hosting environment, at least 50Mb of disk space, and at least one database.
- Download Joomla: You can download the latest version of Joomla here.
- Upload Joomla files to your server: Use an FTP client to upload the Joomla installation packages you just downloaded to the public_html directory or a subfolder on your server, then unpackage the files.
- Create a database: Create a database for use with Joomla in MySQL or an alternative database, and keep a note of the name of the database, the database username, and the password.
- Run the Joomla web installer: Visit the URL of your website or the subfolder where you extracted the Joomla files. You should see a Joomla installation screen.
- Enter your site details: Enter the name of your website, admin email address, username, and password, and click the Next button to proceed.
- Configure your database: Choose your database type and enter the hostname, username, password, and other settings to enable Joomla to connect to the database.
- Final configuration: To complete the installation of your Joomla site, you can opt to install sample data, install additional languages, and set other configuration options.
- Remove the installation folder: After completing the installation, be sure to click the button to remove the installation files for security purposes.
For help with any of these steps, you can follow the official Joomla installation guide.
Now the installation of Joomla is complete, you can continue to follow this guide to complete Joomla setup.
Building a Free Site on Joomla.org
If you want to try out Joomla before installing it on your server or want to create a site for personal use and you’re not bothered about having a custom domain, you can use the free service at Launch.joomla.org.
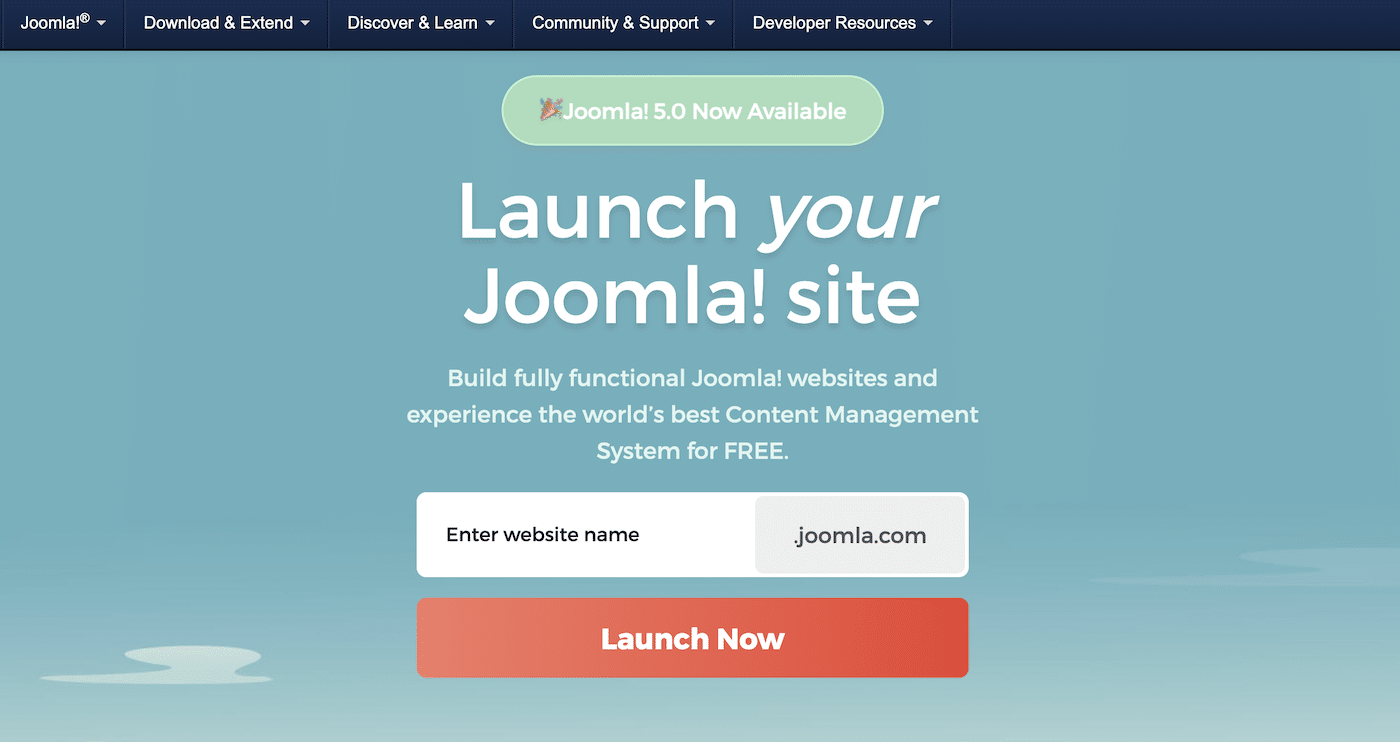
All you need to do is specify the site name (this will be created as a subdomain of joomla.org), choose which version of Joomla you want to run (at the time of writing you can choose between Joomla 4 or 5), and enter your personal details to create an account.
Websites hosted on joomla.org are exactly the same as self-hosted Joomla sites. The only difference is that you can’t use a custom domain if you’re hosting your site on joomla.org.
This can also be a good way to try out new versions of Joomla before upgrading your self-hosted Joomla site.
Step 2: Exploring the Joomla Administration Panel
To access the backend of your Joomla site, navigate to www.yourdomain.com/administration and log in with the username and password you provided during setup.
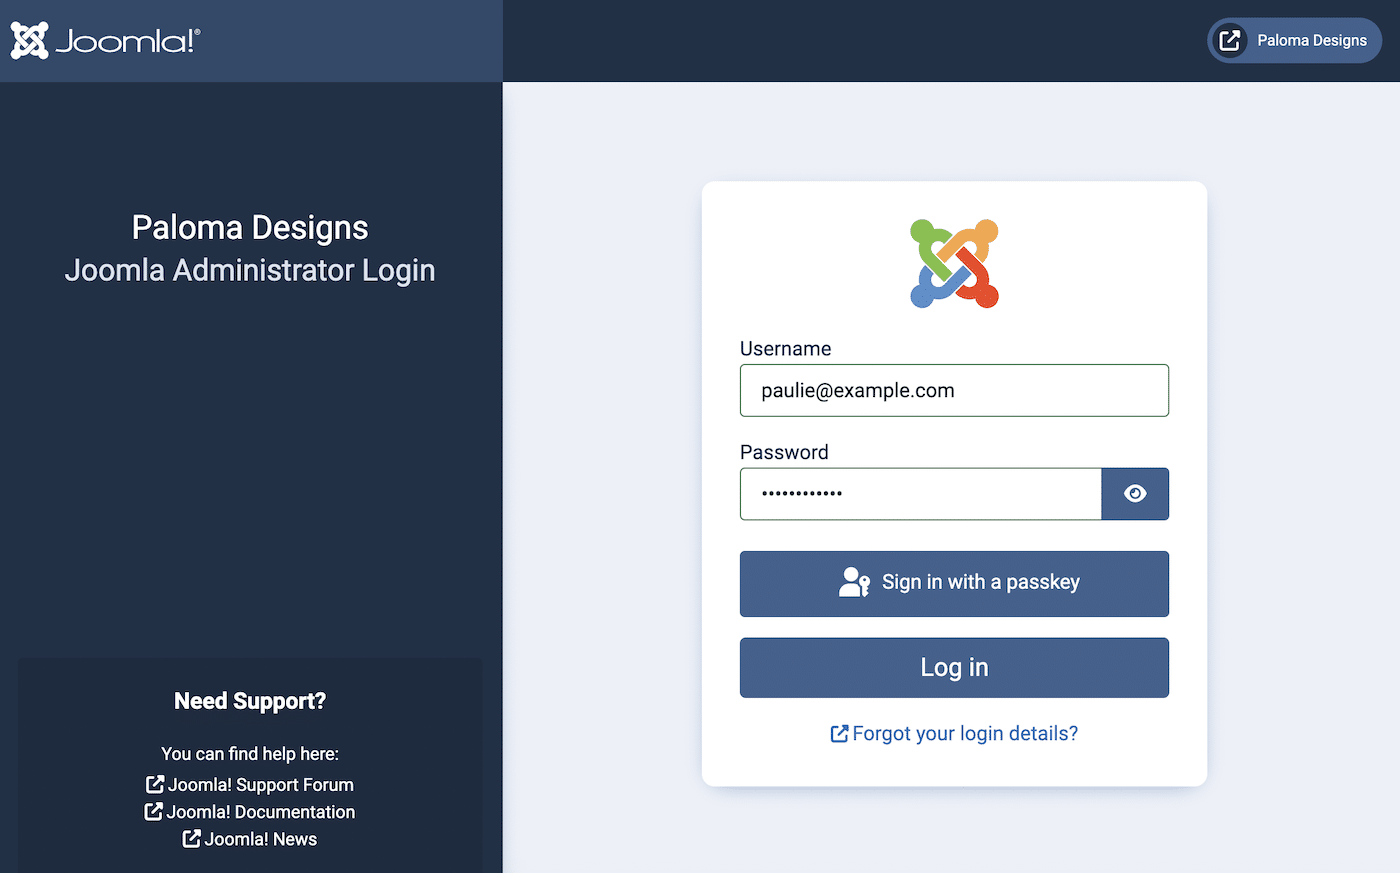
When you log in, you’ll be taken to your Joomla dashboard where you can continue to set up and configure your Joomla site.
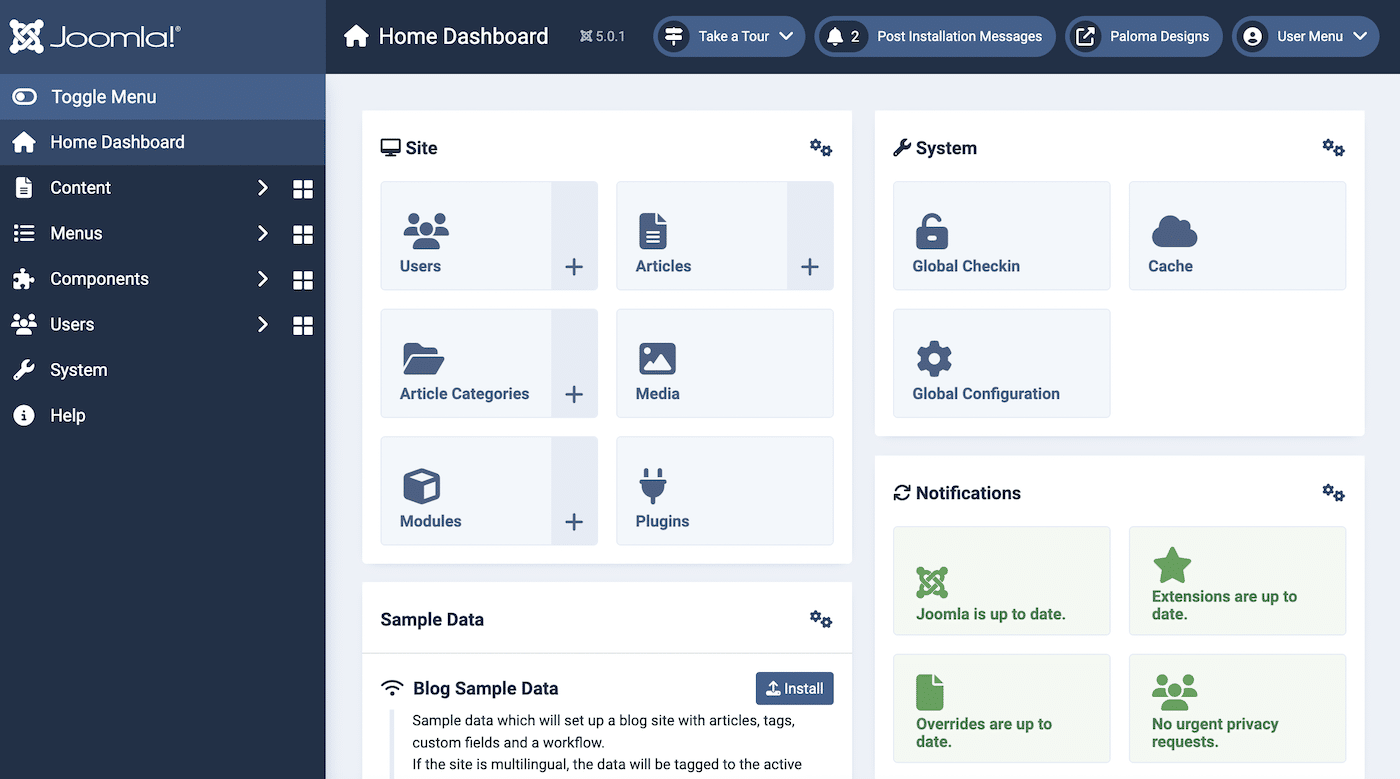
The dashboard includes a main menu and several panels with quick links to useful admin pages and information:
- Site: Manage the users, content, media, navigation, and plugins on your site
- System: Global site settings and configuration
- Sample Data: Install sample data on your site
- Notifications: Important messages about updates and other critical information
- Latest Actions: A log of all user activity
- Logged-in Users: At-a-glance view of the users currently logged into your site
- Recently Added Articles: Your most recently published articles
- Privacy Dashboard: Privacy information requests
- Popular articles: A list of your most viewed content
You can also add additional panels to customize your Joomla dashboard
Step 2: How To Set Up Joomla Email
Like any CMS, Joomla sends out transactional emails to administrators and users for alerts and notifications.
To make sure these emails reach the recipient, it’s crucial to configure SMTP email settings so that your Joomla site emails are sent reliably with an SMTP server of your choice.
You can find the Joomla mail settings by navigating to System » Global Configuration and clicking the Server tab.
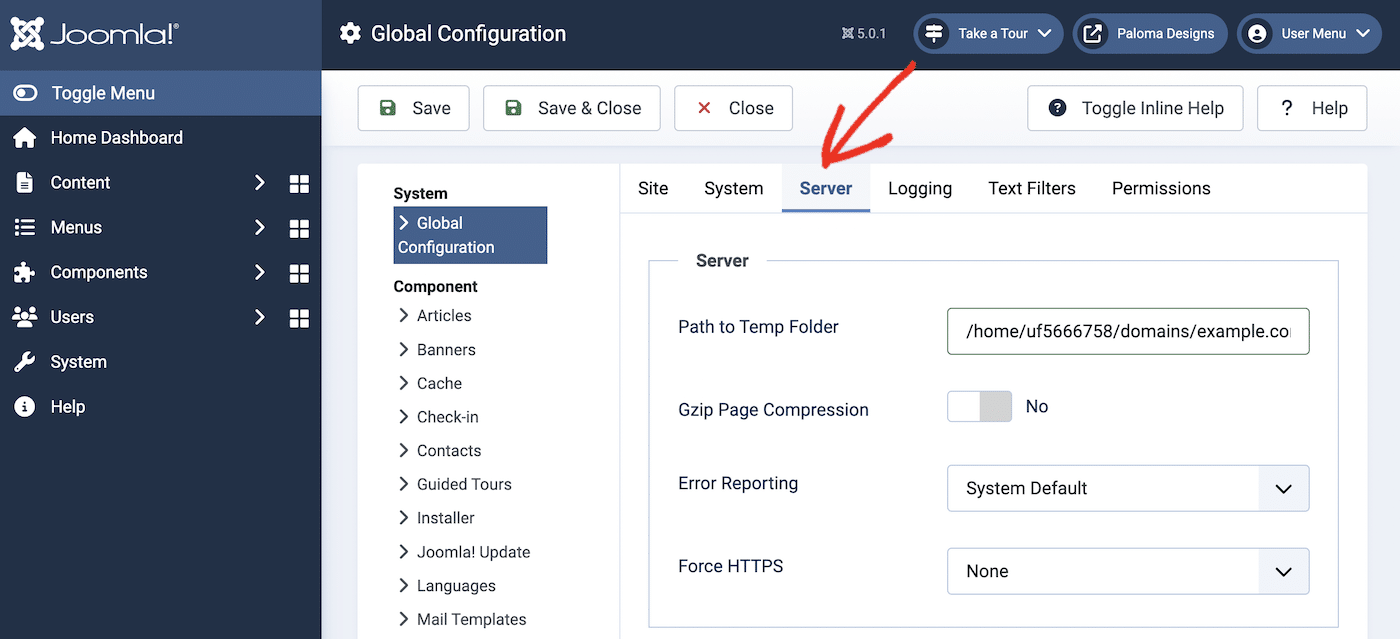
Scroll down and make sure the Send Mail toggle option is enabled.

Out of the box, Joomla uses the PHP mail function. If you want to continue using PHP mail, all you need to do is enter the email address and name you want to use in the From and Reply To email fields.
However, Joomla highly recommends using SMTP email. This is a more reliable and secure mail protocol, which greatly increases the chances of email from your Joomla site reaching the recipient.
If you’re not getting emails from your Joomla site, or they’re going to spam, using PHP email is probably the culprit.
After entering the From Name and From Email address you want to use on your site emails, scroll down to the Mailer option and choose SMTP from the dropdown.
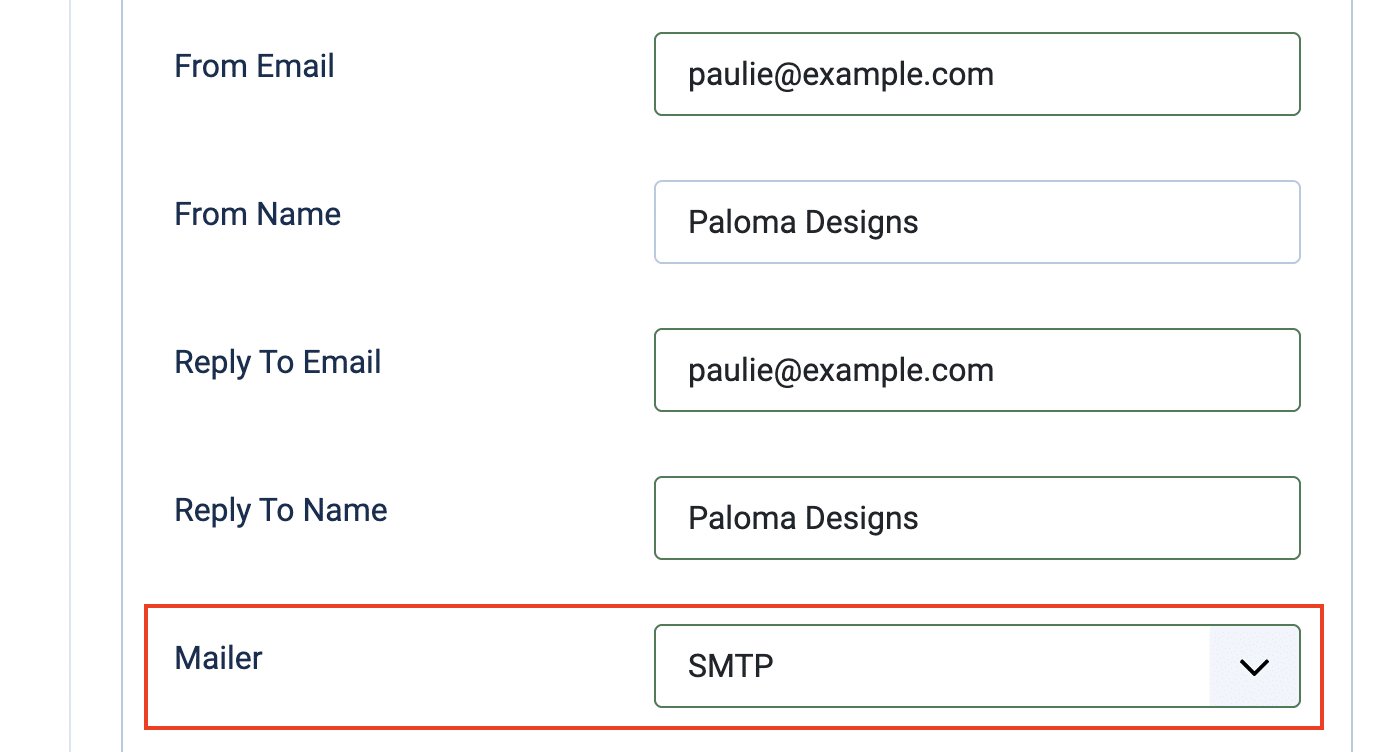
After choosing SMTP, new settings will appear. To complete this section, you’ll need the credentials of your SMTP server.
You can contact your email provider and ask for the SMTP credential for your account, or alternatively, you can opt for a dedicated SMTP email service like SendLayer.
Sign Up for SendLayer SMTP Service
SendLayer is specifically designed to ensure optimal deliverability and performance for transactional emails sent from apps or websites running on content management systems like Joomla.
SendLayer authenticates your email sending domain to make sure your emails don’t bounce or go to the spam filter (authentication is now required if you’re sending emails to Gmail or Yahoo mailboxes) and protects the reputation of your primary domain, so you’ll never be at risk of ending up on spam blacklists.
You can also benefit from extra features such as detailed email logs and analytics to monitor the messages sent from your site and know immediately if there are any issues.
To get started with SendLayer, follow our guides to creating your account and completing domain setup.
Once your domain is authorized in SendLayer, you can find your SMTP credentials by navigating to the Settings page in your SendLayer dashboard and clicking on the SMTP Credentials tab.
Configure SMTP Email Settings in Joomla
Once you have your SMTP credentials, you can enter them in the Joomla email settings as follows:
- SMTP Host: smtp.sendlayer.net
- SMTP Port: 587
- SMTP Security: SSL/TLS
- SMTP Authentication: Yes
- SMTP Username: Copy and paste the Username from SendLayer.
- SMTP Password: Copy and paste the Password from SendLayer
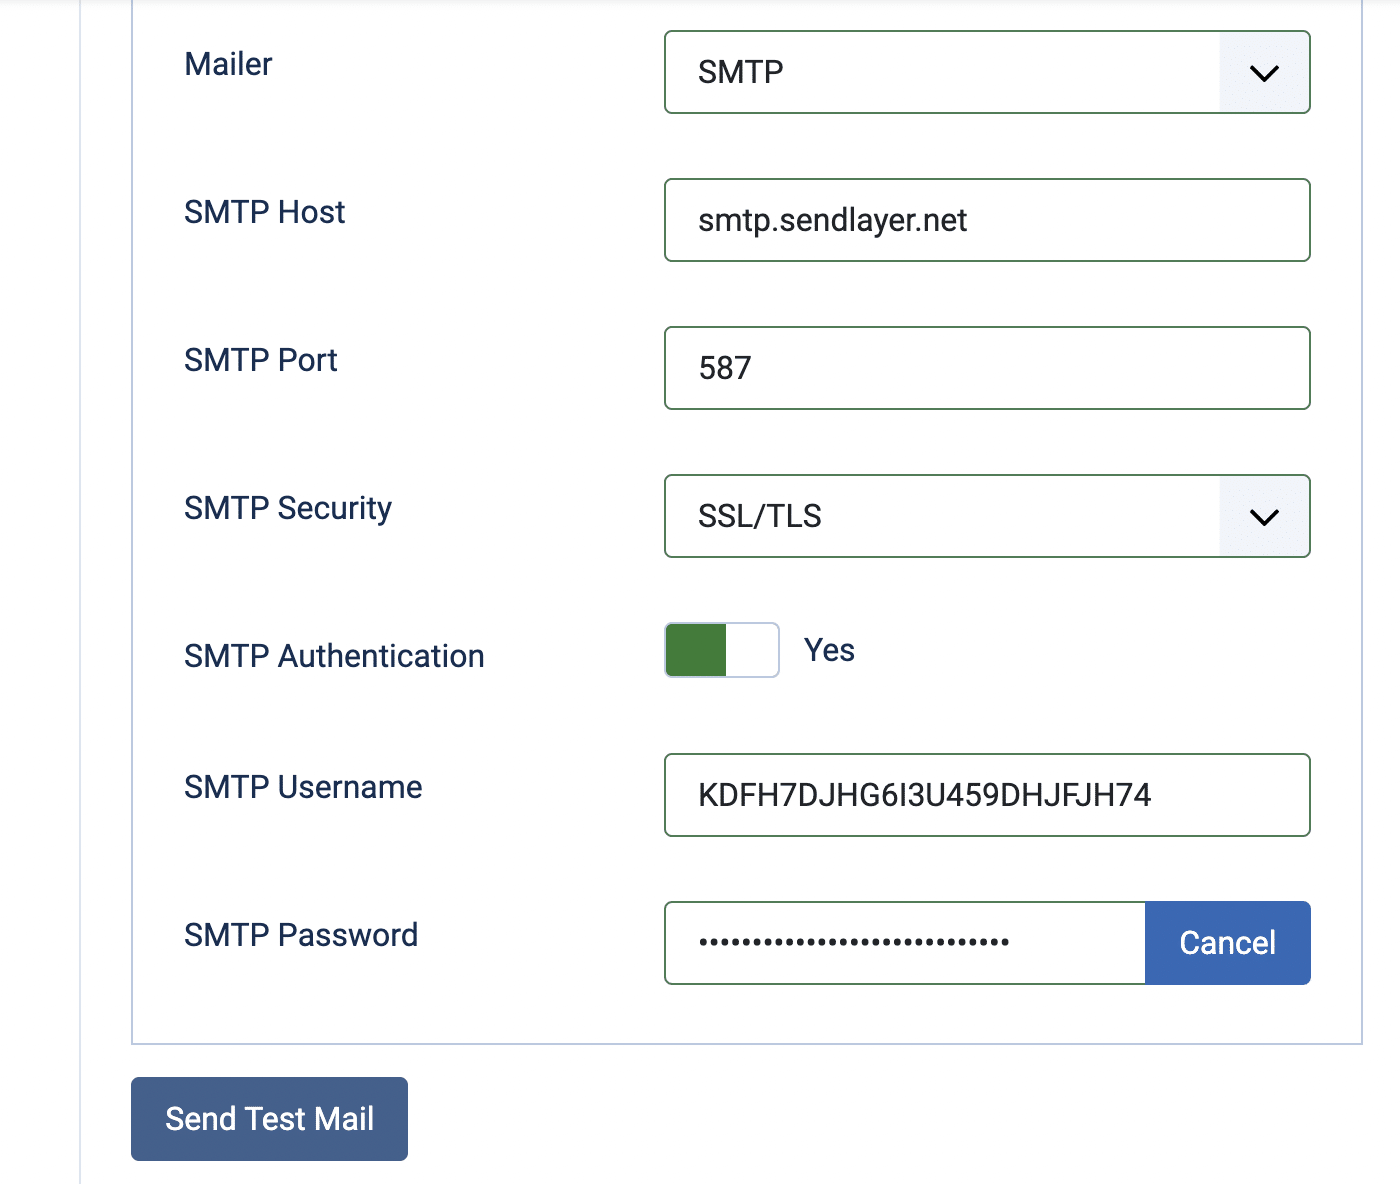
Once you’ve finished entering your SMTP credentials, click the Send Test Mail button to make sure everything is configured correctly.
You should see an alert message at the top of the screen that the test email has been sent.

Check your inbox to ensure the email was delivered. It should look something like this:

Customizing Joomla Mail Templates
Joomla comes with over 20 email templates, which you can completely customize including the wording, format, and style.
You can access the templates by navigating to System » Mail Templates.
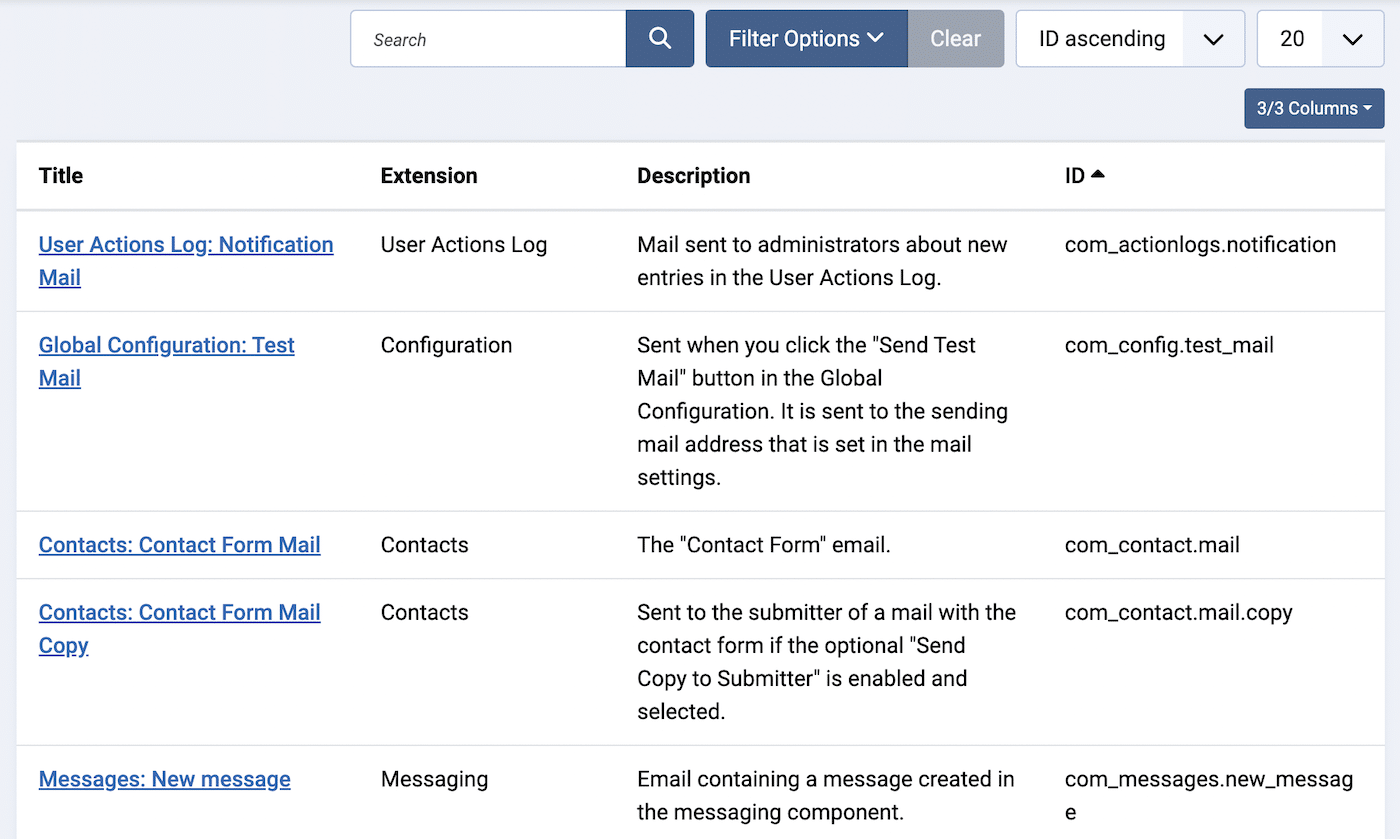
Click on the title of each template to view it and make edits.
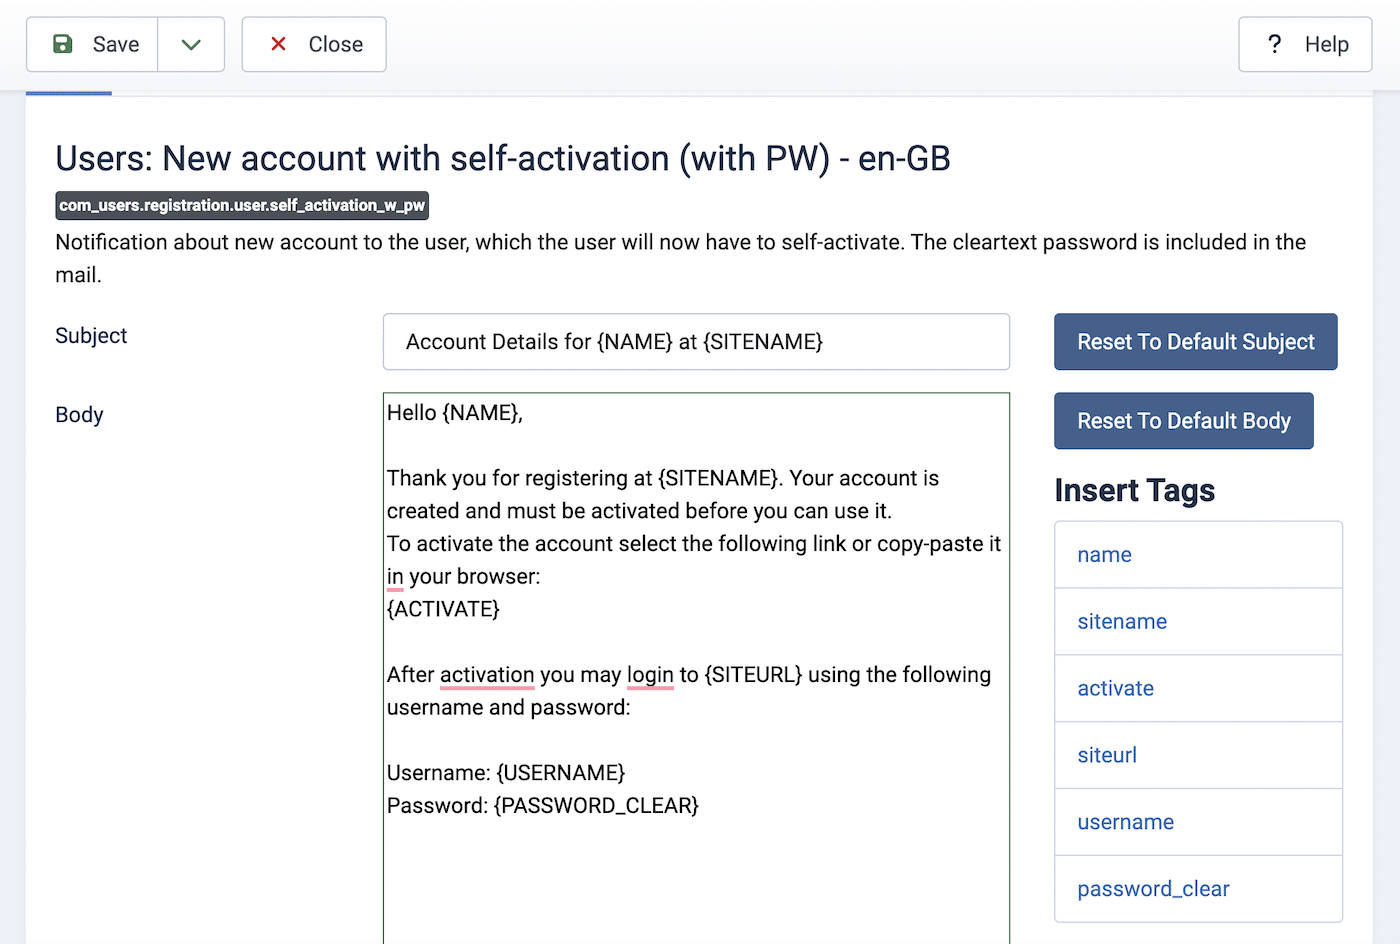
Emails are set up as plaintext in Joomla by default. To change the email templates to HTML, click the Options button at the top of the email template page and choose HTML for the Mail Format. Remember to click the Save button after you’ve made any changes to the settings.
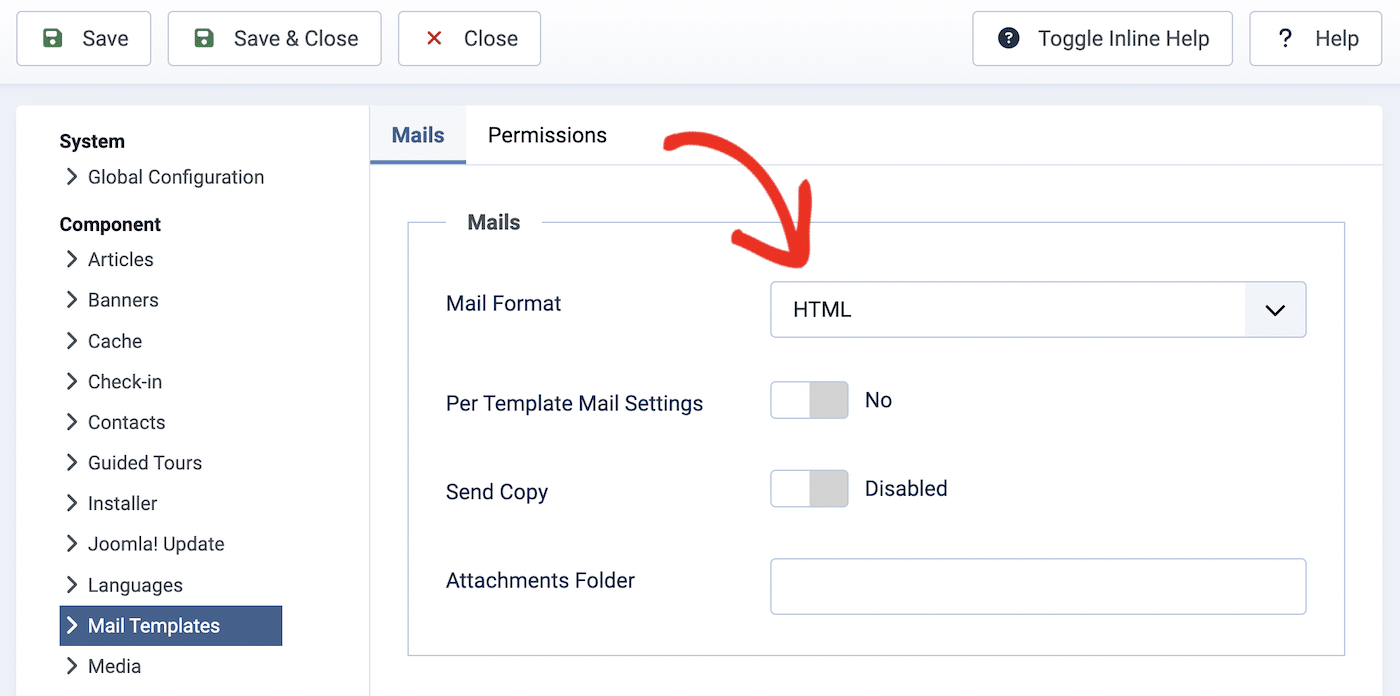
Once you’ve activated HTML email, editing the template will bring you to a multimedia editor where you can change the color and style of the text and add images and other media.
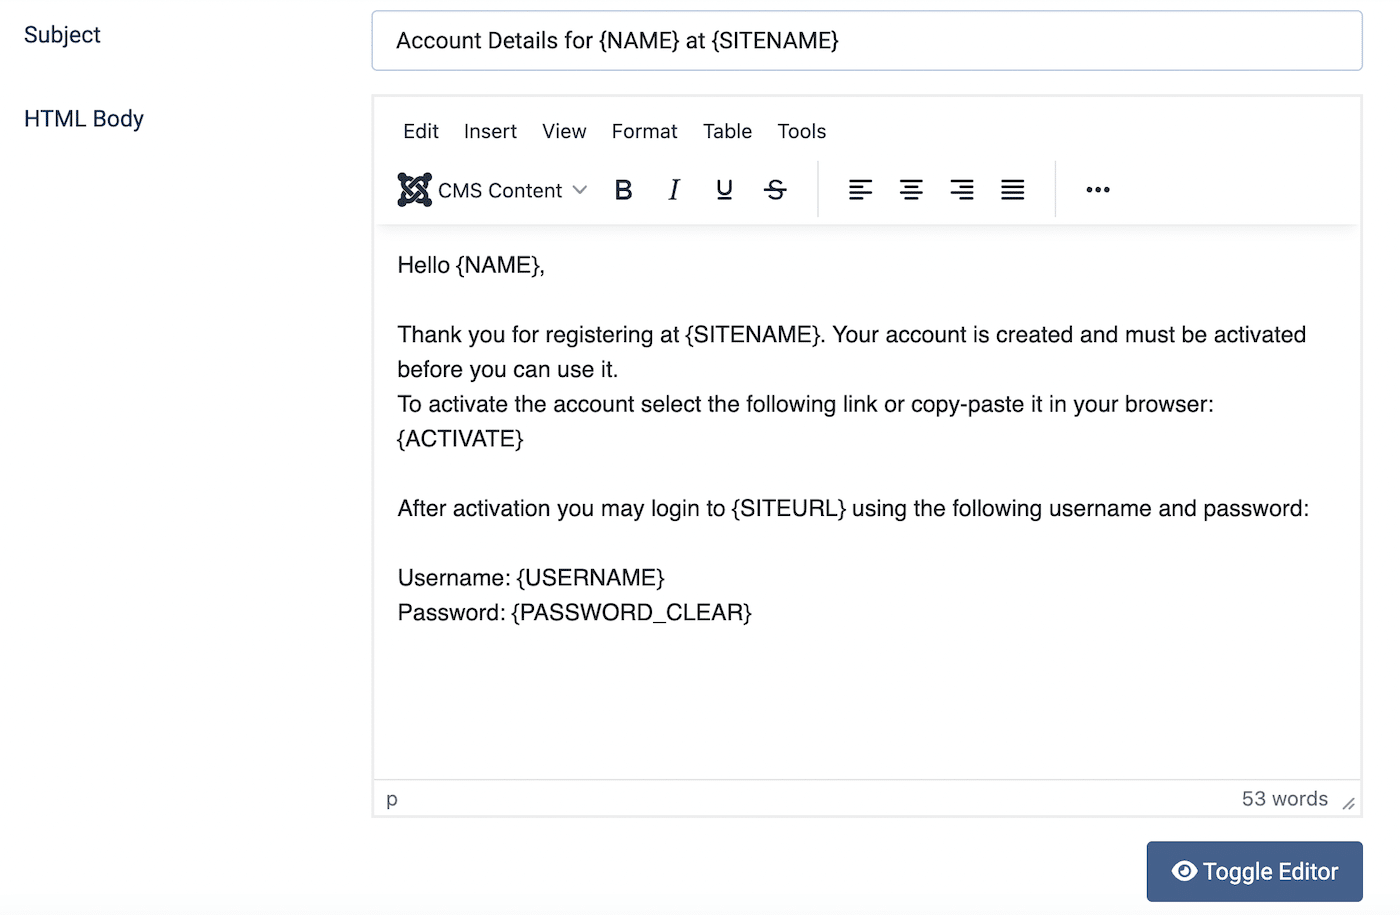
You can also click the Toggle Editor button to edit the HTML of the email directly.
Step 3: Change the Look of Your Joomla Site With Templates
Once you’ve configured your Joomla settings for email and any other settings you want to change, you can take a look at how your site looks from the front end.
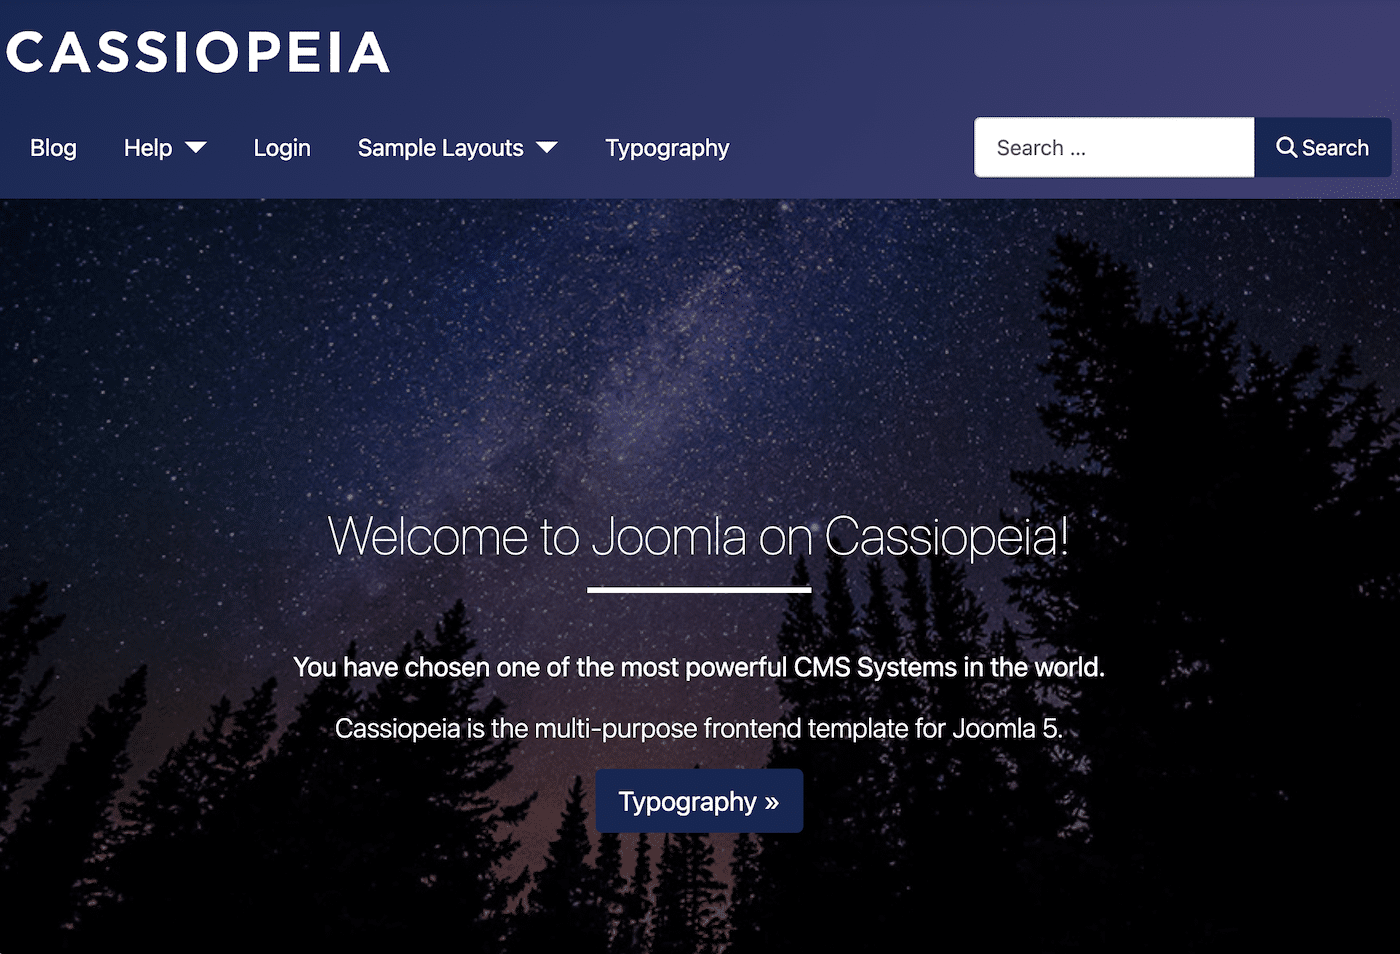
Currently Joomla ships with the Cassiopeia template. If you’ve installed the sample data, you can click on to the blog and other pages of your site to see how everything looks.
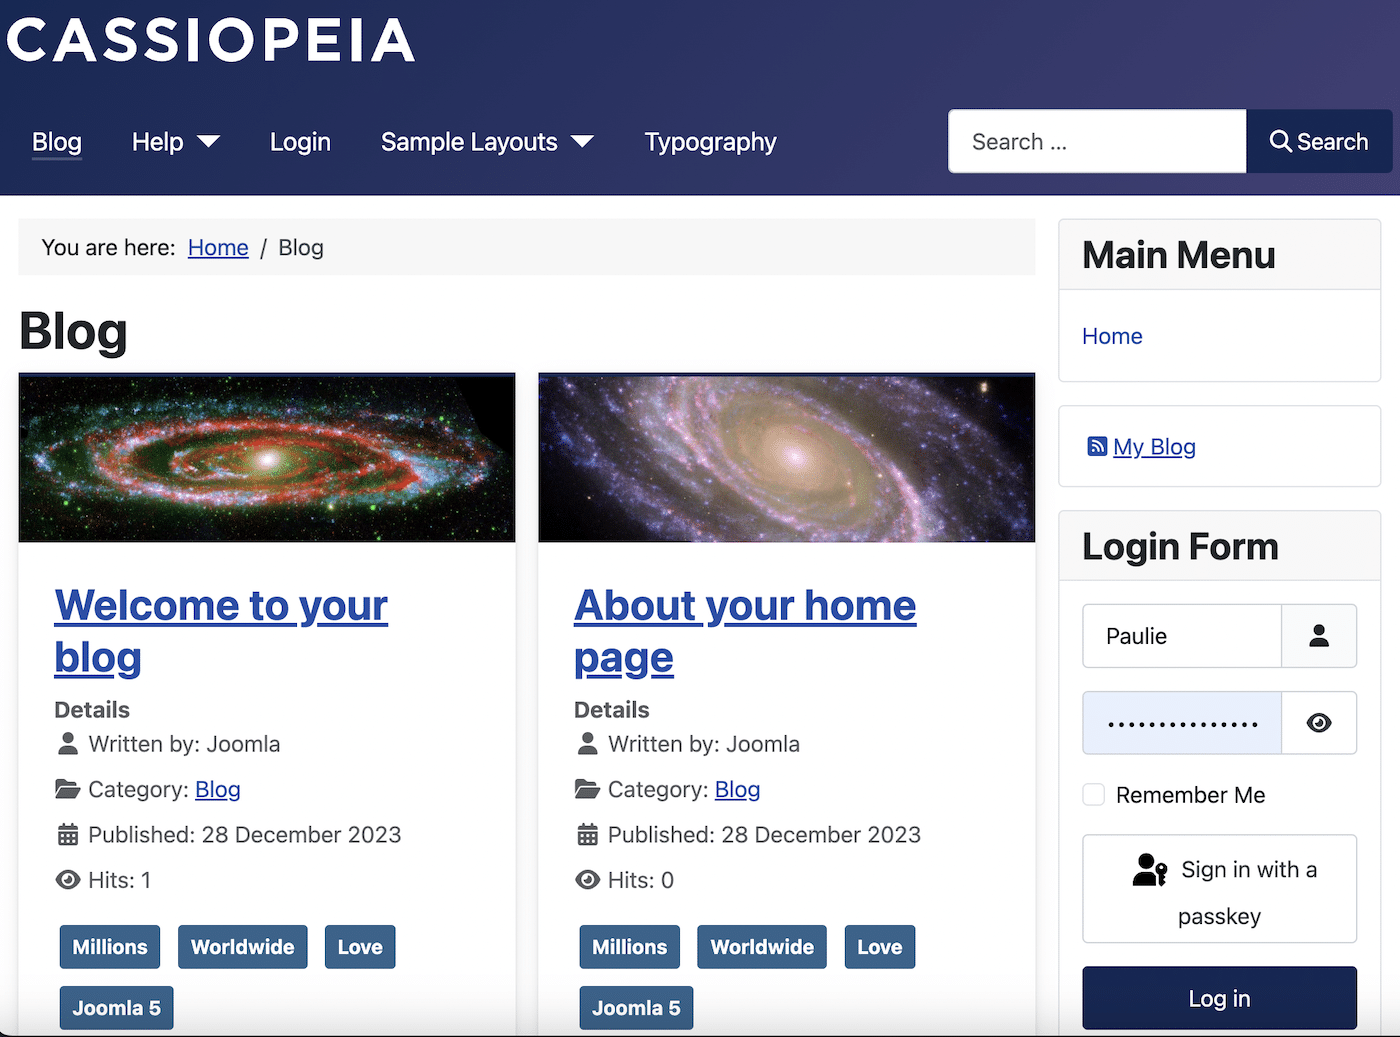
You can either customize the default template to make the changes you wish or install another predesigned template.
Editing Joomla Templates
To edit the template, navigate to System » Site Templates. Here you’ll see a list of all the templates you have installed on your Joomla site.
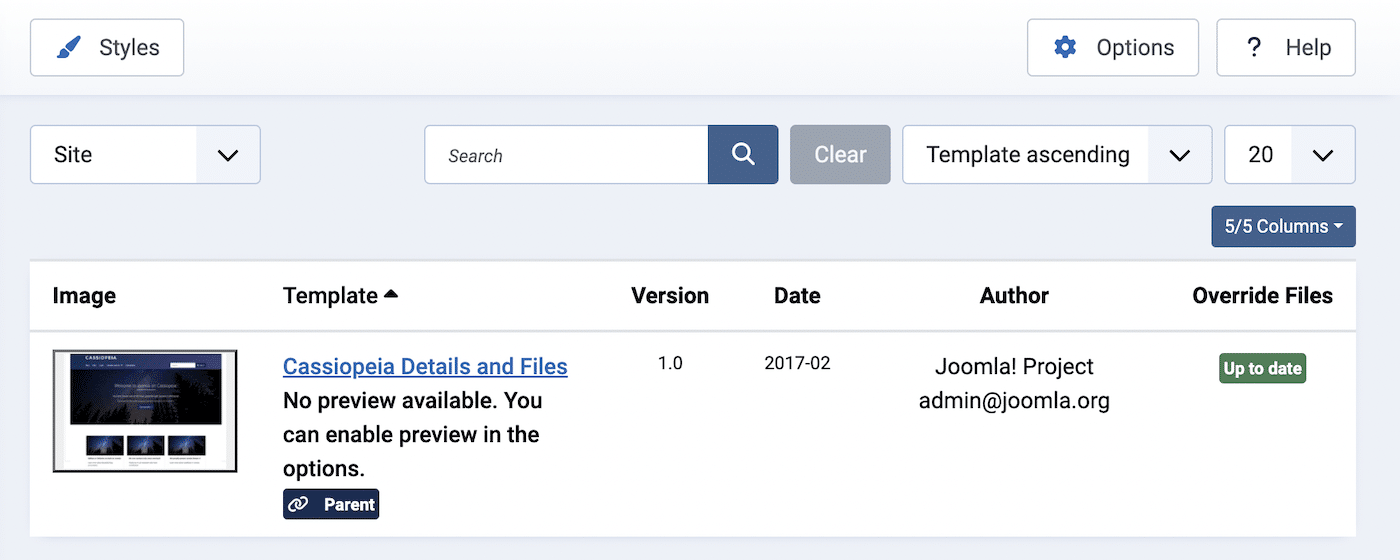
To customize your template, click on the Styles button and select the template you want to adjust.
Click on the Advanced tab to make basic customizations.
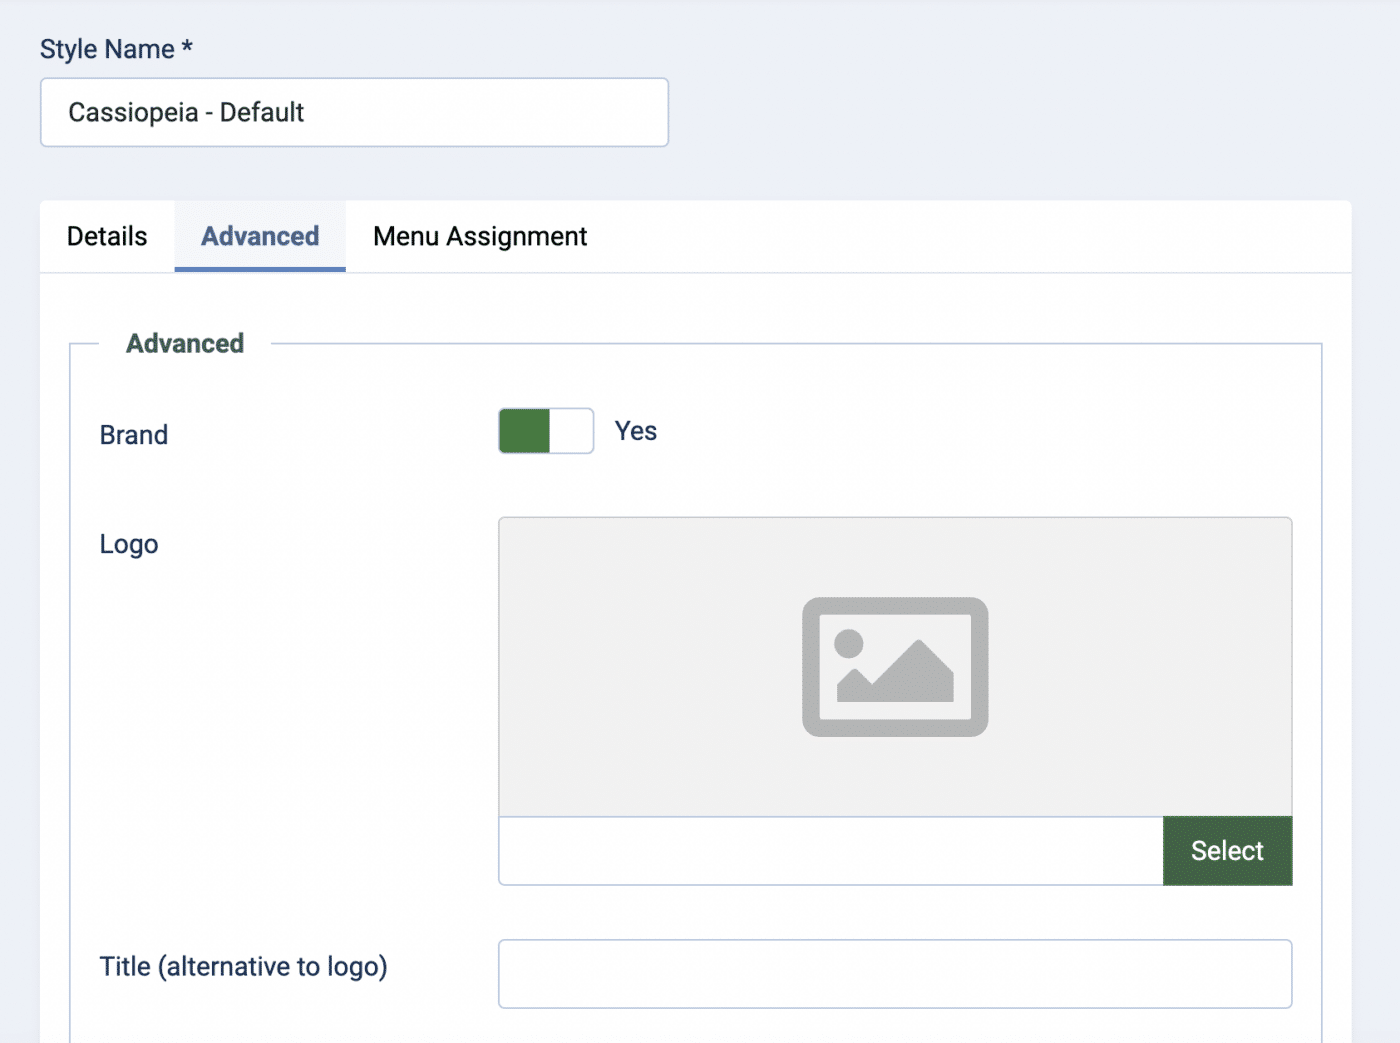
Here you can change the logo or title of your site, change the fonts, choose an alternative color scheme, and choose between a static or fluid layout, sticky or non-sticky header, and include an optional back-to-top link.
You can also click on the Menu Assignment tab to adjust the layout of the menus and site navigation.
Remember to click the Save button if you make any changes.
Installing Joomla Templates
To install a new template on your site, first download the file for the template you want to use on your site. Then, navigate to System » Extensions, and click the Upload Package File tab.
Drag and drop the template file you downloaded to upload it to your Joomla site. This will both upload the file and automatically install the template.
Once the template is installed, it will be listed in System » Site Template Styles and you can activate it as the default template.

Step 4: Install Joomla Extensions
Joomla extensions add additional features and functionality to the core Joomla installation.
You can browse available extensions by navigating to System » Extensions and clicking on the Install from Web tab.
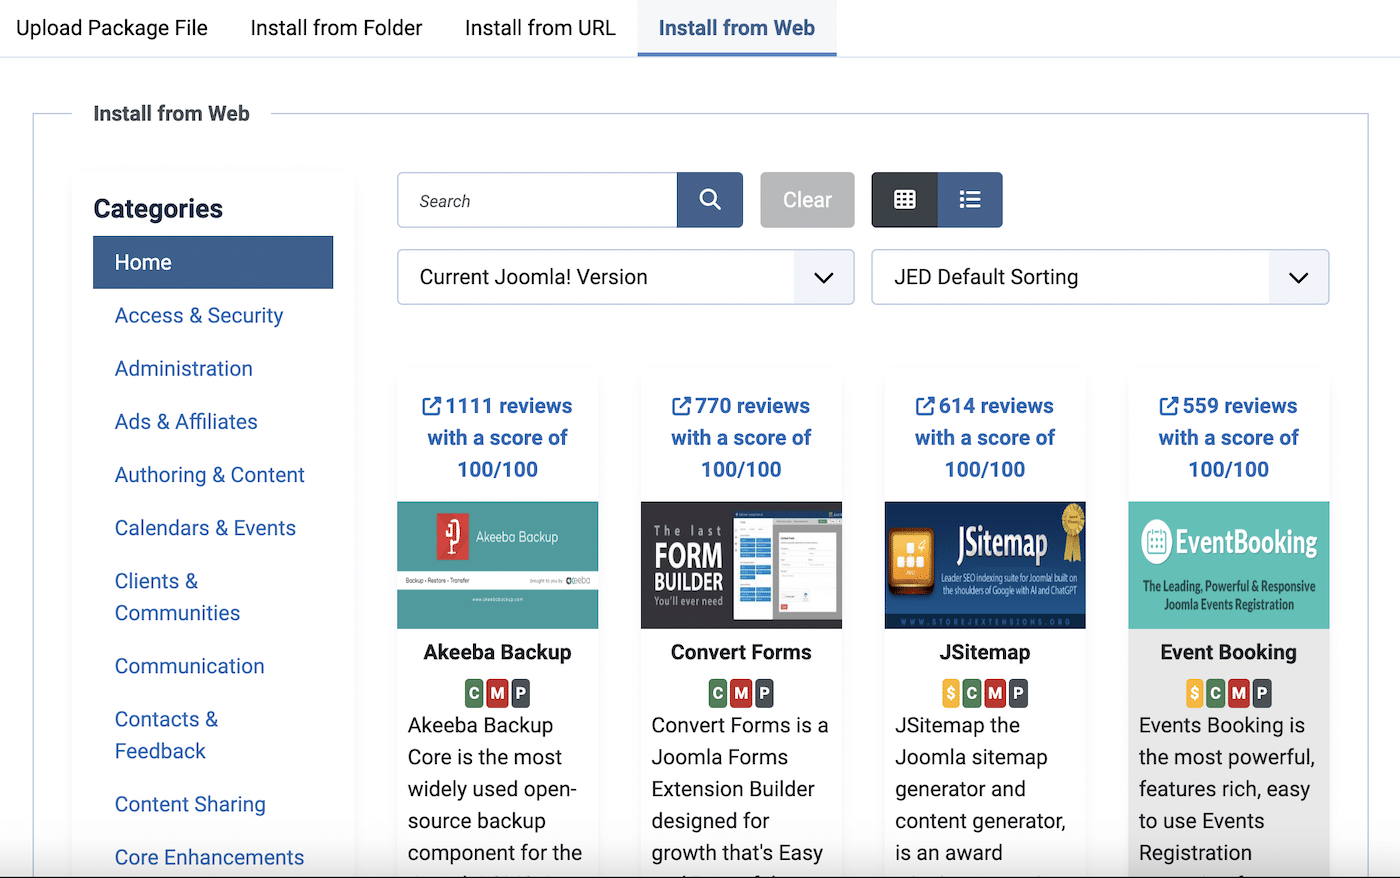
You can browse extensions by category or use the search button if you’re looking for something in particular.
When you find an extension you like the look of, click on it to see further details, and click on the Install button to install it directly to your Joomla site.
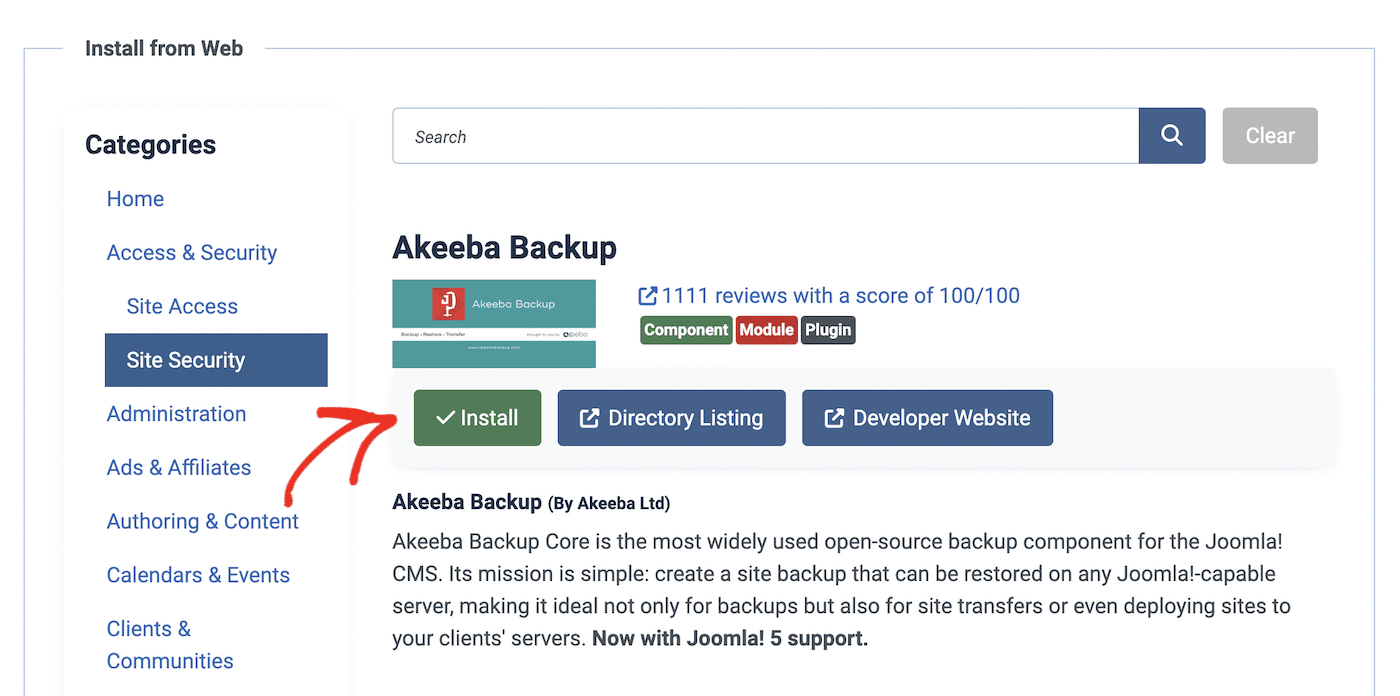
You can also upload and install extensions in the same way you install templates by uploading the file to the Joomla extensions manager.
Installing Languages on your Joomla Site
One of Joomla’s benefits is its built-in support for multi-language sites. Additional languages in Joomla are a special type of extensions, and you can install them in a similar way.
To add a new language to your Joomla site, navigate to System » Languages to see the full list of available languages.
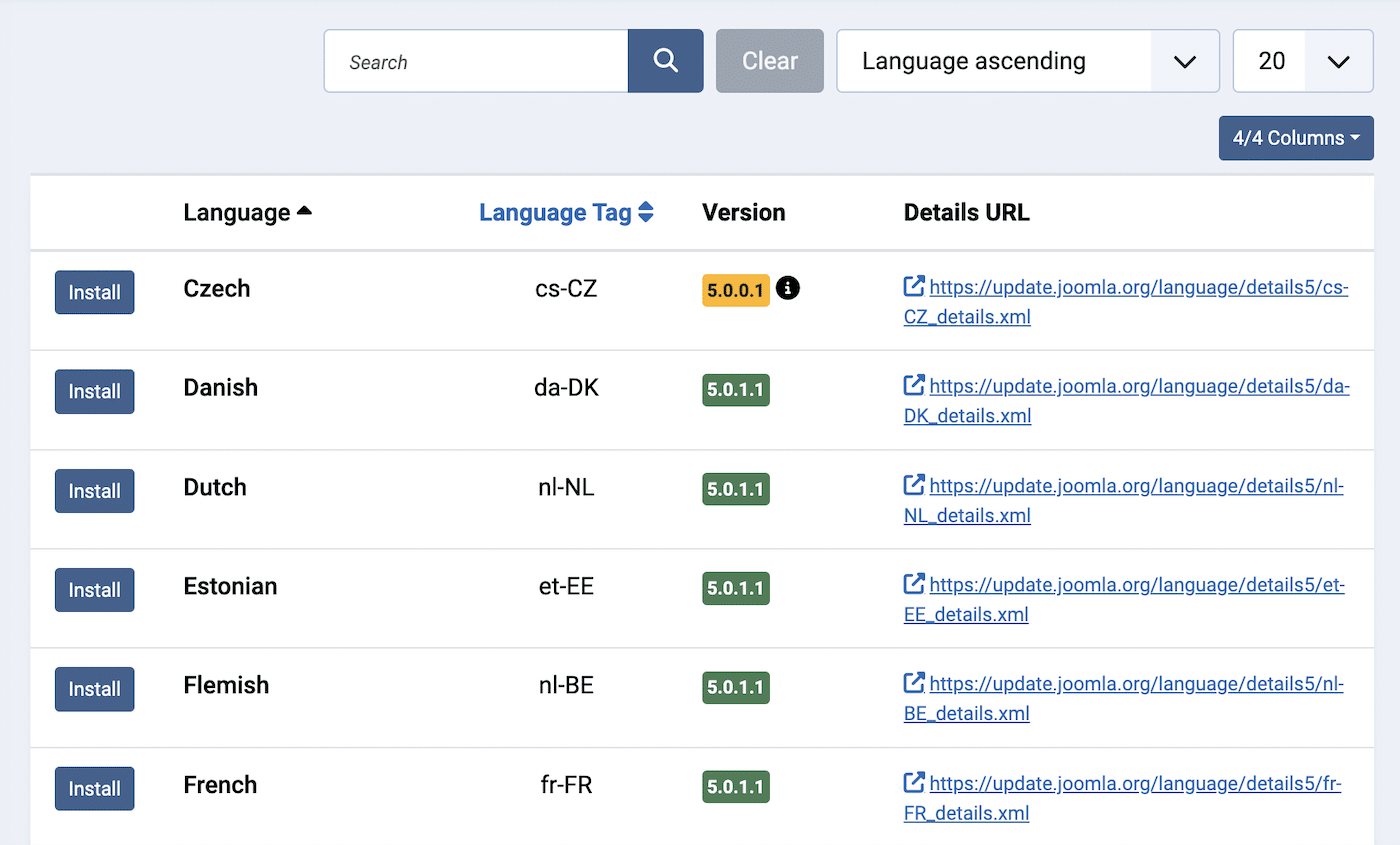
To install a new language, just click the Install button next to the language you want to add to your Joomla site.
Step 5: Add Content to Your Joomla Site
At this point, your Joomla site should be pretty much looking and working the way you want it to. The final step to having a fully functional website is to publish some content.
Each unit of content in Joomla is called an “article”. You can organize articles by category and create pages on your site to display articles depending on their category or other criteria.
Joomla also has a robust user management system, which allows you to restrict certain types of content to certain types of users.
To manage the articles on your site, navigate to Content » Articles in the main menu of your Joomla dashboard. Here you can see a complete list of all the articles on your site along with the date they were created, the author, status and visibility, and the number of hits they have received.
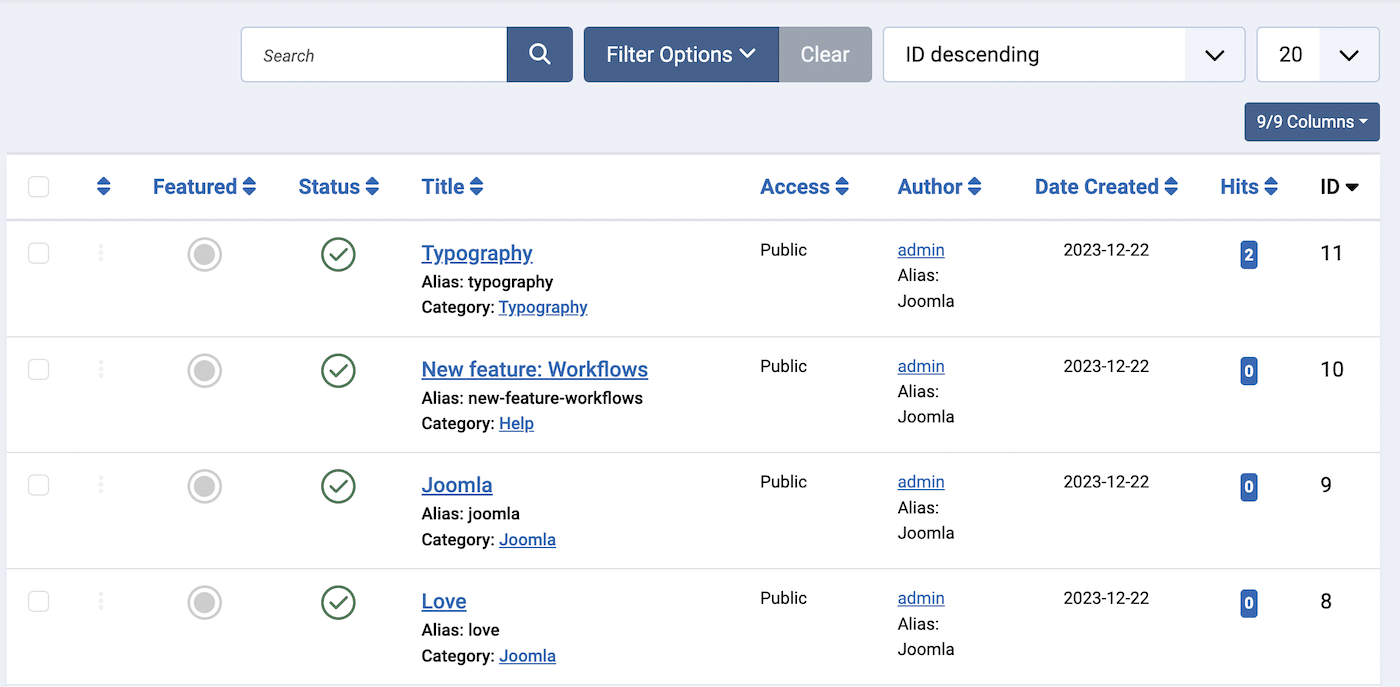
You can click on the title of an individual article to edit it. This will take you to a visual editor that is similar to other content editors you may have used in WordPress or other CMS platforms.
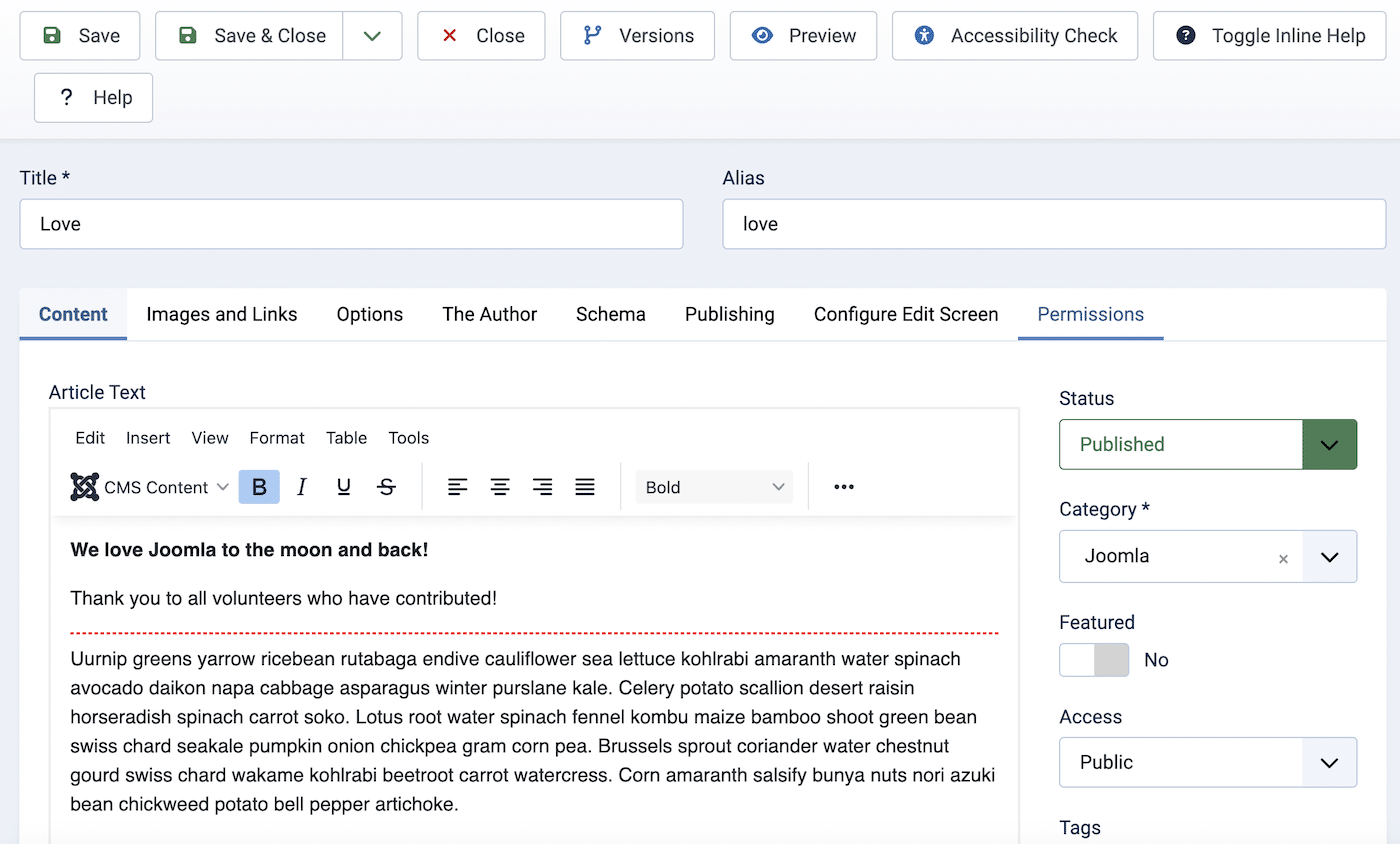
On this page, you can format text, add images and other media, add tags, set a category, mark it as featured, set its visibility, add meta information and schema, and publish the content.
Joomla also allows you to add additional CMS content such as another article, a contact, custom fields, menus, and a read more link. You can also add modules, which you can think of as being a block on your site. A module could be a search bar, menu, breadcrumb navigation, image, or any site component you want to create.
To add a new article, click the + next to the Articles menu listing, which will create a new article and open the edit screen for you.
Editing Categories
To view your existing categories, navigate to Content » Categories. This will show you a list of all the categories you are using to organize your articles and the number of articles in each category. You can nest categories by assigning a parent category.
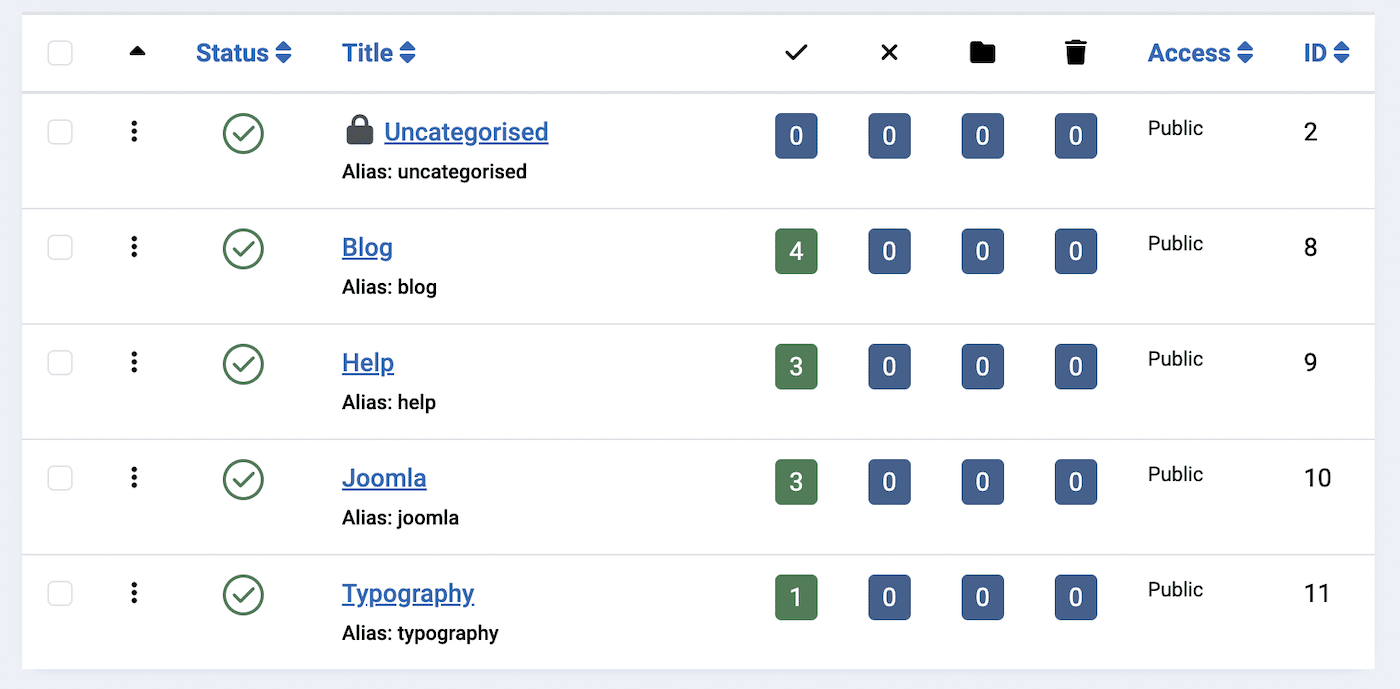
You can edit categories by clicking on the title, and add a new category by clicking the + option in the menu.
Editing Modules
Modules are a special type of content that act as the building blocks of your site. You can edit and add modules in the same way to add any other type of content to your Joomla site.
Navigate to Content » Modules to see your existing modules.
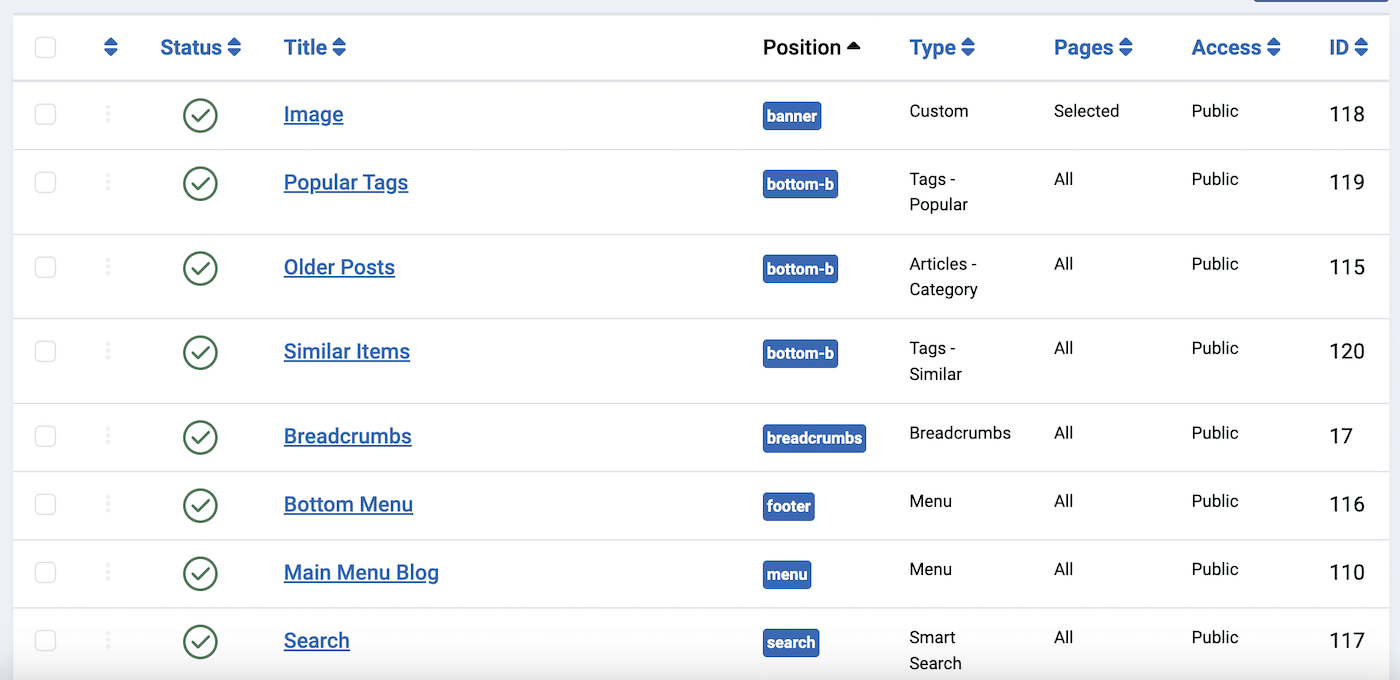
As well as setting the page each module is displayed on, you can also select its position within your site design.
You can download pre-built Joomla components or if you have technical experience, you can even have a go at designing your own.
Step 6: Launch Your Joomla Site
Congratulations! If you’ve made it this far, you’ve already managed to build a basic website in Joomla and you’ve taken the first steps towards becoming a Joomla expert!
The Joomla community is supportive and helpful, so there are lots of free resources available online and community forums if you get stuck and need some extra help.
Have fun experimenting with your Joomla site and let us know how you think it compares to other CMS platforms like WordPress and Magento.
FAQs
Does Joomla have a database?
Yes, Joomla uses a database, typically a MySQL database, to store its data. During installation, a database is created to hold content, user information, and configurations. Joomla supports other databases like PostgreSQL and SQL Server, and its use of a database enables dynamic generation of web pages based on stored content.
Is Joomla free?
Yes, Joomla is a free and open-source CMS. It is available for anyone to download and use without any cost. Joomla is released under the GNU General Public License, which ensures that it remains free for users to use, modify, and distribute. This makes it a popular choice for creating and managing websites, especially for those who are looking for a cost-effective solution.
Is Joomla obsolete?
Joomla is not considered obsolete. It remains a popular and actively maintained CMS. While Joomla may not have as large a market share as some other CMS platforms like WordPress, it continues to have a dedicated user base and a community of developers who contribute to its development and maintenance.
What are the disadvantages of Joomla?
Joomla’s disadvantages include a steeper learning curve than platforms like WordPress, making it less beginner-friendly. Its flexibility can lead to complexity in setup and management. The extension ecosystem is smaller, potentially limiting functionality options. Joomla sites may also require more optimization for speed, and its community, while active, is smaller than those of larger CMS platforms, affecting support availability.
Which is easier, Joomla or WordPress?
The choice between Joomla and WordPress largely depends on the user’s technical proficiency and specific website needs. WordPress is widely considered to be an easier platform for beginners to learn and user. Joomla, while more flexible and feature-rich, has a steeper learning curve and is better suited for users with web development experience or specific advanced functionality needs.
That’s it! Now you know how to set up Joomla.
Joomla not right for you? Maybe you’d like to learn about an alternative like WordPress? Check out our tutorial on how to set up a WordPress site for more information.
