Do you want to understand more about how to use Google Postmaster Tools to monitor your email deliverability and identify issues with errors and spam reports?
Postmaster Tools is a free online tool from Google that gives you important information about the emails you send to Gmail users and the reputation of your sending domain.
With Google’s recent sender requirement updates, it’s even more important to keep an eye on your email metrics, as senders are expected to keep their spam rate below 0.1% and never above 0.3%. Monitoring your email in Postmaster tools means you can be aware and take action as soon as you exceed these limits.
What Is Google Postmaster Tools?

Google Postmaster Tools is a website-based analytics tool that can give you valuable insights into how the emails you send are being handled by Gmail.
It’s designed to help marketers, system administrators, and all types of email senders understand more about their email delivery.
By using the data provided by Postmaster Tools, you can tackle spam complaints promptly and troubleshoot email deliverability problems.
Postmaster Tools monitors various metrics that are critical to email deliverability:
- Spam rate
- IP reputation
- Domain reputation
- Feedback loop (more detailed spam complaint reports)
- Authentication (SPF, DKIM, DMARC)
- Encryption
- Delivery errors
Why Use Google Postmaster Tools
Postmaster Tools is particularly useful if you send large volumes of email. It can help you stay on top of any deliverability issues and to maintain a good sender reputation with Google, which is crucial given Gmail’s massive user base.
A good reputation with Gmail can lead to higher email open rates, better engagement, and ultimately, better deliverability and more successful email campaigns.
However, as well as using monitoring tools like Postmaster Tools, it’s also important to choose a reliable email provider.
For purposes such as sending transactional email from your website, when it’s critical that emails reach the inbox quickly and aren’t marked as spam, it’s a good idea to use a dedicated SMTP delivery service like SendLayer.
A reliable SMTP service ensures that your emails are correctly authenticated, securely transmitted, and efficiently delivered to your recipients’ inboxes.
Additionally, SendLayer provides detailed email tracking, which allows you to monitor email deliverability, open rates, click-through rates, and even spam complaints in real-time.
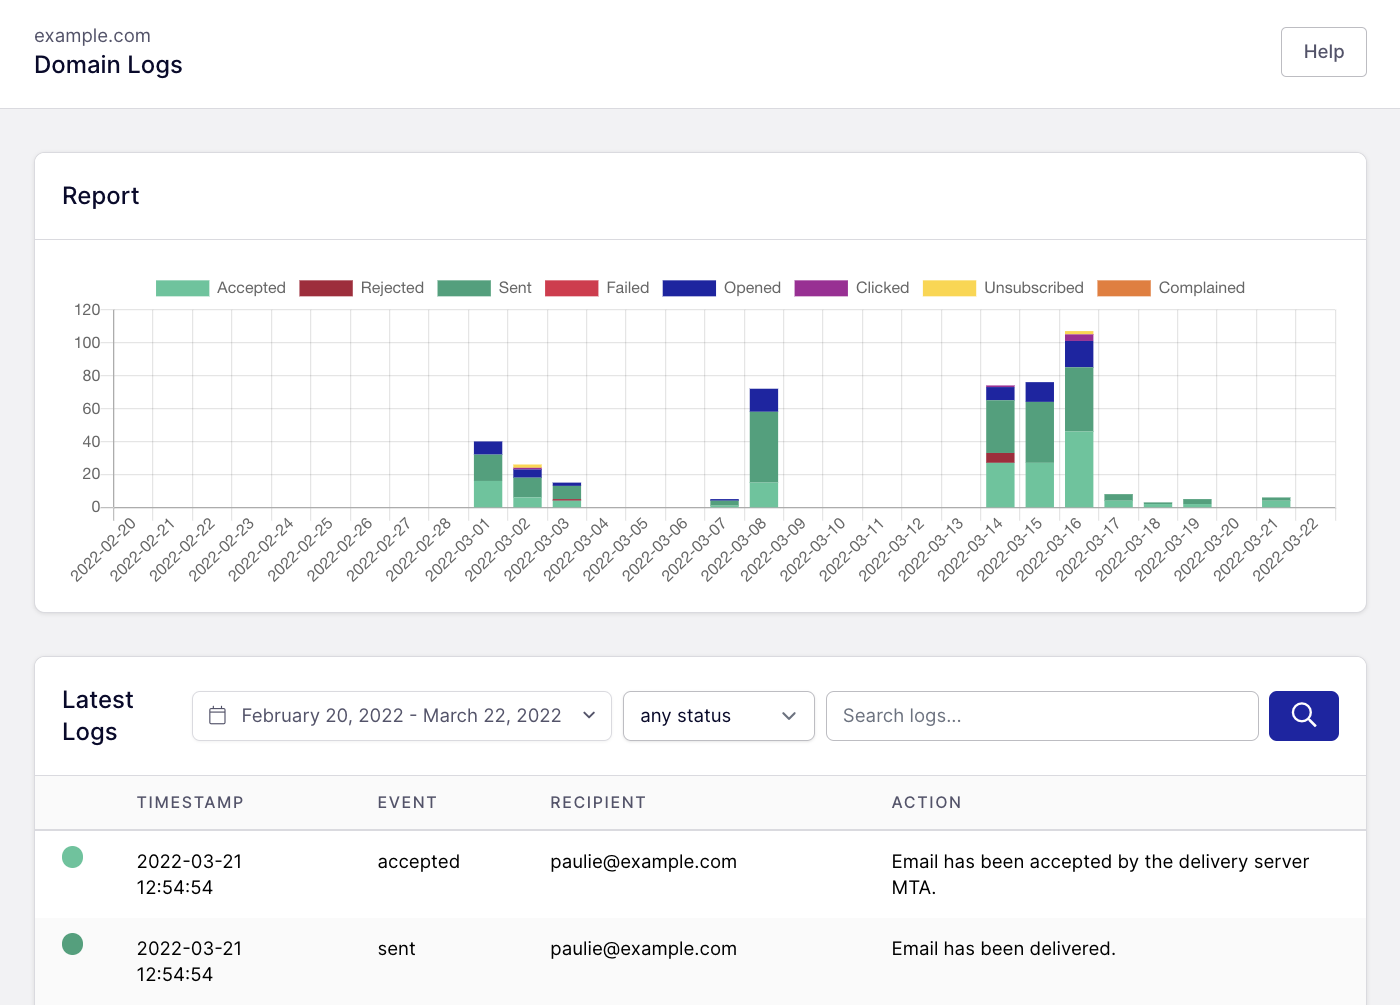
Postmaster tools only displays data when you’re sending a high volume of email. If you’re sending lower volumes, you can use the email analytics dashboard in SendLayer to monitor your email metrics, even if you’re only sending a handful of emails.
Getting Started With Postmaster Tools
You need a Google account to sign in to Google Postmaster Tools. This can be your personal Google account or one associated with your organization.
You must also be able to prove ownership of the domain for which you want to monitor email traffic. Google uses this verification to ensure that only authorized users can access email performance data for a domain.
Adding and verifying your domain in Google Postmaster Tools
To get started, head over to Postmaster Tools and click the Get Started button.
Click Get Started again to add your email domain.

Enter the domain you’ll be using to send email and click Next.

Google will give you a TXT record that you need to add to your DNS settings.

You can find your DNS settings in the control panel of the service you bought your domain name from. This is usually your web host or domain name registrar. If you’re using a cloud platform like Cloudflare, open your DNS settings there instead.
If you need more help on where to find your DNS settings, you can find instructions on editing DNS settings for some popular web hosts here.
Once you’ve located your DNS settings, add a new record. Select TXT as the record type and paste the string Google gave you as the value of the record.

DNS records look slightly different across different providers, but the general process of adding them is the same. Once you’ve pasted in the record provided by Google, save the record and wait for the changes to update.
Once you’ve created the DNS record, return to Google Postmaster Tools, and click Verify.

You should see a confirmation message that your domain has been added.

Click Done, and that’s it! Your Postmaster Tools account is all set up and ready to use.
If you’re sending a low volume of email, you may see the message “No data to display at present. Please come back later.” Otherwise, you should be able to view several charts showing the health of your domain and email deliverability over time.
How To Use Google Postmaster Tools Dashboard
Google displays the data it collects from email you send to its users in a series of charts.
To view the charts, click your domain on the dashboard and select the chart you want to view.

You can also choose the time period to display from the last 7 days to the last 120 days.
Spam Rate
Your spam rate is one of the most important metrics to measure in Postmaster Tools

This chart shows the number of spam complaints you have received each day. You should aim to keep this number below 0.1%.
While spikes in spam complaints are not uncommon, you should take action if you frequently have a spam complaint rate of 0.3% of above as this could cause your emails sent to Gmail users to be blocked.
To keep your spam rate low, ensure it’s easy for users to unsubscribe to your emails and make sure you’re sending information which is relevant. You can also read our guide to email blacklisting for some more tips and email marketing best practices.
IP Reputation
IP reputation is a measure of how trustworthy Google believes the IP address you send your emails from is.

Unless you send email from a dedicated IP, your IP reputation could be affected by other senders sharing the same IP. This is why it’s so critical to choose a reputable email provider.
If your IP reputation is consistently low or bad, contact your email provider with your concerns. If there is no improvement, you may want to consider switching to a new provider.
Domain Reputation
The domain reputation chart lets you see how Google sees the reputation of your email sending domain over time.

Ideally, your domain reputation should be High. If you’ve got work to do, take a look at our guide to domain reputation and how to improve it.
Feedback Loop
Feedback loop provides more information about spam complaints to bulk email senders. If you want to view data on this screen, you’ll need to add a Feedback-ID header to your emails. However, most senders don’t need to worry about this section.
Authentication
The authenticated traffic graph shows you the number of emails that were successfully authenticated via DKIM, SPF, and DMARC.

Your authentication rate should be close to 100% for all three authentication methods. For more information read our guide on email authentication.
Encryption
The encryption chart shows the percentage of your emails using TLS encryption. Again, this should be close to 100%. If not, check any plugins and software you’re using to send email and make sure the settings specify to use TLS encryption rather than SSL or no encryption.
Delivery Errors
Finally, the delivery errors report is another very useful chart that shows you how many of your emails were delayed or refused by Google mail servers.

It’s normal for a small percentage of mail to fail. But if you’re seeing spikes or consistently high numbers in this chart, you should investigate why Gmail is blocking your email and fix the problem as soon as possible.
Make sure to review your Google Postmaster Tools data regularly so you can quickly spot any deliverability issues as they occur.
Remember, if you’re using SendLayer, you can also use the email log to get more information about failed emails and more easily troubleshoot errors.
That’s it! Now you know how to use Google Postmaster Tools.
Next, would you like to learn about how to stop contact form spam? Contact form spam can damage your email reputation and affect deliverability, so it’s important to prevent it from the start Check out our tutorial on stopping contact form spam for more information.
0 comment on "How To Use Google Postmaster Tools To Monitor Email Deliverability"