
Are you looking for help to set up QuickBooks for the first time?
Intuit QuickBooks is user-friendly accounting software aimed at small businesses. QuickBooks is available in two main versions: a downloadable desktop version for Mac and PC, and an online version that stores your data in the cloud
In this guide we’ll take you through the steps of downloading and installing QuickBooks Desktop, setting up your account, configuring your settings, connecting your email, and everything else you need to make the most out of the platform.
How To Set Up QuickBooks Desktop
QuickBooks offers a 30-day free trial of the desktop software. So if you want to try out the system before signing up for a paid contract, follow our easy setup guide below.
Step 1: Download and Install Quickbooks
Follow this link to download the QuickBooks free trial. Mac users should download QuickBooks Desktop for Mac Plus 2024 and PC users should download QuickBooks Desktop Enterprise 24.
When the file is downloaded, run the installer. The process differs slightly for Mac and PC. In this tutorial, we’ll be showing the Mac version.
During the installation process, you may be prompted to log into your Intuit account or create one if you don’t already have one.
After you’ve installed QuickBooks, you’ll be taken to a welcome screen where you can get an overview of new features that have been added since the last update.

After closing the welcome screen, you’ll see the file structure of your QuickBooks files. As this is the first time you’re running QuickBooks, you’ll need to set up a new company file for your business.
Click the Get Started button.

Click the Start Setup button to create your company file.

Enter a password to protect your QuickBooks account.

Fill out your company address and tax information and click the Next button.

Choose your industry and the assets, income sources, services, and other account categories that are relevant to your business. If you’re not sure, you can leave the defaults that are selected by QuickBooks.

When you’ve chosen all the relevant accounts, click the Finish button to create your company file.

Click the OK button to go to your QuickBooks dashboard.

Congratulations! The setup is all complete and you can go ahead and start exploring QuickBooks.
Before you start using QuickBooks, you should take the time to configure the settings to ensure everything is set up correctly and you can use the software effectively.
Step 2: Configure Your Email Settings
It’s crucial to ensure QuickBooks is sending emails correctly.
QuickBooks generates and sends emails to customers, vendors, and employees to send various notifications and documents including:
- Invoices
- Purchase orders
- Statements
- Payment reminders
- Payment confirmations and receipts
- Notifications of received payments
If any of these emails don’t reach the inbox or are delayed, it can cause serious problems. So it’s vital to connect QuickBooks to a reliable email service to ensure all messages reach their intended recipients.
QuickBooks Desktop gives you two options for sending email:
- Use your default email application such as Outlook or Apple Mail.
- Send emails directly from QuickBooks by connecting to an SMTP service.
We recommend the second option as it allows you to send automated emails for notifications such as payment reminders. It’s also more secure than using your email client.
Setting Up SMTP Email Settings
To connect QuickBooks to your email service, you’ll need to know your SMTP server, SMTP port, and the username and password for your email account. If you don’t know this information, contact your mail provider for advice.
Alternatively, you can use a dedicated SMTP delivery service like SendLayer to handle your email. SendLayer is designed for handling transactional emails from your website or apps like QuickBooks and offers several advantages over a standard email service:
- Instant delivery – no waiting around to receive important emails
- Better deliverability – no need to worry about emails bouncing or being sent to spam
- Protect your delivery reputation – SendLayer sets up a subdomain for your outgoing emails, which ensures your primary domain will never be penalized or end up on a blacklist.
- Email logs and analytics – keep track of all the emails you send and see if they’ve been delivered, opened, or clicked.
Sign Up for SendLayer
To get started with SendLayer, sign up for an account by going to the pricing page and choosing a suitable plan. You can try out the service with the free account, which gives you 200 emails.

Once you’ve created your account, log into your SendLayer dashboard.
Adding and Authorizing Your Domain
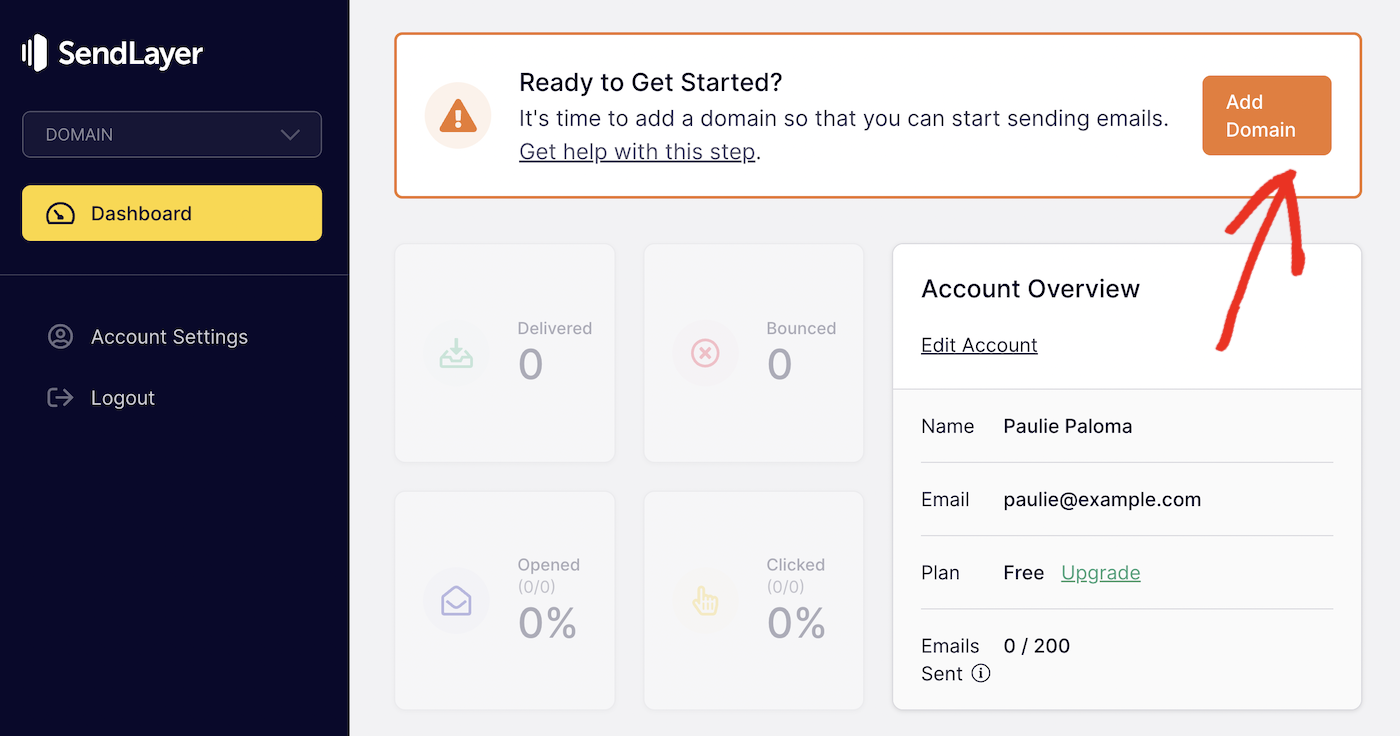
Once you’ve created a SendLayer account, you need to add the domain you want to send your QuickBooks emails from. Click the Add Domain button in the top right corner.
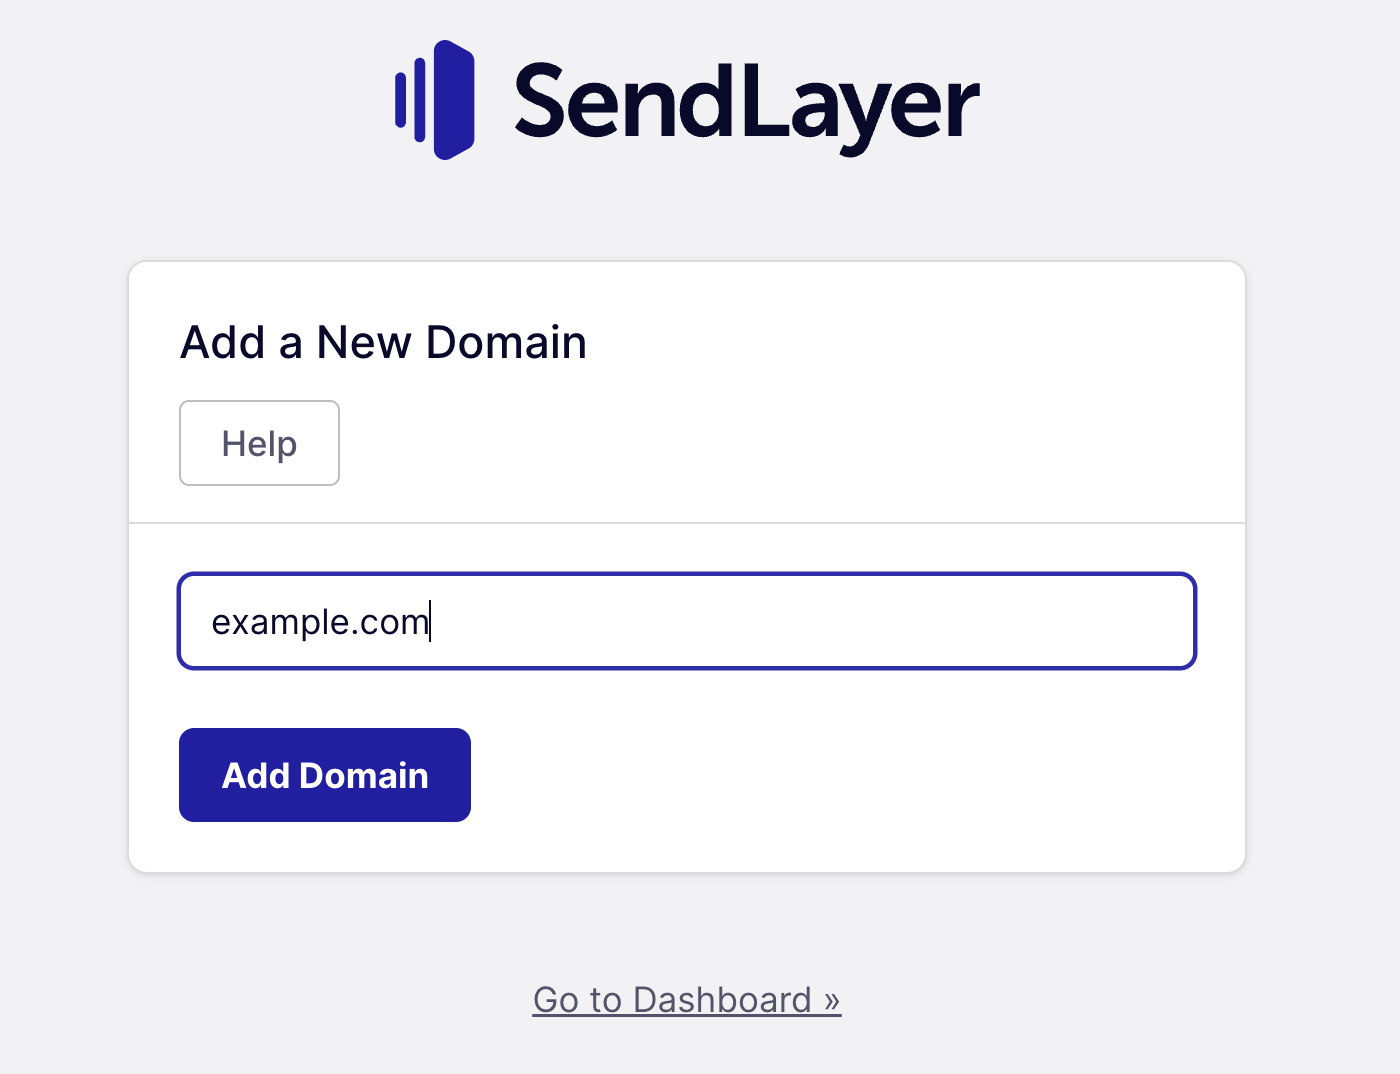
Enter your domain and click the Add Domain button.
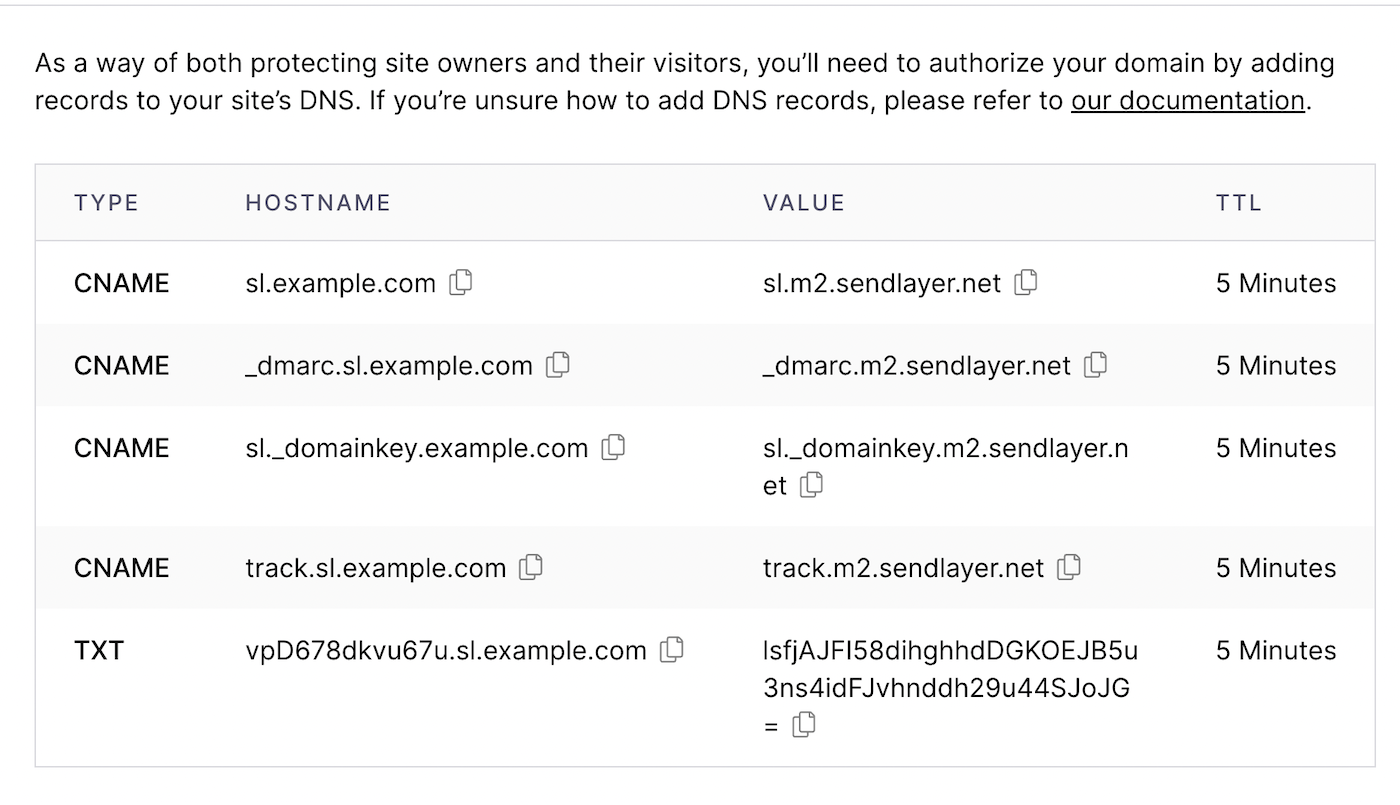
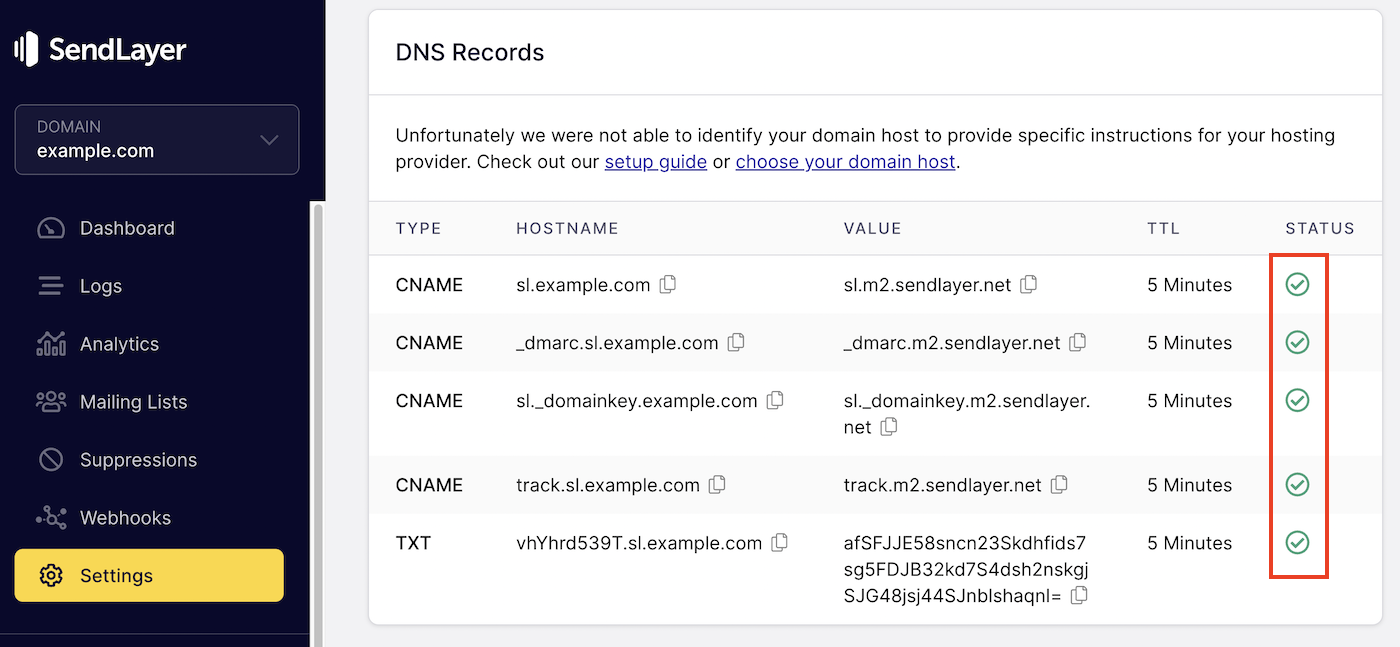
To authorize your domain for optimal email deliverability, SendLayer will generate 5 new DNS records for you. After these DNS records are generated, add them to your domain DNS settings in your web hosting account. You can follow our domain setup guide if you’re not sure how to do this.
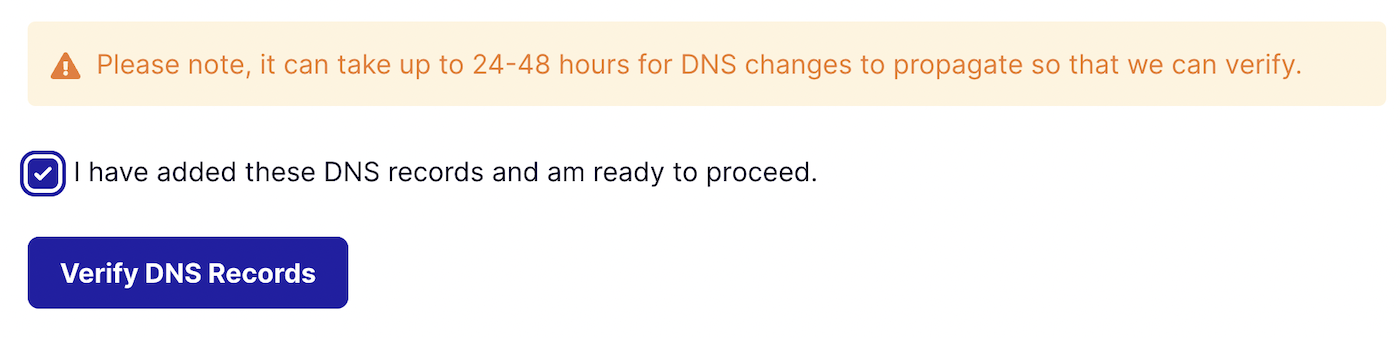
Once you’ve added the records to your DNS settings, go back to SendLayer, tick the box, I have added these DNS records and am ready to proceed, and click the button to Verify DNS Records.
You can check your domain has been authorized by clicking on Settings in the sidebar menu of your SendLayer dashboard and checking the DNS Records & Settings section.
If SendLayer has verified your domain’s DNS records, you will see a green checkmark in the Status column.
Once your domain is activated in SendLayer, you can configure your email in QuickBooks.
Note: changes to your domain DNS settings can take time to propagate across the internet. You may need to wait up to 48 hours until SendLayer can verify your DNS settings.
Add SendLayer SMTP Settings to QuickBooks
Access your email settings by navigating to QuickBooks Settings in the main menu.

Click on Email

Choose the option “Send directly out of QuickBooks using your email account”

Choose Custom under the email provider dropdown and click the OK button.

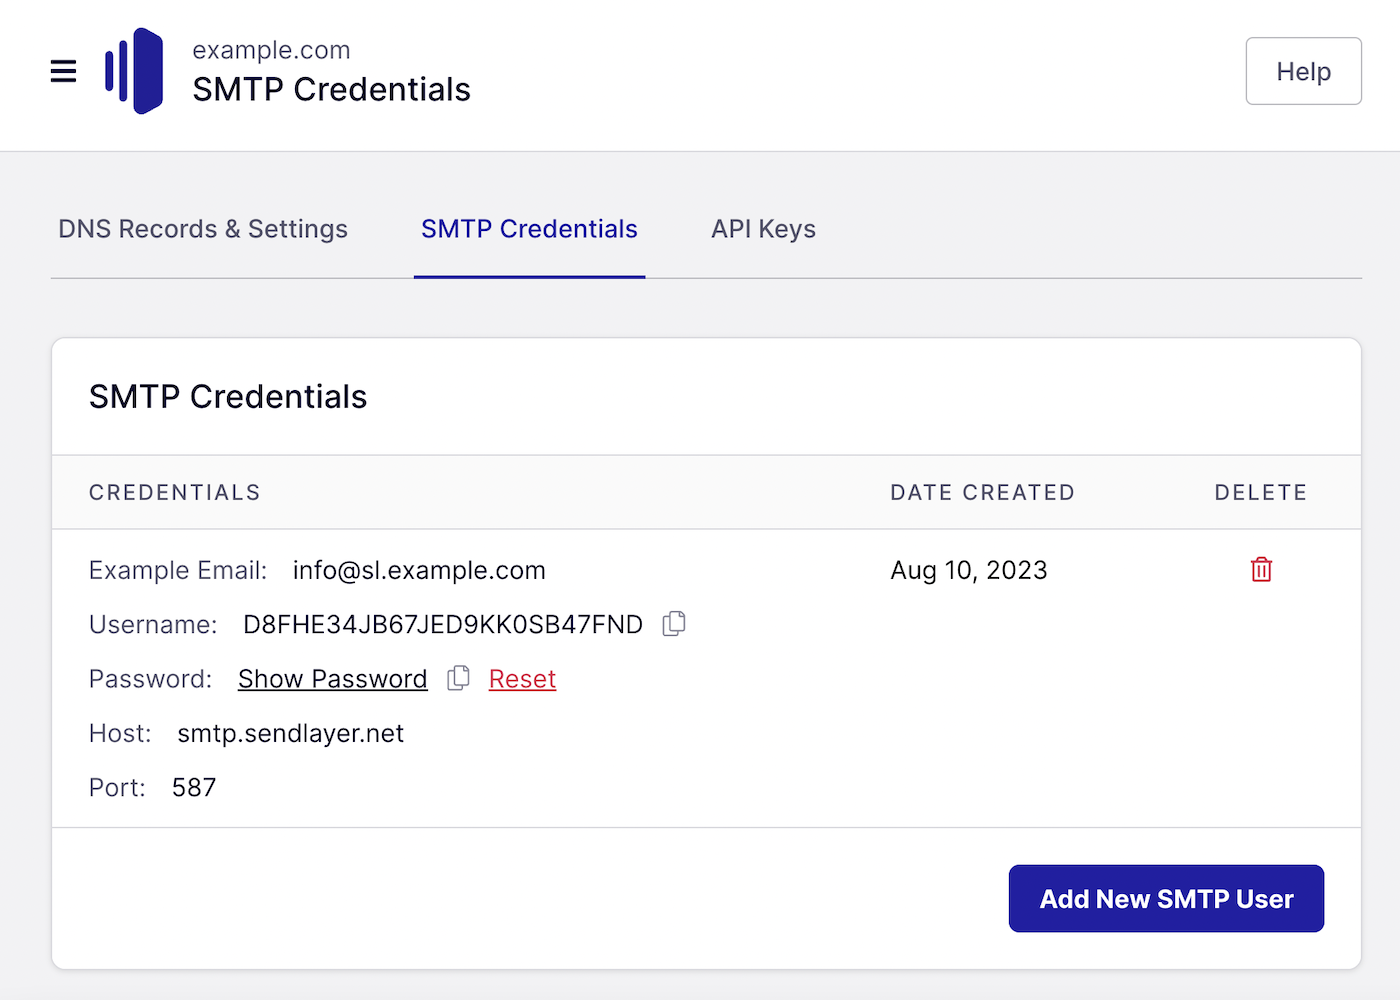
Fill out the details from your SendLayer dashboard. All the information you need is on the Settings page, under SMTP credentials.
Fill out the following data in your QuickBooks SMTP settings:
- Email Provider: Custom
- Account Name: SendLayer (or another name of your choice)
- Full Name: The name you want to use as your email sender name
- Email Address: The email address you want your QuickBooks emails to come from (this should match the domain you just set up in SendLayer.)
- SMTP Server: smtp.sendlayer.net
- Authentication: Password
- Username: Copy and paste the username from your SendLayer dashboard
- Password: Copy and paste the password from your SendLayer dashboard
- Port: 587
- Connection Type: SSL/TLS

QuickBooks will test the connection to your SMTP server using the credentials you’ve provided. If it works correctly, your email is now set up in QuickBooks!
You can click the Show Email Log button on the email settings screen to see a complete list of all the emails sent from QuickBooks, along with status messages and any errors. This can be helpful if you need to troubleshoot any issues such as emails not being received.

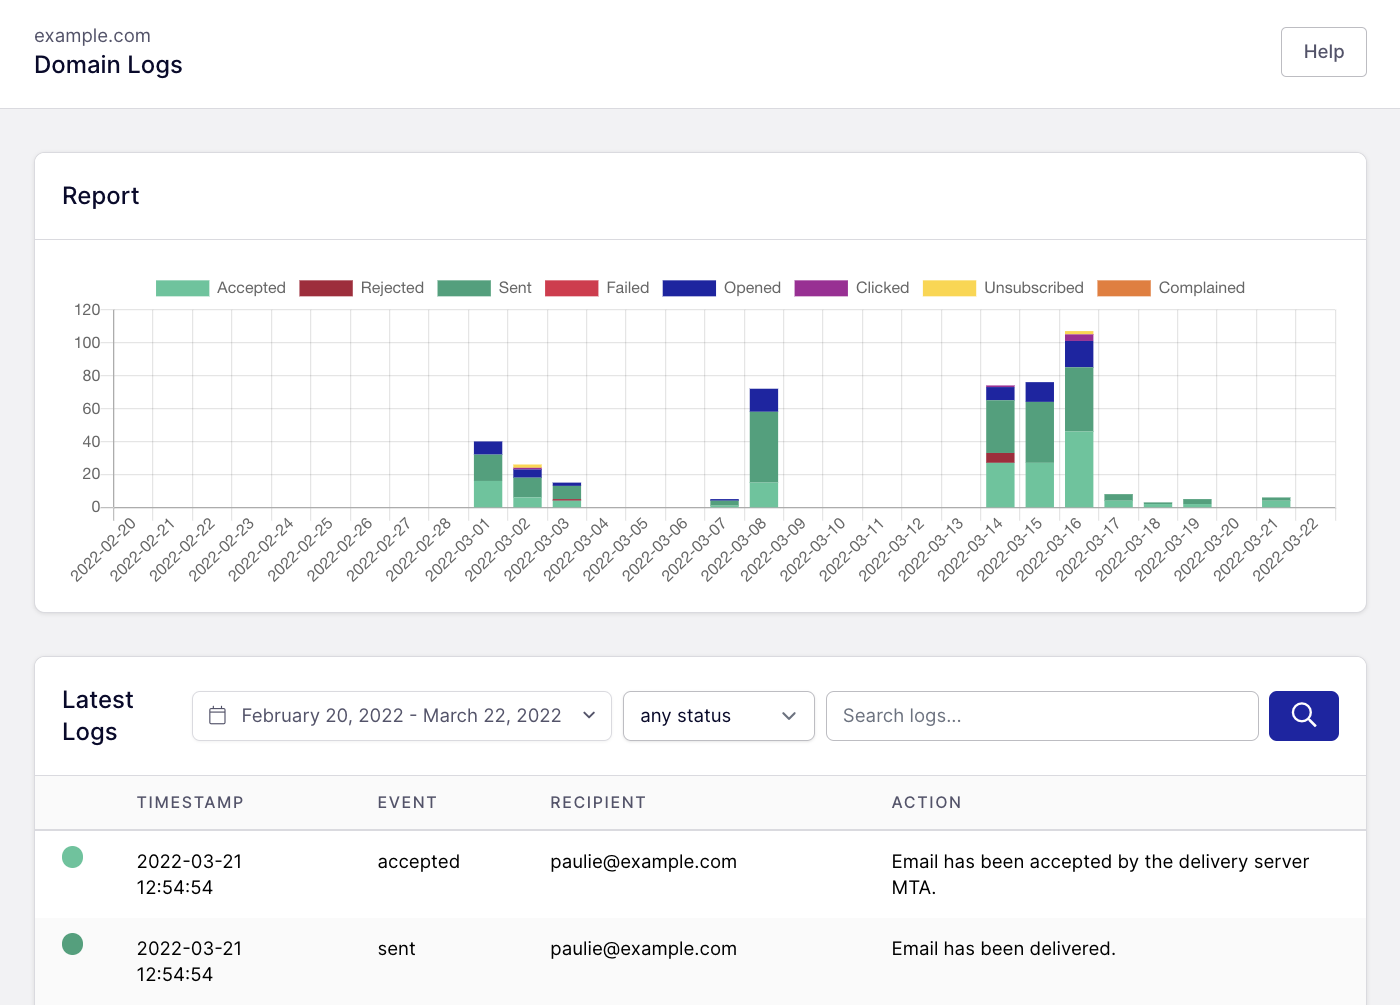
You can also view your email logs in your SendLayer dashboard. The SendLayer email logs are displayed in a user-friendly format, unlike the QuickBooks email logs, so you can see the emails that have been sent from QuickBooks at a glance.
Now that your email is linked to your QuickBooks account, you can go ahead and configure the rest of the settings to get QuickBooks working the way you want. It’s best to refer to the official QuickBooks documentation for detailed guidance, but we’ve provided a quick overview below to get you started
Step 3: Add Contact Details
Before you can really make use of all the features of QuickBooks, you’ll need to add all the contact details of your customers, vendors, and employees.
You can access your contact database easily by clicking on the associated icon in the menu at the top of your dashboard.
Let’s add a new customer. Click on the Customer icon.

The customer center shows you all the customers you already have in your database. Click the + icon to add a new customer.

Enter the details of your customer including the name, customer type, billing address, phone number, email, address, and any other relevant details.

Finally, click the OK button to add the customer to your QuickBooks database.
You can repeat this process for adding more customers. The process is very similar for adding vendors and employees.
Step 4: Send an Invoice
Let’s make sure your email is set up correctly by generating an invoice email. You can set up a dummy customer for this purpose so the invoice is sent to your own email inbox.
Click on Create Invoice on your dashboard homepage or Invoices in the menu.

Choose the customer you want to invoice from the dropdown.

Fill out the invoice details and click the @ icon when you’re ready to send it.

QuickBooks will automatically create an email. You can edit this text before you send it if you wish. Click the Send button when you’re ready.

Check your mailbox to make sure you received the email. It should look something like this:

The invoice is sent as a PDF email attachment.
You’ve now successfully set up QuickBooks and you should have a basic idea of how the software works.
Take some time to explore the dashboard and experiment with adding products, setting up vendor information, paying bills, receiving payments, and setting up bank feeds.
FAQs
As a transactional SMTP service, our SendLayer support team is often asked questions about QuickBooks setup and email. Here are some of the most common questions we receive:
QuickBooks Desktop vs. Online: What’s the Difference?
QuickBooks Desktop is traditional accounting software for Mac or PC with an annual subscription, while QuickBooks Online is a cloud-based platform that you pay for monthly.
If you’re considering QuickBooks for your small business, you may be wondering if QuickBooks Online or Desktop is the best choice for you. Both platforms have their pros and cons, so you need to consider the individual needs of your business.
QuickBooks Desktop starts from $650 a year, which supports up to 40 users. QuickBooks online starts from $30 a month for up to 3 users. Other plans are available, with additional features and supporting more users.
If you’re looking for an accounting platform that you can access from any location or device, QuickBooks Online will be a better choice for you. This is the best option for remote teams.
On the other hand, QuickBooks Desktop offers more advanced features such as inventory tracking. As it’s installed on your computer and you can use your own custom email server, it’s also a more secure option than the Online version.
Is QuickBooks easy to set up?
Yes, QuickBooks is generally easy to set up, especially for those with basic accounting knowledge. It features an intuitive interface and a step-by-step setup guide that simplifies the process. QuickBooks also offers easy data import from other software, customizable options for different business needs, and a wealth of online resources and support to assist new users. This user-friendly design makes it accessible even to those without extensive accounting experience.
Can I import data from another accounting software to QuickBooks?
Yes, QuickBooks allows you to import data from other accounting software. You can typically import lists like customers, suppliers, and chart of accounts, as well as financial transactions. The process varies depending on the format of your existing data and the QuickBooks version you are using.
How do I set up payroll in QuickBooks?
To set up payroll in QuickBooks, you’ll need to subscribe to a QuickBooks Payroll service. Once subscribed, you can set up payroll by entering your business and employee information, setting up your pay schedule, and entering tax details. QuickBooks also helps you keep track of tax filings and payments.
What is the chart of accounts and how do I set it up in QuickBooks?
The chart of accounts is a list of all accounts used to categorize your financial transactions. In QuickBooks, you can set it up by selecting ‘Lists’ from the menu, then ‘Chart of Accounts.’ You can use the default accounts provided by QuickBooks or create custom accounts specific to your business needs.
That’s it! Now you know how to set up QuickBooks.
Next, would you like to learn about setting up Help Scout? Check out our tutorial on setting up a help desk in Help Scout for more information.
