


Nodemailer is the default answer for sending email from JavaScript on the server, and it’s been that way for over a decade. It’s also the fastest way to build something that works in testing and fails in production.
The catch is that Nodemailer is only a transport, not an email delivery service. So the SMTP server you point it at decides whether your mail lands.
In this guide, you’ll learn how to install Nodemailer, configure SMTP, and send your first email from Node.js.
You’ll also learn how to send HTML email, add attachments, use Gmail, and fix the errors that stop it sending. Let’s get started.
- How to send email with Nodemailer (quick steps)
- How to set up Nodemailer and send your first email
- How to send an HTML email with Nodemailer
- Send email to multiple recipients
- How do you send email with attachments?
- How do you use Nodemailer with Gmail?
- Why do Nodemailer emails go to spam?
- Troubleshooting common email failure issues
- Frequently Asked Questions
How to send email with Nodemailer (quick steps)
Sending email with Nodemailer takes 5 steps:
- Install the package with
npm install nodemailer - Get SMTP credentials from an email service
- Create a transporter with your host, port, and login
- Call
sendMail()with your message - Run
verify()to confirm the connection works
The rest of this guide walks through each step with working code.
What is Nodemailer, and what does it actually do?
Nodemailer is a Node.js module that sends email through an SMTP server you supply. It builds the message, opens an authenticated connection, transfers the mail, and reports back.
It has no mail server of its own. You’ll sometimes see it written as “node mailer”, but it’s one package: nodemailer on npm.

How to set up Nodemailer and send your first email
Here, I’ll show you how to add Nodemailer to an existing Node.js application.
Prerequisites
Before getting started, you’ll need to have the following:
- Node.js 20 or newer installed
- A project with
package.json(runnpm init -yif you don’t have one) - An SMTP service provider
I’ll use SendLayer SMTP for this tutorial. But the steps are similar regardless of your SMTP provider.
One of the standout features I like about SendLayer is its domain reputation protection. Your emails are sent from a subdomain (sl.example.com). This protects your primary domain in the event of any issues with your sender reputation.
After creating your SendLayer account, be sure to add and authorize your sending domain. This involves adding DNS records to prove domain ownership and improve email deliverability.
Step 1: Install Nodemailer
Start by installing the package from NPM:
npm install nodemailer dotenv
Nodemailer has no dependencies, so this adds one package to your project.
Notice that I added dotenv to the installation. This package helps with loading environment variables.
If you’re using ES modules, make sure "type": "module" is set in your package.json. The examples below use ES module syntax.
Step 2: Get your SMTP credentials
To configure Nodemailer, you’ll need your SMTP credentials for the transporter. Here’s how to retrieve your details in SendLayer.
Log in to SendLayer and go to Settings » SMTP Credentials. You’ll see the host, port, username, and password your transporter needs.
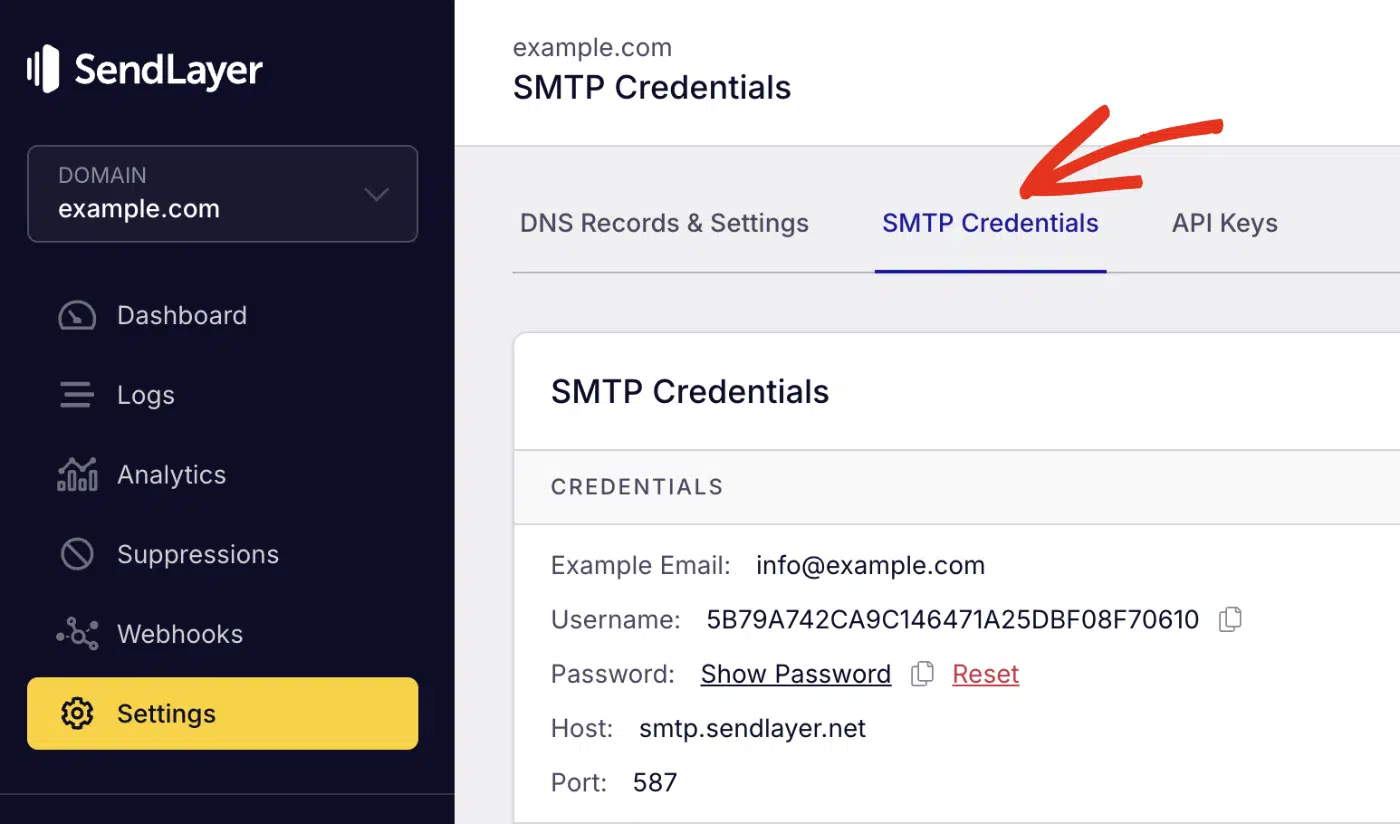
Go ahead and copy these details into a .env file within your project’s directory. Never paste these into your code:
# .env
SENDLAYER_USER=your_smtp_username
SENDLAYER_PASS=your_smtp_password
Pro Tip: Add .env to your .gitignore to ensure it stays on your machine. A committed SMTP password allows anyone to send mail from your domain. If you’ve already pushed one, rotate it in the dashboard instead of just deleting the line.
Step 3: Create the transporter
The transporter holds your connection settings. Create it once and reuse it:
// mailer.js
import nodemailer from 'nodemailer';
import 'dotenv/config';

export const transporter = nodemailer.createTransport({
  host: 'smtp.sendlayer.net',
  port: 587,
  secure: false,
  auth: {
    user: process.env.SENDLAYER_USER,
    pass: process.env.SENDLAYER_PASS,
  },
});
The secure flag confuses almost everyone. On port 587 it’s false, because the connection upgrades to TLS after it opens.
Set it to true only on port 465. Both ports are encrypted, so 587 with secure: false is not an insecure setup.
Step 4: Send a test email
To send your first email with Nodemailer, call sendMail() with your message. Wrap it in a try/catch so a failed send doesn’t crash your app:
// send.js
import { transporter } from './mailer.js';

async function sendTestEmail() {
  try {
    const info = await transporter.sendMail({
      from: '"Northside Goods" <[email protected]>',
      to: '[email protected]',
      subject: 'Your first Nodemailer email',
      text: 'If you can read this, your transporter works.',
    });
    console.log('Sent:', info.messageId);
    return info;
  } catch (error) {
    // Log it and move on. Never let a mail failure break the request.
    console.error('Send failed:', error.message);
    throw error;
  }
}

sendTestEmail();
Run it with node send.js. You should see a message ID in your terminal and the email in your inbox.

The from address must be on your authorized domain. Using an address on a domain you haven’t verified is the most common cause of a rejected send.
Step 5: Verify the connection before sending
Call verify() to test your credentials without sending anything:
// verify.js
import { transporter } from './mailer.js';

try {
  await transporter.verify();
  console.log('SMTP connection is ready');
} catch (error) {
  console.error('SMTP connection failed:', error.message);
}
Most tutorials skip this step. It’s the fastest way to separate a credentials problem from a message problem.
Pro Tip: Run verify() once when your app boots, not before every send. It opens a real connection, so calling it per message wastes time.
How to send an HTML email with Nodemailer
To send HTML emails, add an html property to your message. Keep the text property too, as a fallback for clients that don’t render HTML:
await transporter.sendMail({
  from: '"Northside Goods" <[email protected]>',
  to: '[email protected]',
  subject: 'Order #48211 confirmed',
  // Plain-text fallback. Some clients and most spam filters read this.
  text: 'Order #48211 confirmed. Total $90.72. Arriving Aug 8 to Aug 12.',
  html: `
    <table width="100%" cellpadding="0" cellspacing="0">
      <tr>
        <td align="center" style="padding:24px 0;">
          <table width="600" cellpadding="0" cellspacing="0"
                 style="font-family:Arial,sans-serif;color:#222;">
            <tr>
              <td style="padding:24px;">
                <h1 style="font-size:20px;margin:0 0 12px;">Order #48211 confirmed</h1>
                <p style="font-size:15px;line-height:1.5;margin:0;">
                  Thanks for your order. We're packing it now.
                </p>
              </td>
            </tr>
          </table>
        </td>
      </tr>
    </table>
  `,
});
Two rules for HTML email. Use tables for layout and inline all your CSS, because email clients strip code blocks.
Keep the layout to a single 600px column. That width renders reliably across Outlook, Gmail, and Apple Mail.
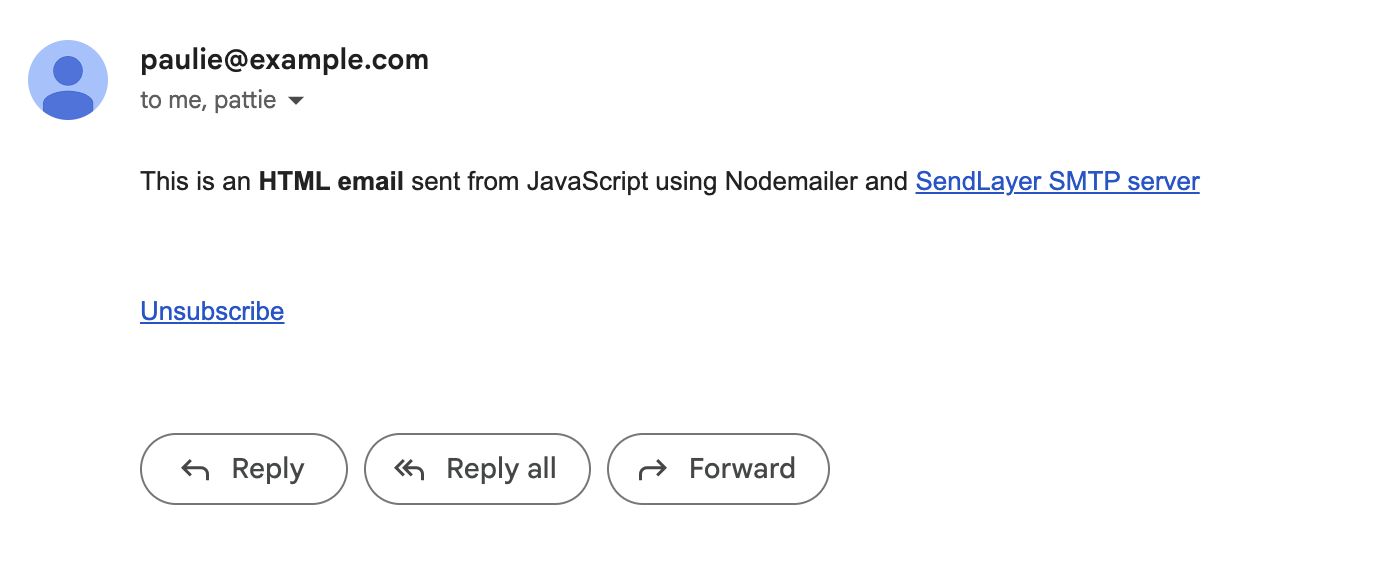
Including a plain-text alternative improves compatibility and gives recipients and filtering systems another representation of your message.
Building a specific flow? Our walkthrough of password reset emails in Node.js uses this exact setup.
Send email to multiple recipients
To send emails to multiple recipients using Nodemailer, pass an array to to, or use cc and bcc for the other fields:
await transporter.sendMail({
  from: '"Northside Goods" <[email protected]>',
  to: ['[email protected]', '[email protected]'],
  cc: '[email protected]',
  bcc: ['[email protected]'],
  subject: 'Weekly order summary',
  text: 'Your weekly summary is attached.',
});
Everyone in to and cc sees each other’s addresses. Use bcc when recipients shouldn’t.
Important: Don’t loop a marketing list through to. One message to 50 visible strangers leaks their addresses and reads as spam. Send individual messages instead.
How do you send email with attachments?
Add an attachments array. Each entry needs a filename and a source:
await transporter.sendMail({
  from: '"Northside Goods" <[email protected]>',
  to: '[email protected]',
  subject: 'Your invoice',
  text: 'Your invoice is attached.',
  attachments: [
    // 1. From a local file path
    { filename: 'invoice.pdf', path: './invoices/48211.pdf' },
    // 2. From a string or Buffer you generated at runtime
    { filename: 'summary.txt', content: 'Order #48211\nTotal: $90.72' },
    // 3. From a remote URL
    { filename: 'logo.png', path: 'https://yourdomain.com/logo.png' },
  ],
});
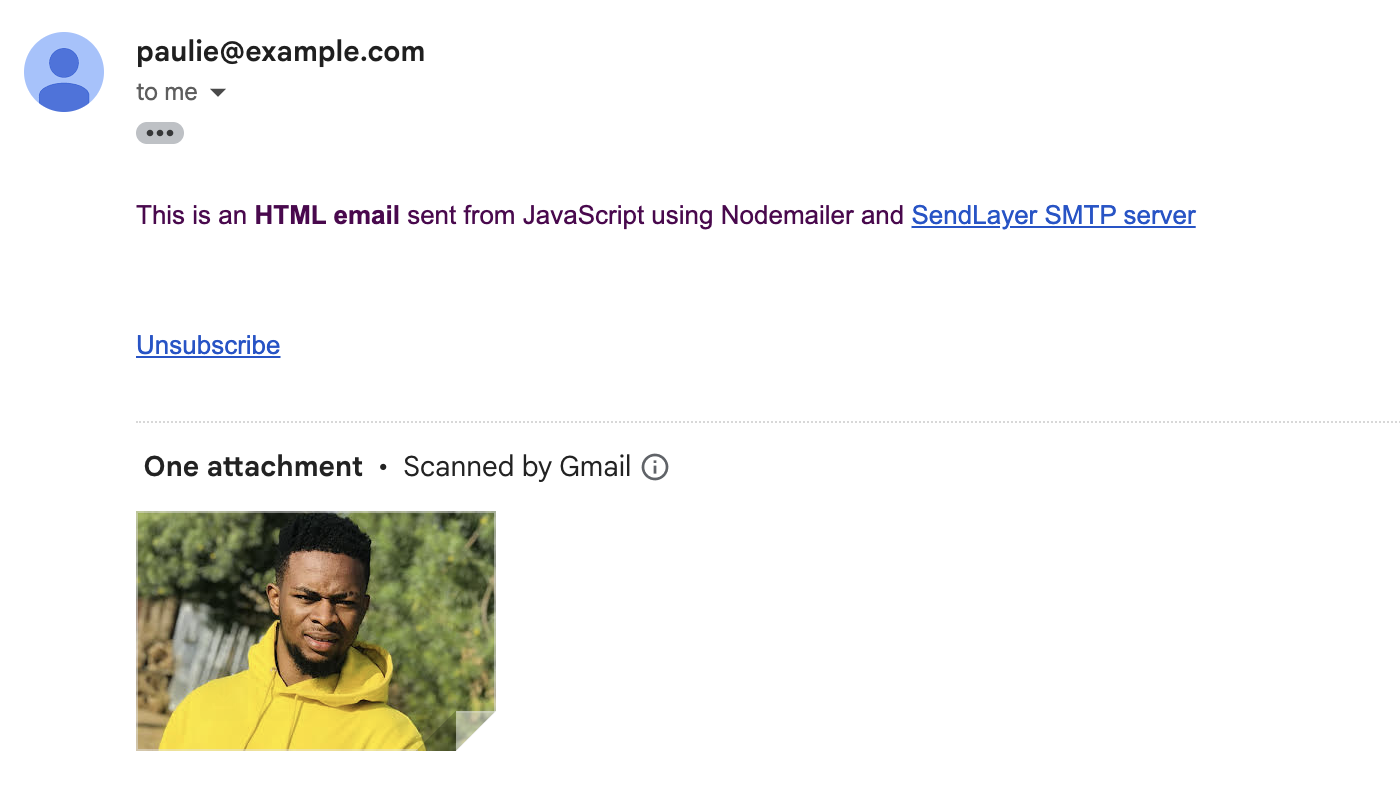
Keep the total message under 10 MB, including the body. Larger files should be stored with a download link in the email.
How do you use Nodemailer with Gmail?
Set service: 'gmail' and authenticate with an app password. Gmail blocks plain password logins, so you’ll need 2-Step Verification enabled first:
const gmailTransporter = nodemailer.createTransport({
  service: 'gmail',
  auth: {
    user: '[email protected]',
    // A 16-character app password, NOT your Google account password.
    pass: process.env.GOOGLE_APP_PASSWORD,
  },
});
Nodemailer recommends OAuth2 over app passwords for anything long-lived. An app password is fine for a local test.
Here’s the OAuth2 version. It stores a refresh token and swaps it for a fresh access token on each send:
const gmailOAuth = nodemailer.createTransport({
  service: 'gmail',
  auth: {
    type: 'OAuth2',
    user: '[email protected]',
    clientId: process.env.GOOGLE_CLIENT_ID,
    clientSecret: process.env.GOOGLE_CLIENT_SECRET,
    refreshToken: process.env.GOOGLE_REFRESH_TOKEN,
  },
});
OAuth2 survives password changes. It also takes time to set up a Google Cloud project, so budget an hour the first time.
Google applies several sending and recipient limits depending on your account type and how you send. Typical daily sending limits include:
| Personal Gmail | Google Workspace | |
|---|---|---|
| Recipients per 24 hours | 500 | 2,000 |
| Counts per recipient | Yes, each To and Cc counts separately | Yes |
| Delivery logs | No | Limited |
| Bounce handling | No | No |
Nodemailer’s own guide says Gmail is “not recommended for production workloads.” Google monitors for unusual login activity and can block your connection mid-send.
So Gmail works for a proof of concept. Move to a transactional service before real customers depend on it.
Why do Nodemailer emails go to spam?
Nodemailer emails land in spam when the receiving inbox can’t verify who sent them. The fix is DNS, not code.
Add 3 records for your sending domain:
| Record | What it proves | Without it |
|---|---|---|
| SPF | This server may send for your domain | Spam folder or rejection |
| DKIM | The message wasn’t altered in transit | Failed alignment checks |
| DMARC | What to do when SPF or DKIM fails | No policy, no reporting |
Google and Yahoo have required all 3 from bulk senders since February 2024. Microsoft applied the same rules to Outlook.com in May 2025. Google’s Email sender guidelines list the current requirements.
Three more things that hurt delivery, in order of how often they bite:
- No plain-text fallback. An HTML-only message may be less compatible with some clients and filtering systems.
- A
fromdomain that doesn’t align with SPF or DKIM. This can cause DMARC to fail and, depending on the domain’s policy, lead to quarantine or rejection.
See our guide on SPF, DKIM, and DMARC for more details on email authentication.
Troubleshooting common email failure issues
Most Nodemailer failures throw one of 3 errors. Match the message to the fix.
Of the three, the secure flag mismatch is the one we see most often, and it’s the easiest to miss because the code looks correct.
EAUTH, invalid login. Your username or password is wrong, or you’re using an account password where an app password is required. Confirm the credentials by running verify() on its own.
ECONNREFUSED, or a hanging connection. The port is blocked. Some hosting and cloud environments restrict outbound SMTP connections, so test the port directly:
openssl s_client -connect smtp.sendlayer.net:587 -starttls smtp
If that hangs or is refused, the port is blocked and no code change will fix it. Try the other port.
ESOCKET, a secure mismatch. You set secure: true on port 587 or false on 465. Match the flag to the port.
Two failures that throw nothing at all are worth knowing:
- The send resolves but nothing arrives. Check your provider’s delivery logs. A message can be accepted and then rejected downstream.
Frequently Asked Questions
These are answers to some of the common questions developers ask about sending emails with Nodemailer.
Is Nodemailer free?
Yes. Nodemailer is open source under the MIT-0 license, so it’s free for commercial use with no attribution required. You’ll still pay whatever your email service charges, since Nodemailer only sends through a server you provide.
Can you use Nodemailer in browser JavaScript?
No. Nodemailer is server-side only, because it needs Node’s networking modules and it holds your SMTP password. Putting those credentials in browser JavaScript would expose them to anyone who opens devtools. Send from a backend route instead. If you need the client-side options, see our guide to the other ways to send email in JavaScript.
Do you still need an email service with Nodemailer?
Yes. Nodemailer needs an SMTP server to connect to, and that server owns your sending reputation.
Here’s what that means in practice. Nodemailer will happily report a successful send while the receiving inbox drops the message into spam.
Your options are your own mail server, a personal mailbox like Gmail, or a transactional email service like SendLayer.
That’s it! Now you know how to use Nodemailer to send email in Node.js.
Next, see how the same setup looks in a full framework. Read our guide on sending email in Next.js with Nodemailer to wire it into an API route.
