What Is Causing This Error?
If the app you created on Google Cloud Console isn’t published or currently set to Testing, you’ll likely encounter this error.
Resolving the Error – Solution
To fix this error, you’ll need to publish your app from Google Cloud Console and reauthorize your SMTP plugin. We’ll explain the steps in this guide.
Publishing Your Google App
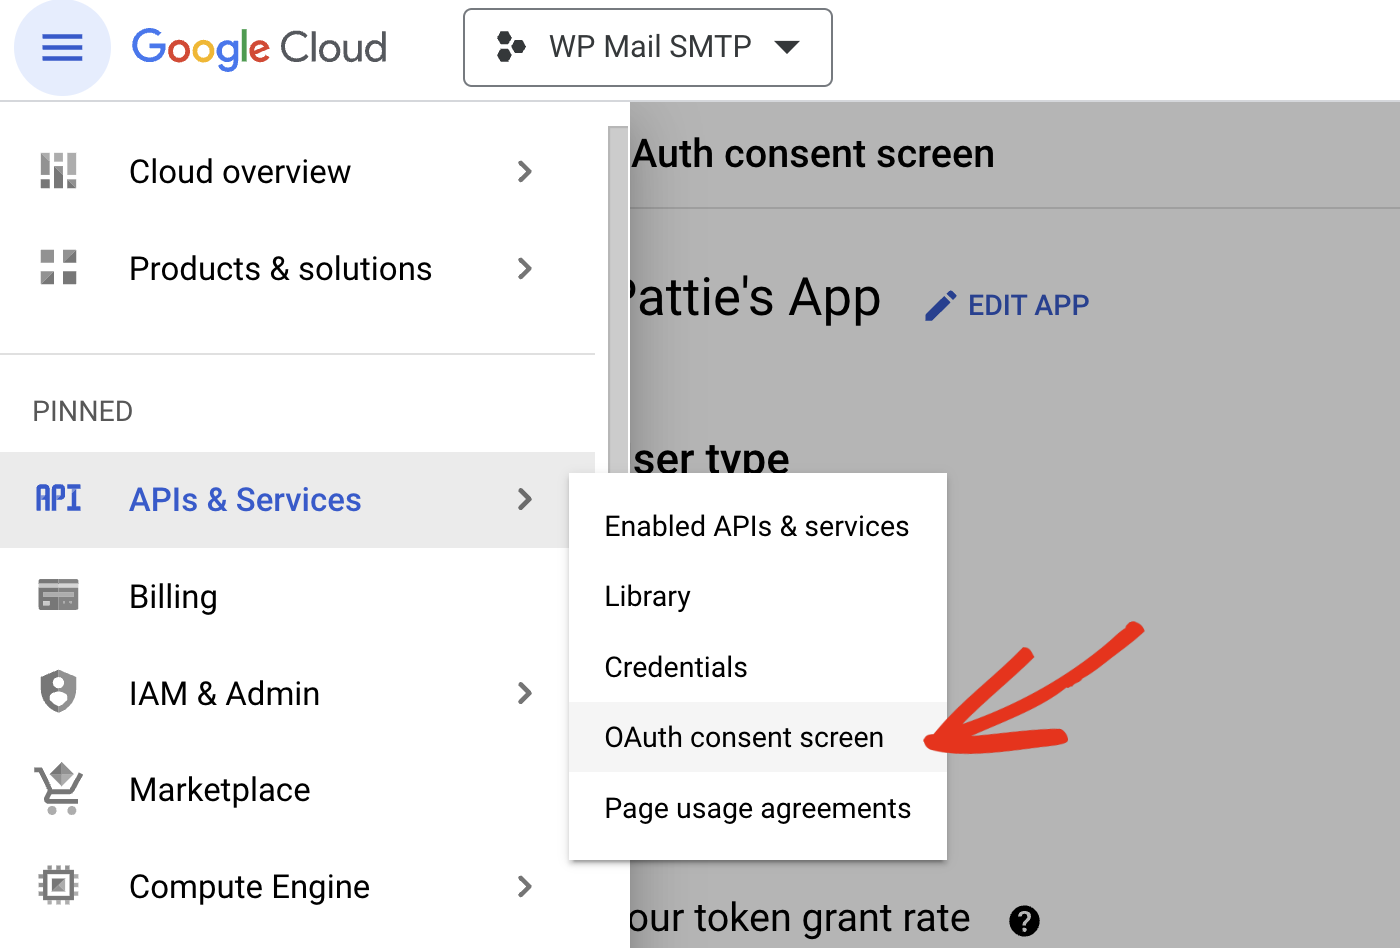
To publish your app, log in to the Google Cloud Console dashboard. Within your Google Cloud project, navigate to APIs & Services » OAuth consent screen.
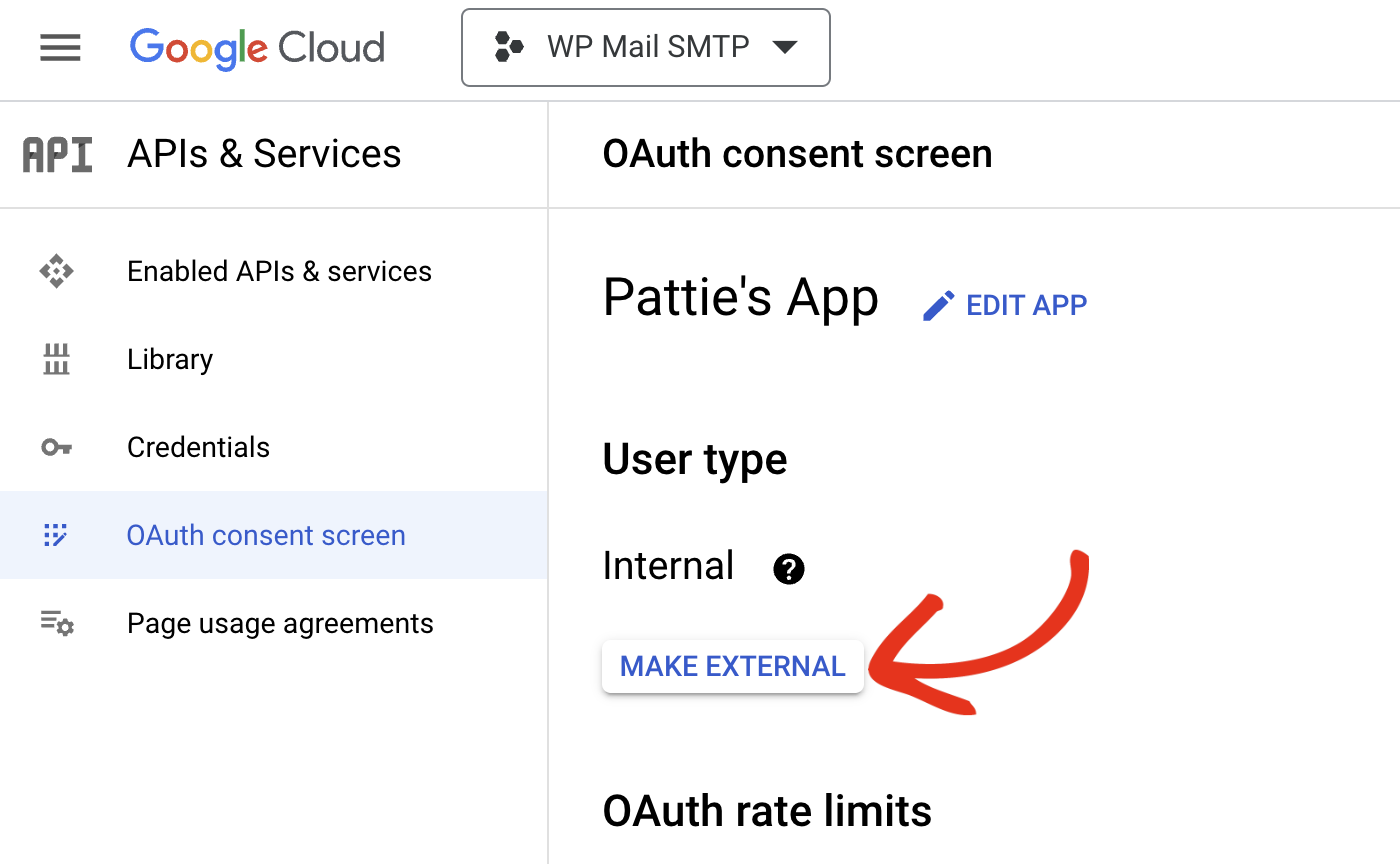
In the OAuth consent screen page, click the MAKE EXTERNAL button.
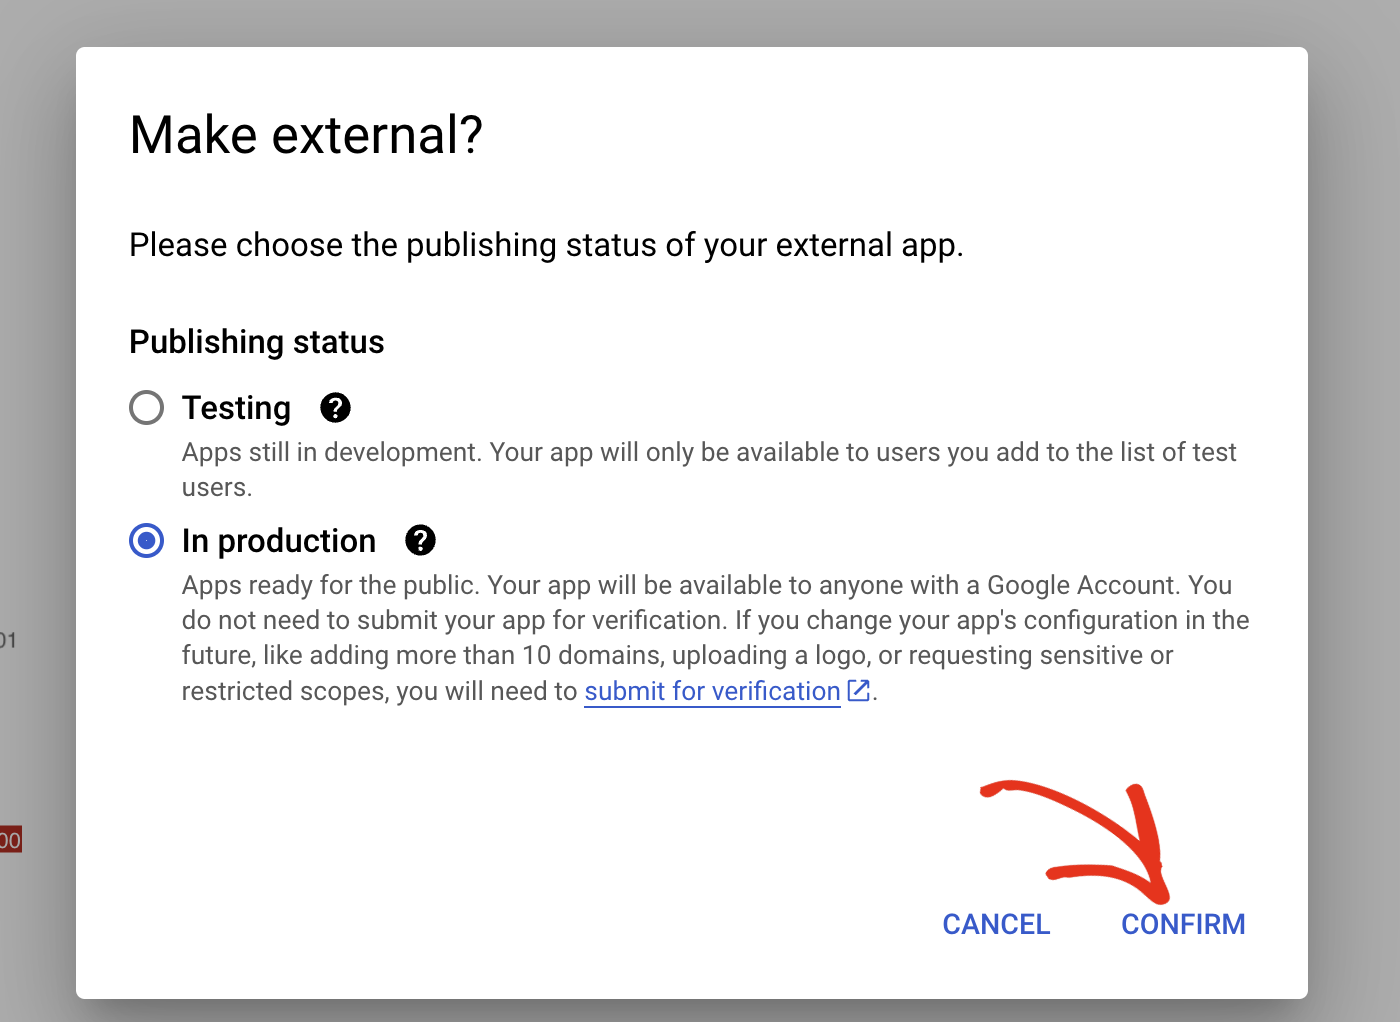
Next, select the In Production option in the overlay that appears. Then click CONFIRM to save your changes.
After updating your app status, you’ll need to reauthorize your Google app in the SMTP plugin you’re using.
Authorizing Your App
We’ll use WP Mail SMTP as an example for this guide. But the steps should be similar for other SMTP plugins.
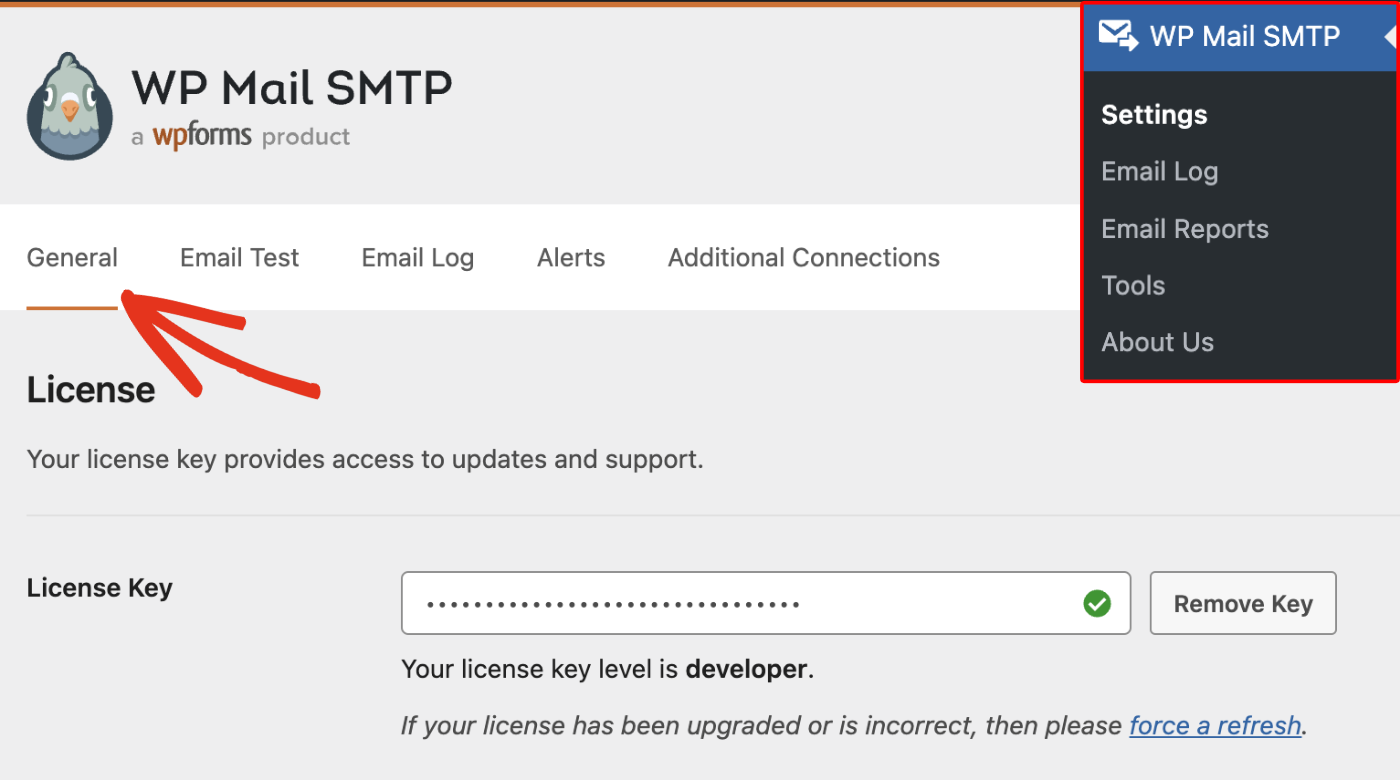
To begin, log in to your WordPress admin area. Then go to WP Mail SMTP » Settings, and select the General tab.
After that, scroll to the Authorization section and click the Remove OAuth Connection button.
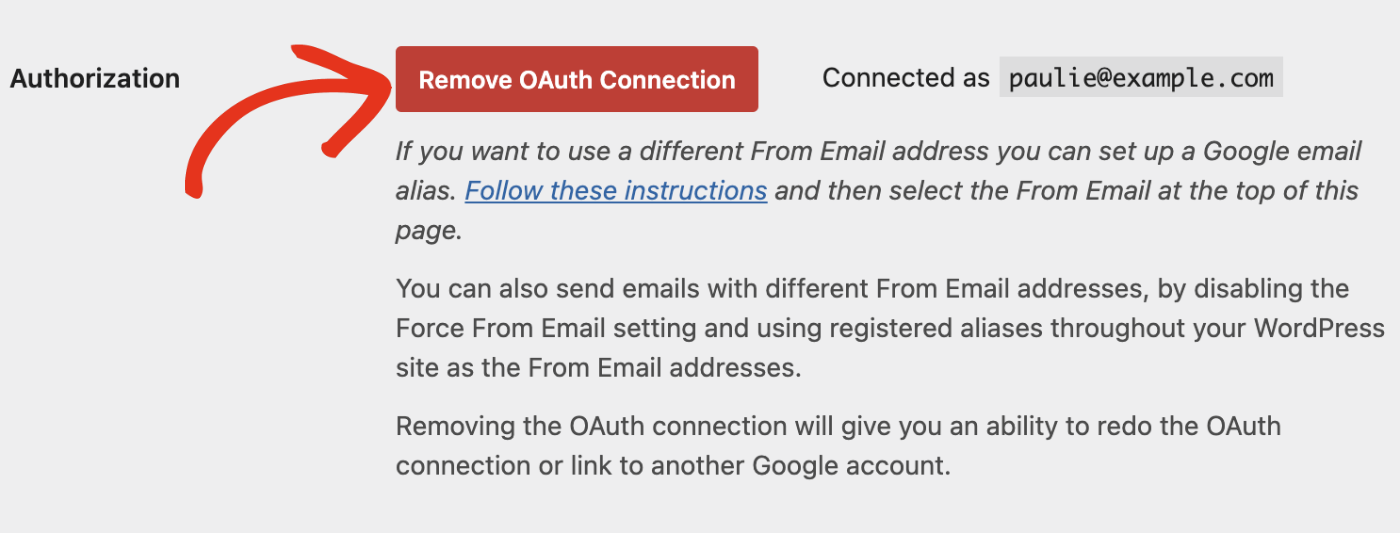
Once done, the button changes to Allow plugin to send emails using your Google account. Click on this button to authorize your Google account.

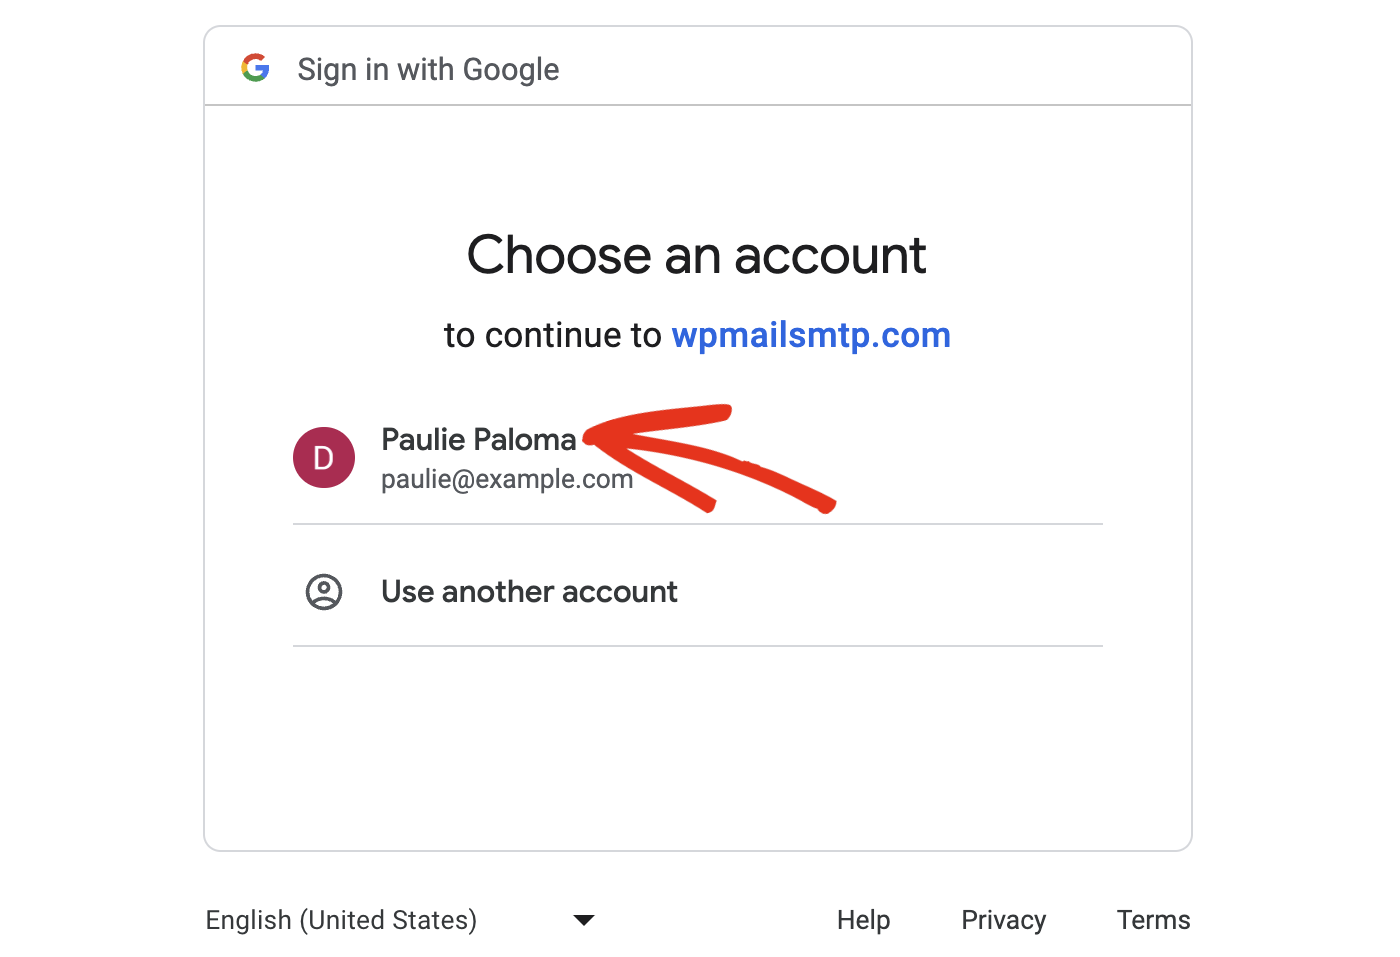
On the next page, you’ll need to select the Google account linked to your app on Google Cloud.
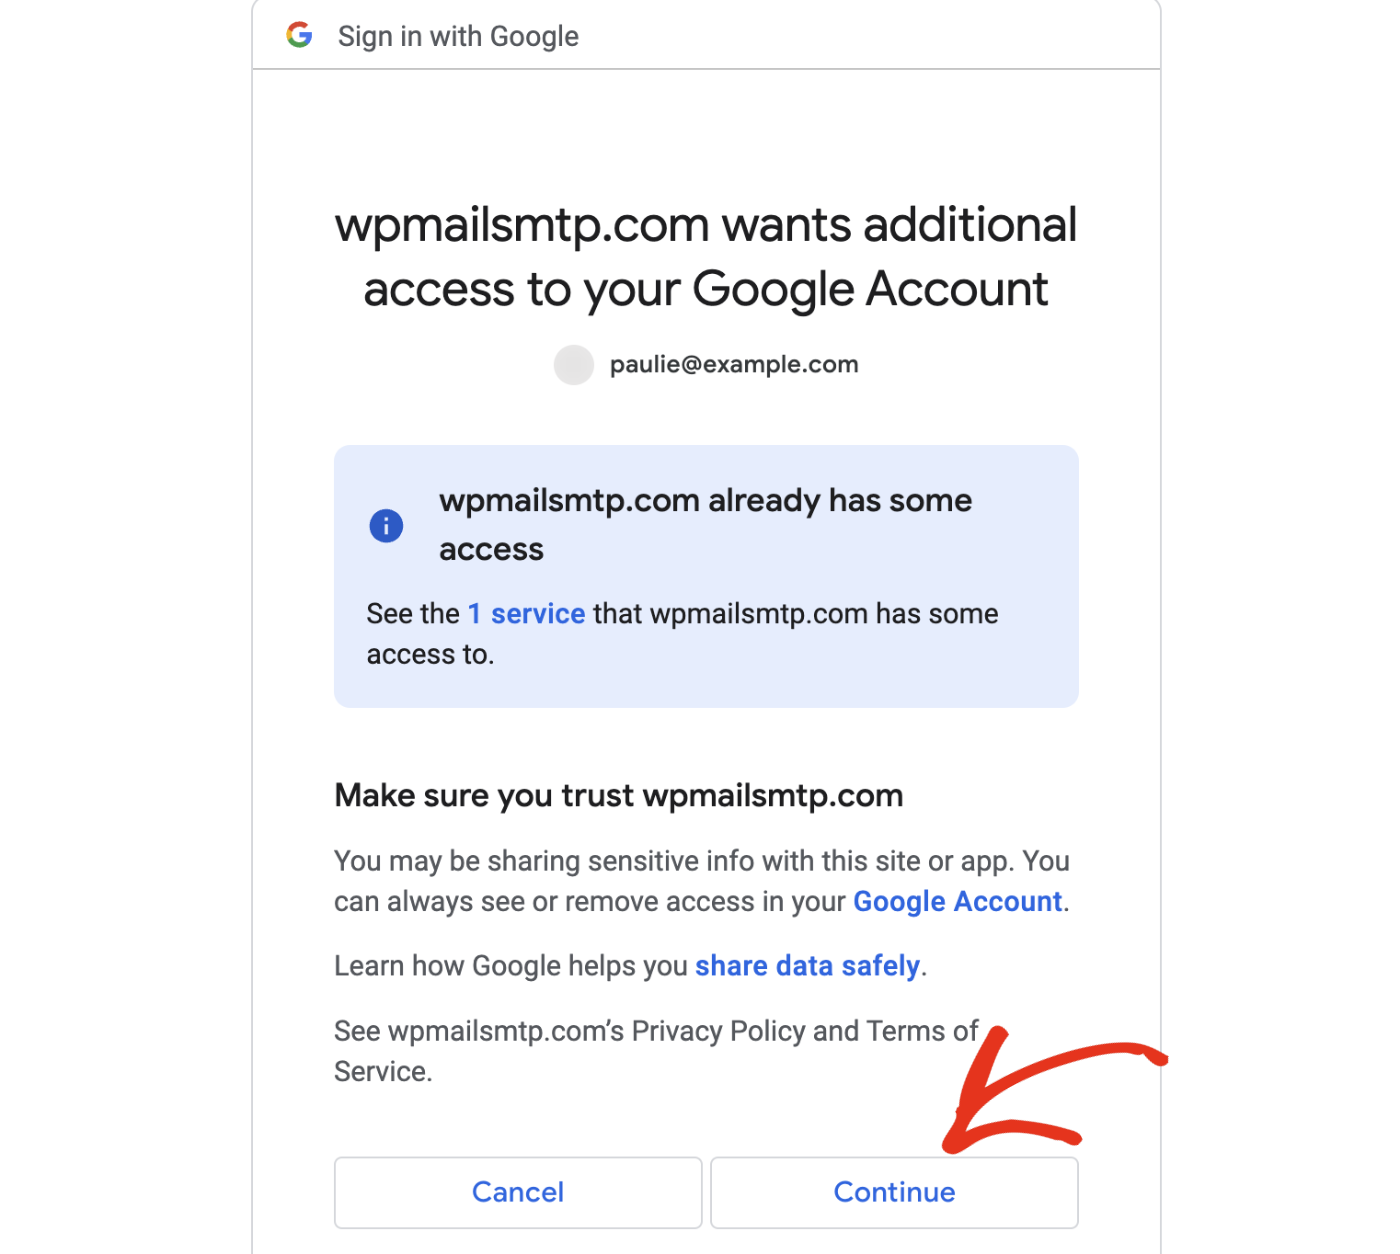
Then click Continue to grant WP Mail SMTP access to your Google account.
You’ll be redirected to your WordPress admin area. You should also see a success notice on the WP Mail SMTP settings page.

Publishing your app and reauthorizing your SMTP plugin should resolve the ‘Error 403: access_denied’ issue.
Note: If you’d like to learn more about sending emails with WP Mail SMTP through the Gmail API, see WP Mail SMTP’s Gmail mailer guide.
That’s it! Now you know how to troubleshoot and fix the ‘Error 403: access_denied’ error.
Are you experiencing a different SMTP error, check out the following related tutorials: