
Need to send email with JavaScript?
Whether you’re building a contact form, password reset flow, order confirmation system, or transactional email workflow, JavaScript offers several ways to send emails from web applications.
As a developer who has implemented email functionality across Node.js applications, I’ve found that choosing the right email-sending method is often the biggest challenge.
Many developers start by searching for a simple JavaScript email-sending example. Only to discover significant differences among SMTP, email APIs, client-side solutions, and backend implementations.
In this guide, I’ll show you how to send email with JavaScript using proven methods that work in real-world applications.
Quick Answer: The most reliable way to send email with JavaScript is through a backend service using Nodemailer with SMTP or an email API such as SendLayer. While client-side solutions exist, backend implementations are generally more secure and better suited for production applications.
How to Send Email with JavaScript
As I mentioned earlier, you can send emails in JavaScript through the client side as well as a backend server. I’ll cover both methods in this tutorial.
Prerequisites
Below are some requirements you’ll need to meet to follow along with this guide:
- Node.js installed on your machine. Download the latest version here
- Code editor. I recommend using Visual Studio Code
- Basic knowledge of HTML and JavaScript
- A SendLayer account. You can get started with the trial account that lets you send up to 200 emails for free
After creating your SendLayer account, make sure to authorize your domain. This step is essential to improve your site’s email deliverability. With that, you’re all set up and ready to send your first email in JavaScript.
Send an Email With JavaScript Through a Backend Server
In this section, I’ll show you 2 ways to send an email in JavaScript using a backend service.
1. Send an Email With JavaScript Using Nodemailer
To send emails using SMTP in JavaScript, we’ll use the popular Nodemailer library. Nodemailer simplifies the process of sending emails via SMTP and supports advanced features like HTML emails, attachments, and more.
You can integrate it with other JavaScript frameworks like React and Express.js to send emails through your React web apps or Express.js email backend.
First, install Nodemailer by running the following command in your terminal:
npm install nodemailer
Next, create a new JavaScript file (e.g., sendEmail.js) and add the following code:
const nodemailer = require('nodemailer');

// Create a transporter object using SendLayer's SMTP server
const transporter = nodemailer.createTransport({
   host: 'smtp.sendlayer.net',
   port: 587,
   secure: false, // true for 465, false for other ports
   auth: {
     user: 'your-sendlayer-username',
     pass: 'your-sendlayer-password' }
});

// Configure email options
const mailOptions = {
    from: '[email protected]', // Sender address
    to: '[email protected]', // Recipient address
    subject: 'Test Email from JavaScript', // Subject line
    text: 'This is a plain text email sent from JavaScript using Nodemailer.' // Plain text body
};

// Send email
transporter.sendMail(mailOptions, (error, info) => {
      if (error) {
           console.error('Error sending email:', error);
      } else {
           console.log('Email sent:', info.response);
      }
   }
);
In the code above, we first import the nodemailer library using the require statement. After that, you’ll need to create a transport object using the nodemailer.createTransport() class. Within the transporter, I’ve defined my SMTP credentials. I’m using my trusted SendLayer for this example. But you can use Gmail SMTP or any SMTP server you want.
Pro Tip: See our tutorial to learn how to access and manage your SendLayer SMTP credentials.
Within the transporter, make sure to replace your-sendlayer-username and your-sendlayer-password with your actual SendLayer SMTP credentials. Also, update the from and to fields with your sender and recipient email addresses.
The mailOptions object is where I specify the email data such as the sender and recipient email addresses, the subject line, and the email body.
Note: If you’re using SendLayer, the From email address needs to be at the domain you’ve authorized. For instance, if you authorized example.com, the sender email needs to include @example.com.
Finally, we call transporter.sendMail() to trigger the send mail function. The function accepts 2 arguments: mailOptions and a callback function.
After updating the code with your SMTP credentials, run the script using the following command:
node sendEmail.js
If everything is set up correctly, you should see a success message in the console, and the recipient will receive the email.

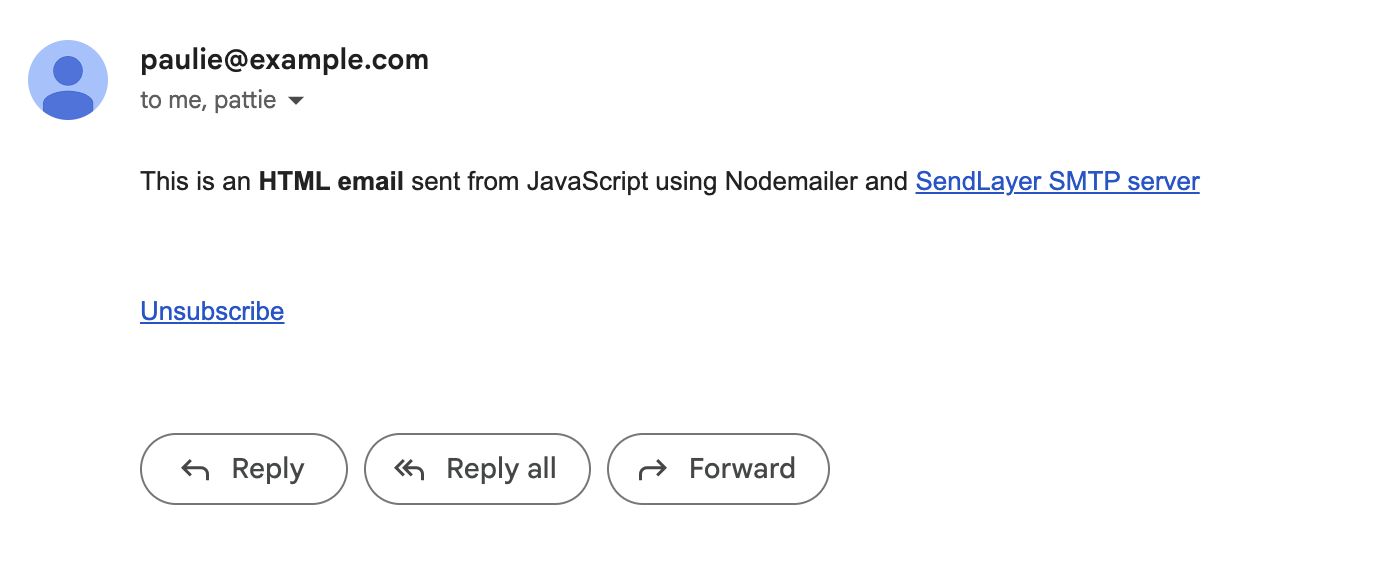
Send HTML Emails in JavaScript
Nodemailer also supports sending HTML emails. This is useful if you want to create email templates for welcome message or password resets mails. The example above demonstrates how to send a plain text email. If you want to send an HTML email, update the mailOptions object as follows:
const mailOptions = {
      from: '[email protected]',
      to: '[email protected]',
      subject: 'Test HTML Email from JavaScript',
      html: '<p>This is an <b>HTML email</b> sent from JavaScript using Nodemailer and <a href="https://sendlayer.com">SendLayer SMTP server</a></p>'
};
This will send an HTML-formatted email to the recipient.
Send Emails to Multiple Recipients
To send an email to multiple recipients, simply add their email addresses to the to field, separated by commas:
const mailOptions = {
    from: '[email protected]',
    to: '[email protected], [email protected]',
    subject: 'Test Email to Multiple Recipients',
    text: 'This email is sent to multiple recipients.'
};
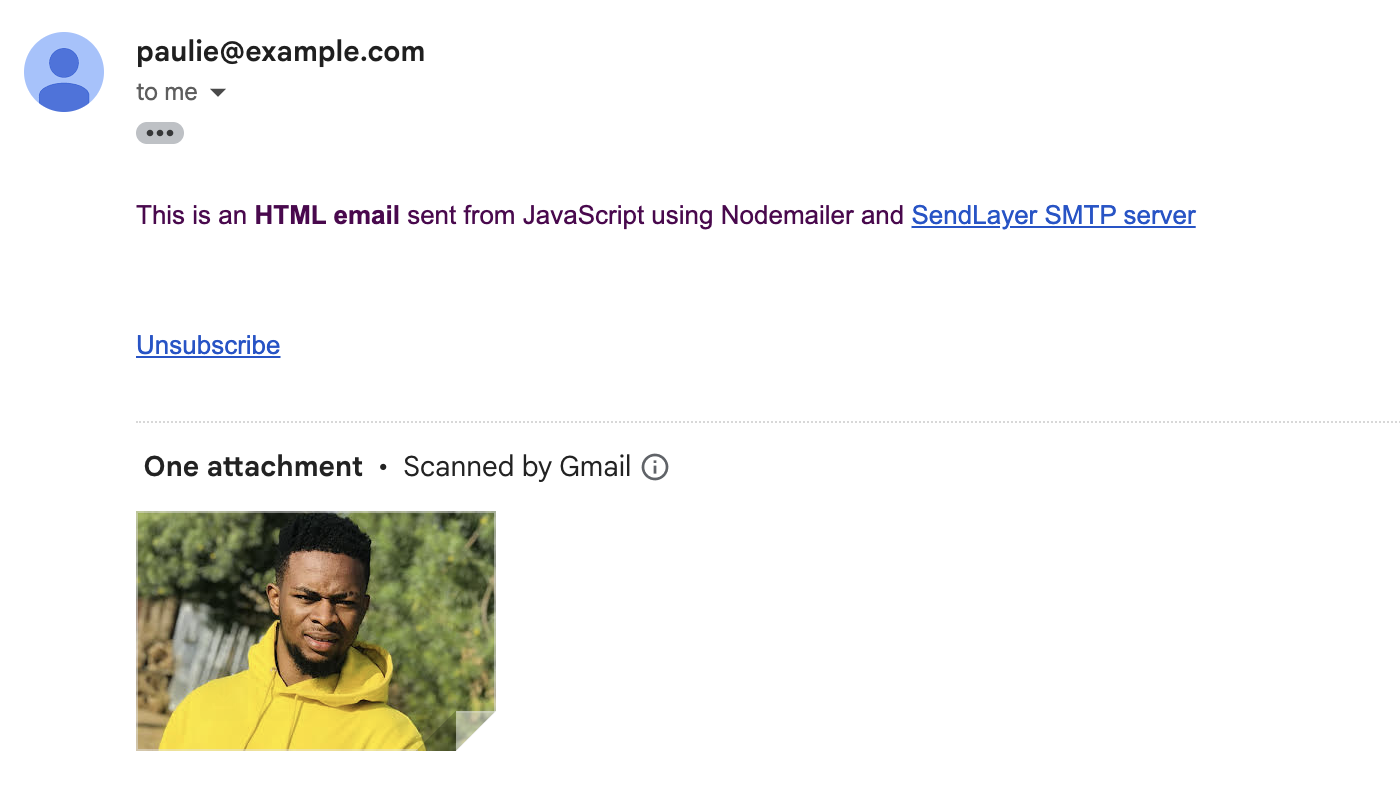
Send Emails With Attachments
To send an email with attachments, add the attachments field to the mailOptions object. Within the attachments field, specify the filename and path to the directory of the file you’d like to attach:
const mailOptions = {
    from: '[email protected]',
    to: '[email protected]',
    subject: 'Test Email with Attachment',
    text: 'This email includes an attachment.',
    attachments: [
       {
         filename: 'example.pdf',
         path: './path/to/example.pdf' // Update with the correct file path
       }
    ]
};
This will attach the specified file to the email.
2. Send an Email with JavaScript via Email API
Sending emails through an API is faster and more secure than using SMTP. Transactional email services like SendLayer provide APIs for sending emails programmatically.
You can integrate it by making API requests or using client SDKs provided by the email API. I’ll use the SendLayer SDK for this guide. The SDK includes advanced features out of the box, like email validation, error handling, and file attachment encoding, among other features.
To use the SendLayer SDK, you’ll need an active API key. The API key grants you access to SendLayer’s email API with endpoints for sending emails and tracking email events.
To start, install the sendlayer library to your project:
npm install sendlayer
Next, create a new JavaScript file (e.g., sendEmailAPI.js) and add the following code to initialize the SendLayer module:
import { SendLayer } from 'sendlayer';

const apiKey = 'your-sendlayer-api-key'

// Initialize the SendLayer package with your API key
const sendlayer = new SendLayer(apiKey)
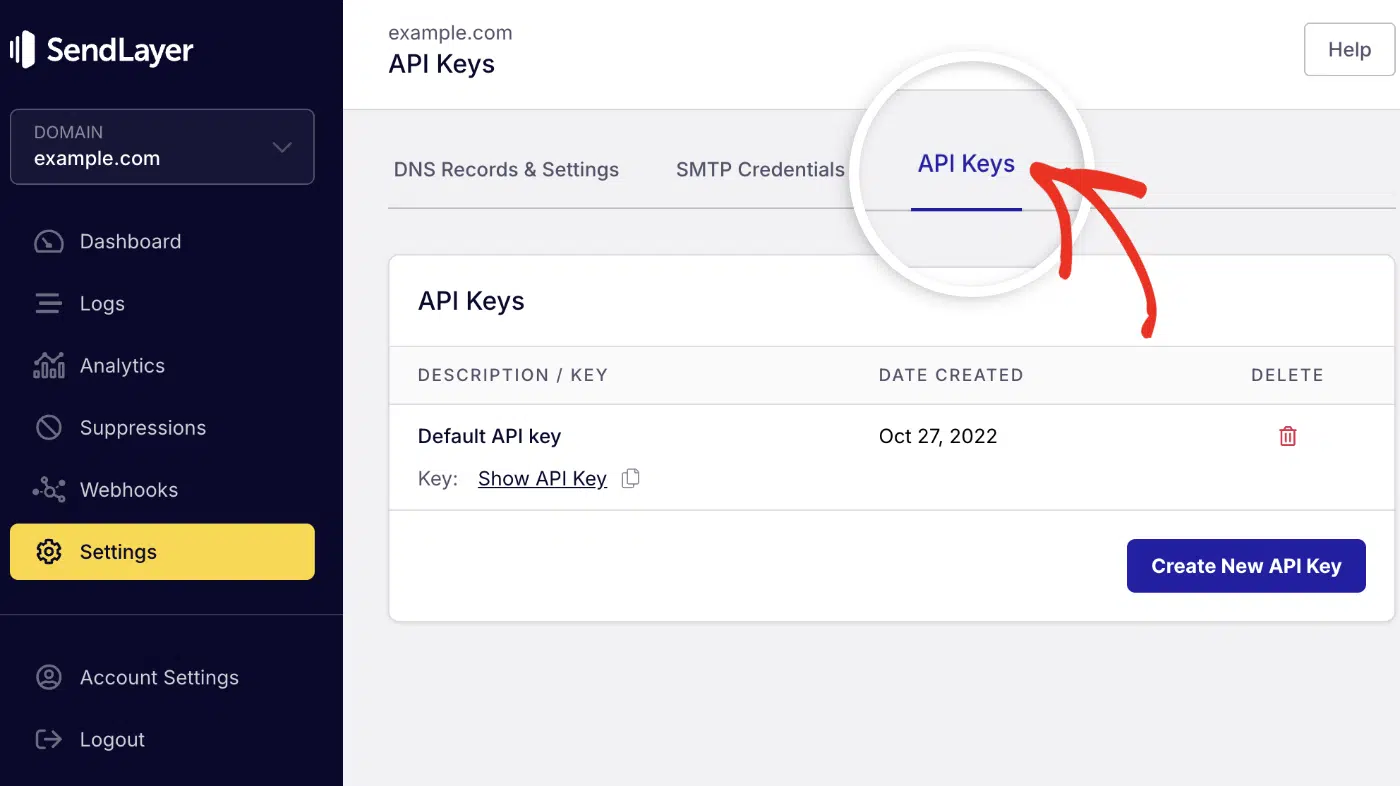
You’ll initialize the module with your SendLayer API key. Be sure to replace your-sendlayer-api-key with your actual SendLayer API key. You can find your API key in your SendLayer account under Setting » API Keys.
After initializing the package, I’ll create a function to handle email sending. Here’s the complete snippet:
import { SendLayer } from 'sendlayer';

const apiKey = 'your-sendlayer-api-key'

// Initialize the SendLayer package with your API key
const sendlayer = new SendLayer(apiKey)

const sendEmail = async () => {

   // Email data
    const params = {
             from: '[email protected]'
             to: '[email protected]'
             subject: 'Test Email via SendLayer API',
             text: 'This is a test email sent via the SendLayer API.'
         };

   // email sending function with error handling
    try {
       const response = await sendlayer.Emails.send(params);
       console.log('Email sent successfully:', response);
      }
    catch (error) {
       console.error('Error sending email:', error.message);
      }
};

sendEmail();
Code breakdown
In the code above, I’m creating the sendEmail() asynchronous function. Within this function, I created the params variable which holds the email data. SendLayer SDK requires 4 parameters to work properly:
from: The sender email addressto: Recipient email address or list of recipientssubject: the email subject linetextorhtml: The email content. You can pass plain text or HTML emails
Tip: The From email address needs to be at the domain you’ve authorized. For instance, if you authorized example.com in your SendLayer account, the sender email needs to include @example.com.
After specifying the email parameters, we call the sendlayer.Emails.send() method to send the email. You’ll need to pass the params variable as an argument in the send() method.
I wrapped the entire logic in a try...catch block to handle errors that might prevent emails from sending.
After updating the script with your details, run the code using the following command:
node sendEmailAPI.js
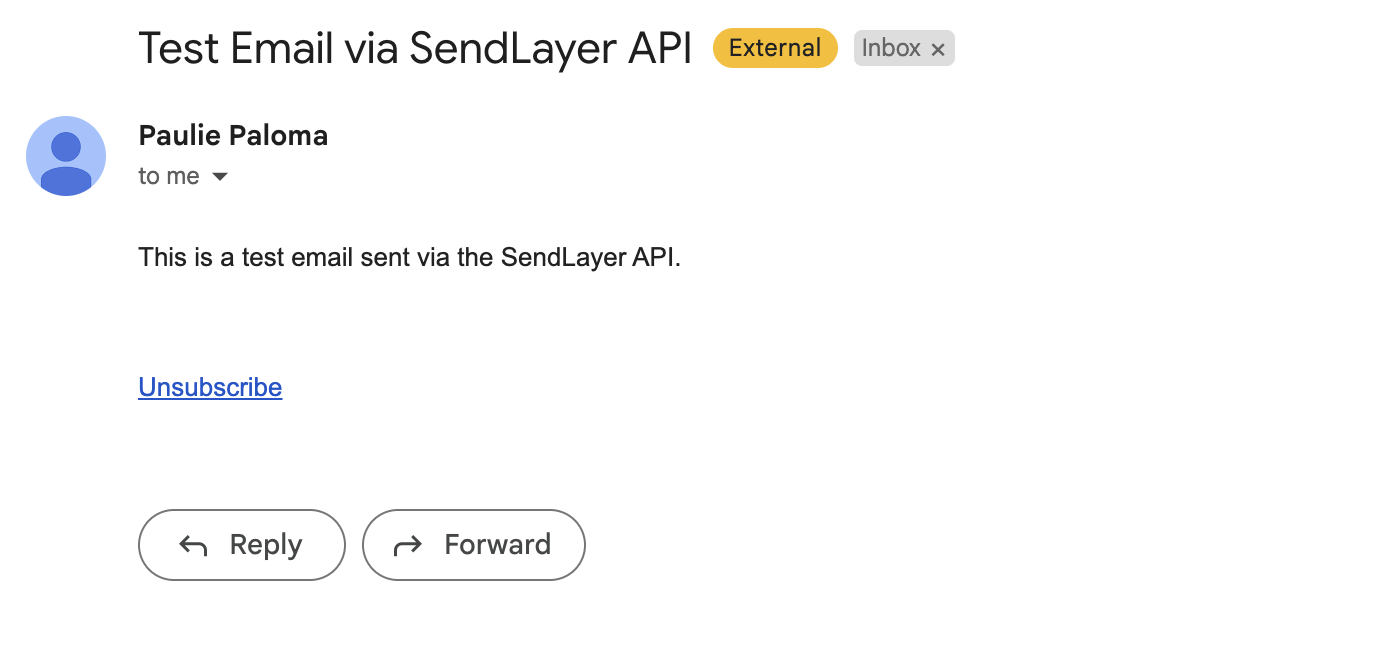
If the request is successful, you’ll see a confirmation message in the console.
Email sent successfully: { MessageID: '62e09048-039f-4fce-a744-b096981e4990' }
You should receive the test email in the recipient’s inbox you specified.
Sending Emails to Multiple Recipients
To send an email to multiple recipients via the API, update the to field in the params variable with the email addresses of the recipients you’d like to add.
You can enter the recipients as a list of comma-separated strings containing each email address. Alternatively, you can add them as objects with name and email key value pairs. Here’s an example:
// Other code snippets...

// Email data
const params = {
  from: {
    name: "Sender Name",
    email: "[email protected]"
},
  to: [
    { name: "Recipient 1", email: "[email protected]" },
    { name: "Recipient 2", email: "[email protected]" },
  ],
  subject: "Test Email to Multiple Recipients",
  html: "<p>This email is sent to multiple recipients.</p>",
};
SendLayer’s SDK also supports other recipient types including CC and BCC email addresses. Here is an example of the updated email params.
// Other code snippets...

// Email data
const params = {
  from: {
    name: "Sender Name",
    email: "[email protected]"
},
  to: [
    { name: "Recipient 1", email: "[email protected]" },
    { name: "Recipient 2", email: "[email protected]" },
  ],
  subject: "Test Email to Multiple Recipients",
  html: "<p>This email is sent to multiple recipients.</p>",
  cc: ["[email protected]"],
  bcc: [
    { name: "BCC", email: "[email protected]" },
  ],
};

const response = await sendlayer.Emails.send(params)
Note: There’s a limit to the number of recipients that can be added per email request. See our developer documentation for more details.
Send Emails With Attachments
SendLayer SDK also support file attachment. The best part is that it also handles attachment encoding, so you won’t have to write many lines of code.
To send an email with attachments via the SendLayer SDK, add the attachments field to the params variable. Within the attachments field, you’ll need to specify the type and path to the file you intend to attach. Here is an example snippet:
// Other code snippets...

// Email data
const params = {
    from: {
        name: 'Sender Name',
        email: '[email protected]'
    },
     to: [
        {
            name: 'Recipient Name',
            email: '[email protected]'
        }
    ],
    subject: 'Test Email with Attachment',
    html: '<p>This email includes an attachment.</p>',
    attachments: [
        {
         path: 'path/to/file.pdf',
         type: 'document/pdf',
        }
    ]
};

const response = await sendlayer.Emails.send(params)
Pro Tip: The type field needs to be the MIME type of the file you’re attaching. If you’re not sure of what to enter, see Mozilla’s guide to common MIME types.
The SDK also allows you to attach multiple files, including local and remote file attachments. Here is an example:
// Other code snippets...

// Email data
const params = {
    from: {
        name: 'Sender Name',
        email: '[email protected]'
    },
     to: [
        {
            name: 'Recipient Name',
            email: '[email protected]'
        }
    ],
    subject: 'Test Email with Attachment',
    html: '<p>This email includes an attachment.</p>',
    attachments: [
        {
         path: 'path/to/file.pdf',
         type: 'document/pdf',
        },
        {
         path: 'https://example.com/image.png',
         type: 'image/png',
        }
    ]
};

const response = await sendlayer.Emails.send(params)
When you send a test email, you’ll receive an inbox with the file attached to the email.
Pro Tip: The maximum file size for emails sent through SendLayer’s API is 10MB. This includes the email content and attachments.
To learn more about using SendLayer’s SDK, be sure to check our developer documentation.
Send Email in JavaScript Through the Client Side
While sending client-side email is technically possible, it’s not advisable considering the security risks. For instance, the code sits in your website’s frontend, making your SMTP credentials accessible to anyone who’s looking.
For illustration purposes, I’ll show you how to send an email through the client side. If you’re building a production app, I suggest using one of the server methods to send your emails.
3. Send Email Using SMTP.js
SMTP.js is a lightweight JS library that helps serverless applications send emails through an SMTP server. You can essentially send emails directly from the index.html file of your website.
To get started, create a new HTML file or edit one. I recommend editing the index.html file or the file connected to your homepage.
Once there, add the following code between the <head> tag on your HTML file.
<script src="https://smtpjs.com/v3/smtp.js"></script>
The code above is a CDN script to import the SMTP.js library. After importing the library, we’ll need to create the logic to send the email. For this, add the code snippet just before the closing <body> tag on your HTML file.
<!DOCTYPE html>
<html>

<head>
    <title>SendLayer Email Function</title>
    <script src="https://smtpjs.com/v3/smtp.js">
    </script>

</head>

<body>
    <form method="post">
        <input type="button" value="Send Email" onclick="sendSLEmail()" />
    </form>

    <script type="text/javascript">
        function sendSLEmail() {
            Email.send({
                Host: "smtp.sendlayer.net",
                Username: "[email protected]",
                Password: "Enter your password",
                To: '[email protected]',
                From: "[email protected]",
                Subject: "My First JavaScript Email Through SMTP.js",
                Body: "I'm glad it worked!",
            })
                .then(function (message) {
                    alert("email successfully sent")
                });
        }
    </script>
</body>

</html>
Code Explanation
In the code above, I’m creating a function sendSLEmail() that essentially uses the Email.send() function that SMTP.js provides.
The library already includes all the details you’ll need to send the email. You’ll just need to update the SMTP credentials with your server details.
Note: As of the time of writing this post, SMTP.js only allows using Elastic Email SMTP server. So you’ll need to sign up for an account and create an SMTP user from the Elastic Email account dashboard.
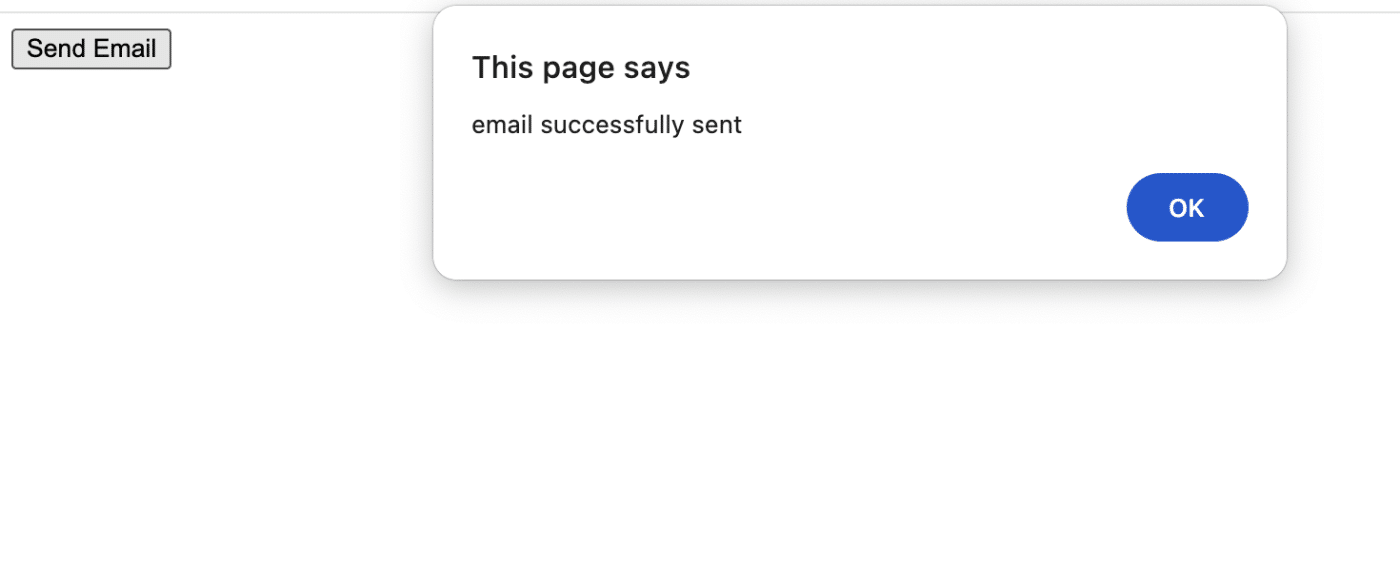
When you view the HTML file in your browser, you’ll see a form with a button to send an email. There’s an onclick() event that triggers the sendSLEmail() function. When triggered, it’ll send the email to the recipient you’ve specified. You’ll see an alert that the email has been sent.
After that, check the email inbox of the recipient you’ve specified.

4. Send Emails With JavaScript using the Mailto: Protocol
Mailto is a protocol used to add hyperlinks for emails on websites. It allows users to send emails directly from the website to a specific address without having to manually enter the email details in their email client.
Note that this protocol doesn’t send the email from the user’s browser. Instead, it redirects the user to their default email client with the email data prefilled.
You can directly add the HTML syntax to the webpage where you’d like users to send an email. Here is a basic implementation of this protocol:
<a href=”mailto:[email protected]”>Contact Admin</a>
Let’s take it a step further and prepopulate the anchor link with details like the email subject line and message. Here’s the updated snippet.
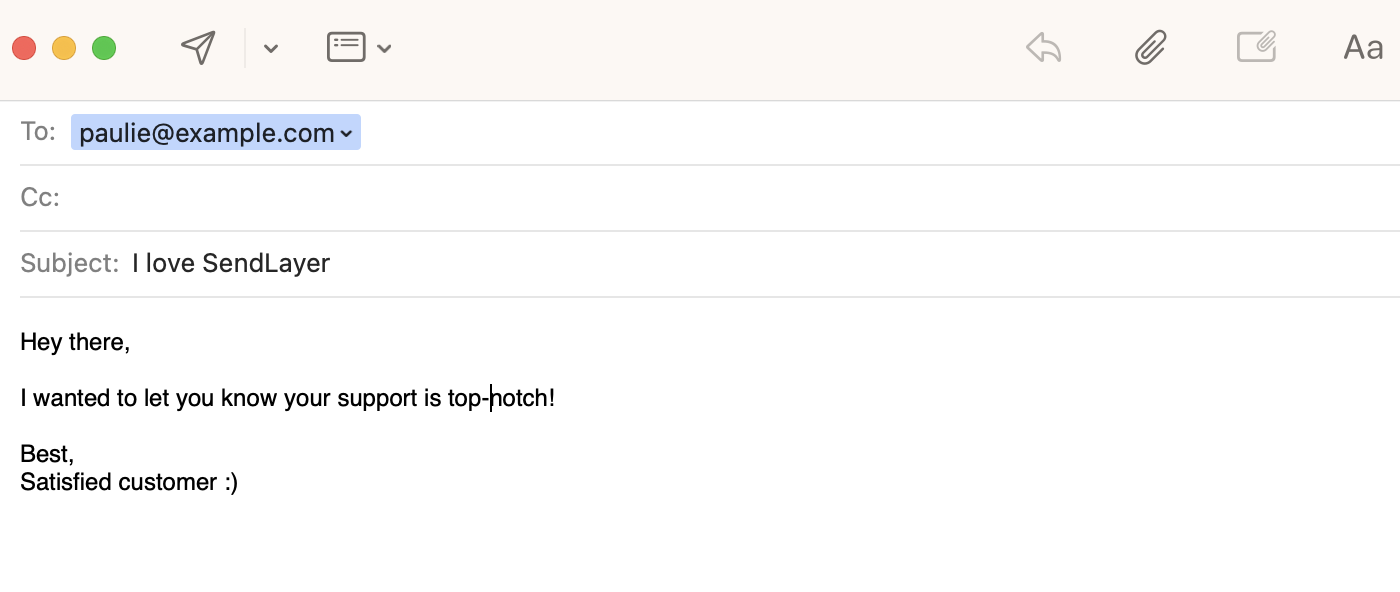
<a href="mailto:[email protected]?subject=I%20love%20SendLayer&body=Hey%20there,%0D%0A%0D%0AI%20wanted%20to%20let%20you%20know%20your%20support%20is%20top%20notch!%0D%0A%0D%0ABest,%0D%0ASatisfied%20customer%20%3A%29">Contact Admin</a>
When you click on the anchor link on your browser, it’ll open your default email client with the email prepopulated with the values specified in the anchor link.
Pro Tip: I’m using the %20 encoding to add a space to the email subject and body. Similarly, %0D%0A is used in the snippet above to add a new line to the email body.
Send Email Through HTML Form
You can also use the mailto: protocol to send emails through forms embedded on your website. Here’s an example:
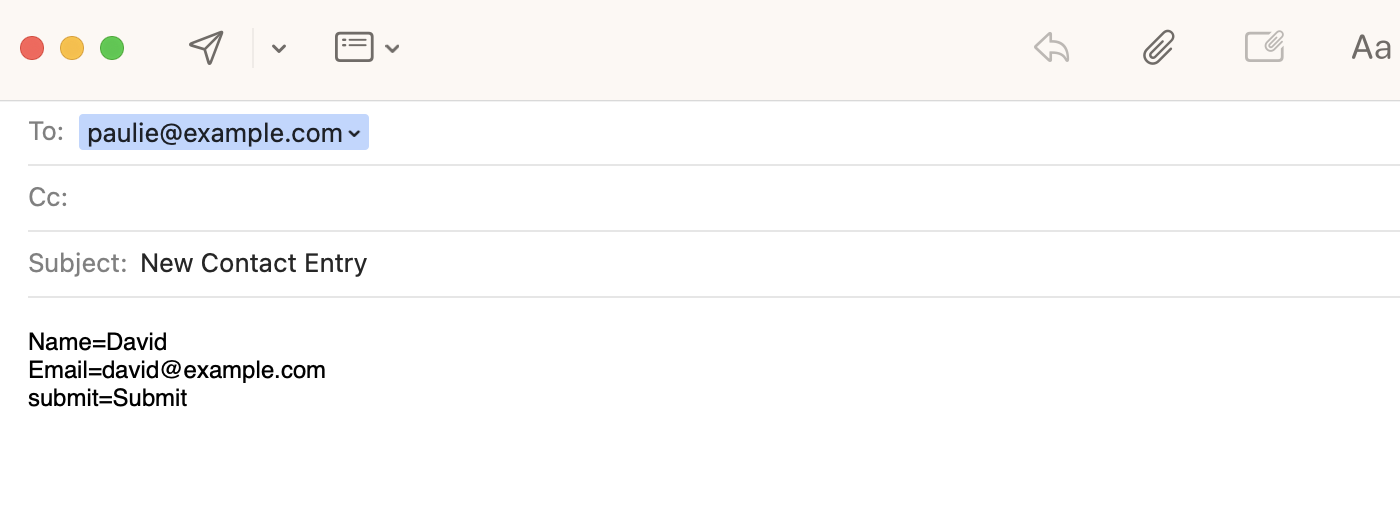
<form action="mailto:[email protected]?subject=New Contact Entry" method="post" enctype="text/plain">
        Name: <input type="text" name="Name">
        Email: <input type="text" name="Email">
        <input type="submit" name="submit" value="Submit">
 </form>
When you preview the snippet in the browser, it should look similar to the one in the image below.

After filling out the form and clicking submit, you’ll be directed to your email client with the form data pre-filled as the email message.
Sending emails with the mailto: protocol is very straightforward, as you’ve seen above. The good part about this is that it doesn’t require configuring an SMTP server. It relies on the user’s default email client’s server.
However, this method has some drawbacks. For starters, there’s no protection against spambots. Bad actors can exploit the form on your website for brute-force attacks.
Also, there’s little control over which email client opens for the user. This is controlled by the user’s operating system. And it might open another email client, one different from the one the user prefers.
Best Practices For Sending Emails Using JavaScript
Here are some tips to optimize your email-sending process:
1. Secure Sensitive Credentials
Never hardcode sensitive information like API keys or SMTP credentials in your code. I recommend using environment variables to store these details securely instead. You can create a .env file and store sensitive data on it. Here’s how to do it:
Start by creating a .env file in your project root and add the following:
SENDLAYER_API_KEY=your-api-key
SMTP_USER=your-smtp-username
SMTP_PASS=your-smtp-password
Next, you’ll need to install the dotenv package to load these variables in your script:
npm install dotenv
After installing the package, load the environment variables at the top of your script:
require('dotenv').config();
Then access them using the process.env command. Here is an example:
const apiKey = process.env.SENDLAYER_API_KEY;
const smtpUser = process.env.SMTP_USER;
const smtpPass = process.env.SMTP_PASS;
2. Implement Error Handling
Always include error handling in your email-sending logic to catch and log issues. Here’s an example implementation using the Nodemailer library:
transporter.sendMail(mailOptions, (error, info) => {
      if (error) {
            console.error('Error sending email:', error); }
      else {
            console.log('Email sent:', info.response);
       }
});
3. Apply Rate Limiting
Most email providers include rate limits when sending emails through their API. It’s important to also implement rate limiting on your app to prevent hitting the limit set by your email provider.
You can use a library such as bottleneck to add this functionality to your app. Here’s an example snippet.
import Bottleneck from 'bottleneck';

const maxEmailsPerSecond = 10; // Set an appropriate value

const rateLimiter = new Bottleneck({
	minTime: 100 / maxEmailsPerSecond,
});

rateLimiter.schedule(() => transporter.sendMail(mailOptions));
FAQs –– Send Email in JavaScript
Here are answers to some common questions about sending emails with JavaScript:
What are the different ways to send emails using JavaScript?
There are several methods to send emails using JavaScript. Below, I’ve highlighted the most common ones:
What’s the most reliable way to send emails in a production environment?
The most reliable approach is using a server-side solution with a reputable email provider like SendLayer.
Can JavaScript send email directly?
One of the most common questions developers ask is whether JavaScript can send emails directly from the browser.
The short answer is: not securely.
Unlike server-side languages such as Node.js, browser JavaScript runs on the user’s device. If you place SMTP credentials, API keys, or other authentication details directly inside frontend JavaScript, anyone can inspect your code and gain access to those credentials.
How do I send email in JavaScript on button click?
You can send email in JavaScript on button click by attaching a click event listener to a button and sending the data to a backend API.
document.getElementById("sendBtn").addEventListener("click", async () => {
   await fetch("/api/send-email");
});
In production applications, the button click should trigger a backend request rather than sending email directly from browser JavaScript. This keeps SMTP credentials and API keys secure.
How do I send an email with an HTML body in JavaScript?
Most JavaScript email libraries support HTML email content.
For example, with Nodemailer:
const mailOptions = {
  from: "[email protected]",
  to: "[email protected]",
  subject: "HTML Email Example",
  html: "<h1>Hello</h1><p>This is an HTML email.</p>",
};
Using the html property allows you to create formatted emails containing links, images, buttons, and styled content.
That’s it! Now you know different ways to send email with JavaScript.
If your web app is built using a different framework, check out our guides to learn how to send emails with Python or Lavarel for beginners.