Email is designed for one-to-one communication, and messages can easily be missed, lost, or duplicated when conversations involving multiple team members are carried out over email.
- What Is Zoho TeamInbox?
- 1. Sign Up for TeamInbox
- 2. Exploring TeamInbox
- 3. Add a Sender Address and Set Up Custom SMTP in TeamInbox
- 4. Create a Team and Add Team Members
- 5. Create Inboxes
- 6. Assigning Team Roles
- 7. Managing Your Inboxes
- 8. Using Comments
- 9. Integrate TeamInbox With Other Apps
- 10. Install the Zoho TeamInbox Mobile Apps
- Frequently Asked Questions
What Is Zoho TeamInbox?
TeamInbox is the shared inbox solution offered by the popular business email platform Zoho Mail.
Similar to other customer helpdesk solutions like Help Scout and Front, in Zoho TeamInbox, you can set up shared inboxes for different teams in your organization, such as support, marketing, or finance.
Everyone in the team has access to the emails sent to these shared inboxes, so there’s no need to CC multiple people into messages that go out to the whole team. The result is a clutter-free inbox without multiple threads.
Zoho TeamInbox also incorporates a chat feature so that team members can communicate and leave messages related to specific email threads. These conversations are viewable only internally, so there’s no need to worry about accidentally forwarding internal discussions that shouldn’t be seen outside the team.
Zoho TeamInbox Setup Guide
It’s fairly straightforward to get started with TeamInbox, but there are a few things you should be aware of to make sure your outgoing messages are routed properly, and you get the most out of the platform.
1. Sign Up for TeamInbox
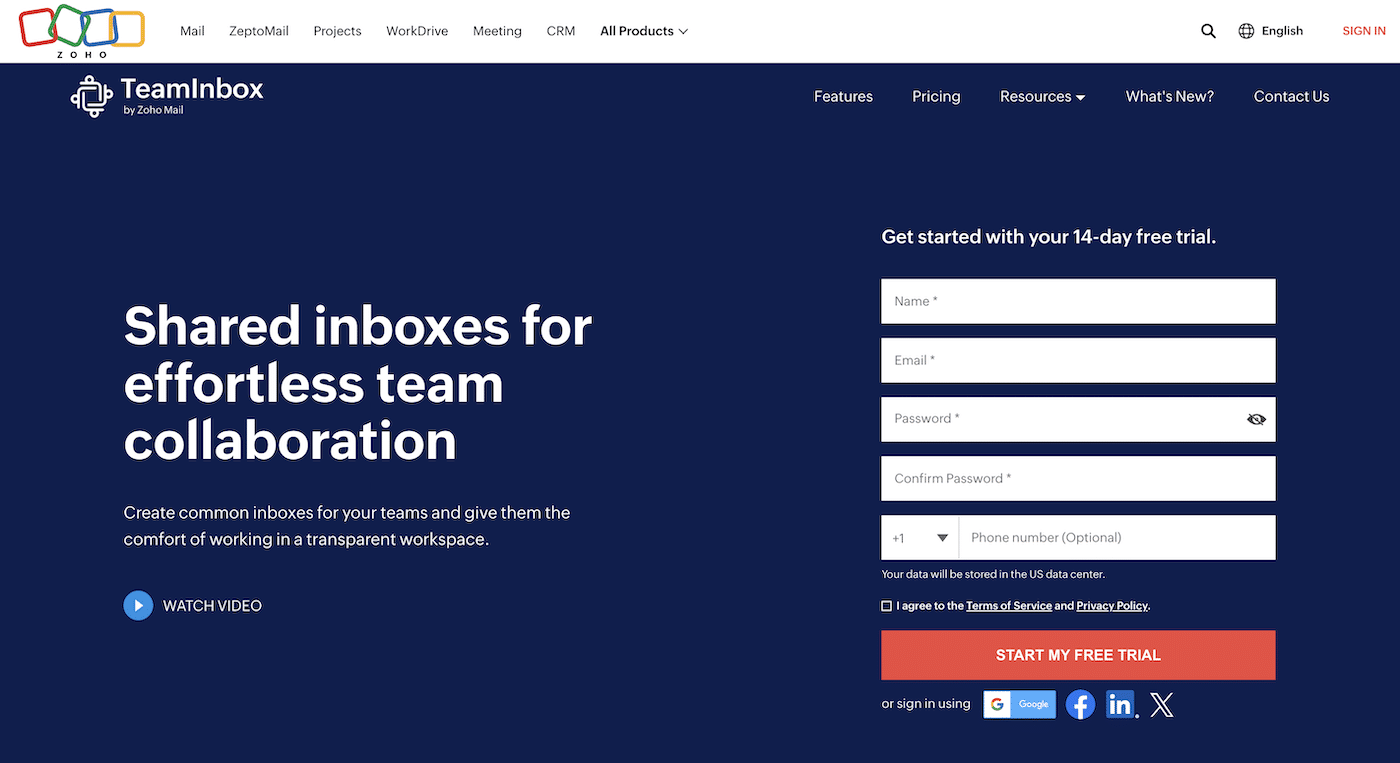
Zoho offers a 14-day free trial, so you can try out TeamInbox before committing to an annual contract. You don’t have to have an existing account with Zoho to sign up for the trial.
To get started, head over to the Zoho TeamInbox signup page, fill out your details, and click the Start My Free Trial button.
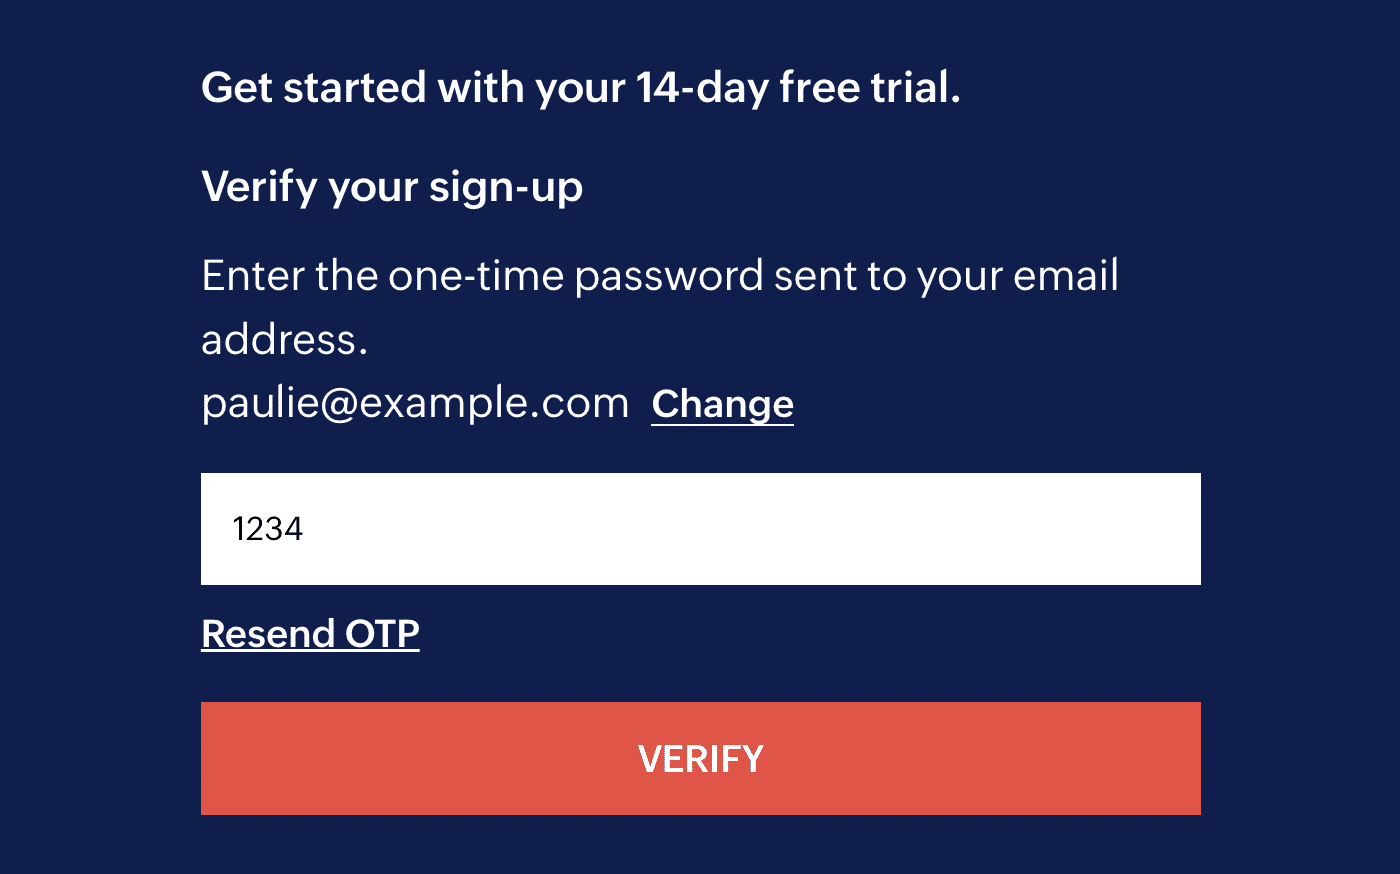
Zoho will send a one-time password (OTP) to your email inbox. Check your email for the OTP and click the Verify button
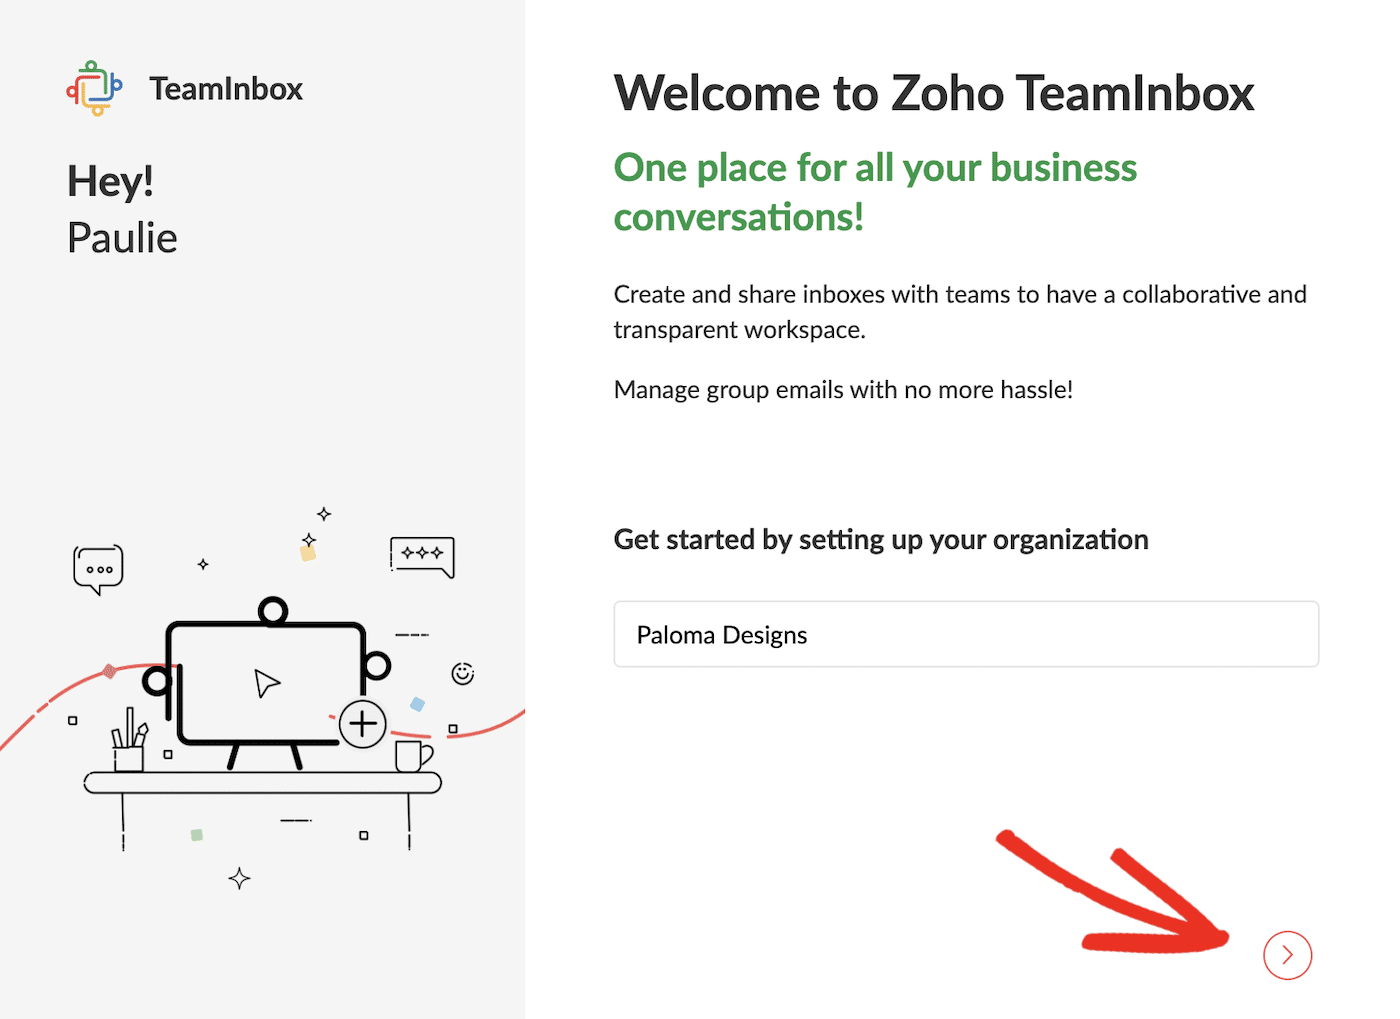
After entering the OTP, you should be greeted with a welcome message and an invitation to set up your organization.
Enter the name of your organization and click the next(>) button to progress to the next screen.
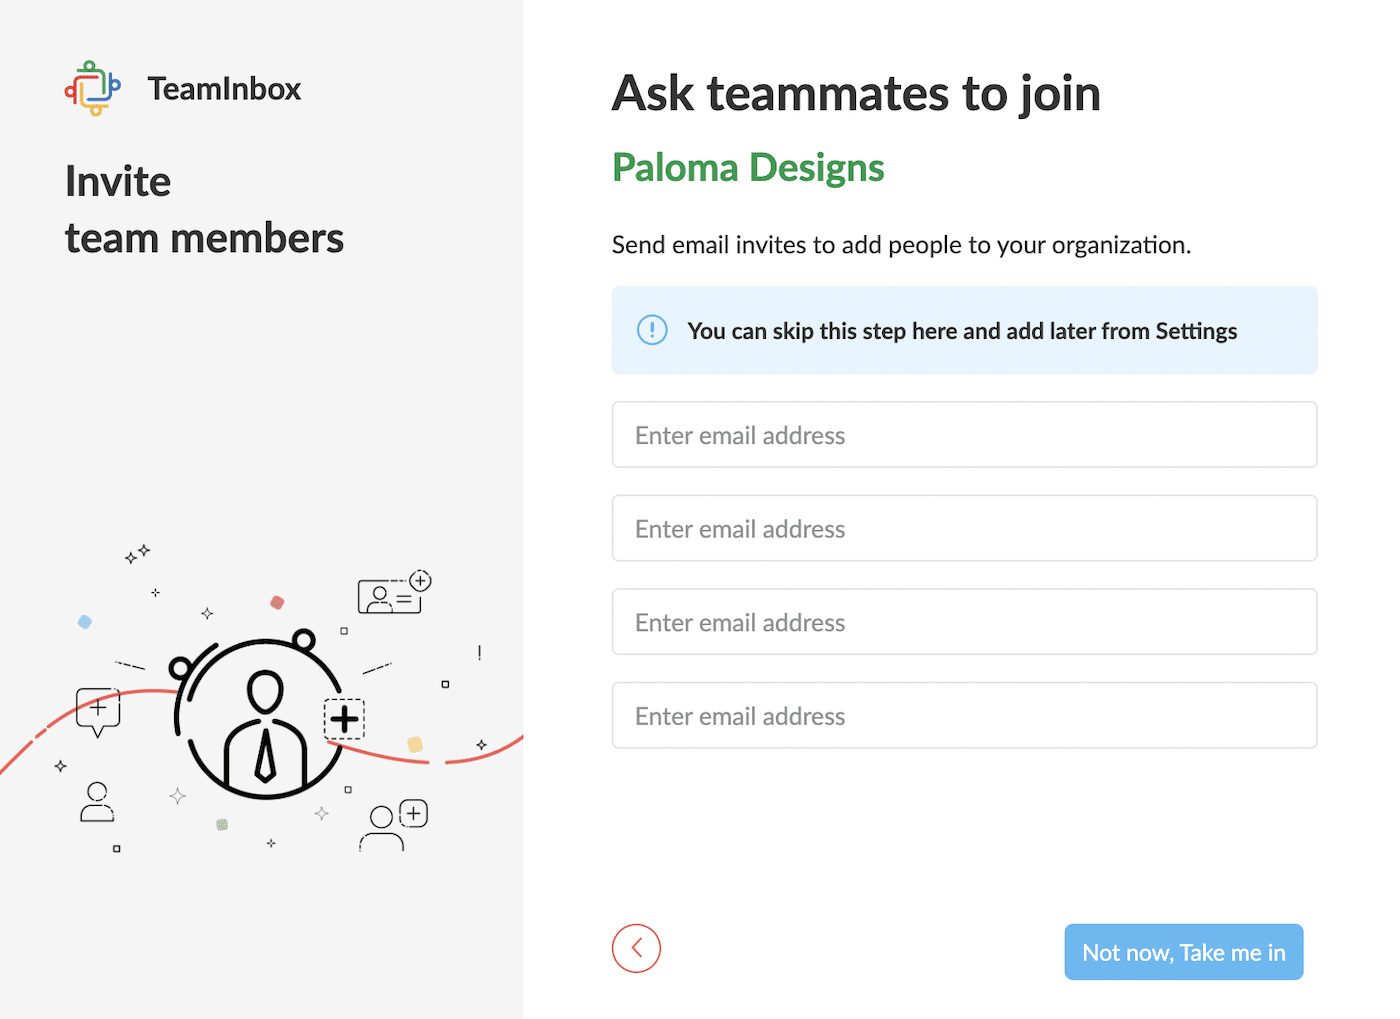
At the next step of setup, you can invite team members. Enter the email addresses of a few teammates if you wish, or skip this step and click the Not now, Take me in button (you can invite people later from settings.)
Hurray! You’re in! You’ve now set up a shared inbox for your organization. Let’s take a look around and get everything set up so your team can use it effectively.
2. Exploring TeamInbox
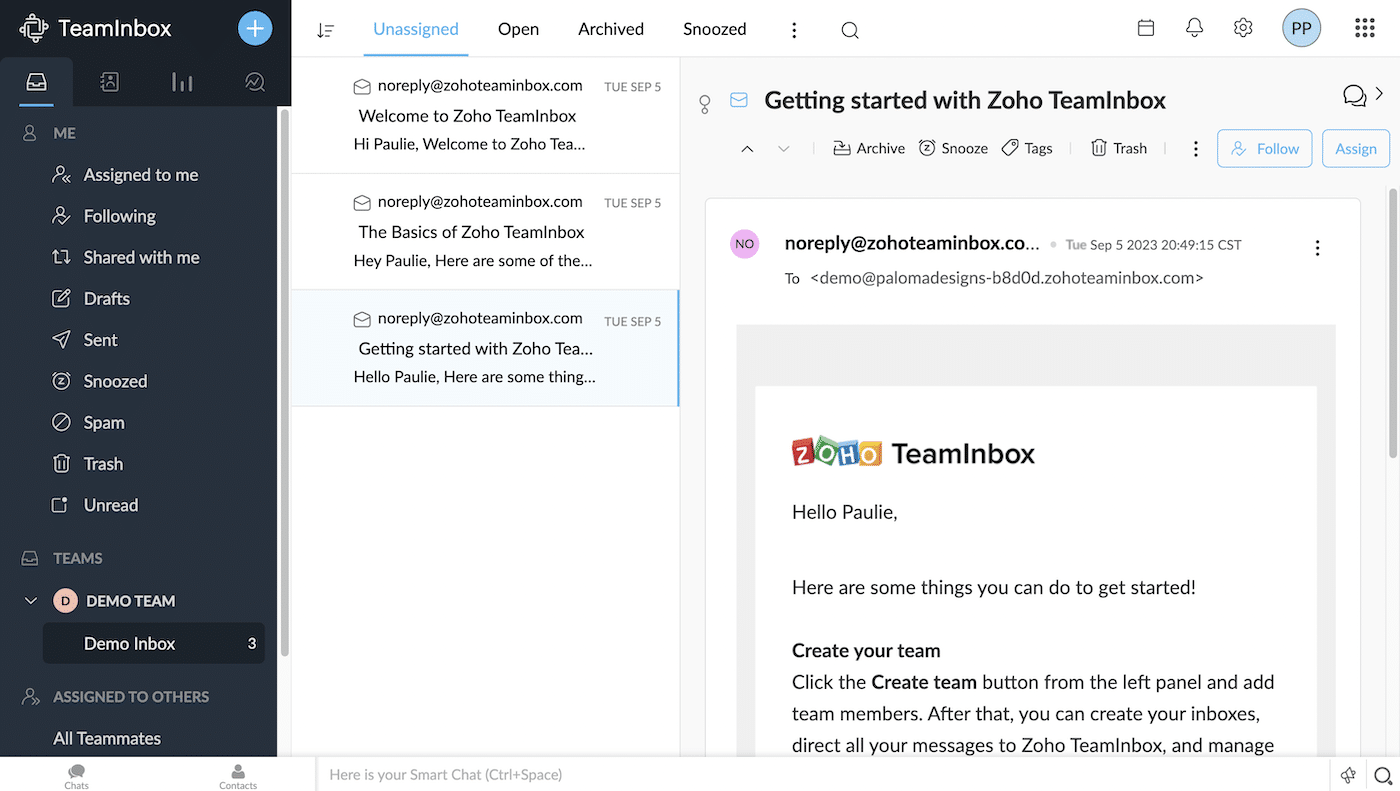
After you’ve created your account, you can start exploring your new shared inbox.
You’ll notice this looks similar to any other email platform you may be familiar with using. The main difference is that as well as the usual email folders like Inbox, Sent, and Drafts, you’ll see:
- Assigned to me
- Following
- Shared with me
These “folders” allow you to see only email threads that you’ve chosen to follow, or that have been shared with you or assigned to you. Viewing your emails in this way can be very helpful if you get a lot of email in the shared inbox, as you can focus only on the important messages.
You can also set up multiple inboxes for different teams in Zoho TeamInbox. For now, there’s just one: Demo Inbox.
If you look in your new Demo Inbox under Teams, you’ll see that Zoho has sent you three emails. These emails include a welcome message and some useful information about getting started, so take the time to read them.
Spend some time getting familiar with the TeamInbox workspace. Don’t worry if you’re not sure how to find your way around yet. All will become clear as you continue through this tutorial.
3. Add a Sender Address and Set Up Custom SMTP in TeamInbox
Simple Mail Transfer Protocol (SMTP) is a standard protocol that mail servers use for sending and receiving email messages.
Zoho TeamInbox has its own email servers, but Zoho recommends setting up custom SMTP.
This can improve deliverability for your team emails and gives you full control over your DNS settings and email messages.
Using SendLayer SMTP
SendLayer is an SMTP email delivery service that will ensure fast and reliable delivery of your emails from Zoho TeamInbox.
When you send emails via SendLayer, your sender protection is protected to reduce the risk of your domain ending up on blacklists or your emails going to spam.
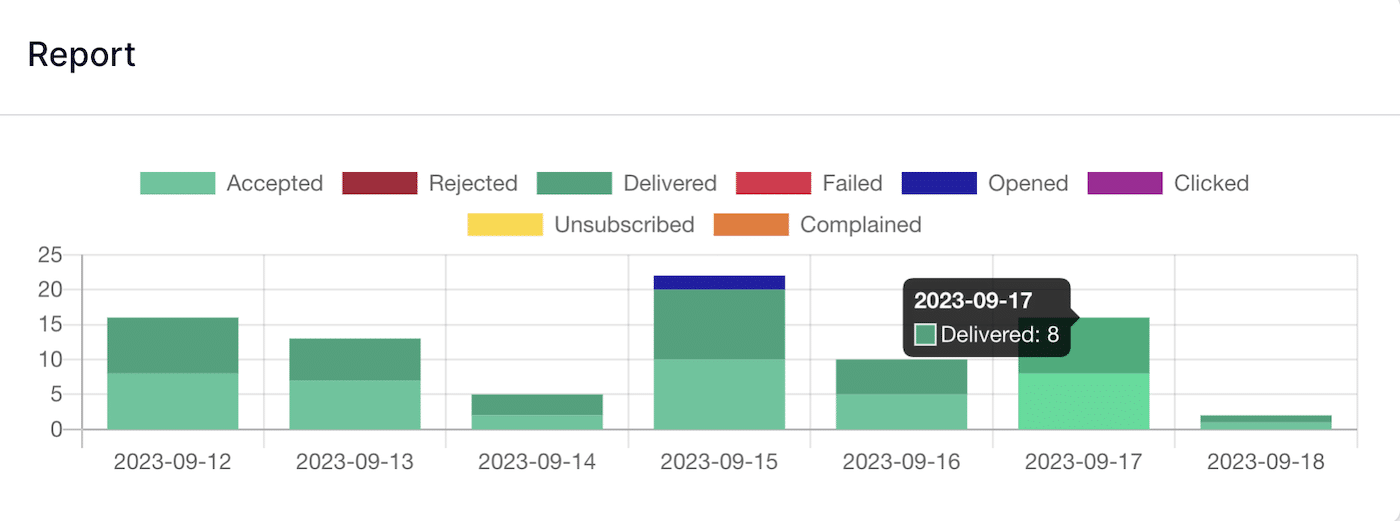
SendLayer also includes email logs and analytics so you can see immediately when your emails are being opened and if there are any issues with delivery.
To get started with SendLayer, head over to the pricing page and choose a plan suitable for the number of emails you’ll be sending each month.
You can also sign up for a free trial to give SendLayer a try with up to 200 emails.
Once you’ve signed up, log into your SendLayer dashboard to set up your domain and find your SMTP details.
Adding and Authorizing Your Domain
Before you can start using SendLayer to send emails, you’ll need to add the domain you’ll be sending TeamInbox emails from. Click the Add Domain button in the top right corner of the dashboard.
Type in your domain and click the Add Domain button.
SendLayer generates 5 new DNS records for you. You must add these DNS records to your domain DNS settings in your web hosting account or domain management dashboard. You can follow our domain setup guide for more help with this.
Once you’ve added all 5 DNS records to your domain, return to your SendLayer dashboard, tick the box, I have added these DNS records and am ready to proceed, and click the Verify DNS Records button.
Make sure your domain has been authorized before continuing onto the next step. You can see the status of your domain in Settings in the sidebar menu of your SendLayer dashboard and scrolling down to the DNS Records & Settings section.
If SendLayer has verified your domain’s DNS records, you will see a green checkmark in the Status column.
Note: changes to your domain DNS settings can take time to propagate across the internet. You may need to wait up to 48 hours until SendLayer can verify your DNS settings.
You’ll need some information from your SendLayer account in a moment, so leave the tab open while you go back to Zoho TeamInbox.
Add Sender Addresses to TeamInbox
Once SendLayer has verified your DNS records, you can continue with setup in Zoho TeamInbox.
To set your sender addresses, access your organization settings by clicking the cog icon in the top right corner of your TeamInbox, followed by the More Settings link.

In the panel on the left-hand side of the screen, click the Organization tab and scroll down to the Sender Address setting.
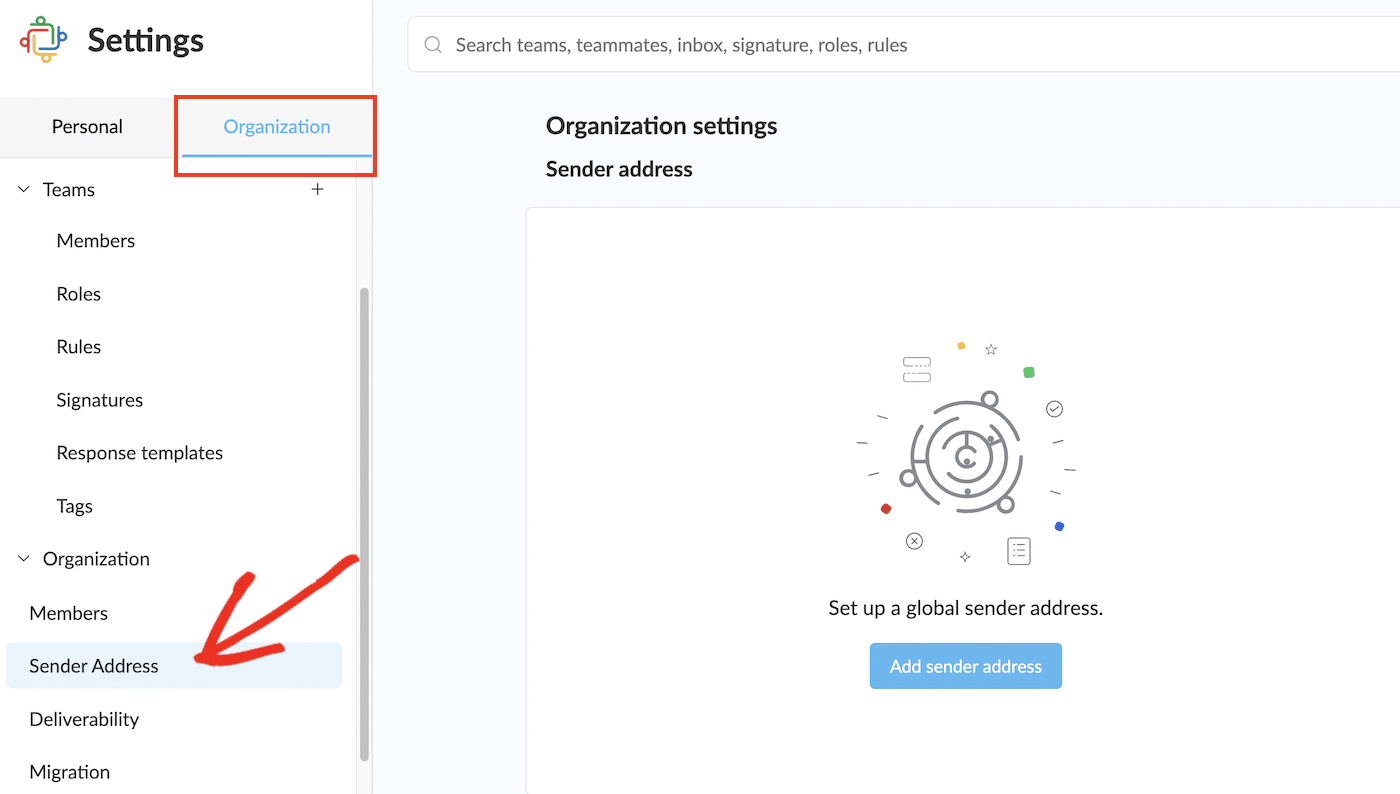
Click the Add Sender address button.
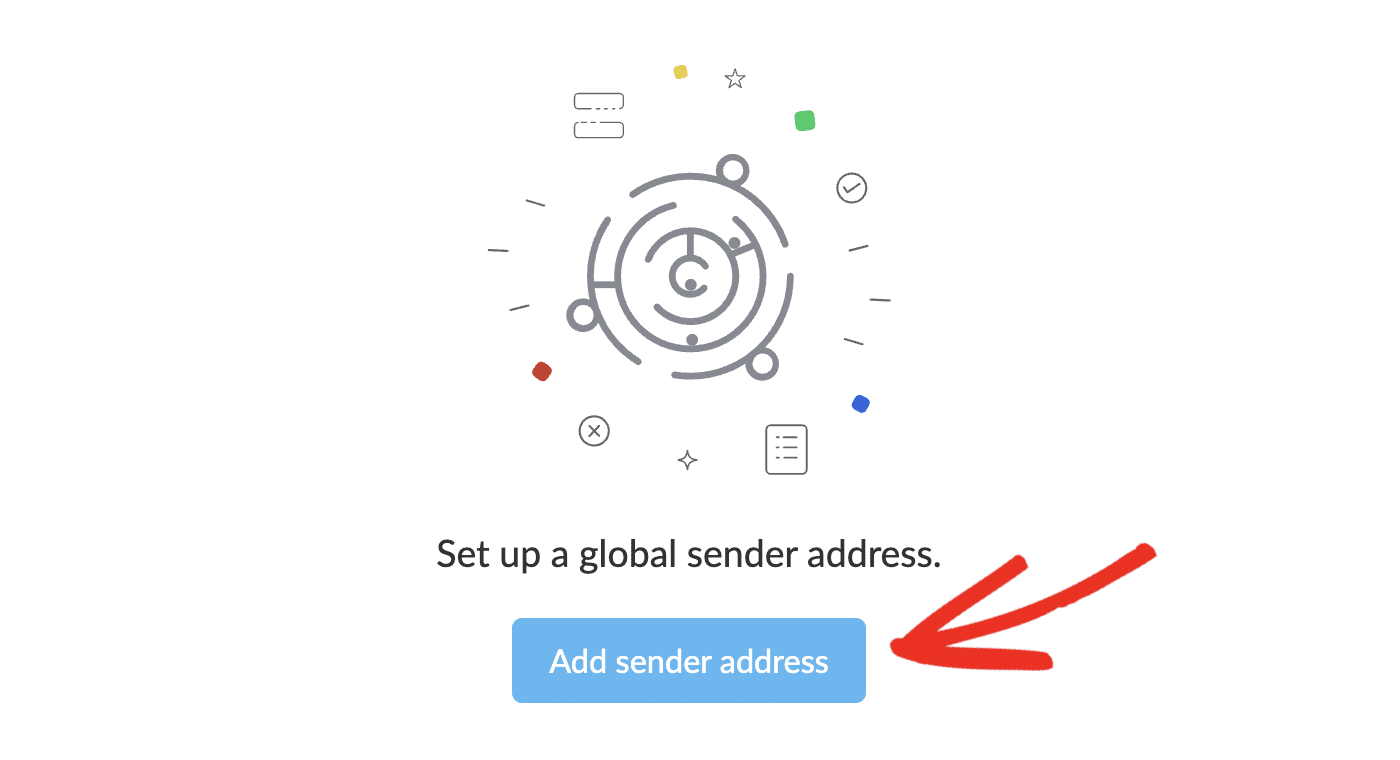
This will bring you to a screen where you can fill add your outgoing email address and server details.
Fill out a Name (for internal reference), select “Others” as the Outgoing Mail Provider, and fill out the Email Address you want to set as the sender.
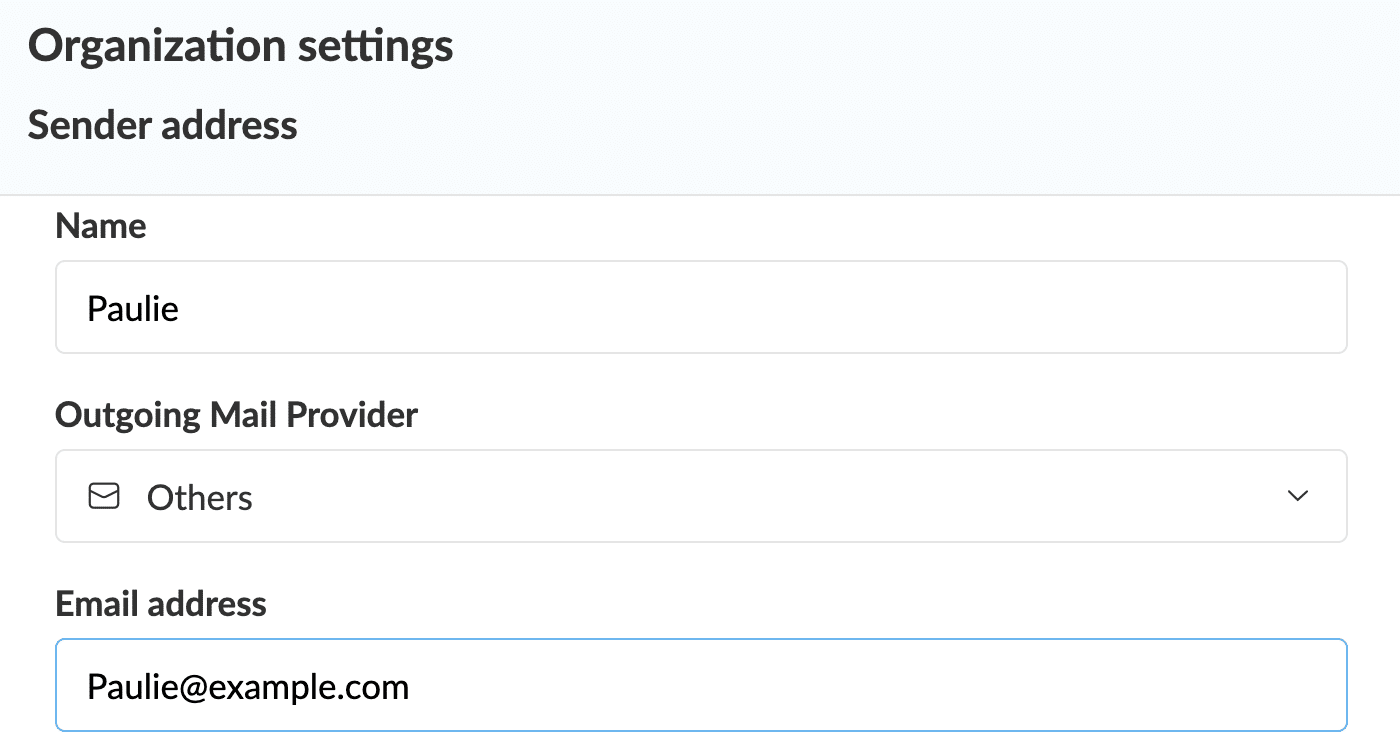
Scroll down and make sure the option to Use Custom SMTP Server is checked.
Here, you’ll need to fill out the information from your SendLayer dashboard, so go back to the tab you have SendLayer open in.
You can access this information on the Settings page, under SMTP credentials.
Fill out the sender information as follows:
- Outgoing server name: smtp.sendlayer.net
- Port: 578
- SSL/TLS: TLS
- Account credentials email: copy and paste Username from SendLayer
- Account credentials password: copy and paste Password from Sendlayer
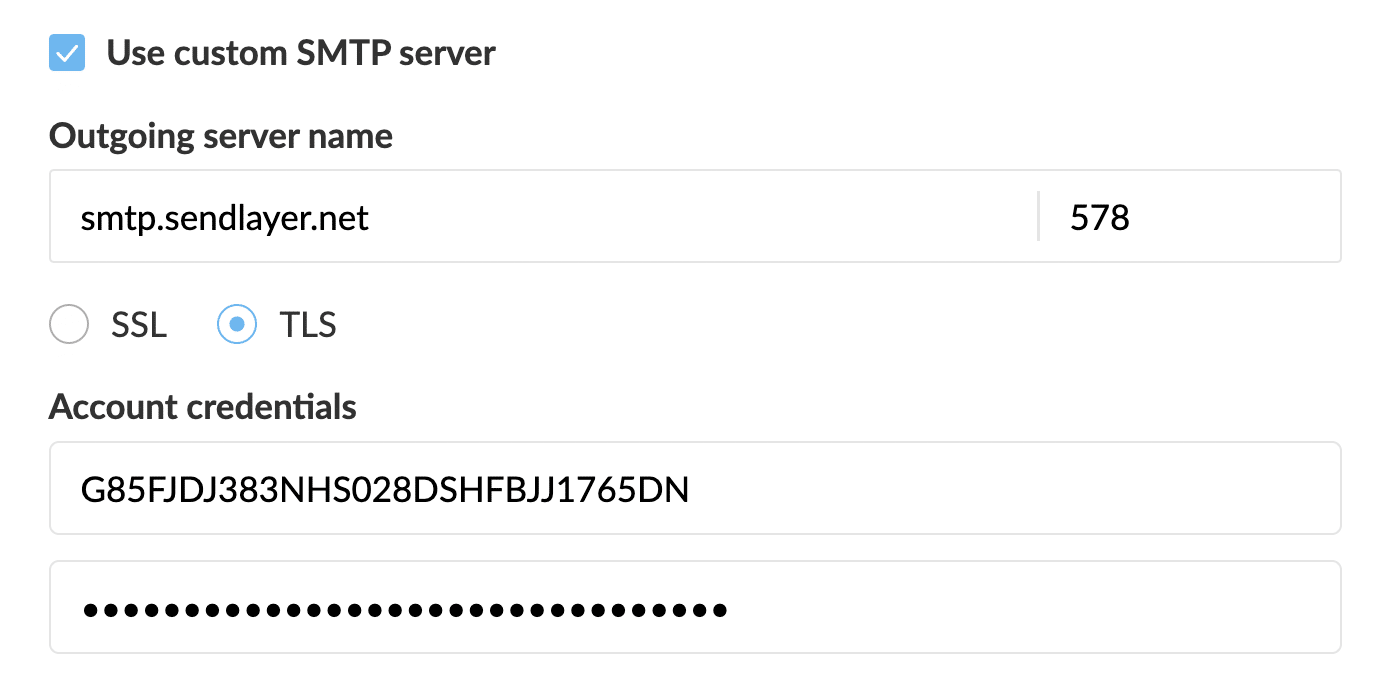
Finally, choose whether or not you want all inboxes to be able to choose this email address as the sender address and check or uncheck the checkbox accordingly.
Click the Add button to set your sender address.

Once you’ve entered all the correct credentials and clicked the Add button, you should see a confirmation message that your sender address has been added and a popup asking for a verification code.
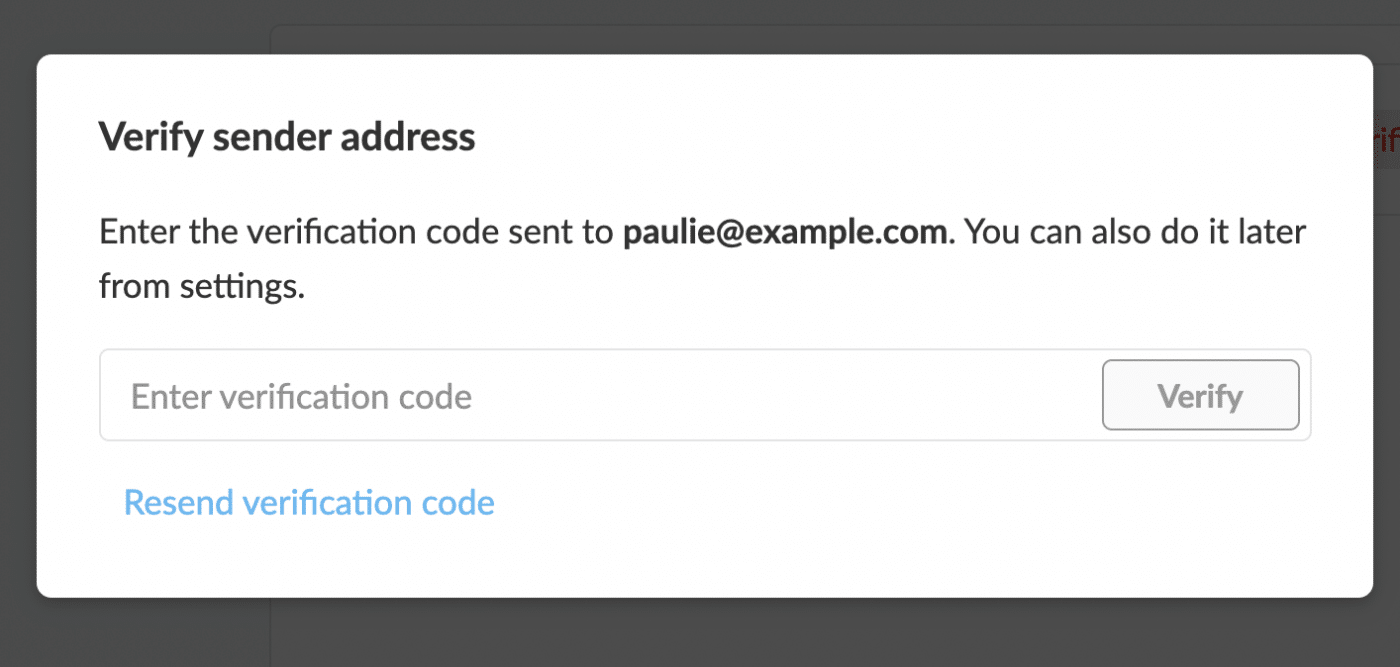
Check your email for the verification code. The email should look something like this:
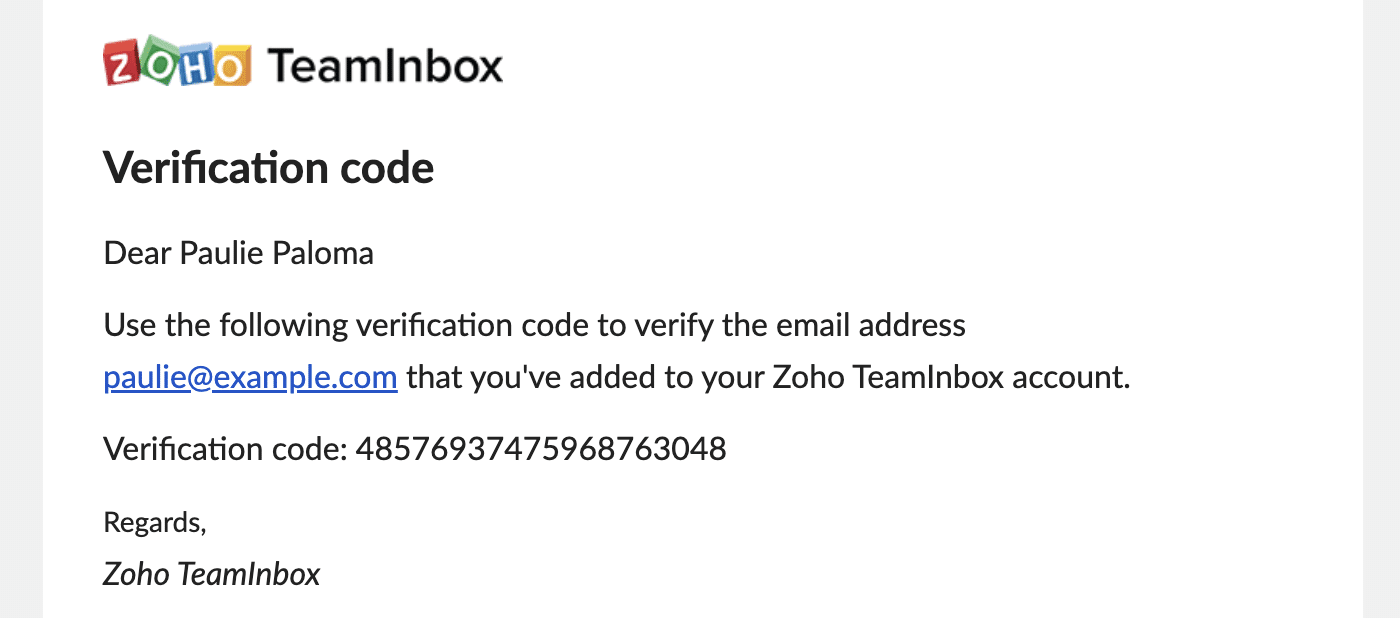
Copy the verification code, paste it into the popup, and click the Verify button.
You should see a notification that the sender address has been verified.
The email address will now be listed under your Sender Address settings, and you can edit the details and enable or disable it as you wish.

You can repeat the process to add more sender addresses.
At this point, you’ve successfully set up Zoho TeamInbox to send emails from the sender address of your choice, and all replies you send from Zoho TeamInbox will be routed through SendLayer’s secure SMTP server to maximize your deliverability.
Remember, you can log into your SendLayer dashboard to see an overview of how many emails you’ve been sending each day and whether each email has been delivered or failed. You can also track opens, clicks, unsubscriptions, and complaints to ensure customer satisfaction and your sender reputation remains high.
4. Create a Team and Add Team Members
A shared inbox isn’t much use if you’re the only one using it! So make sure you go through the next step to invite team members.
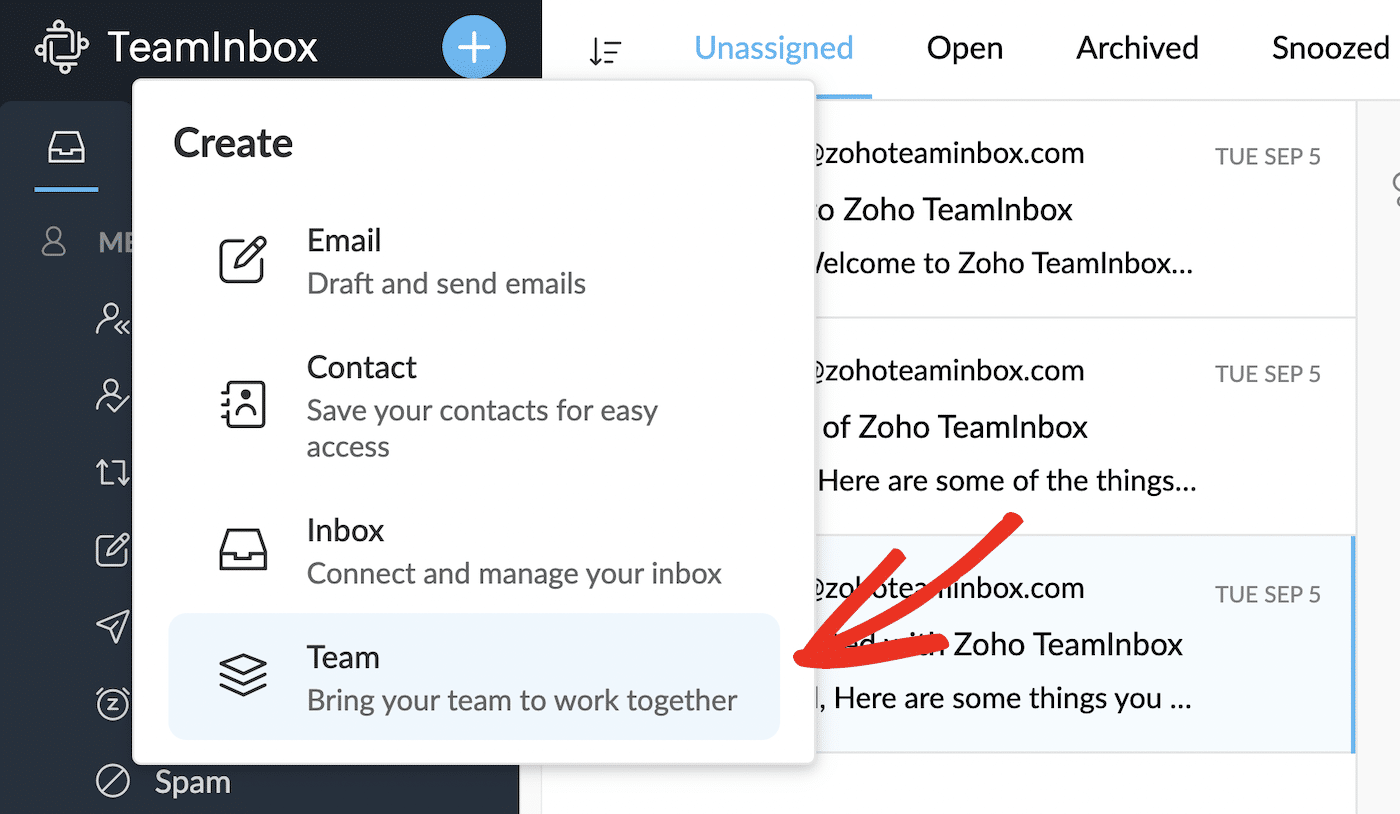
Click the plus(+) icon next to TeamInbox in the top left corner and choose Team from the dropdown.
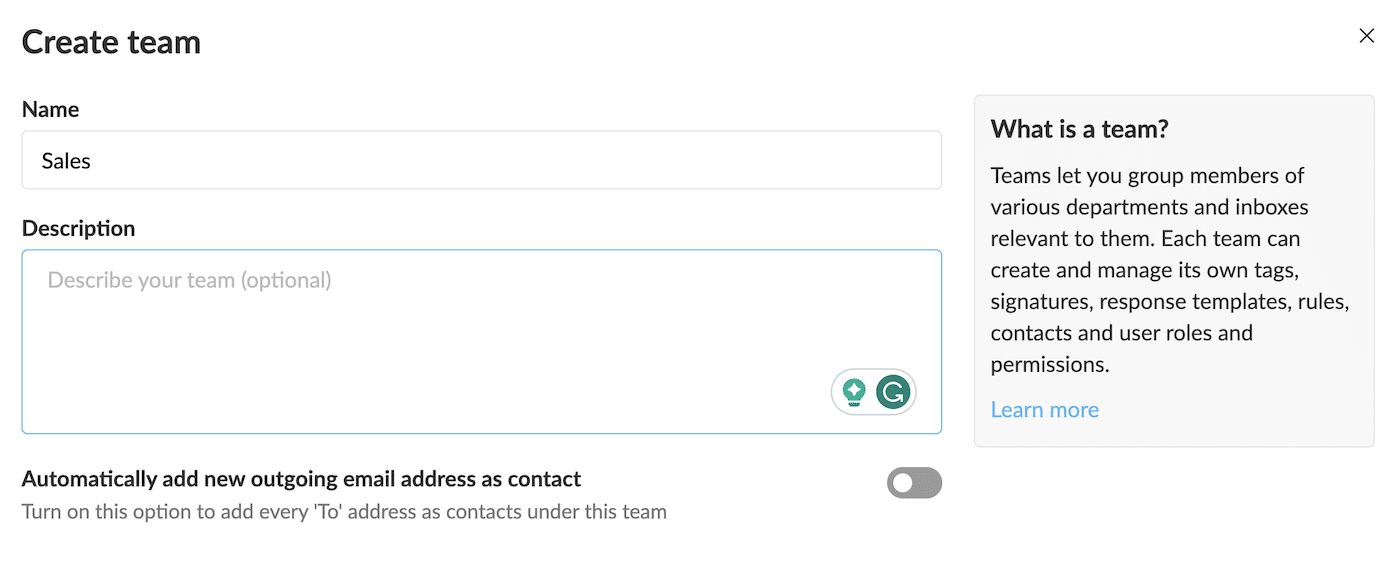
Fill out a name for your team and an (optional) description, and click the Next button to continue.
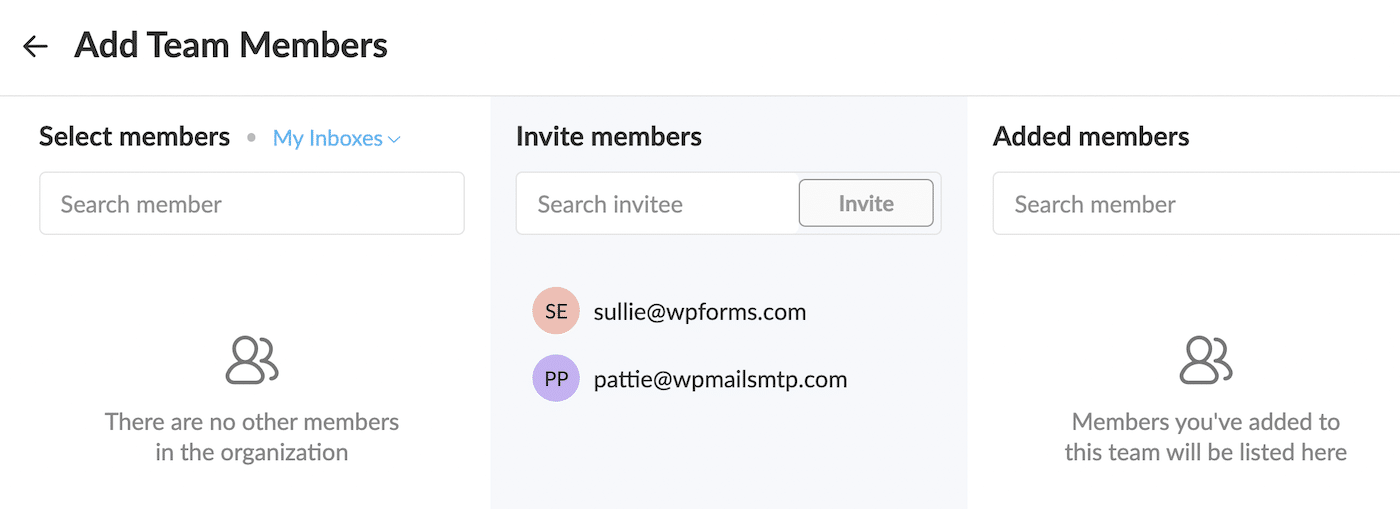
You can now add users that are already registered to your organization and invite others to join.
To invite new users from outsize Zoho Mail, enter each email address individually, and click the Invite button. Zoho TeamInbox will send an email invitation to these people, asking them to create a Zoho account. After creating the account, they’ll automatically be added as a team member.
When you’ve finished adding and inviting members, scroll down and click the Create button to create your team
5. Create Inboxes
You can create multiple shared inboxes in Zoho TeamInbox and assign them to one or more teams.
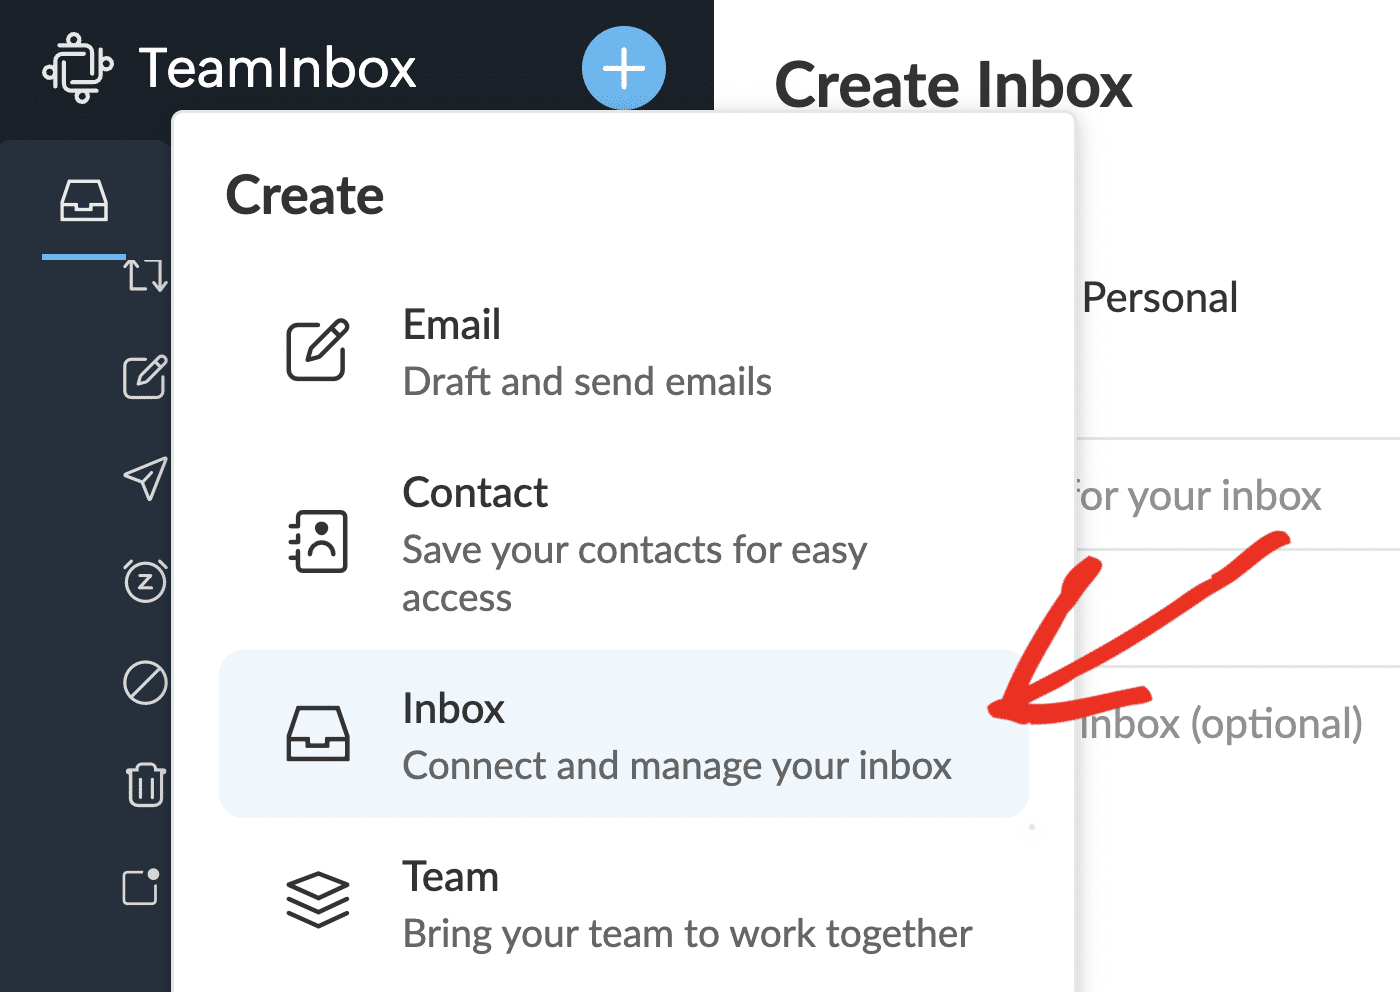
To create a new inbox, click the plus(+) icon and choose Inbox from the dropdown.
Fill out a Name for your inbox, an optional Description, and choose the Team you want to handle the inbox.
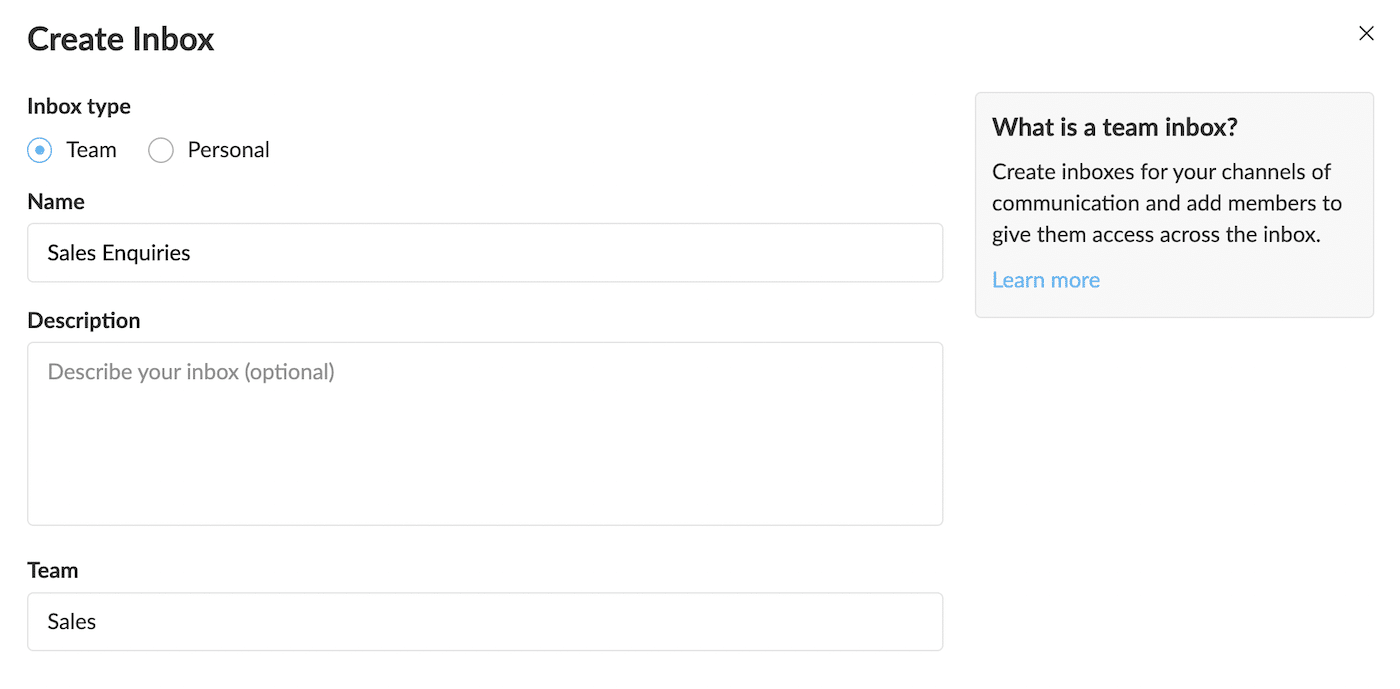
When you’ve finished filling out the information, scroll down and click the Next button.
On the next screen, you can choose a channel that will be the source of messages in the inbox.
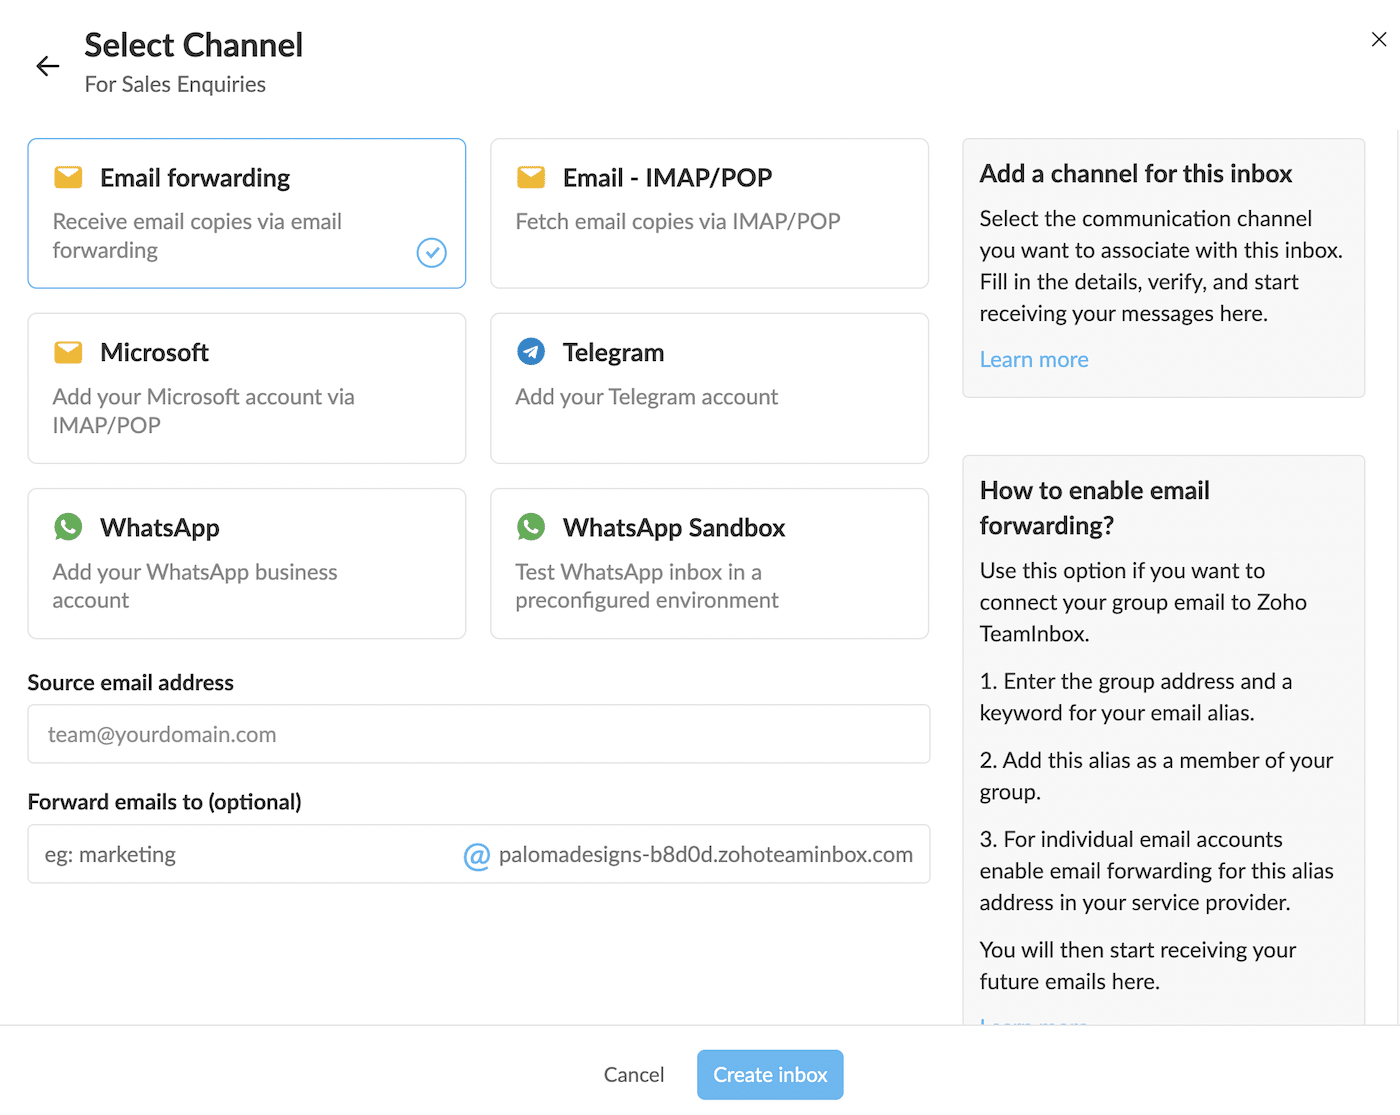
You can either:
- Connect your group email to Zoho TeamInbox and automatically forward emails
- Fetch copies of emails from an incoming mail server via IMAP
- Fetch emails from your Outlook and Office 365 accounts
- Receive messages sent to Telegram
- Receive messages from your WhatsApp business account
Once you’ve chosen a channel, scroll down and click the Create inbox button. Your new inbox is now active, and your team can receive and reply to messages in it.
6. Assigning Team Roles
As the TeamInbox administrator, there are various user roles you can set for members of each team and for each individual inbox.
These roles include:
- Observer: Can view and follow threads and comments
- Member: Can compose and forward messages, assign and archive threads, mark email as spam, apply and remove tags, view, add, and delete own comments.
- Admin: In addition to all usual Member permissions, Admins can also permanently delete threads.
Users added to a team are automatically assigned Member status, but you can change this in Organization Settings » Members by clicking the edit (pencil) icon next to the team member’s name.

You can also customize the permissions for each role in Organization Settings » Roles.
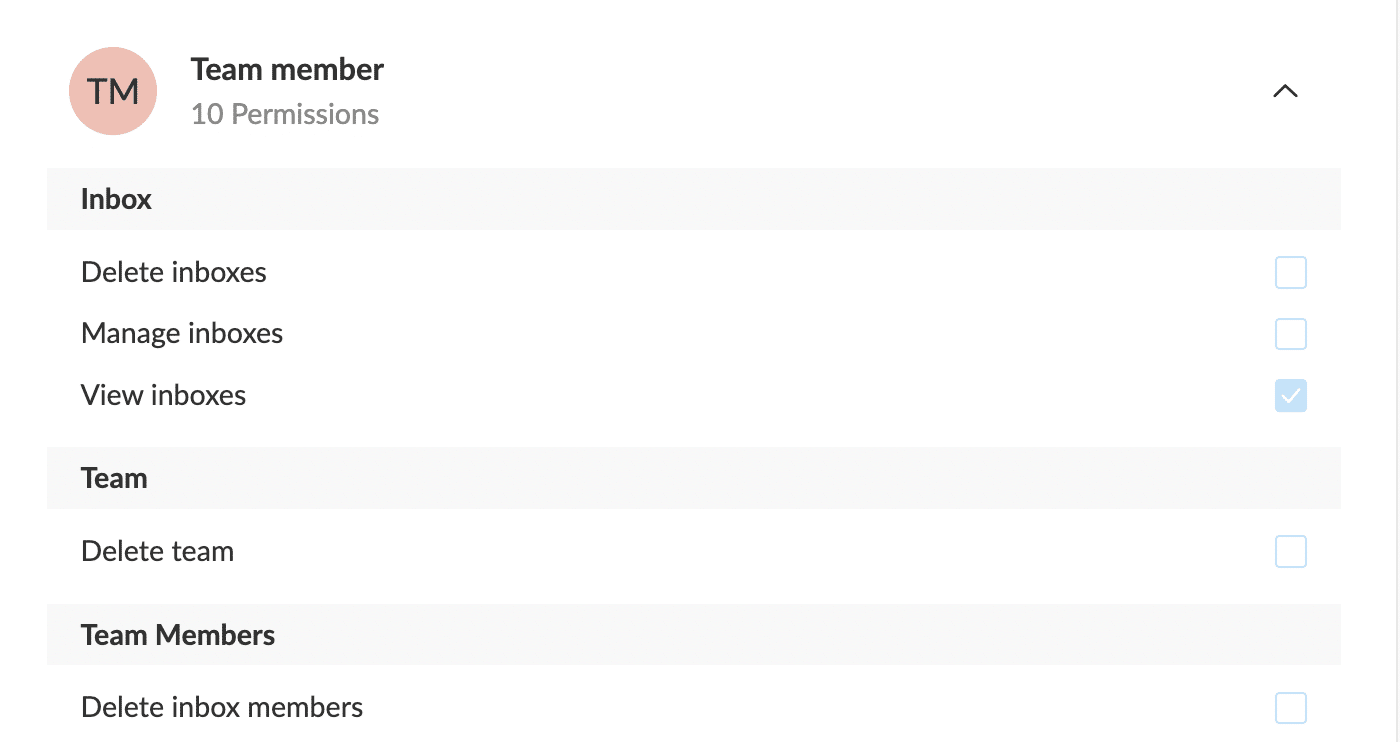
By selecting which permissions you want each team role to have, you have complete control over your team and how your messages and inboxes are managed.
7. Managing Your Inboxes
Once you start receiving messages in your Zoho TeamInbox, there are several ways you can read and respond to them.
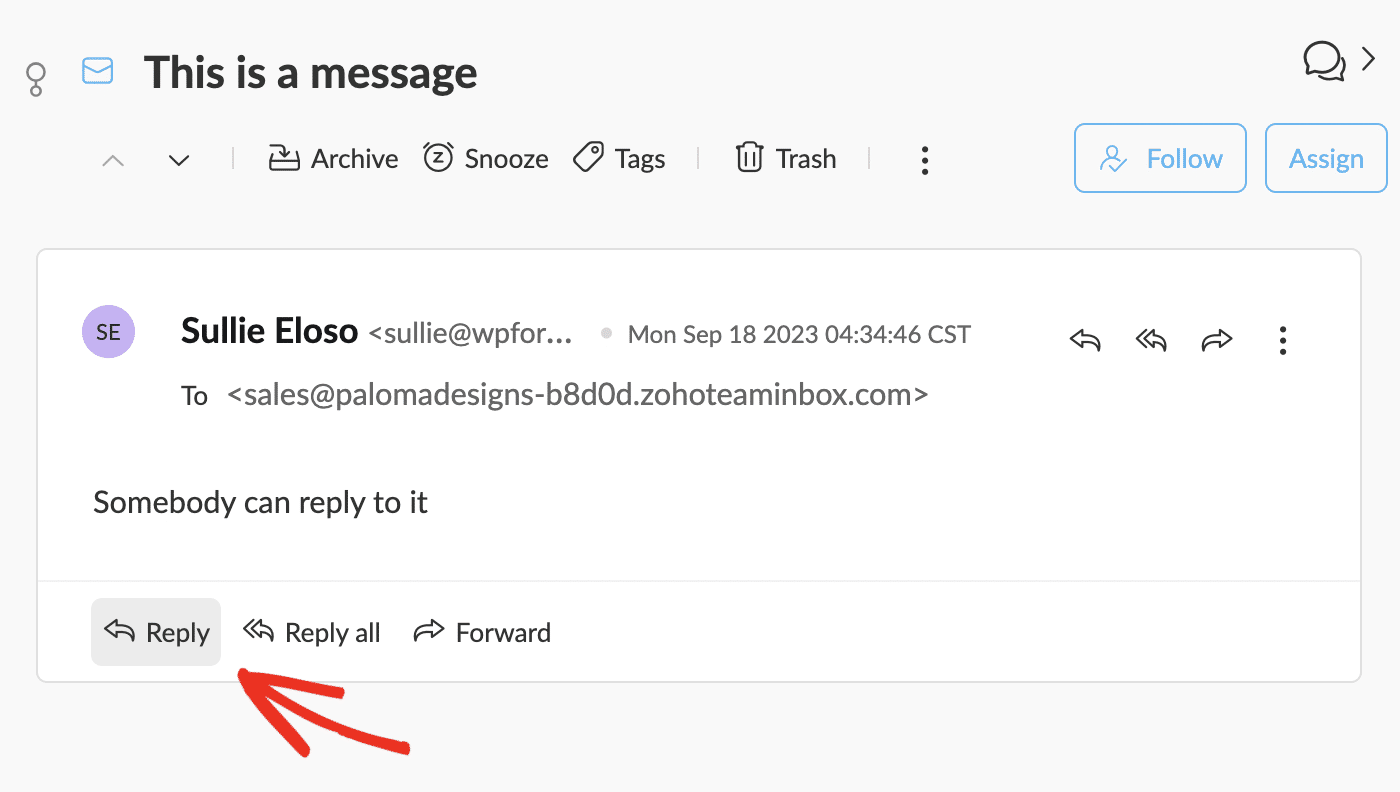
Reply to a Message
Any team member can reply to a message from within Zoho TeamInbox, just as with a regular email inbox. Their reply and the entire email thread will be visible to anyone in the team.
Assign Messages
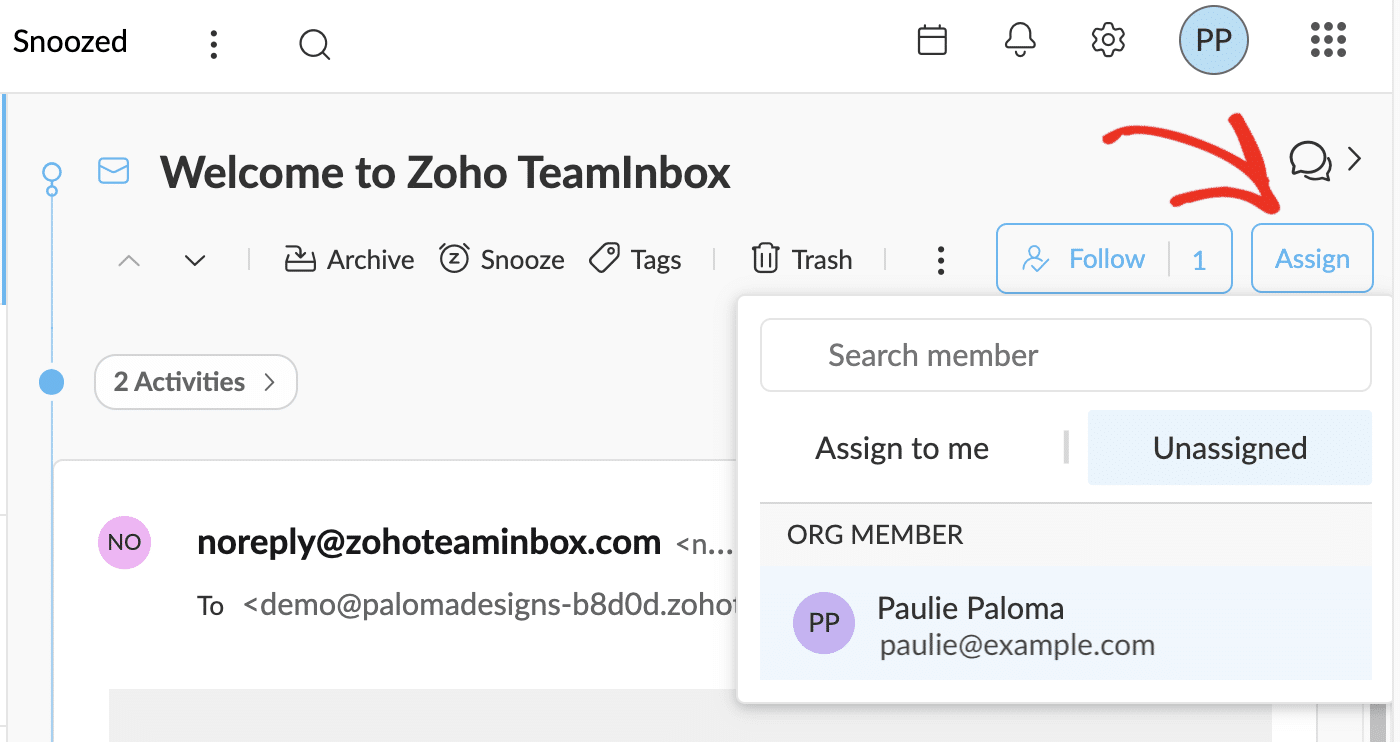
If you want to assign a message to a particular team member to respond to it, simply click the Assign button at the top right corner of a message and choose the team member you want to assign it to.
Snooze Messages
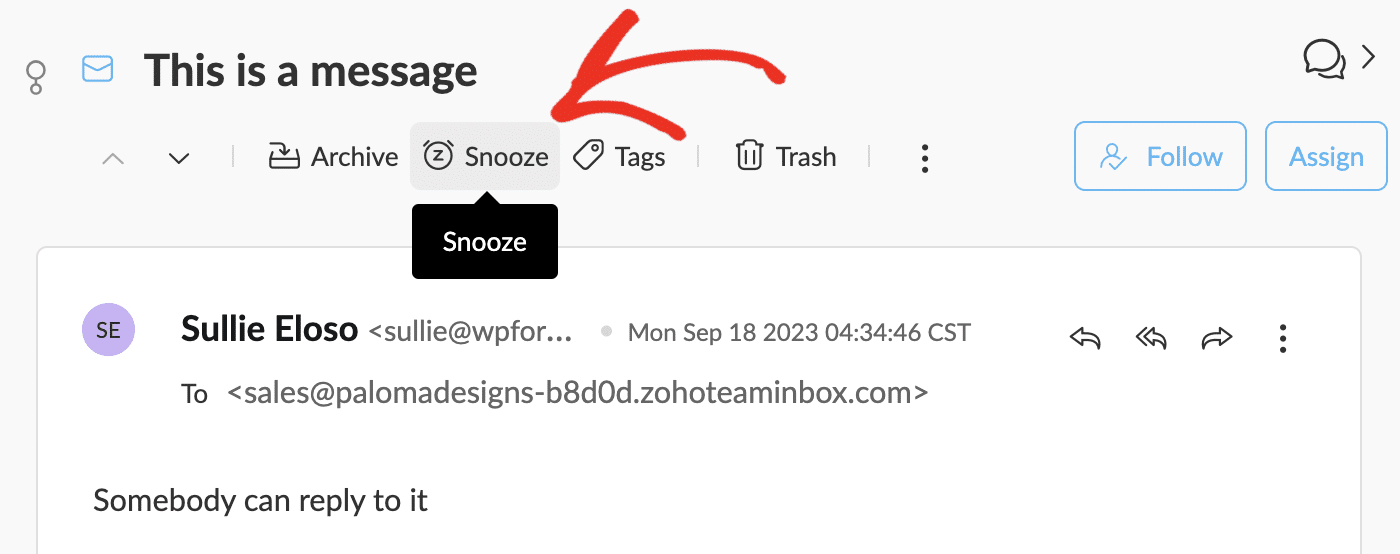
If a message doesn’t need a reply immediately, you may want to hide it from the inbox for a while. Hitting the Snooze button will allow you to hide the message for a time period you set.
Following a Thread
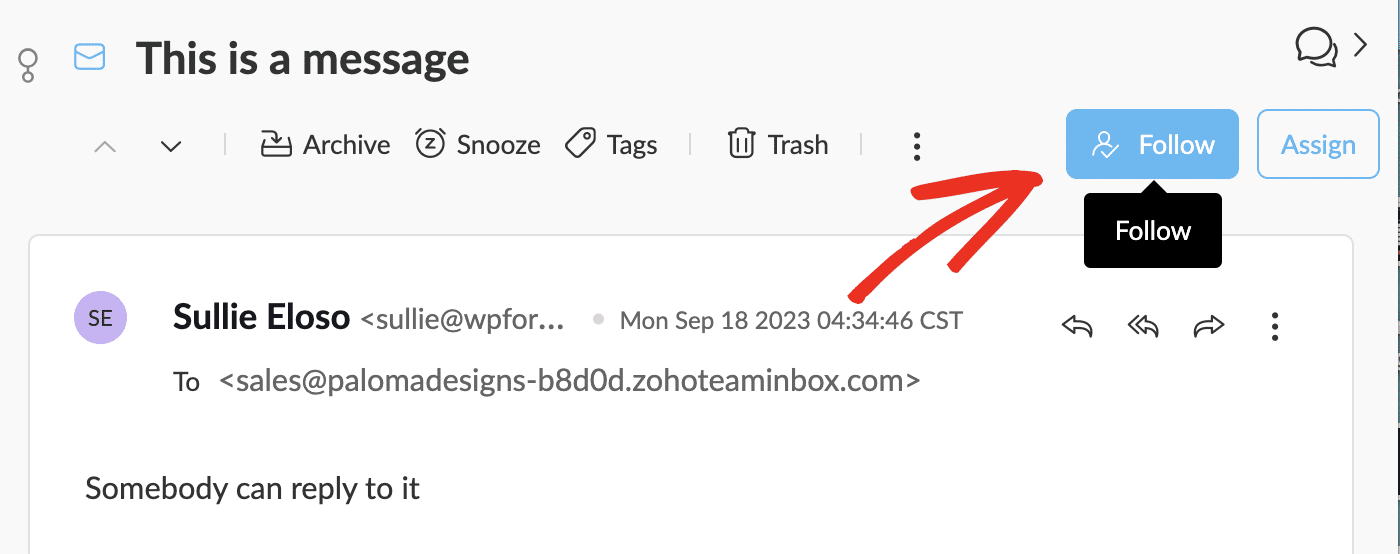
If you want to keep an eye on a particular email thread, you can follow it and get notifications about activity such as new replies. You can find the Follow button in the top right corner of each message.
You can see the messages you’re following in the Following folder in your Zoho TeamInbox sidebar.
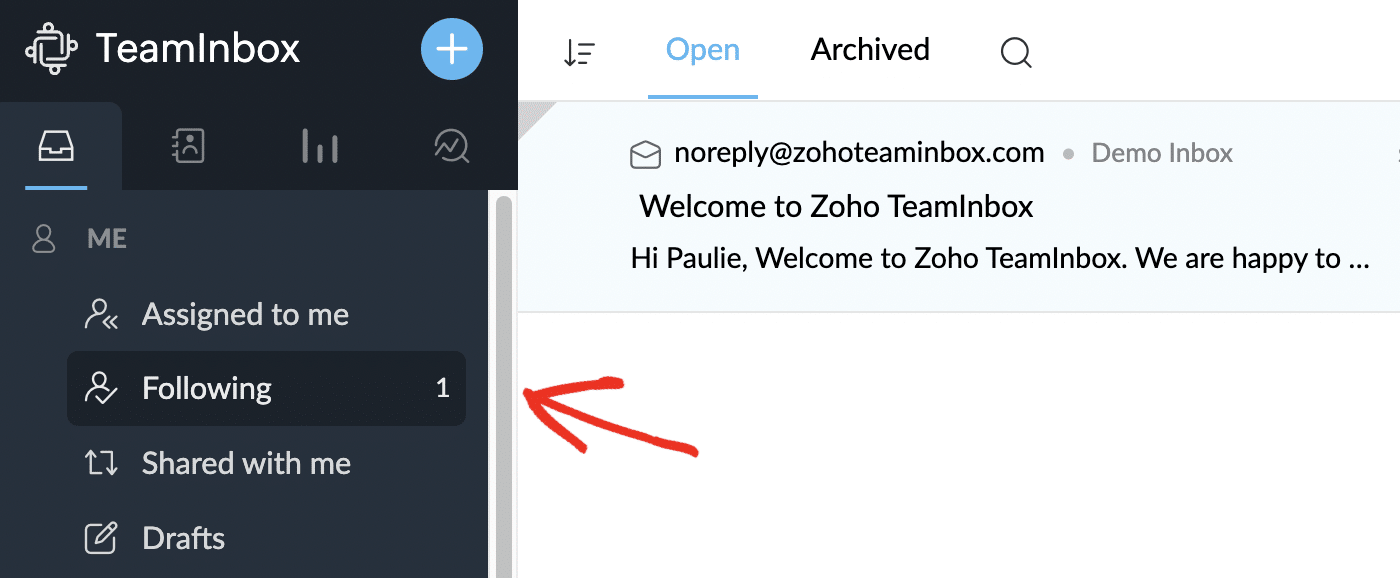
This is also an easy way to access messages that have been assigned to you or shared with you.
8. Using Comments
Aside from normal email replies and following threads, team members can communicate about individual email threads by leaving comments alongside them.
This feature is really useful, as it allows team members to share internal-only information without the risk of accidentally sharing it externally.
To view comments or leave a comment on a message thread, click the speech bubble icon in the top right corner of the message. This will open an additional window for conversations, which is completely separate from the main message thread.
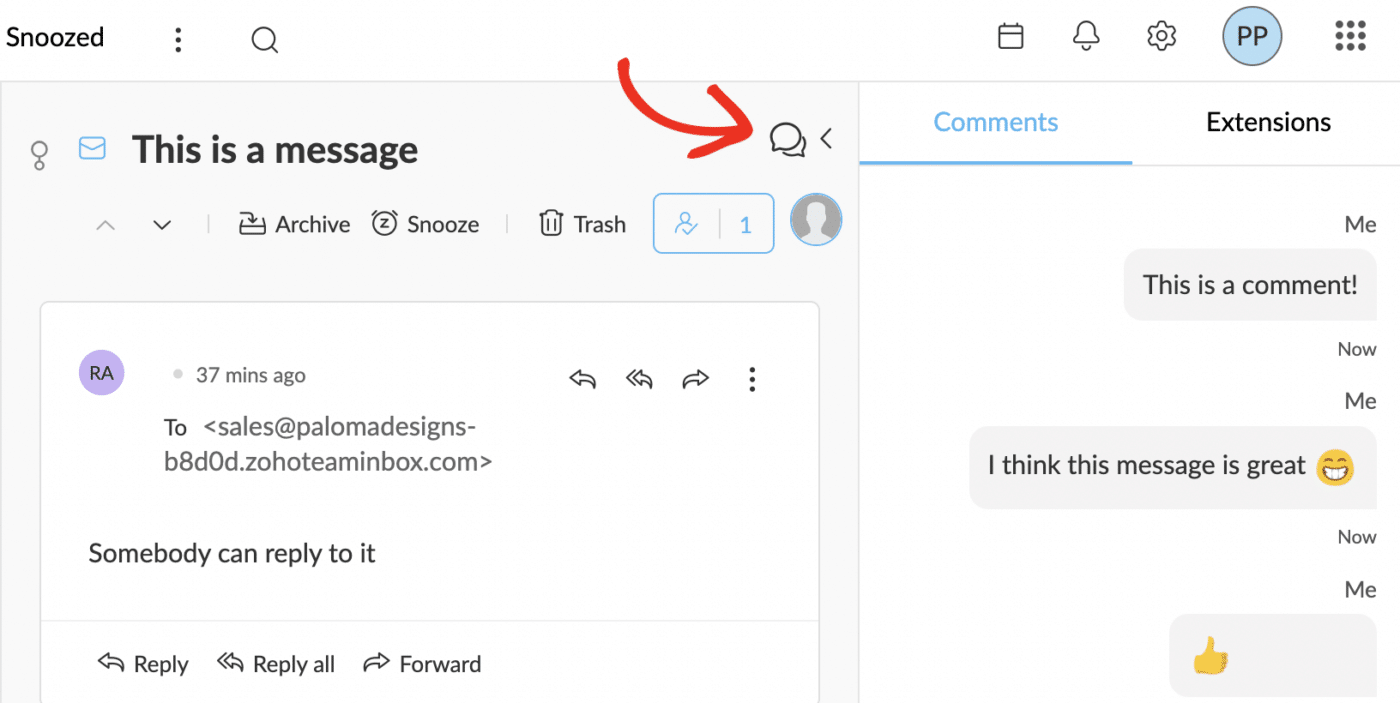
As well as text messages, you can also leave emojis and even upload files.
9. Integrate TeamInbox With Other Apps
Zoho TeamInbox has built-in integrations with several Zoho apps, including Zoho CRM, Zoho Desk, Zoho, Meeting, and Zoho Recruit, as well as third-party project management apps Asana, and Trello.
These integrations are activated by default, and you can see them under Organization Settings » Integrations.
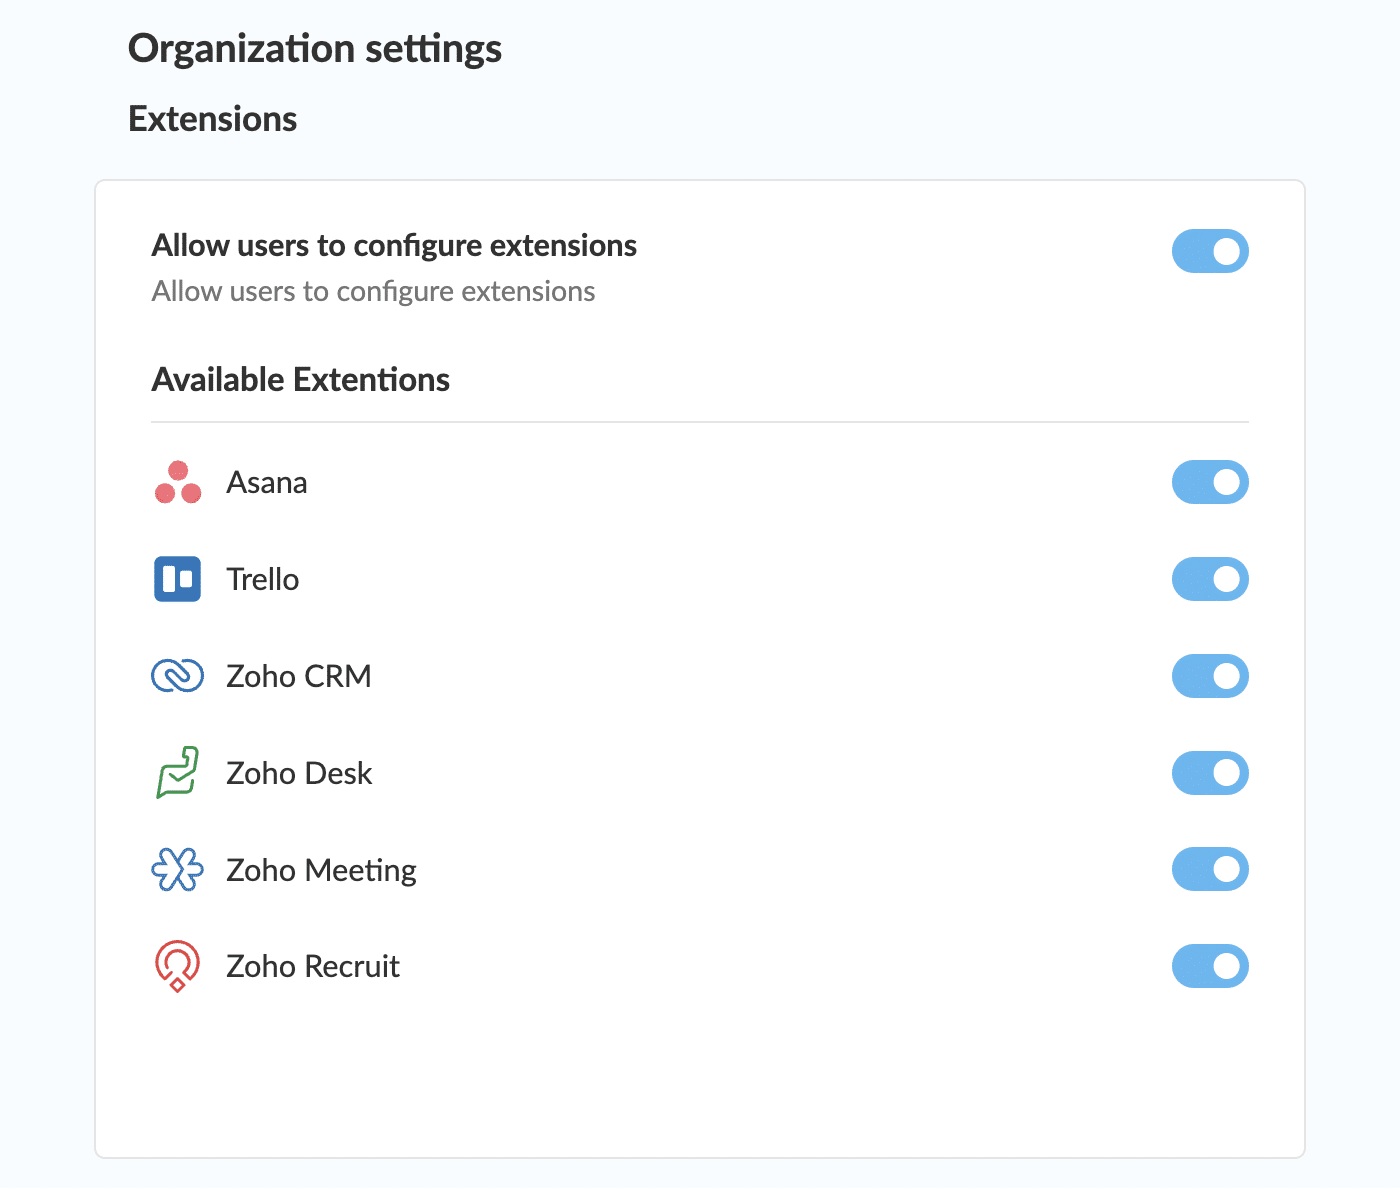
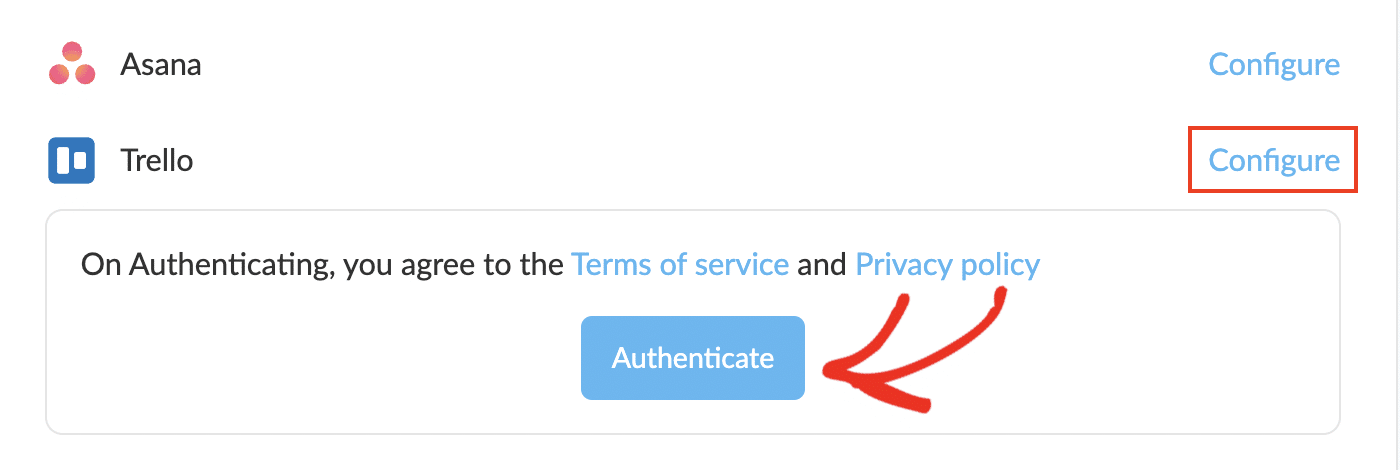
To configure your integrations, navigate to Personal Settings » Integrations and click the Configure link for the app you want to set up with TeamInbox.
Click the Authenticate button to connect TeamInbox to the app.
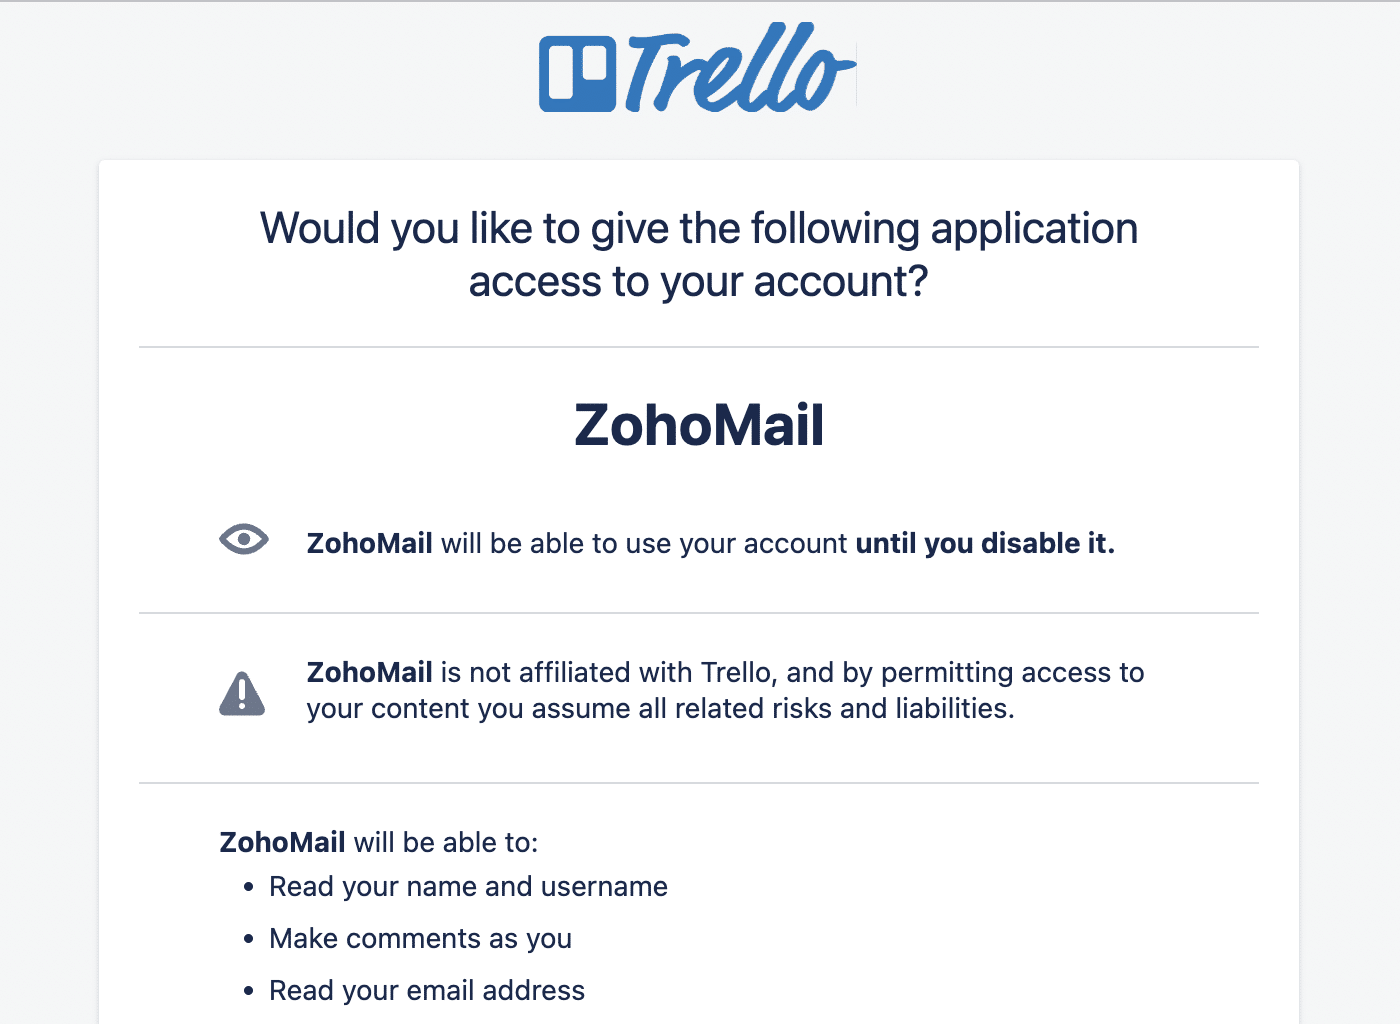
This will take you to a permissions page for your chosen app. Check the permissions you’re granting to ZohoMail and log into your account to grant the permissions.
After confirming you want to integrate the apps, you’ll see your account has been authenticated in your TeamInbox settings.
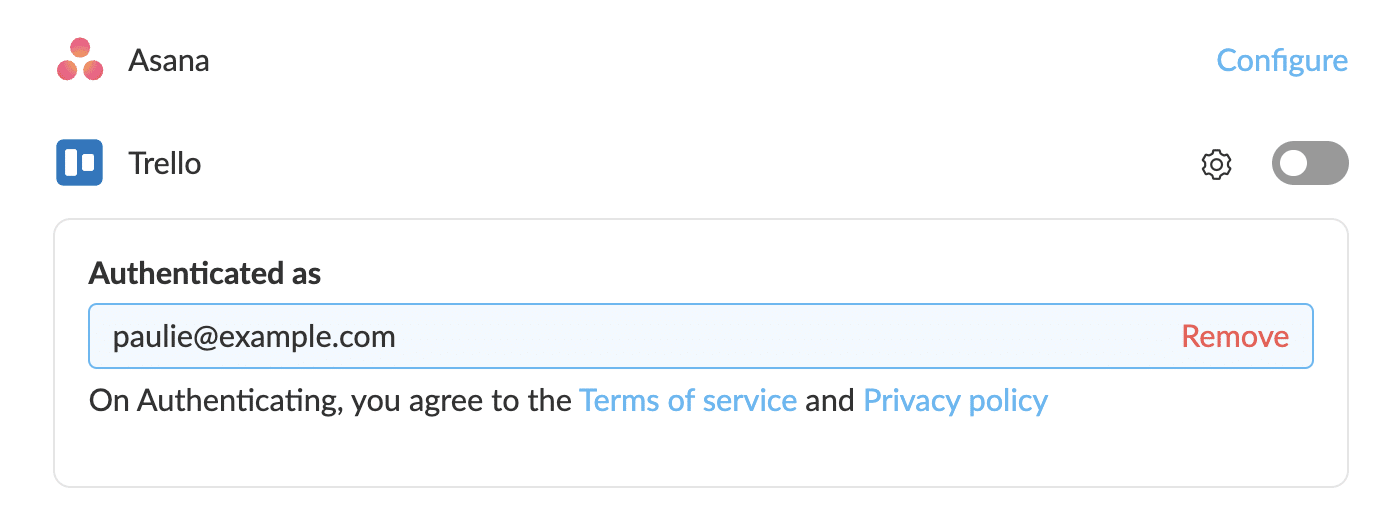
You can now activate the app within TeamInbox by navigating to the Extensions tab in the comments of a message thread and toggling on your chosen app.
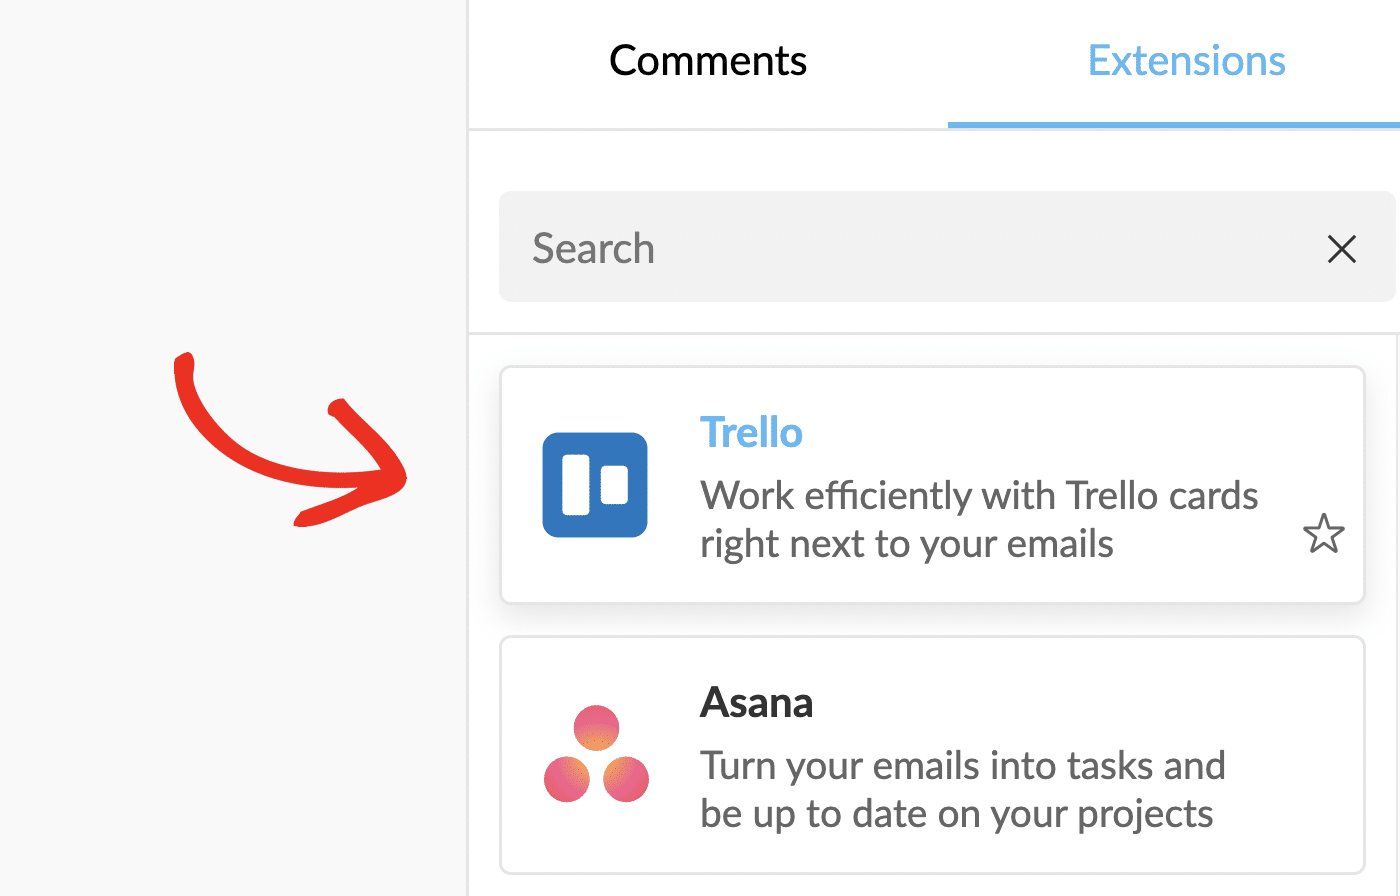
The specific functionality of the integration depends on the app. For example, if you connect TeamInbox to Trello, you can view your Trello projects from within TeamInbox, and open, view, search, add, and edit cards.
You can continue this process to integrate as many apps as you want to use.
10. Install the Zoho TeamInbox Mobile Apps
As well as the TeamInbox website, there are also Zoho TeamInbox apps available for iOS and Android.
You can download these apps from their respective app stores.
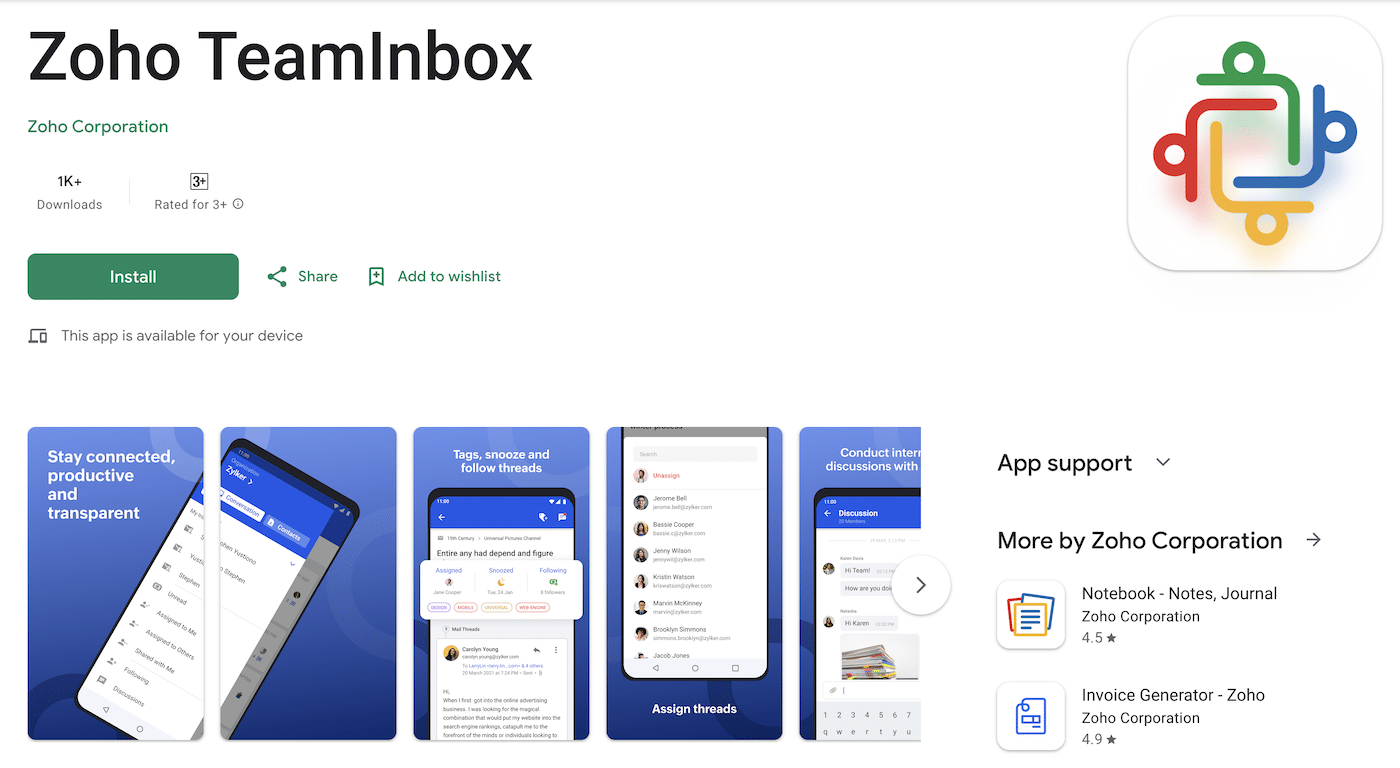
The mobile apps allow you to access your TeamInbox on the go, and you can reply to messages, assign messages, chat, and archive or snooze threads just as you can on the web app.
Now you know all the basics of setting up and managing your Zoho TeamInbox, so you should be good to go! Make sure to try out all the features during the 14-day trial so you can assess whether it’s the right shared inbox solution for your team or not.
Frequently Asked Questions
We often get asked about setting up a shared inbox in Zoho TeamInbox. Here are some of the most common questions people ask us:
Is TeamInbox part of Zoho One?
Zoho TeamInbox is included in Zoho One, along with over 40 other enterprise-level applications built by Zoho Corporation for CRM, marketing automation, eCommerce, project management, word processing, and more.
What is the difference between Zoho TeamInbox and Zoho Desk?
Zoho TeamInbox is a shared inbox tool designed for communication and collaboration between team members. In contrast, Zoho Desk is a complete customer support help desk ticketing system for tracking and resolving customer issues and complaints.
What is the best way to manage a shared inbox?
Defining workflows and business processes will help you manage your shared inboxes and deal with messages effectively. Enforcing team roles, defining tags for sorting messages, and prioritizing inbox zero will ensure users receive prompt email responses and their messages are handled efficiently.
Is there a limit on the number of inboxes for a team?
The Zoho TeamInbox Starter plan includes three inboxes, and the Professional plan includes five inboxes. A team may be responsible for any number of the inboxes included in your plan.
Do I have to use a Zoho Mail address for setting up a shared inbox, or can I use any email address?
You can use your own domain email address for Zoho TeamInbox; it’s not necessary to create a Zoho Mail address first. Remember to set your email address in the sender address settings and set up custom SMTP with SendLayer or a similar SMTP service to ensure email deliverability.
Can I invite clients and guests to our TeamInbox?
You can send an email invitation to any individual, and they will be automatically added to your organization. However, it’s advisable to keep your TeamInbox restricted to members of your internal team only.
Can I share personal emails in TeamInbox?
You can forward any email from your personal inbox to your shared inbox if you want it to be viewable in TeamInbox. You can also mention team members in the comments of personal email in TeamInbox to make it viewable to them.
Can I create multiple signatures to use in TeamInbox?
You can create as many email signatures as you wish for any of your inboxes. Individual team members can then choose the signature they want to use when they draft an outgoing email or reply.
Can users be added to more than one team in Zoho TeamInbox?
Users can be added to multiple teams and inboxes. There is no limit to the number of teams a user can be added to.
That’s it! Now you know how to set up Zoho TeamInbox
Next, would you like to learn about more ways you can improve your email deliverability? Check out our guide explaining why you should send email from a subdomain for more information.
