Would you like to cancel your SendLayer account?
If you’ve decided that SendLayer isn’t the right solution for you, then you can easily cancel your account.
In this tutorial, we’ll show you how to close your SendLayer account.
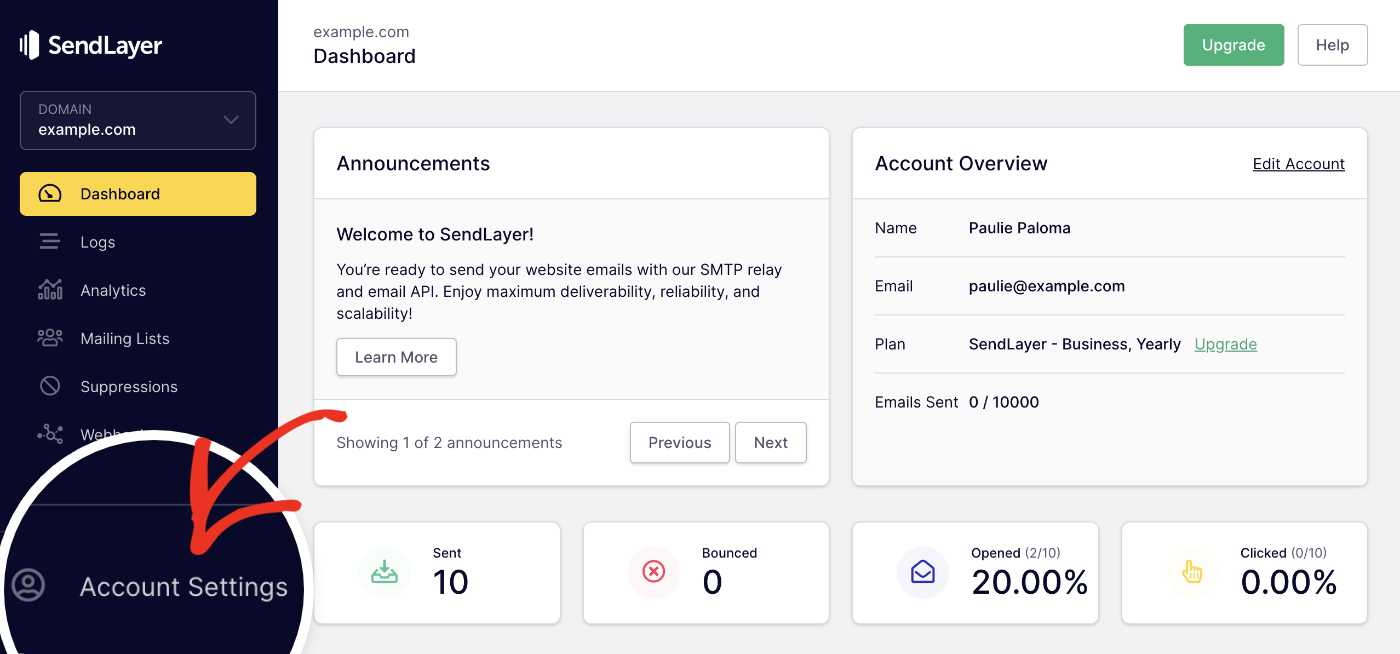
To cancel your account, you first need to log in to SendLayer. Then navigate to your dashboard and click on Account Settings in the sidebar menu.
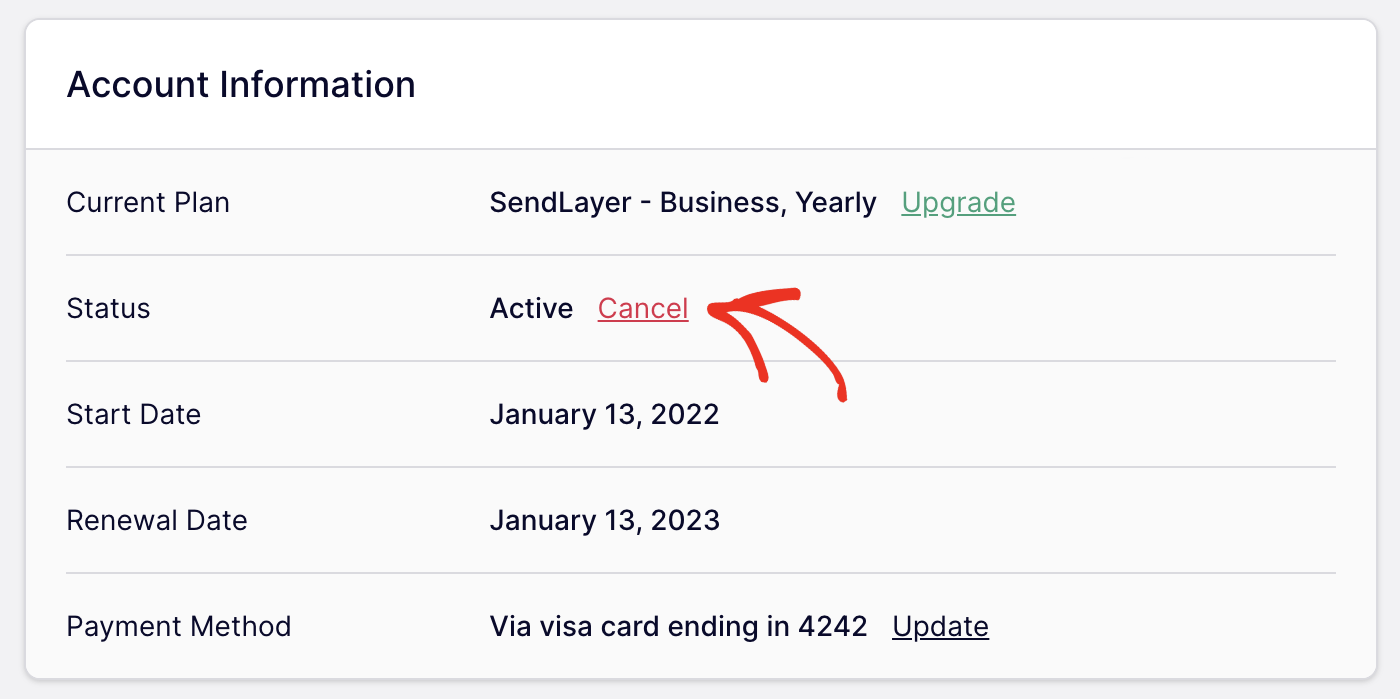
On the Account Settings page, look under the Account Information section. Next to Status, click Cancel.
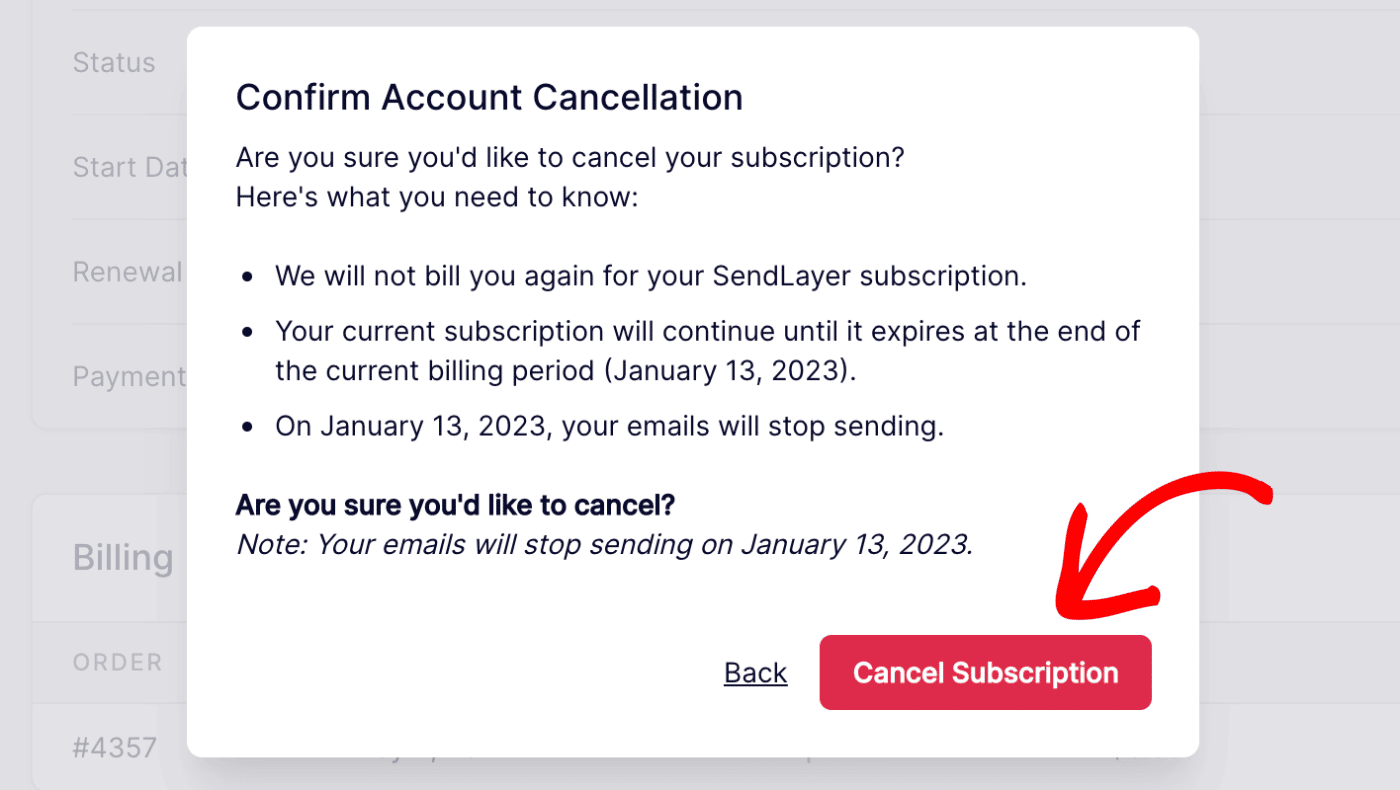
Next, a modal window will appear with details regarding your account cancellation. If you still wish to cancel after reading over the details, click the Cancel Subscription button to confirm your account cancellation.
You’ll then see a success message at the top of the screen that reads, “Your subscription has been canceled and will expire at the end date displayed below.”
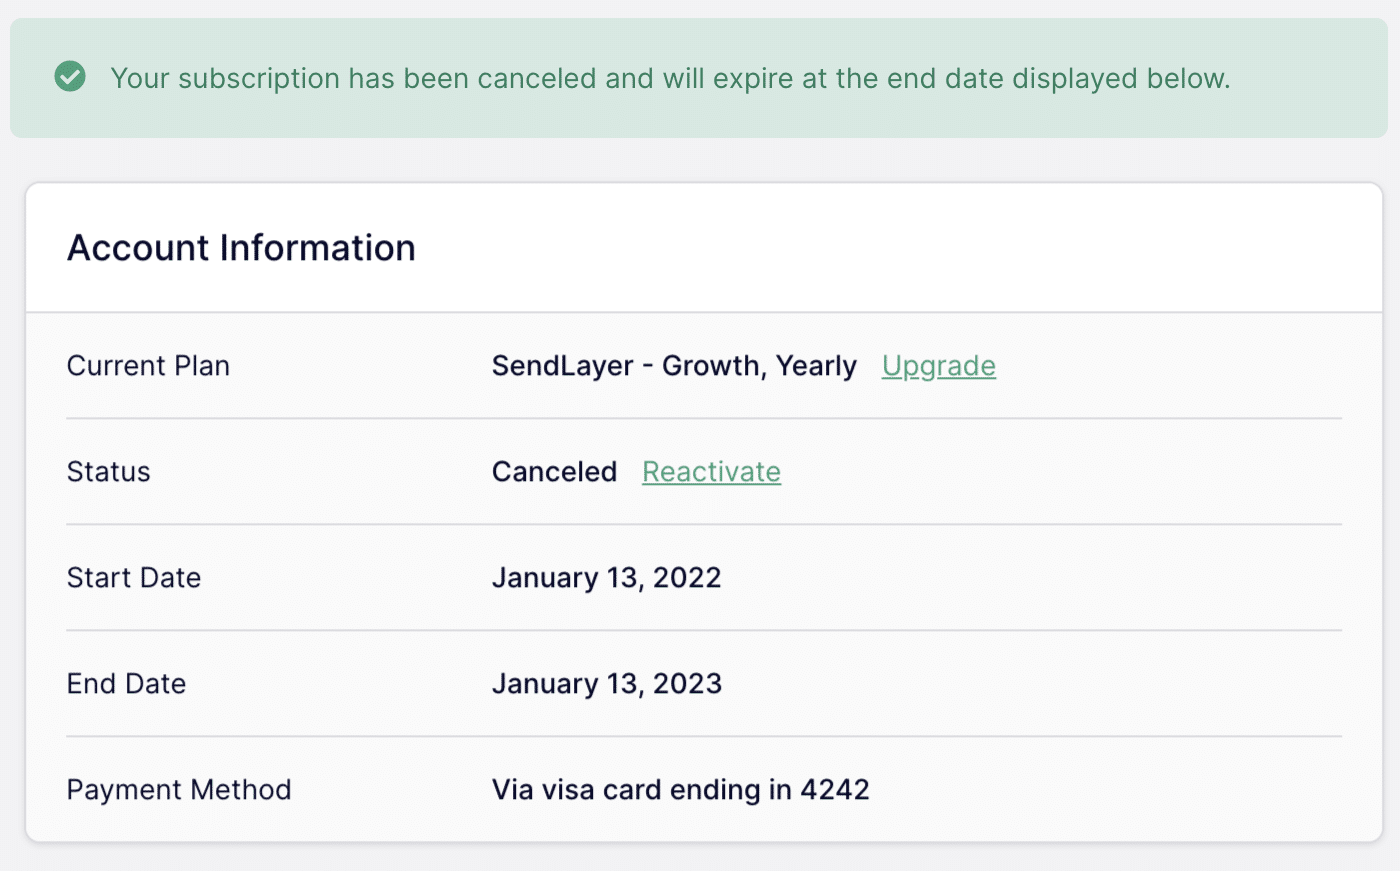
You can continue to use your account normally until the end date listed in your account settings. After this date, you’ll lose access to your SendLayer features.
Frequently Asked Questions
These are some of the most common questions about canceling your SendLayer account.
I changed my mind and want to keep my account. Can I undo my cancellation?
Prior to your account’s end date, you can reactivate your SendLayer account by going to Account Settings » Account Information and clicking on the Reactivate link.
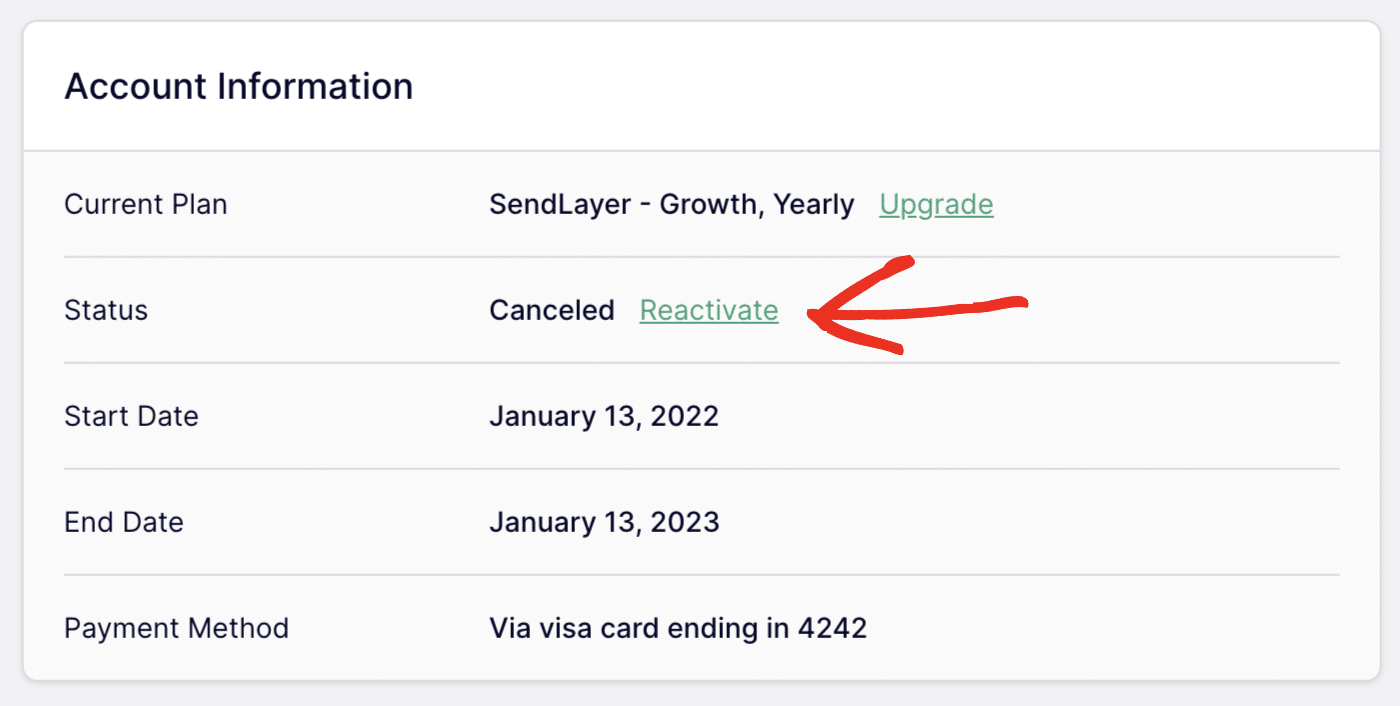
If you’d like to continue using your SendLayer account after the end date has passed, you’ll need to purchase a new plan. Be sure to purchase the new plan using the email address associated with the SendLayer account you’d like to continue using.
That’s it! Now you know how to cancel your SendLayer account.
Would you rather downgrade your account to a plan that better fits your needs? Check out our tutorial on downgrading your SendLayer account for more information.