Would you like to upgrade your SendLayer plan to access more features and send more emails?
You can easily switch plans at any time right from your account dashboard.
In this tutorial, we’ll show you how to upgrade your SendLayer account.
First, log in to your SendLayer account. Then navigate to your dashboard. From here, there are 2 ways you can access the upgrades page.
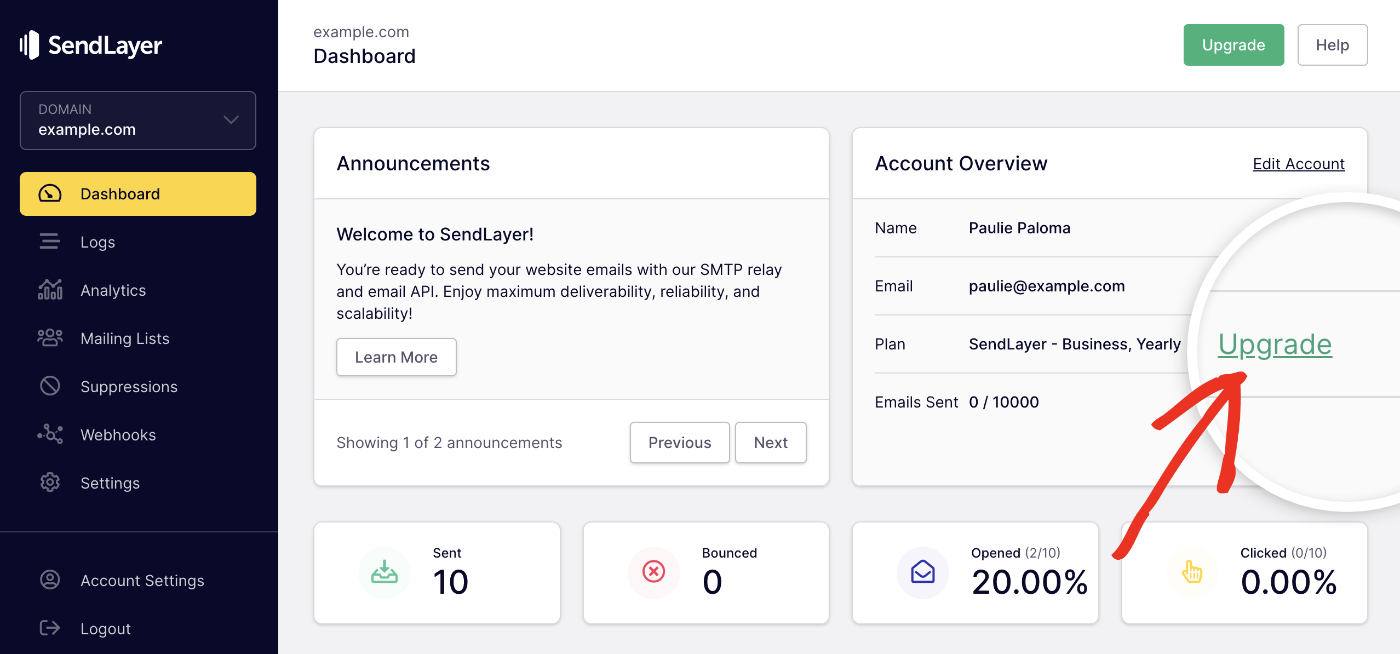
In your dashboard, look under the Account Overview section for your current plan and click on the Upgrade link.
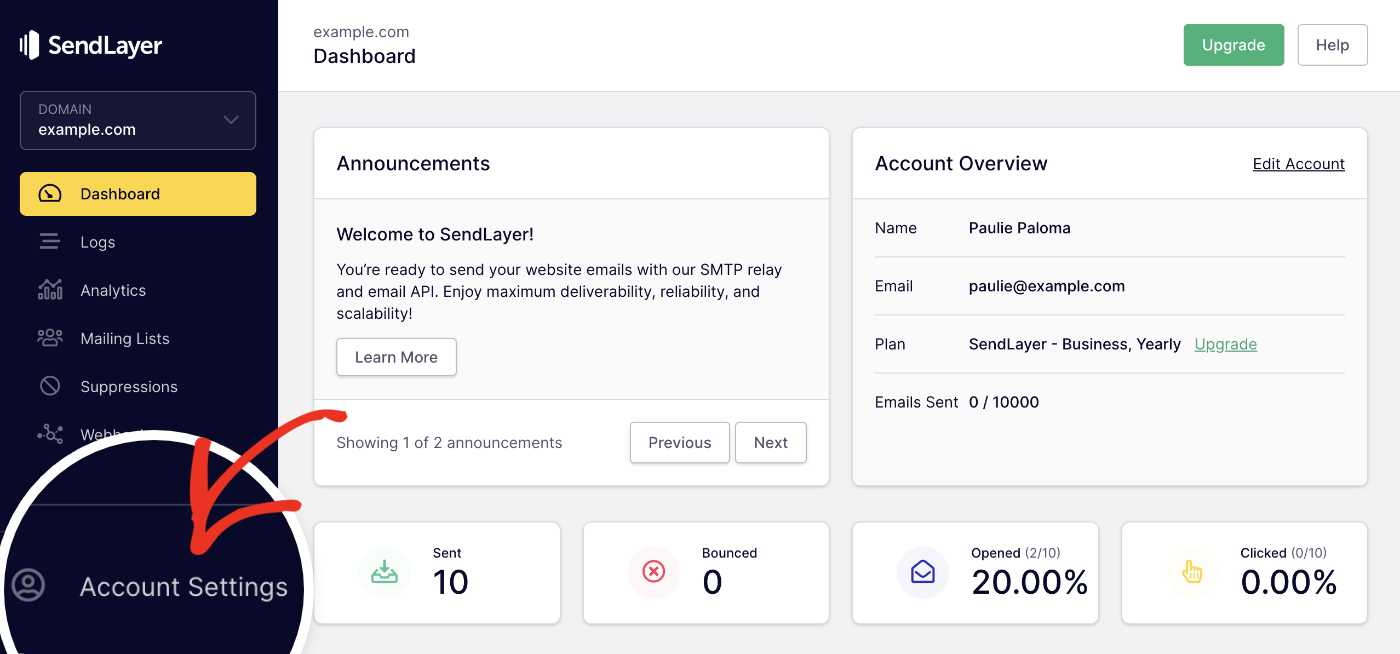
Or, click on the Account Settings option in the sidebar menu.
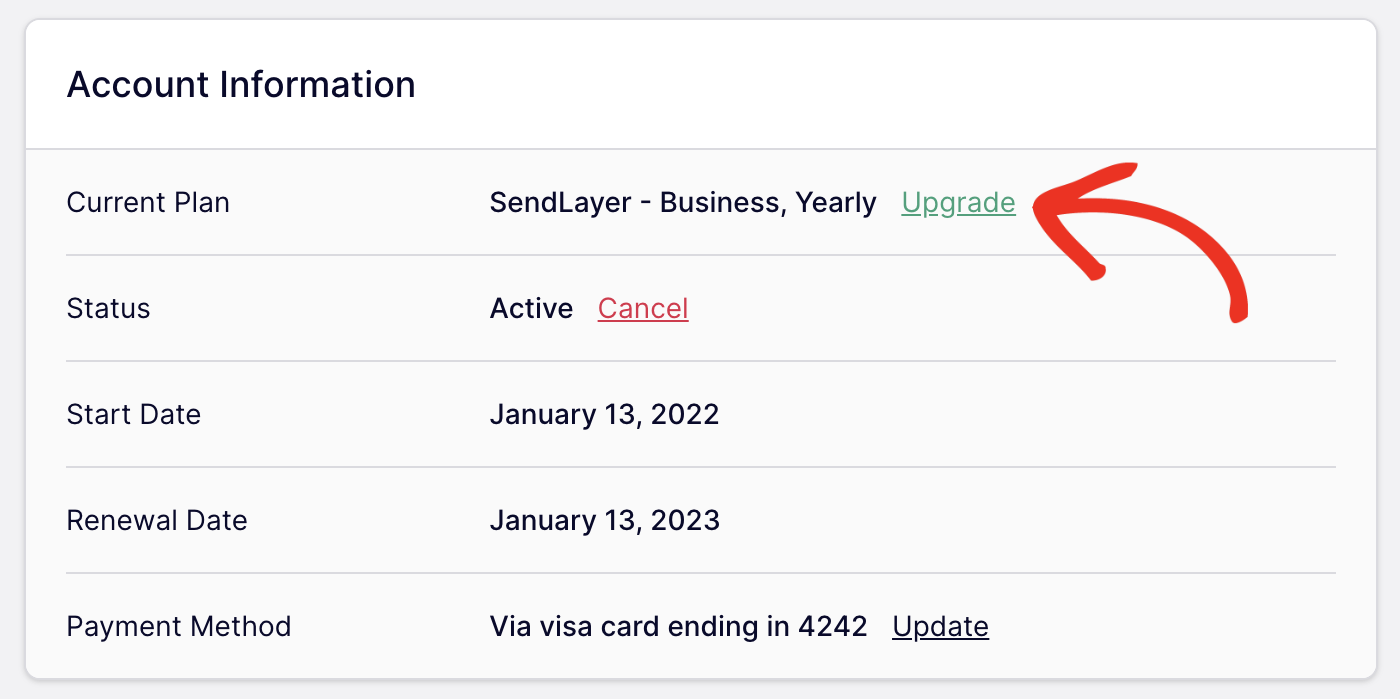
Then look under the Account Information section on the next screen. By your current plan, click on the Upgrade link.
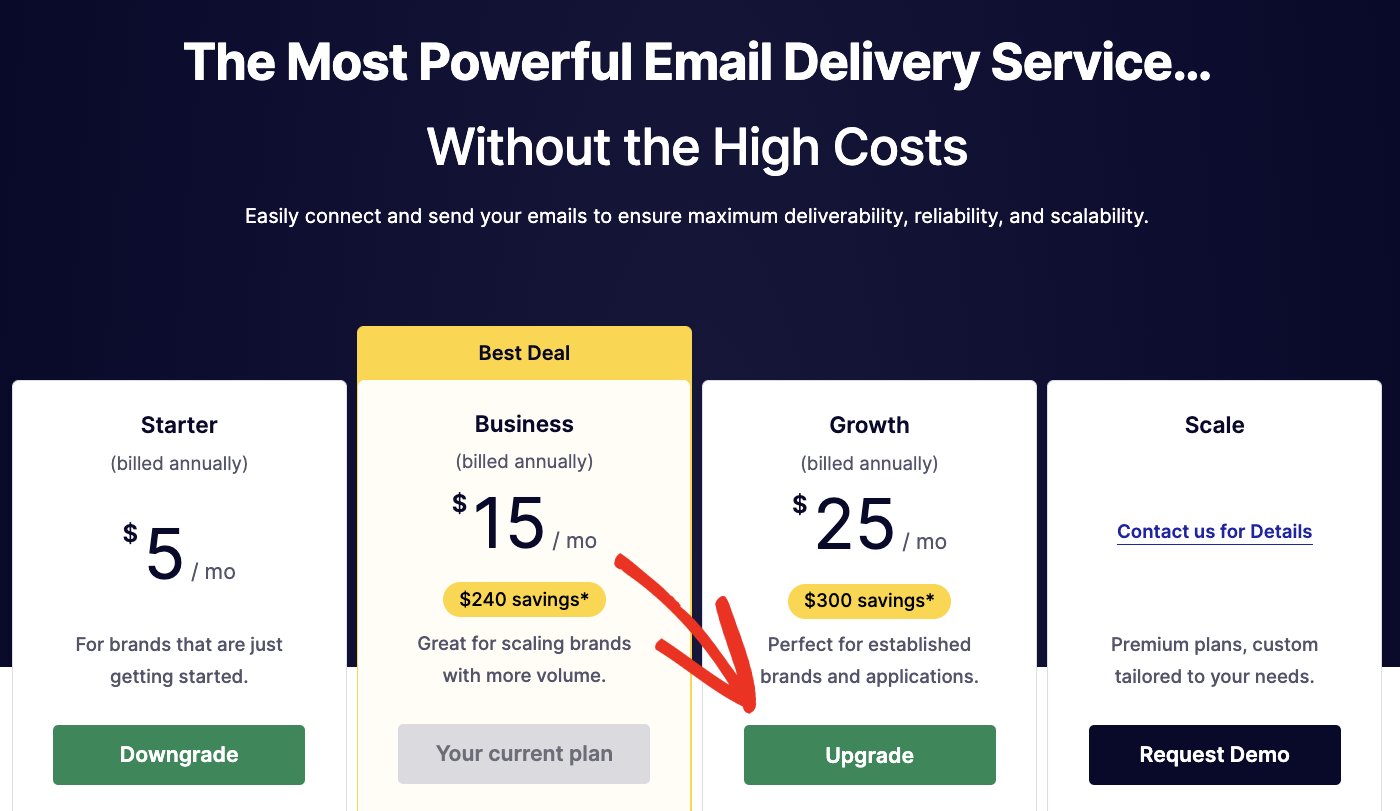
This will take you to our Pricing page. Here, click on the Upgrade button for the plan you’d like to switch to.
This will take you to our checkout page. You’ll be charged the difference between your current plan and the higher level you’re switching to. You can pay using your card on file, or add a new payment method.
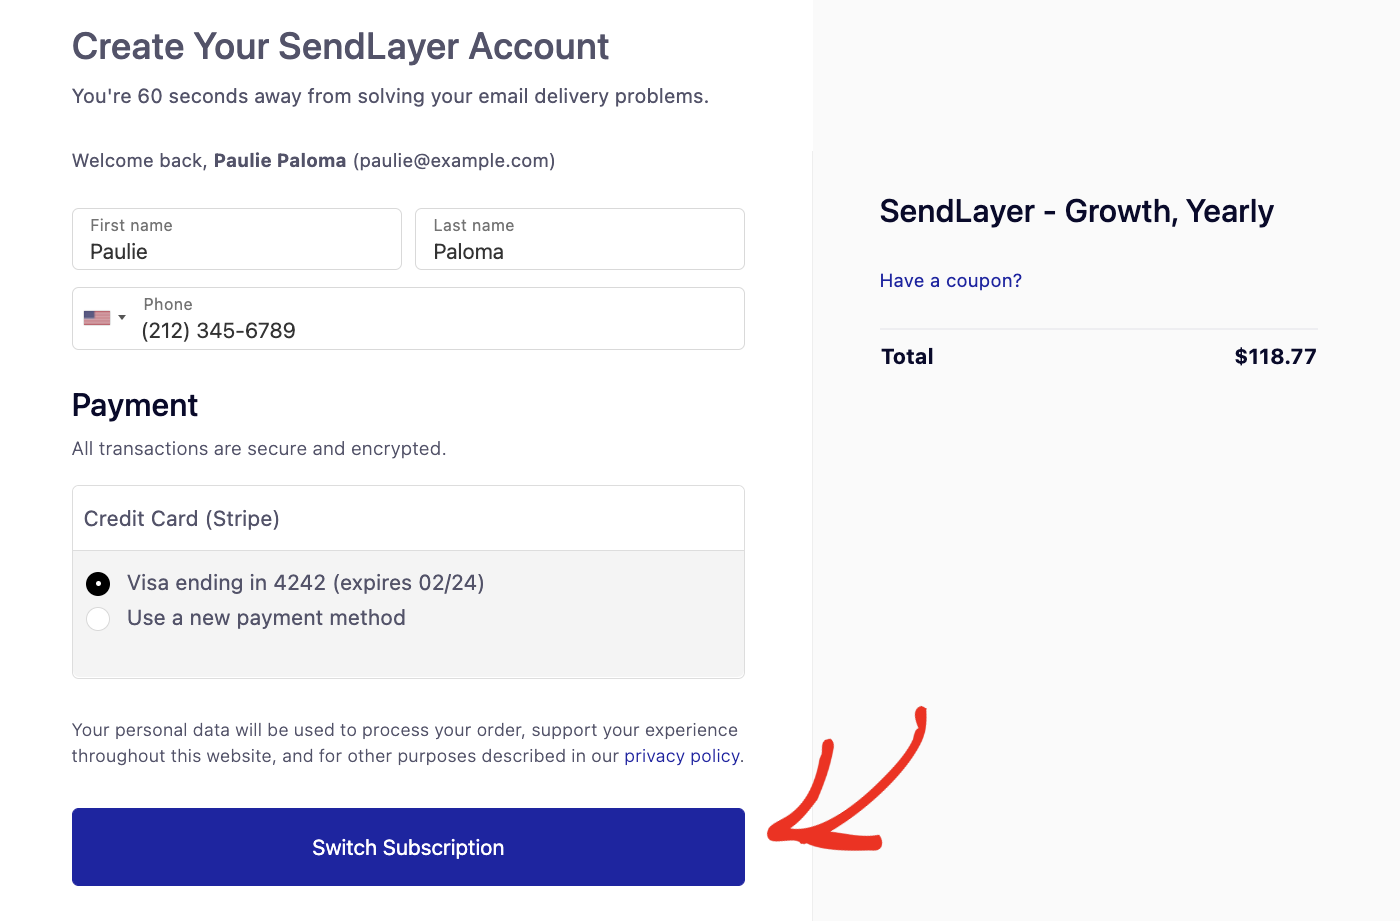
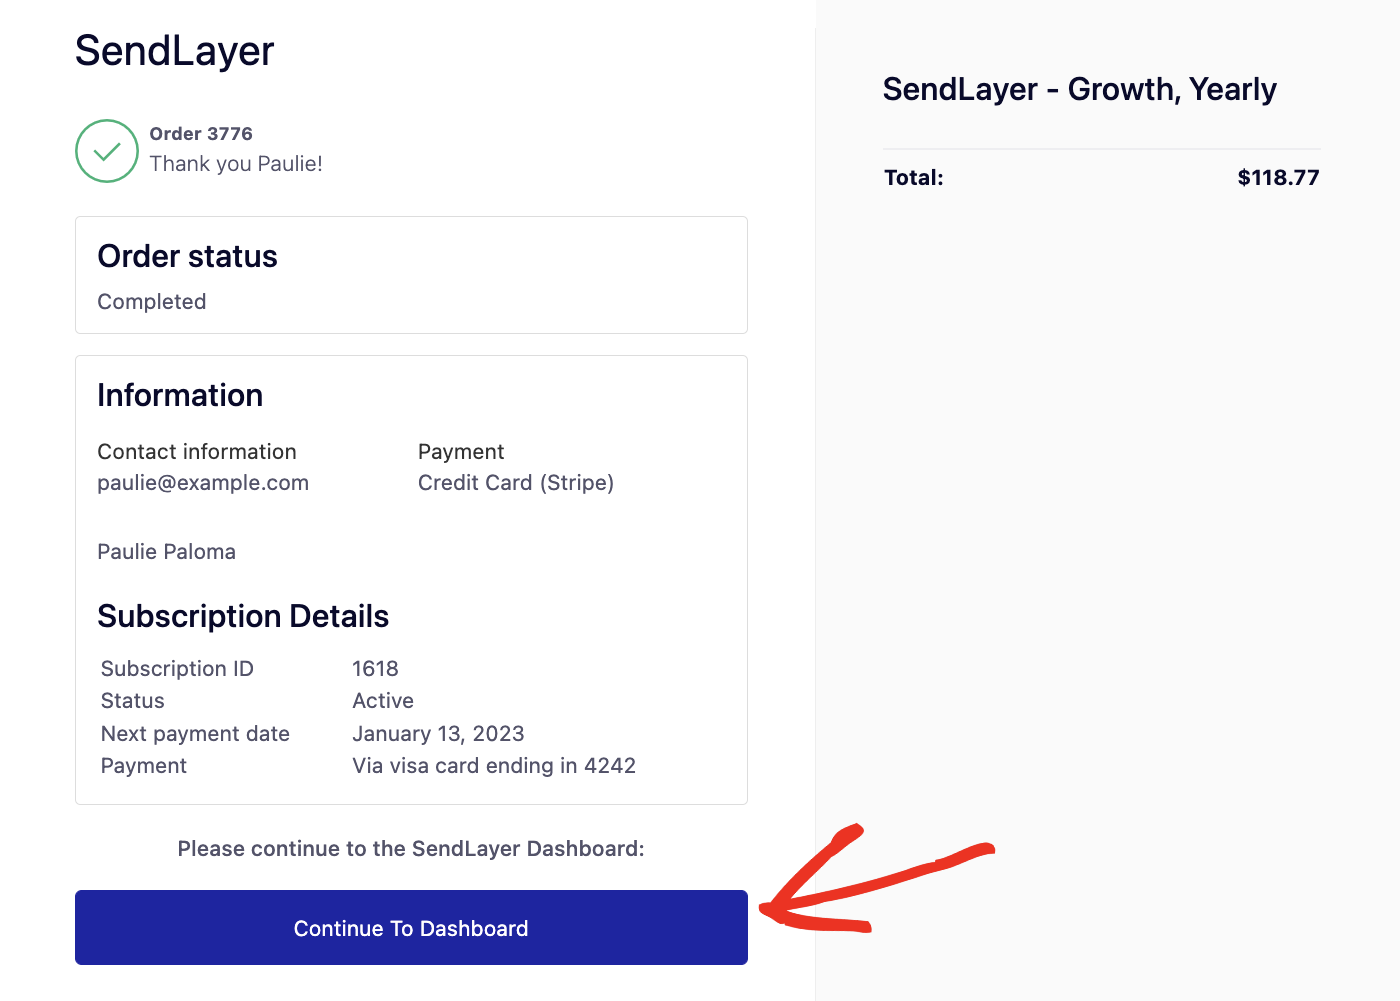
Once you’ve entered your payment details, click on Switch Subscription to proceed. You’ll then see a confirmation page for your purchase. Click on Continue To Dashboard to return to your dashboard.
When you’re account renews, you’ll be charged the new price for your upgraded plan.
That’s it! Now you know how to upgrade your SendLayer account to a higher plan.
Next, would you like to learn about email logging? Check out our tutorial on how to enable email logs for more information.