


Magento stores rely heavily on email communication.
When a customer creates an account, places an order, requests a password reset, or receives a shipment update, Magento sends a transactional email to keep them informed.
However, setting up your Magento store is only part of the process. You also need a reliable way to send these emails so they actually reach your customers’ inboxes.
In this tutorial, I’ll show you how to set up a Magento 2 site and configure SMTP for sending transactional emails.
I’ll use SendLayer as the SMTP provider, but the general process is similar if you’re using another SMTP service.
Understanding Transactional Emails in Magento 2
Magento includes a built-in email system for messages generated by events that happen on your store.
These are generally known as transactional emails.
For example, Magento can automatically send emails for:
- New customer registrations
- Order confirmations
- New invoices
- Shipment notifications
- Credit memos
- Password reset requests
- Product alerts

Magento also includes email templates for many of these events. You can customize the templates from your Magento Admin dashboard if you’d like the messages to better match your brand.
However, Magento still needs an email transport to deliver those messages.
This is where SMTP comes in.
SMTP, or Simple Mail Transfer Protocol, is the standard protocol used to send email between applications and mail servers.
Instead of relying on your web server’s default mail configuration, you can connect Magento to a dedicated transactional email provider such as SendLayer.
This can improve the reliability and deliverability of emails sent from your store.

Prerequisites
Before we dive in, make sure you have:
- A Linux server or development environment for Magento
- PHP and the required PHP extensions
- Composer installed
- A supported database such as MySQL or MariaDB
- OpenSearch configured
- Adobe Commerce Marketplace authentication keys
- Basic familiarity with the command line
- An SMTP email service
For this tutorial, I’ll use Magento Open Source 2.4.9 and SendLayer.
Important: The native SMTP settings we’ll use in this tutorial were introduced in Magento 2.4.6. If you’re running 2.4.5 or older, Magento has no built-in SMTP transport, so you’ll need a third-party SMTP extension instead. You can check your version by running bin/magento --version from your Magento directory.
Magento’s exact PHP, Composer, database, and OpenSearch requirements depend on the Magento version you’re installing, so I recommend checking the current system requirements before setting up your server.
If you already have a working Magento 2 store, you can skip ahead to the SMTP configuration section.
If you’d like to use SendLayer, you’ll first need a SendLayer account and an authorized sending domain.
How to Create a Magento 2 Site
Magento requires a little more server configuration than many other web applications. If you’d rather follow a walkthrough that covers the storefront side too, we have a separate guide on setting up a Magento store.
I’ll assume you’ve already installed the required server packages, PHP extensions, database server, and OpenSearch.
Step 1: Create Your Magento Database
First, log in to your database server. For MySQL or MariaDB, run:
mysql -u root -p
Next, create a database for Magento.
CREATE DATABASE magento;
Then create a database user:
CREATE USER 'magento'@'localhost' IDENTIFIED BY 'your_secure_password';
Grant the user permission to access the Magento database:
GRANT ALL PRIVILEGES ON magento.* TO 'magento'@'localhost';
FLUSH PRIVILEGES;
Be sure to replace your_secure_password with a secure password.
Then exit the database console:
EXIT;
We’ll use these database credentials when installing Magento.
Step 2: Get Your Magento Access Keys
Magento packages are available through the Adobe Commerce Composer repository.
Before downloading Magento, you’ll need authentication keys from your Adobe Commerce Marketplace account.
To get the keys, log in to your Adobe Commerce Marketplace account. Once you’re logged in, click your account name in the top-right and choose My Profile.
After that, select Access Keys from the Marketplace tab.

Then click Create a New Access Key to generate your keys. Once done, copy both generated values:

Your public key will be used as the Composer username, while your private key acts as the password.
Keep these credentials secure since Composer will use them to download Magento packages.
Step 3: Download Magento With Composer
Navigate to the directory where you’d like to install Magento.
For example:
cd /var/www/html
Then run:
composer create-project --repository-url=https://repo.magento.com/ magento/project-community-edition magento2
Composer will ask for your Magento repository credentials.
Enter your public key as the username and your private key as the password.
The command creates a new directory named magento2 and downloads the Magento Open Source packages into it.
Once the installation completes, change into the Magento directory:
cd magento2
Step 4: Set the Required File Permissions
Before running the Magento installer, you’ll need to make sure the web server can access the required directories.
Run these commands from inside your Magento directory. For an Ubuntu server using the www-data web server group, you can use:
find var generated vendor pub/static pub/media app/etc -type f -exec chmod g+w {} +
find var generated vendor pub/static pub/media app/etc -type d -exec chmod g+ws {} +
chown -R :www-data .
chmod u+x bin/magento
You may need to prefix the chown command with sudo, depending on which user owns the files.
Your web server user or group may also be different depending on your hosting environment.
Step 5: Install Magento
Next, run the Magento installation command.
Here’s an example:
bin/magento setup:install \
--base-url=https://example.com/ \
--db-host=localhost \
--db-name=magento \
--db-user=magento \
--db-password='your_secure_password' \
--admin-firstname=Admin \
--admin-lastname=User \
[email protected] \
--admin-user=admin \
--admin-password='YourStrongPassword123!' \
--language=en_US \
--currency=USD \
--timezone=America/New_York \
--use-rewrites=1 \
--search-engine=opensearch \
--opensearch-host=localhost \
--opensearch-port=9200
You’ll need to update these values to match your environment.
For example:
--base-urlshould contain your Magento site’s URL. You can uselocalhost:8080if you’re installing locally.--db-name,--db-user, and--db-passwordshould match the database you created.--admin-emailshould contain your email address.--admin-userand--admin-passwordwill become your Magento Admin login credentials.--opensearch-hostshould point to your OpenSearch server.
If everything is configured properly, Magento will finish installing and display your Admin URI.
You should now be able to access your storefront and Magento Admin dashboard.
Pro Tip: Notice that I left out the --backend-frontname option. When you omit it, Magento generates a random Admin URI such as admin_jkhgdfq, which is harder for bots to find than a predictable /admin path. Save the Admin URI that’s displayed after installation, because you’ll need it to log in.
How to Configure SMTP in Magento 2
Now that the Magento store is running, let’s configure SMTP. I’ll use SendLayer in this example.
Step 1: Create an Account
To create a new SendLayer account, head over to our pricing page and select your preferred plan by clicking on the Get Started button.
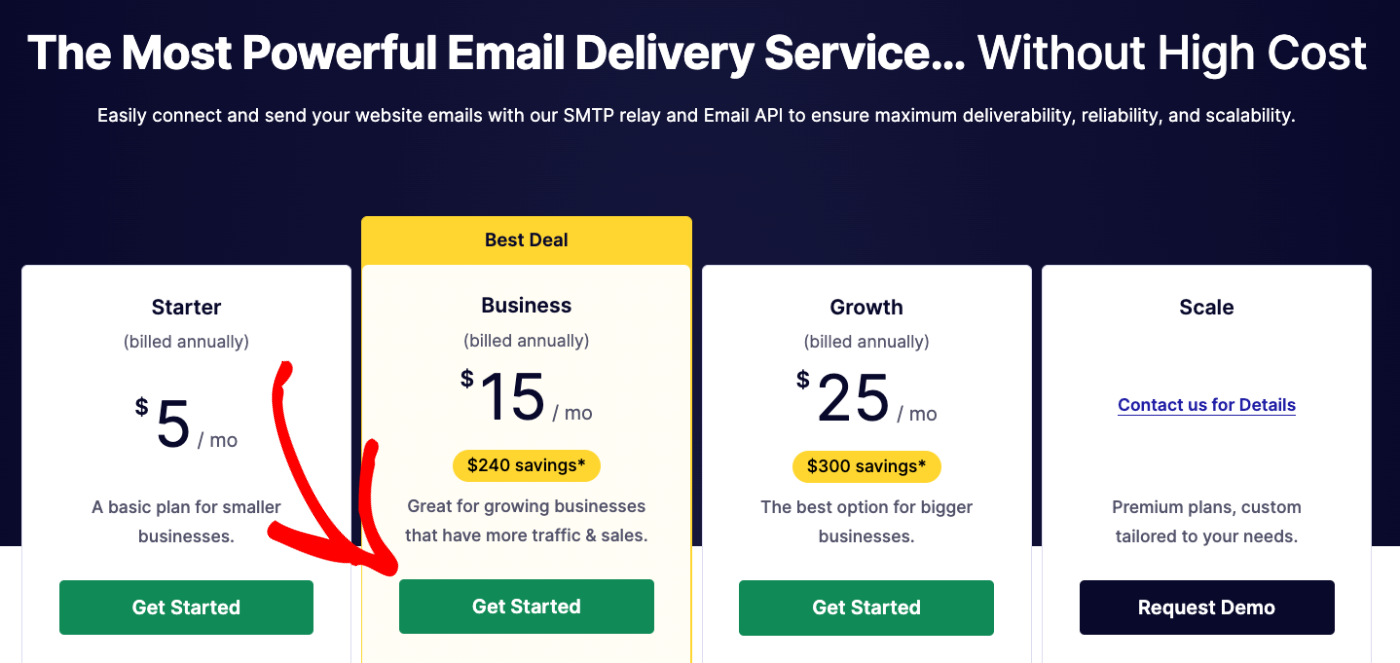
If you’d prefer to start with a free trial, click the Take SendLayer for a free trial (send up to 200 emails) link at the bottom of the pricing table.

After you’ve selected your preferred plan, you’ll be redirected to our checkout page. There, you’ll need to provide basic information like your email and business name.
Once you’ve created your account, you’ll need to authorize your sending domain before sending emails.
This usually involves adding 5 DNS records to your domain host. Our guide on authorizing your sending domain covers all the steps in detail.
After authorizing your domain, SendLayer automatically creates SMTP credentials you can use to connect Magento to its mail server.
Step 2: Get Your SendLayer SMTP Credentials
To retrieve your SMTP credentials, log in to your SendLayer dashboard. Then go to Settings » SMTP Credentials.
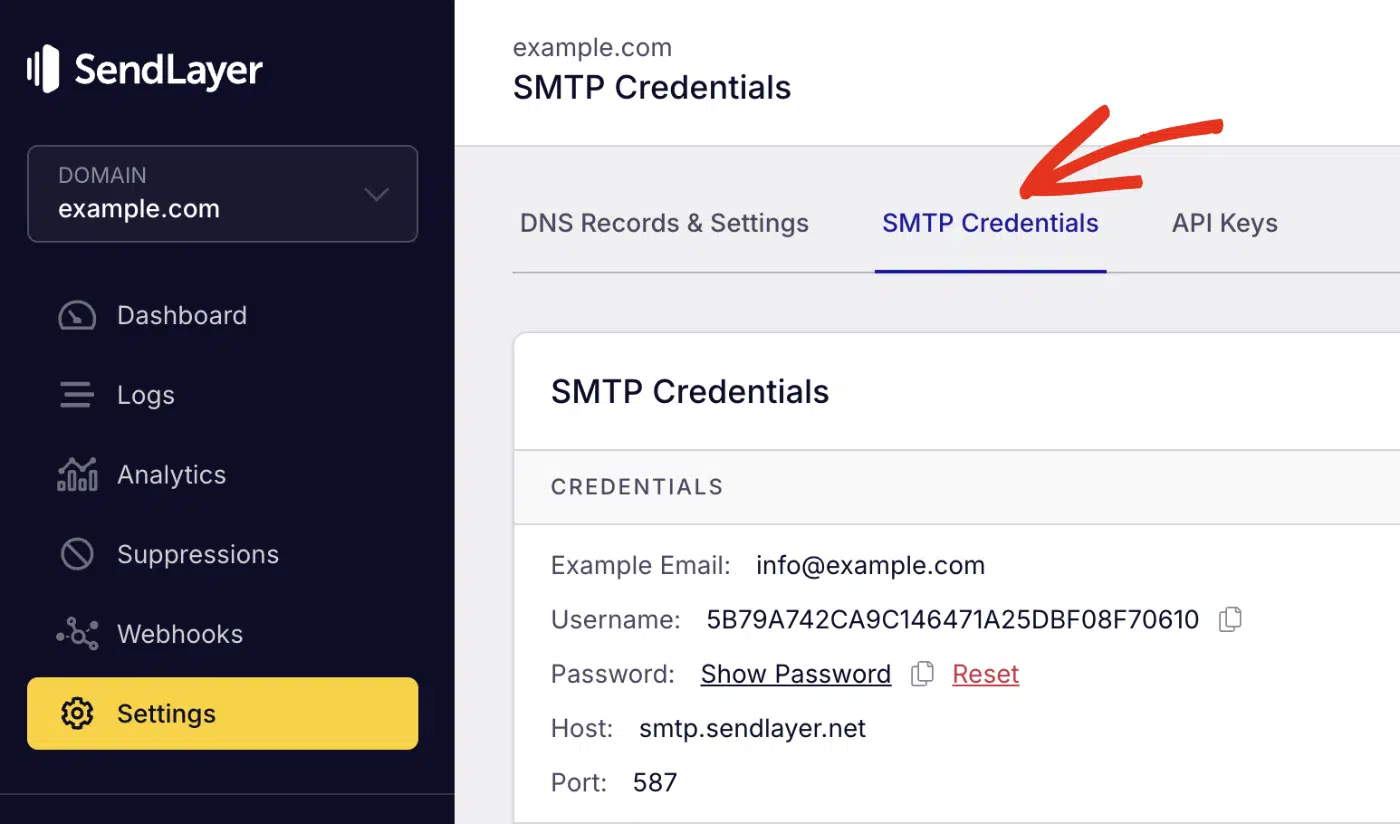
You’ll see the credentials required to connect an application to SendLayer.
They include:
| Setting | Value |
|---|---|
| Host | smtp.sendlayer.net |
| Port | 587 |
| Username | Your SendLayer SMTP username |
| Password | Your SendLayer SMTP password |
The host and port are the same for every SendLayer account, but your username and password are unique to yours.
Keep this page open because we’ll paste these details into Magento next.
Step 3: Open Magento Mail Sending Settings
Log in to your Magento Admin dashboard.

After that, navigate to Stores » Settings » Configuration from the admin area.

From the left sidebar, expand Advanced and select System.

Find the Mail Sending Settings section and expand it.
This is where Magento lets you configure the transport used to deliver emails generated by your store.
Step 4: Enable Email Communications
First, locate the Disable Email Communications option and choose No from the dropdown.

Note: This setting can be a little confusing because you’re selecting whether to *disable* email. Setting it to No means Magento is allowed to send emails.
Step 5: Select SMTP as the Transport
Find the Transport option and select SMTP.

Additional SMTP configuration fields should appear.
We’ll use these fields to connect Magento to SendLayer.
If you don’t see an SMTP option in the Transport dropdown, you’re most likely running a Magento version older than 2.4.6.
Step 6: Enter Your SMTP Settings
Configure the fields using your SendLayer SMTP credentials.
Use:
Host: smtp.sendlayer.net
Port: 587
Username: your-sendlayer-username
Password: your-sendlayer-password
Auth: LOGIN
SSL: TLS
Replace the username and password with the credentials from your SendLayer account.
Port 587 uses STARTTLS to secure the SMTP connection, which is why the SSL field is set to TLS rather than SSL. If you’re curious how the other SMTP ports compare, we break each one down in a separate post.
I also recommend keeping Set Return Path set to No.
Adobe recommends this as a security measure, so it’s best to leave it disabled unless you have a specific reason to change it.

Once you’ve entered your settings, click Save Config.
Magento is now configured to send outgoing email through the SendLayer SMTP server.
Configuring Your Store Email Addresses
Connecting Magento to an SMTP server isn’t quite enough.
You should also make sure the sender addresses used by Magento belong to the domain you’ve authorized with your email provider.
In Magento Admin, go to Stores » Settings » Configuration. Then navigate to General » Store Email Addresses.

Magento includes several sender identities, such as:
- General Contact
- Sales Representative
- Customer Support
- Custom Email 1
- Custom Email 2
Each identity contains a sender name and email address.
For example:
Sender Name: Example Store
Sender Email: [email protected]
If you’ve authorized example.com in SendLayer, you should use an address associated with that sending domain.
For instance:
Using an authenticated sending domain is important for email authentication and deliverability.

After updating the addresses, click Save Config.
Choosing the Sender for Sales Emails
You can also control which identity Magento uses for specific transactional emails.
To do so, go to Stores » Settings » Configuration. Then navigate to Sales » Sales Emails.
You’ll find separate sections for things like:
- Orders
- Invoices
- Shipments
- Credit Memos
For example, expand the Order section.
The New Order Confirmation Email Sender option determines which store identity Magento uses for order confirmation emails.

You could set this to Sales Representative. Magento will then use the email address configured for that identity.
How to Test Transactional Emails in Magento 2
Now let’s make sure the SMTP configuration actually works.
Magento’s native SMTP settings don’t include a “send test email” button, so the best way to test is to trigger a real transactional email.
One of the easiest is to create a customer account.
Test a New Customer Email
Open your Magento storefront. Select Create an Account and register a new customer using an email address you can access.

Magento should trigger its new-account transactional email.
Check the recipient inbox to make sure the message arrives.
If you’re using SendLayer, you can also log in to your SendLayer dashboard to confirm that the message was processed.
Test an Order Confirmation Email
Another useful test is an order confirmation. Add a product to your Magento cart and proceed through checkout.
After completing the order, Magento should generate an order confirmation email.
This is an especially useful test because order emails are some of the most important transactional messages an Ecommerce store sends. We also have a guide on writing a good order confirmation email if you’d like to improve the template itself.
If the email doesn’t arrive, check your SendLayer email logs as well as your Magento configuration.
Enable Asynchronous Email Sending
Magento can also process sales emails asynchronously instead of making the customer wait while the email is sent.
For this, go to Stores » Settings » Configuration. Then navigate to Sales » Sales Emails.
After that, expand General Settings and then set Asynchronous sending to Enable.

Once done, save your configuration.
When asynchronous sending is enabled, Magento queues sales emails and sends them from a cron job, so cron has to be running for anything to go out.
If you haven’t set up cron yet, you can install Magento’s crontab with:
bin/magento cron:install
You can also process the queue manually to test it:
bin/magento cron:run
Clearing Magento’s Cache
Magento caches configuration settings, so if your changes don’t seem to take effect immediately, clearing the cache is often a good first troubleshooting step.
From the Magento installation directory, run:
bin/magento cache:clean
You can also flush the cache using:
bin/magento cache:flush
Then trigger another transactional email.
FAQs – Magento 2 SMTP Configuration
These are answers to common questions we see about setting up SMTP for transactional email in Magento 2.
Does Magento 2 support SMTP?
Yes, as of Magento 2.4.6. That release added SMTP as a native email transport option.
You can configure it from: Stores » Settings » Configuration » Advanced » System » Mail Sending Settings
From there, select SMTP as the transport and enter your email provider’s host, port, username, password, authentication method, and TLS/SSL configuration.
On Magento 2.4.5 and older, there’s no built-in SMTP transport, so you’ll need an extension.
Do I need a Magento SMTP extension?
Not if you’re on Magento 2.4.6 or newer. Those versions include native SMTP settings, so you can connect Magento directly to an SMTP provider without installing an additional extension.
If you’re on an older version of Magento, an extension is still the only way to send through SMTP.
What transactional emails does Magento send?
Magento can send transactional messages for many store activities, including:
- Customer registrations
- Password resets
- Order confirmations
- Invoices
- Shipments
- Credit memos
- Product alerts
The exact messages generated depend on the features enabled on your store.
Can I customize Magento transactional emails?
Yes. Magento provides built-in email templates for its transactional messages.
You can manage email templates from: Marketing » Communications » Email Templates
You can also create custom templates and then assign them to different Magento email events from the relevant configuration section.
Why are my Magento emails going to spam?
Magento emails may land in spam if your sending domain isn’t properly authenticated, your From address doesn’t match the authenticated domain, your sender reputation is poor, or your SMTP configuration is incorrect.
Using a dedicated transactional email provider like SendLayer and properly configuring your domain authentication can help improve deliverability.
That’s It! Now you know how to configure Magento 2 SMTP for transactional emails.
Next, would you like to learn more about improving Ecommerce email delivery? Check out our guide on the best transactional email services to compare popular options for sending automated emails.
