Do you want to know how to set up SendLayer on your website hosted by Hosting.com?
With SendLayer’s transactional email service, you can send mail easily and efficiently from your domain on Hosting.com.
This tutorial will show you how to set up SendLayer on Hosting.com (formerly A2 Hosting).
Before getting started, be sure to:
Accessing DNS Records In SendLayer
When you add a domain to your account, SendLayer will automatically detect your domain host and generate 5 DNS (Domain Name System) records unique to your domain.

If it doesn’t detect the correct domain host, click Change your domain host here to choose your domain registrar.

In the overlay that appears, click the Choose your domain host dropdown and select A2 Hosting from the available options.

Note: Every time you add a domain to your account, SendLayer automatically creates the sl subdomain for you. For instance, if your domain is example.com, the subdomain would be sl.example.com.
Check out our article on why SendLayer creates a subdomain for more information.
SendLayer will provide the following types of DNS records:
Each DNS record has a specific HOSTNAME, VALUE, and TTL (time-to-live) for your domain. You’ll need the HOSTNAME and VALUE to get SendLayer up and running on your domain on Hosting.com. We’ll cover how to do this in the next few steps.
Editing Your DNS Settings in Hosting.com
To access your DNS settings, log in to your Hosting.com account. Then, click the Products & Services sidebar dropdown and select DNS.
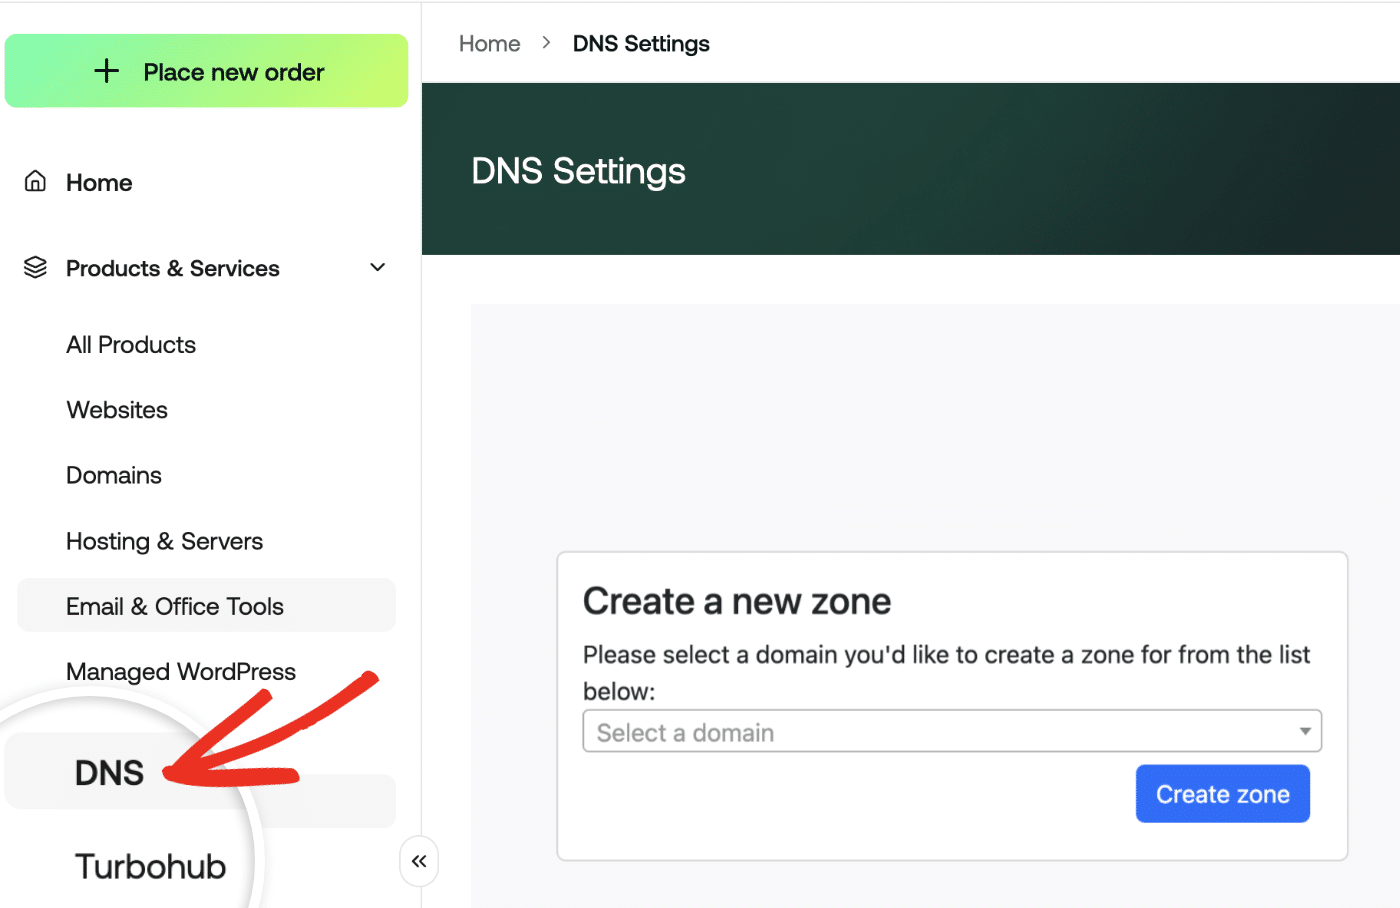
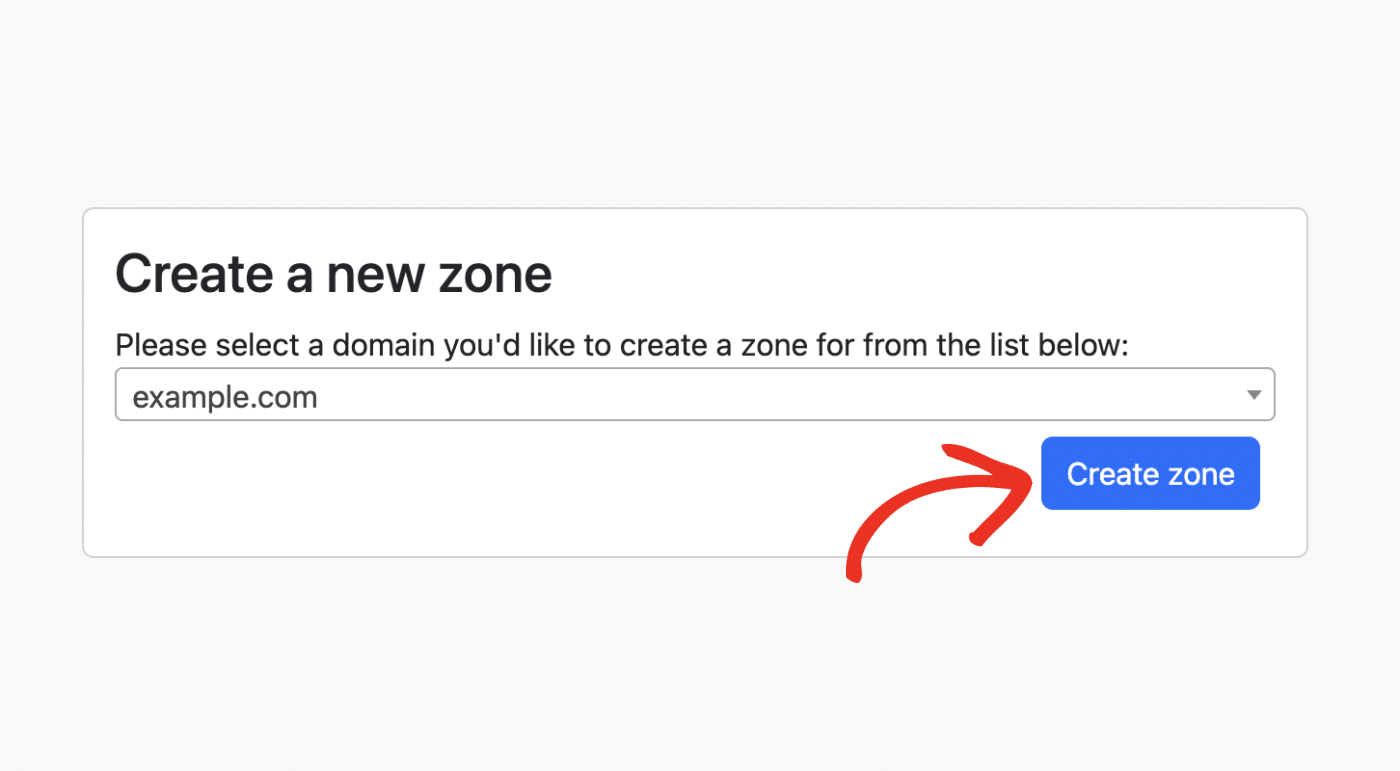
After that, click Select a domain and choose the domain you added to SendLayer. Next, click the Create zone button to enable DNS settings for your domain.
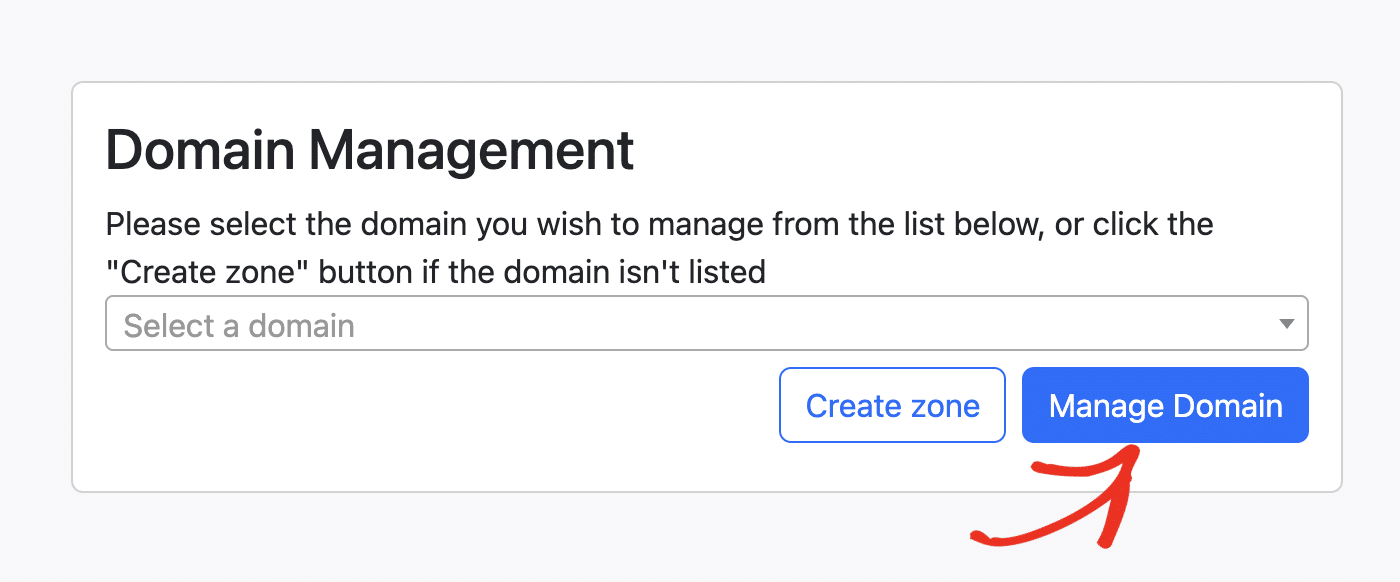
Once you’ve done that, you’ll be able to manage your DNS records. To do so, click the Manage Domain button.
Note: Hosting.com automatically points your domain to its nameservers if you don’t a hosting plan. You don’t need to manually add these nameservers to your DNS settings.
To add DNS records, click the Add New Record button.
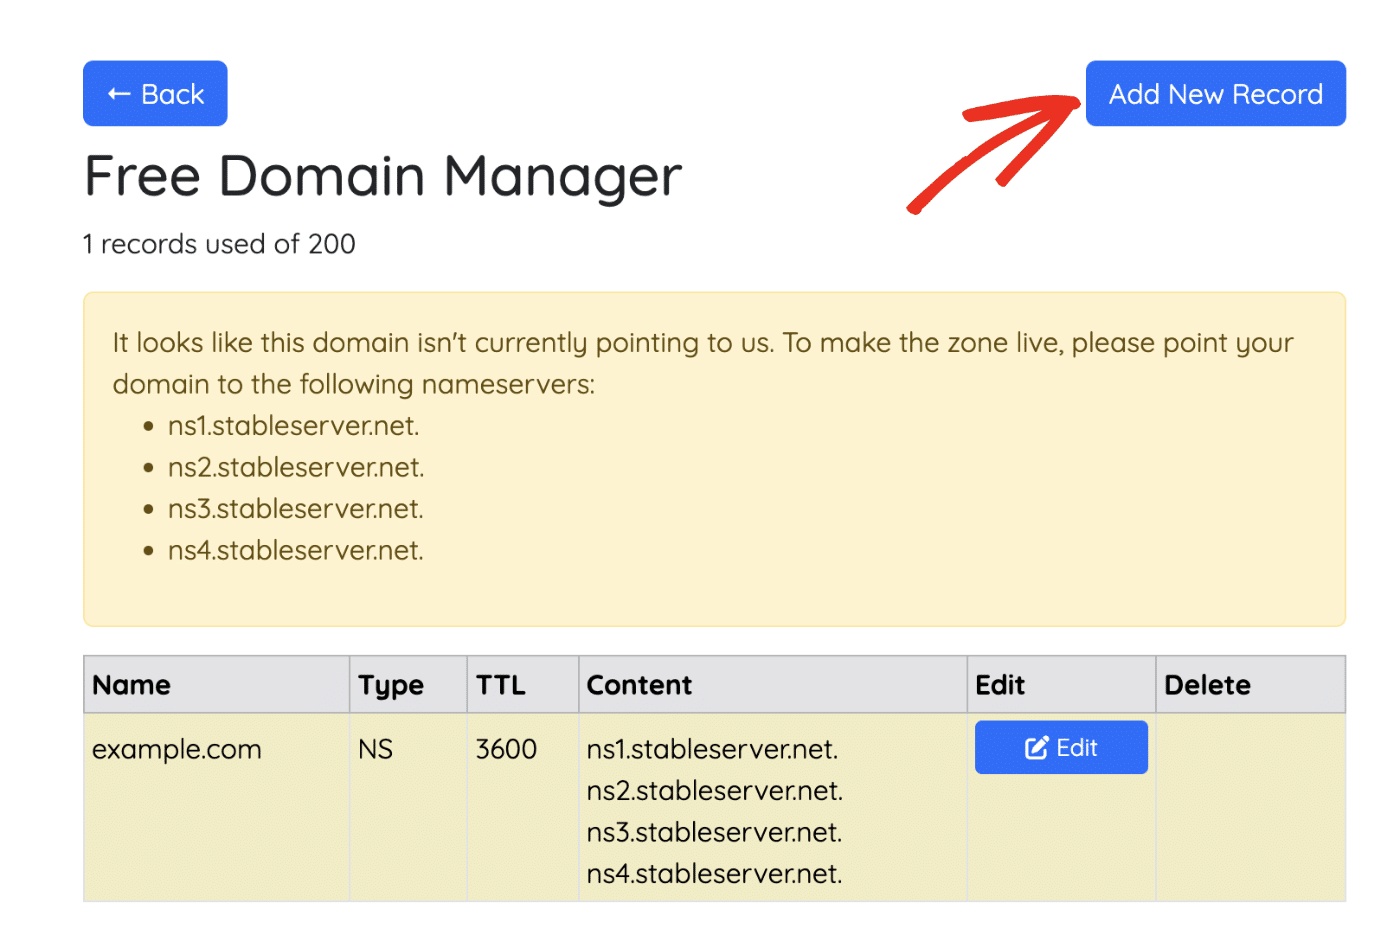
If you see the warning that your domain isn’t currently pointing to Hosting.com, it means your domain is hosted on a different name server. You’ll need to point it to Hosting.com.
Note: You can ignore this warning if you can see the NS record type that points to Hosting.com’s nameservers.
Adding DNS Records in Hosting.com
On the DNS Management page, add the DNS records required to set up SendLayer for your domain.
Note: We recommend keeping your SendLayer and Hosting.com settings open in different tabs to make copying and pasting your DNS records easier.
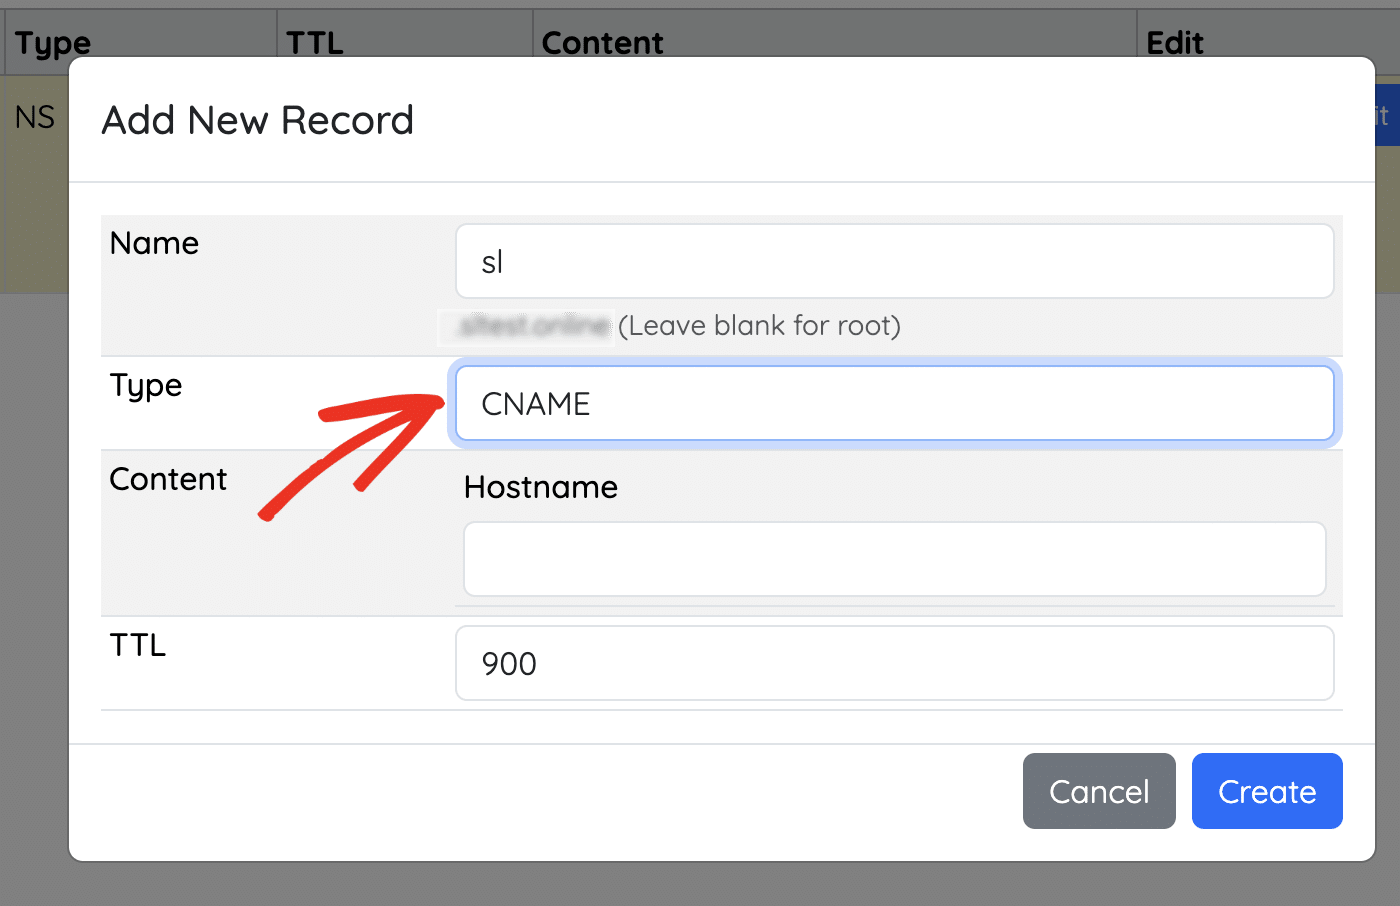
To get started, copy the HOSTNAME of the first DNS record SendLayer provided. You can click the copy icon to the right of any entry to copy its value to the clipboard.

Next, paste the HOSTNAME from SendLayer into the Name field on your Hosting.com domain’s DNS settings.

For the Record Type, choose CNAME so that it matches the DNS record generated by SendLayer.
Next, copy the VALUE from SendLayer.

In your Hosting.com dashboard, paste the VALUE in the Content field.
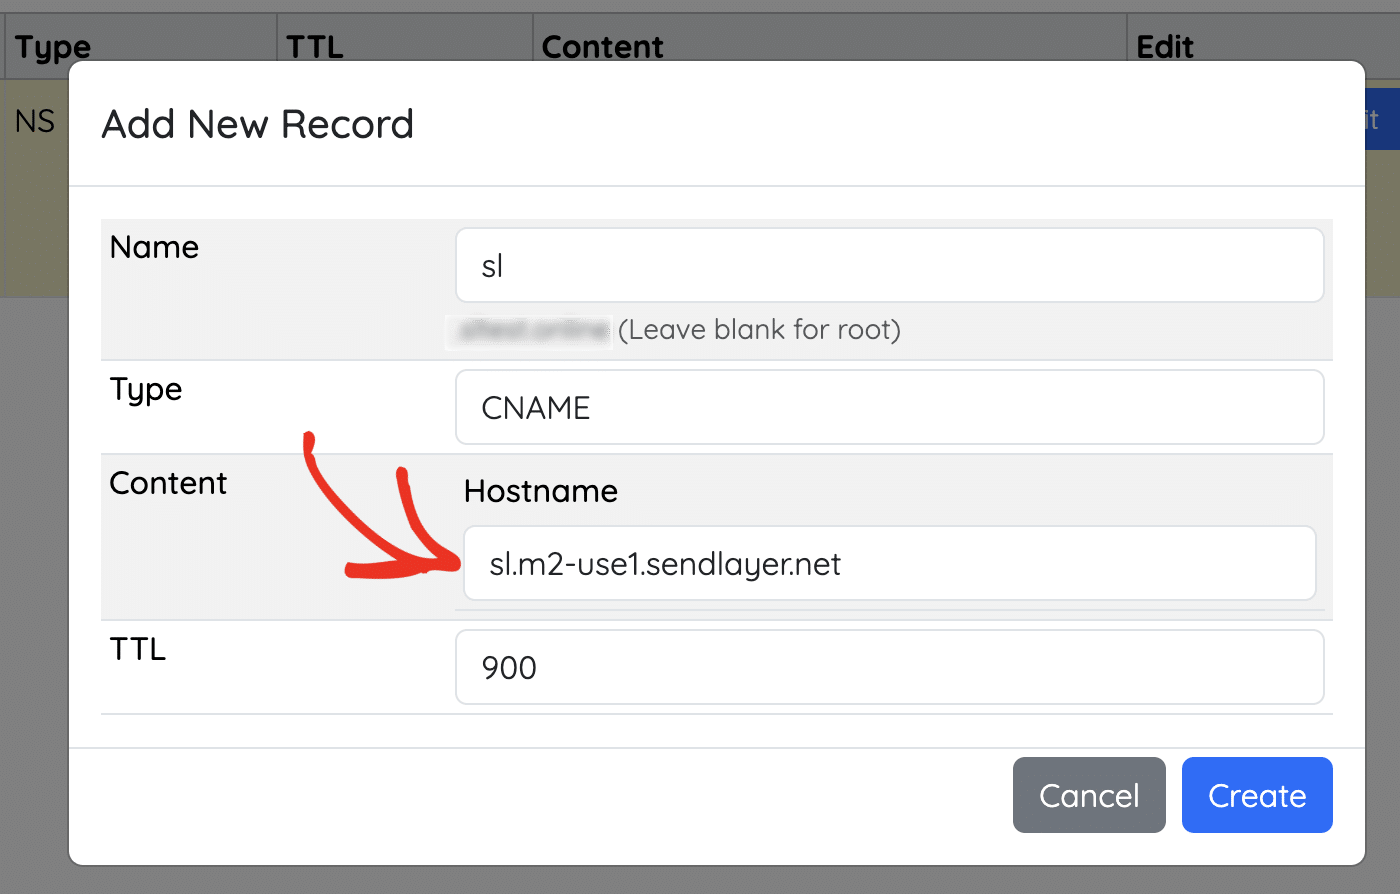
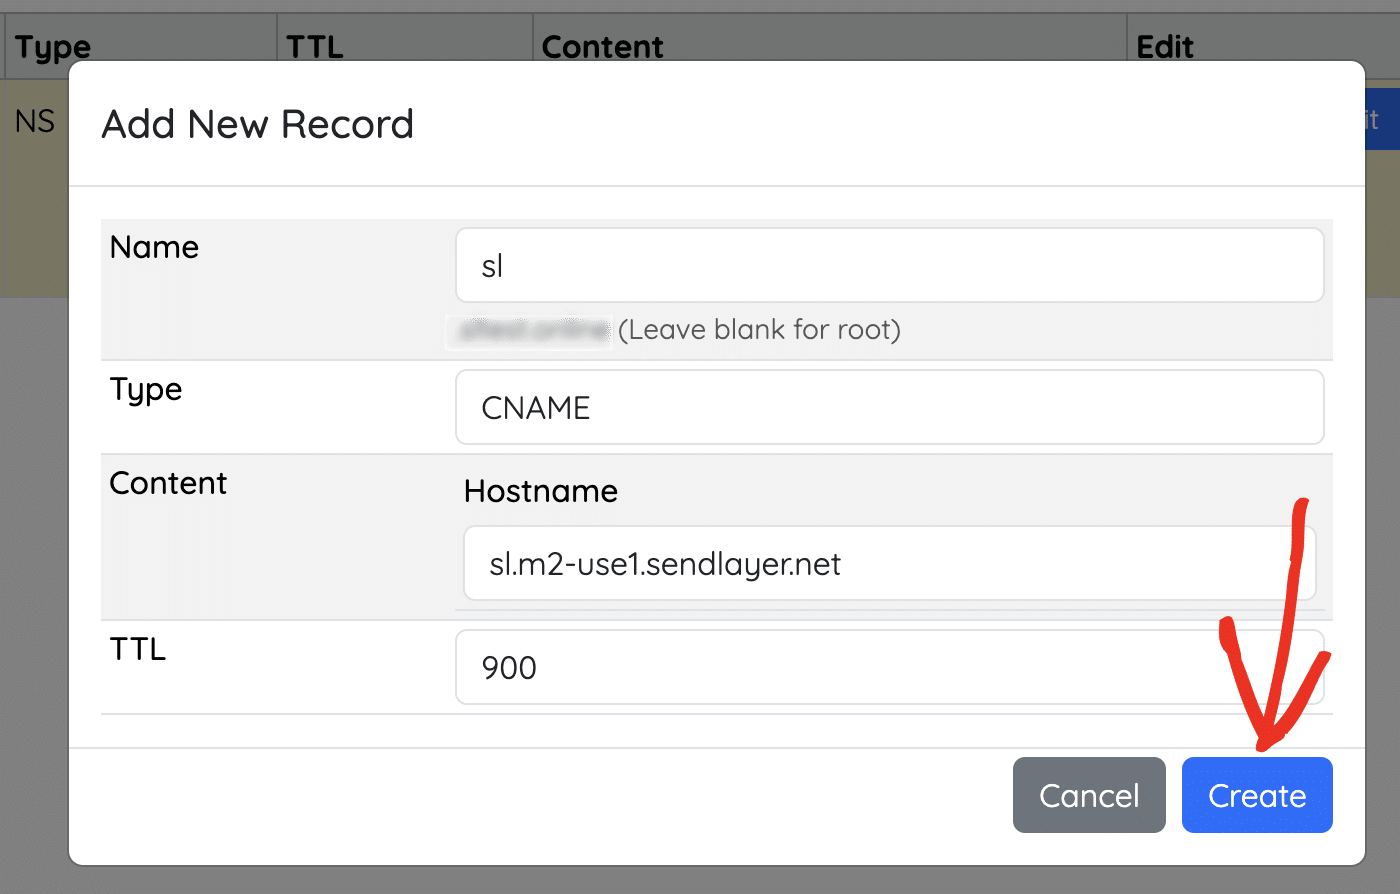
Once done, click Create to add your record.
Note: It can take up to 24-48 hours for DNS records to propagate.
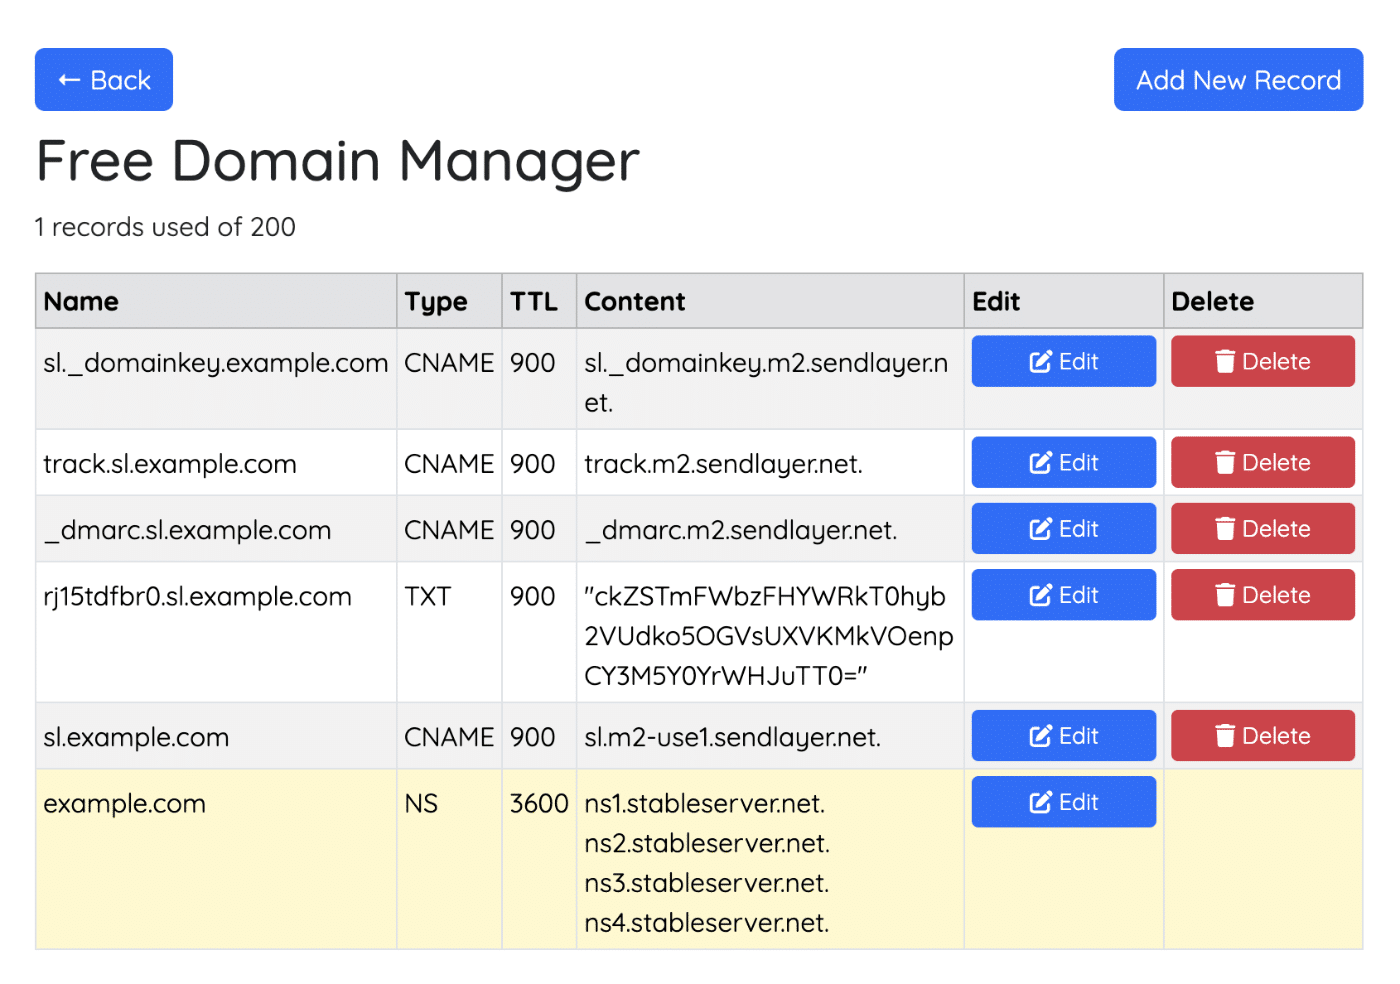
After the page reloads, you’ll be able to add a new record immediately. Make sure that you’ve added all 4 CNAME records and the 1 TXT record provided by SendLayer. When you’re finished, you should have a list like this:
Note: If you need to remove a record, click the Delete button.
Checking Your Domain Status
Once you’ve entered all of your domain’s records, you can check if your domain’s records have been propagated from your SendLayer account. As a reminder, it may take 24-48 hours for your DNS changes to be applied.
If you would like to learn how to check if DNS records have been added successfully, check out our tutorial on checking your domain status.
That’s it! Now you know how to set up SendLayer with your domain on Hosting.com.
Next, would you like to know how to protect your domain’s reputation using a suppression list? Check out our tutorial on managing suppression lists for more information.