Want to use SendLayer with a domain hosted on Amazon Route 53?
SendLayer offers an efficient solution for sending transactional emails from your Amazon Route 53 domain, ensuring easy setup and dependable delivery.
In this tutorial, we’ll show you how to set up SendLayer with a site that’s hosted on Route 53.
Before getting started, be sure to:
Viewing DNS Records in SendLayer
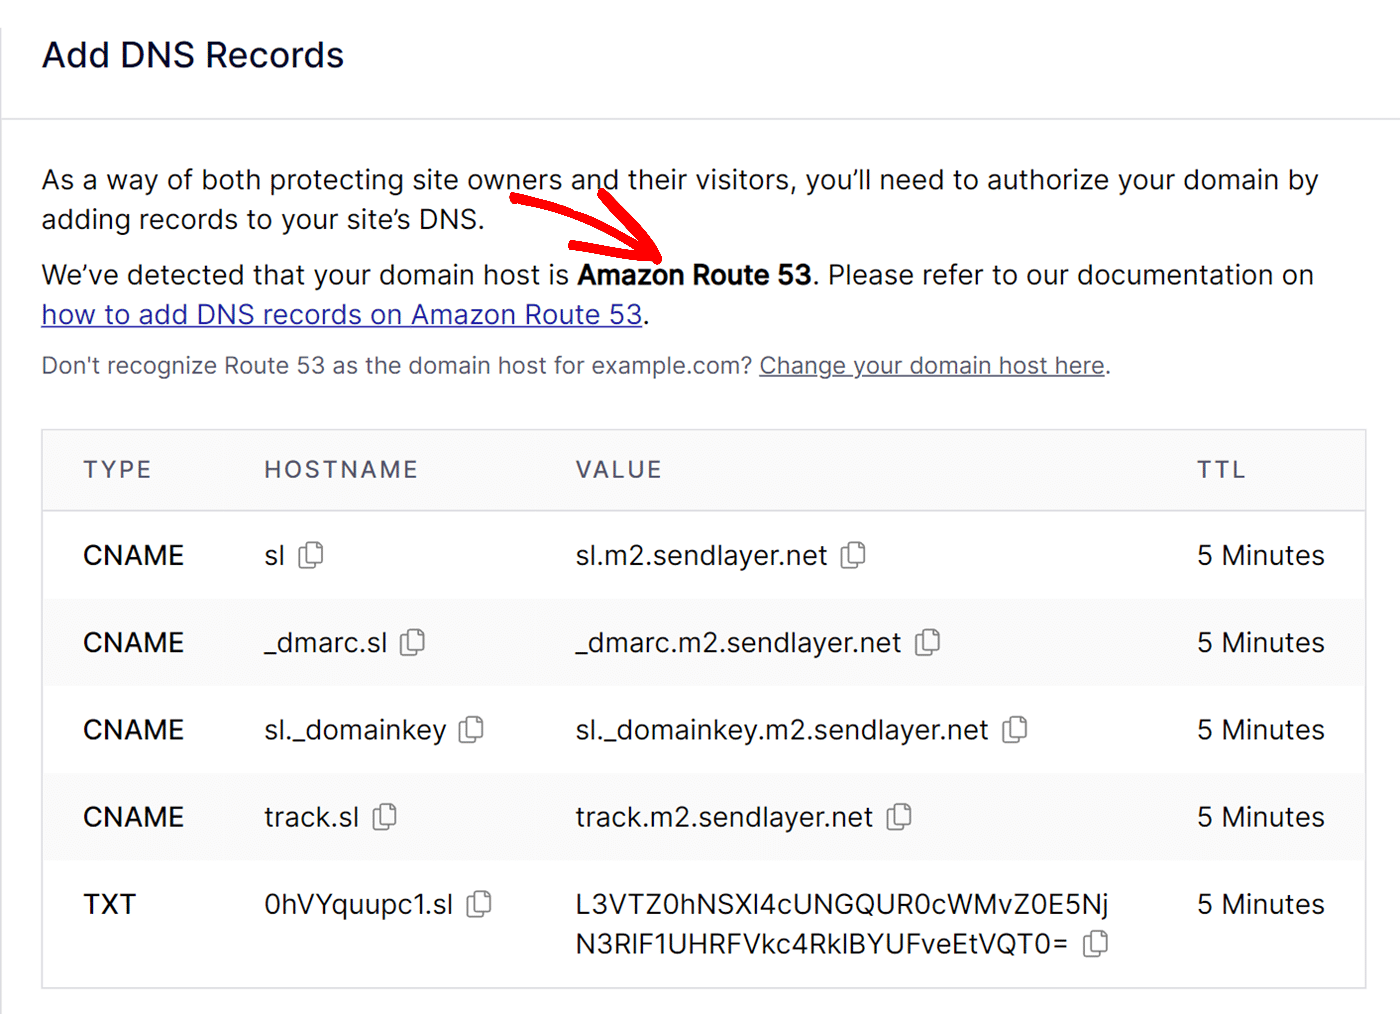
After you’ve added your domain, SendLayer will automatically detect your domain host and generate 5 unique DNS (Domain Name System) records tailored for your domain.
If it doesn’t detect your domain host, click choose your domain host and select your domain registrar.
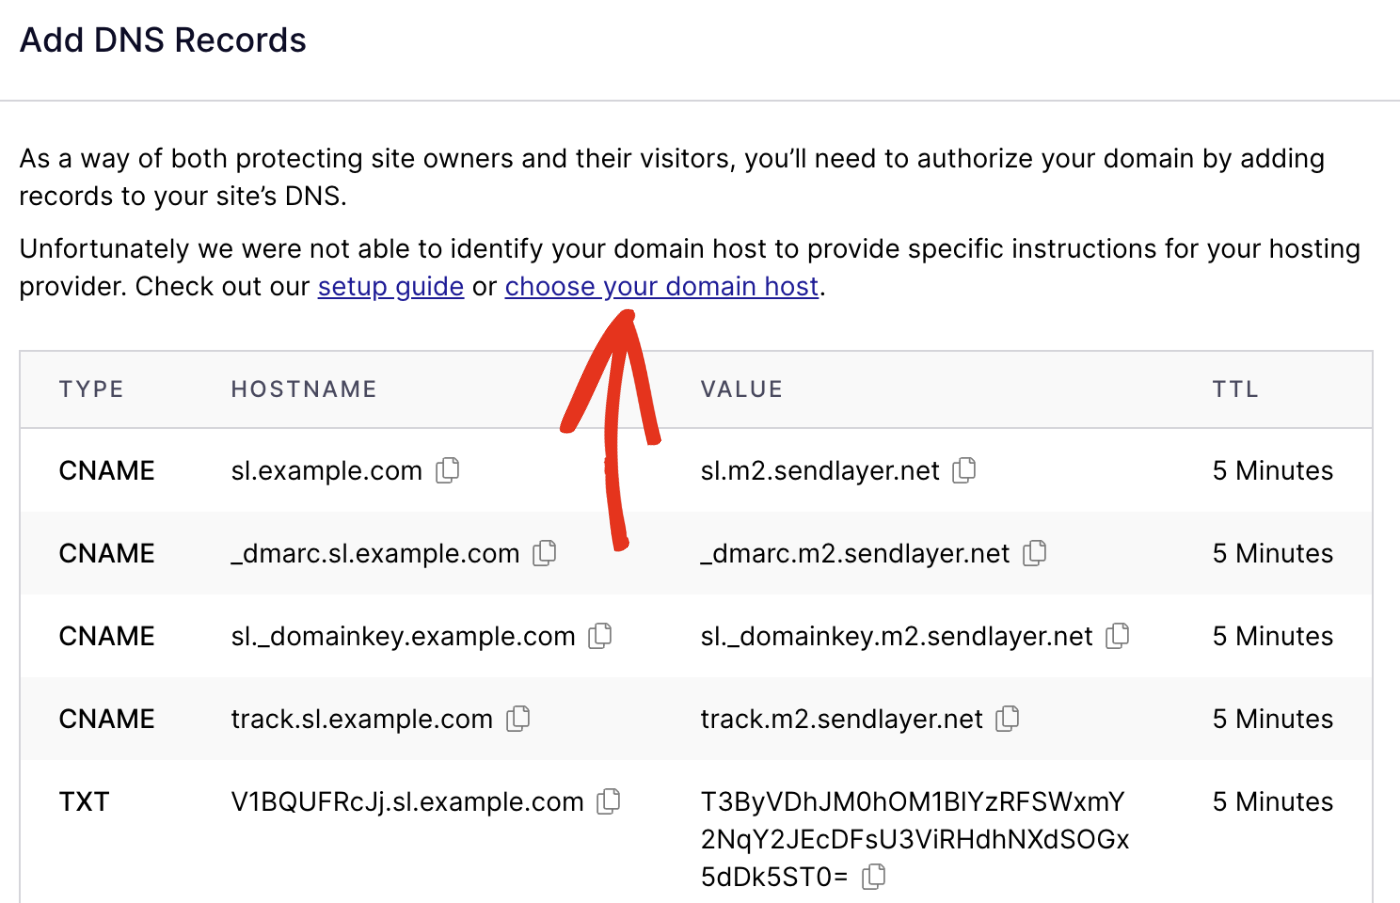
In the overlay that appears, click the Choose your domain host dropdown and select your domain registrar from the available options.
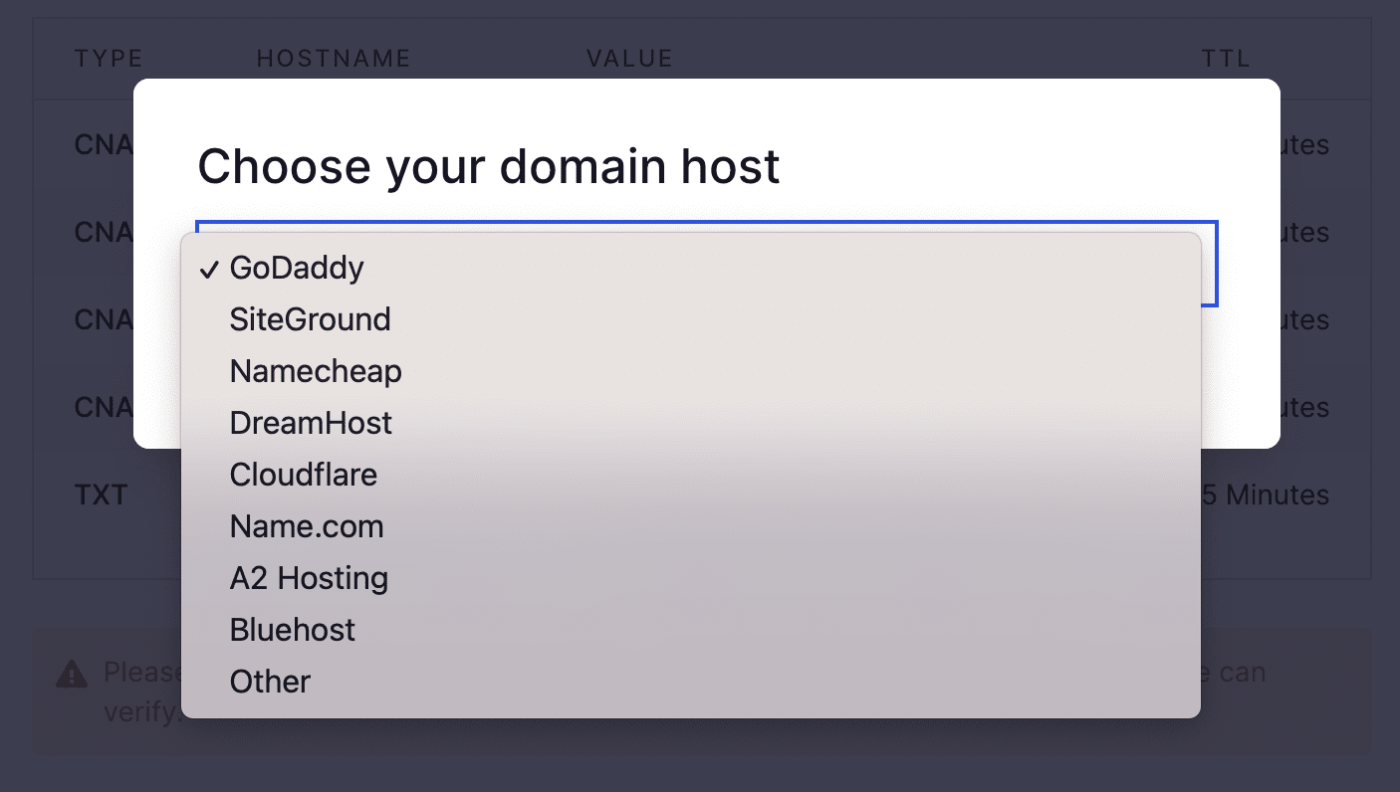
If you don’t find Amazon Route 53 from the dropdown, we recommend choosing the Other option and using the general DNS settings.
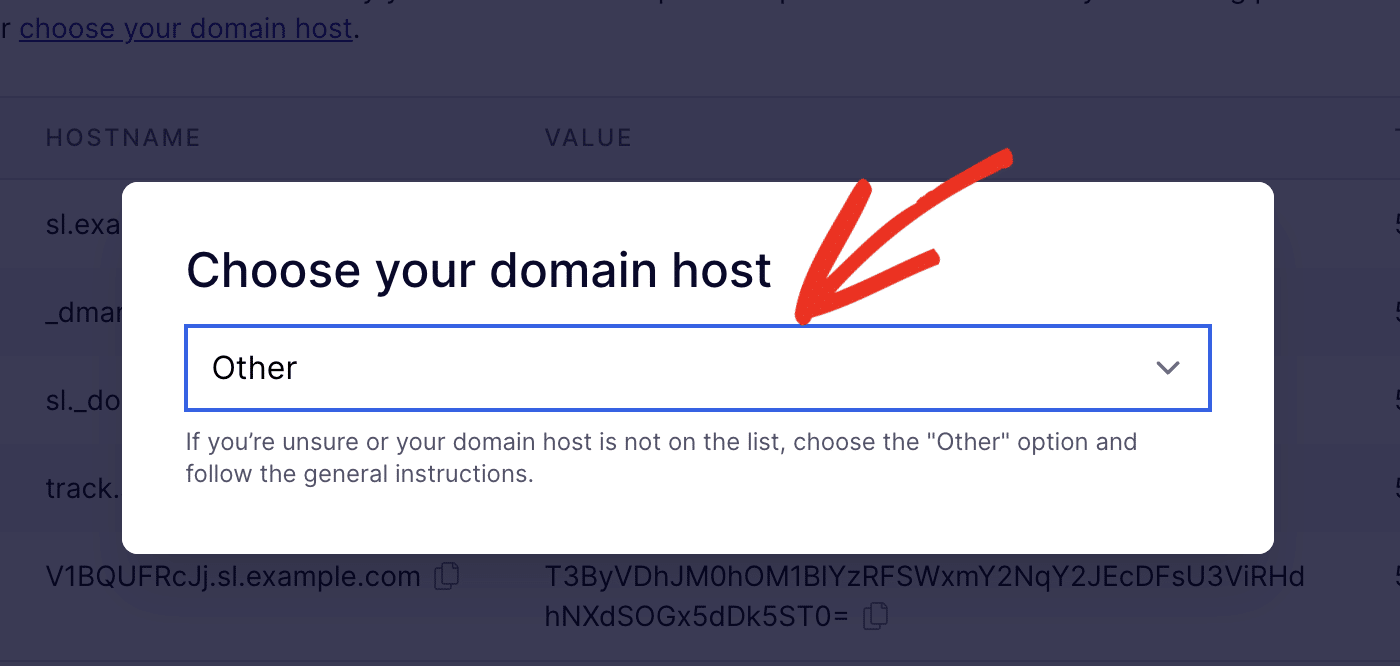
Note: When you add a new domain to your SendLayer account, we’ll create a subdomain for you that starts with ‘sl‘ (e.g. sl.example.com). For additional information, be sure to check out why SendLayer creates a subdomain.
Here are the types of DNS records that SendLayer generates:
The 5 records will each have a TYPE, HOSTNAME, VALUE, and TTL (Time To Live) that correspond to your domain. You’ll need to add each of the 5 DNS records in your Amazon Route 53 account, which we’ll go over in the following steps.
Locating DNS Settings in Amazon Route 53
To locate your domain’s DNS settings in Amazon Route 53, you’ll first need to log in to your Route 53 dashboard. We recommend having your SendLayer and Amazon Route 53 accounts open in different windows or tabs for easy switching between them.
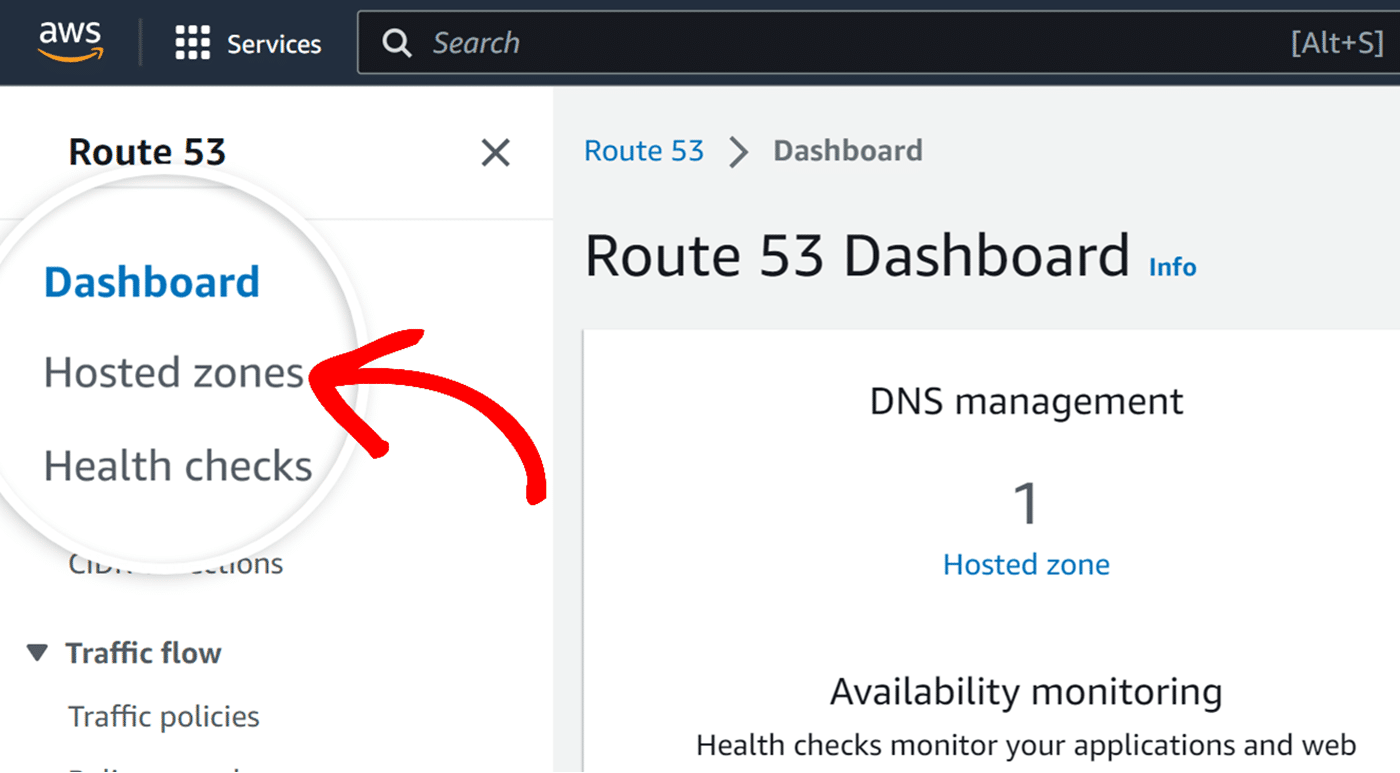
Once you’ve accessed your Route 53 dashboard, click on Hosted zones from the side menu.
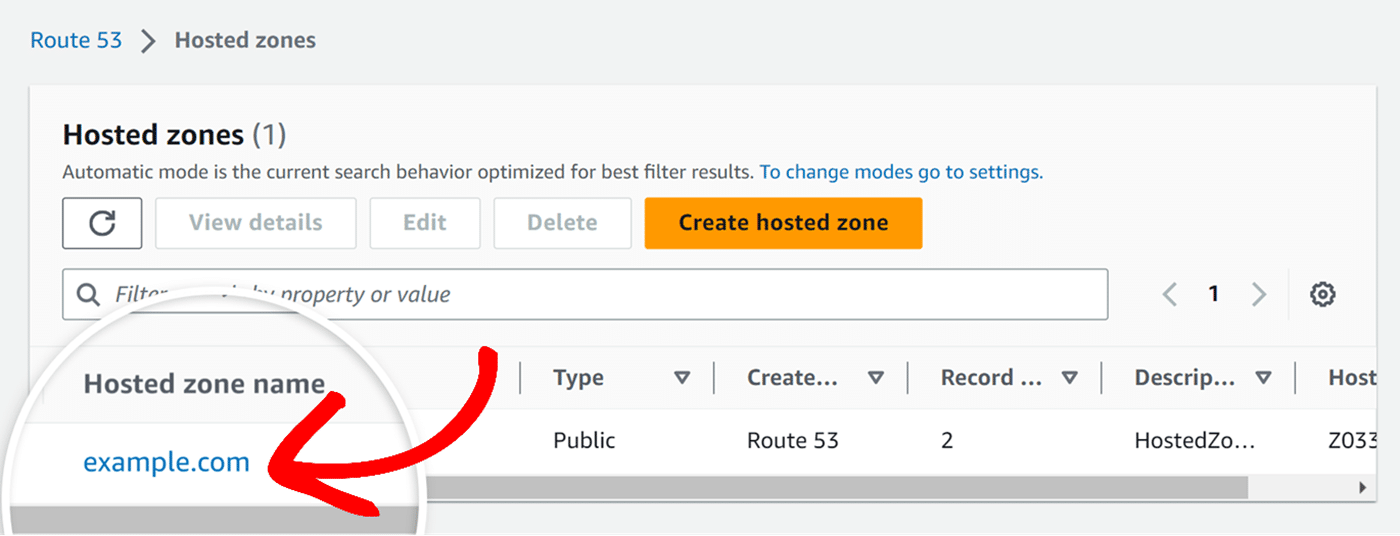
On the next page, you should see a list of your domains. Go ahead and click on the same domain that you’ve added to your SendLayer account.
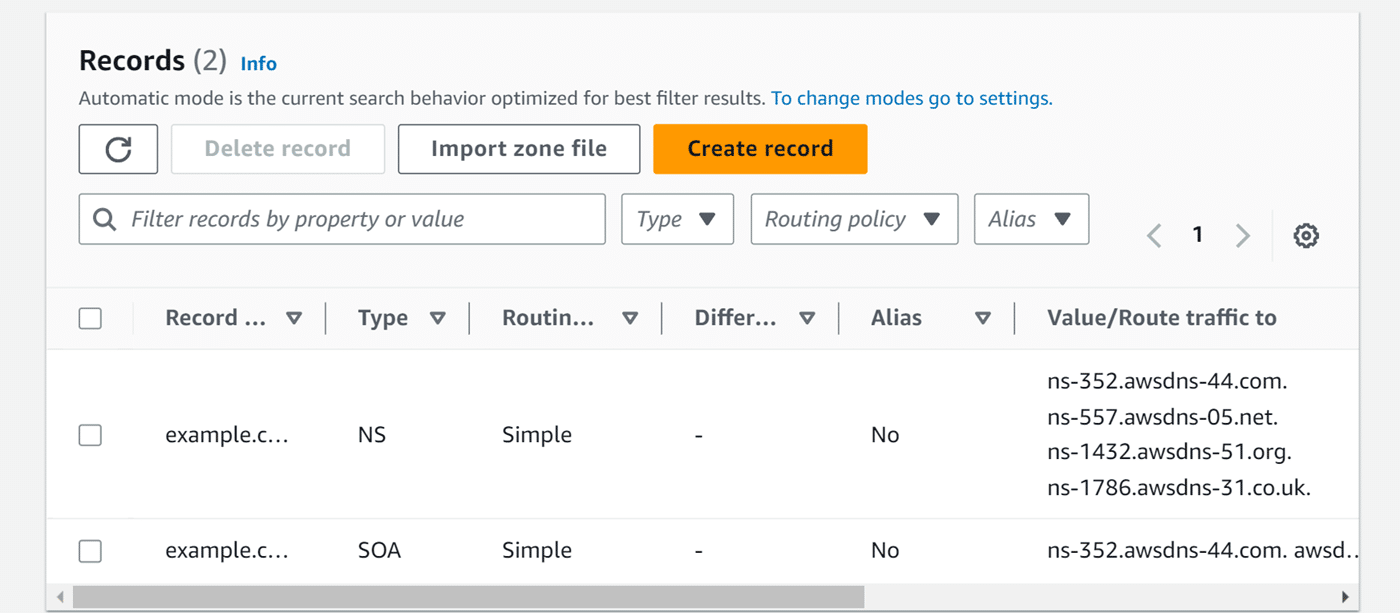
On the following Amazon Route 53 page, you’ll see a list of your current DNS records.
In the next section, we’ll cover how to add SendLayer DNS records to your Amazon Route 53 account.
Adding DNS Records in Amazon Route 53
To add a new DNS record to your domain, click the Create record button.
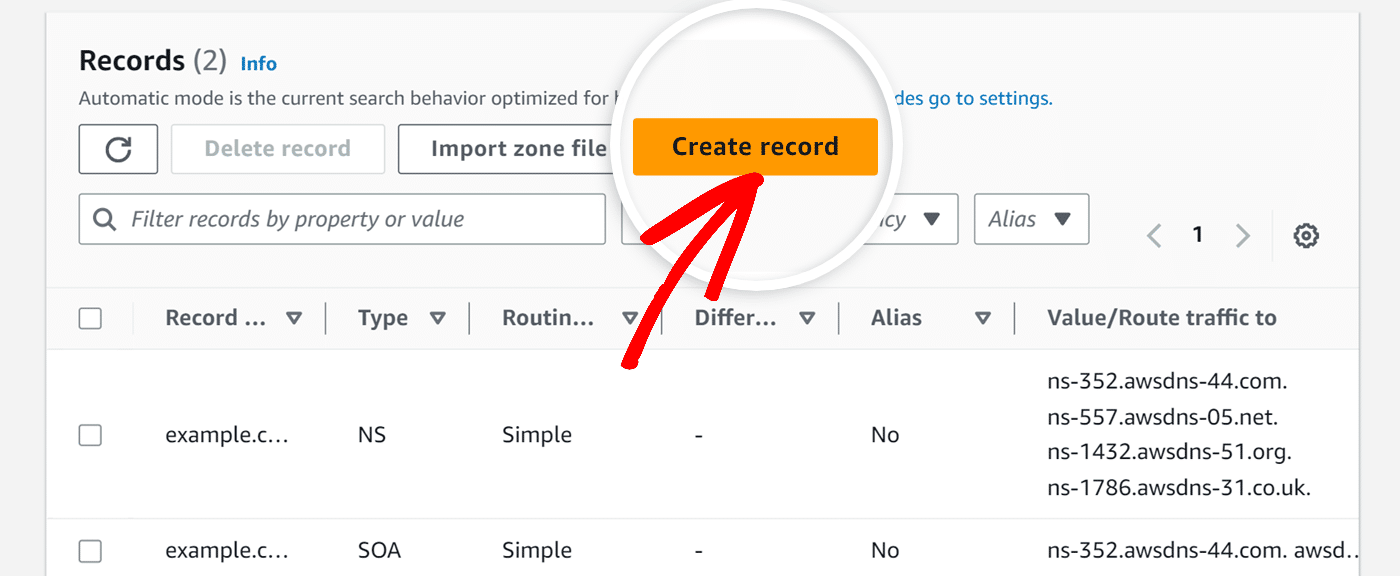
This will open a new page with some configuration options for adding a new DNS record. Here you’ll see inputs for the Record Name, Record type, Value, TTL, and Routing policy.
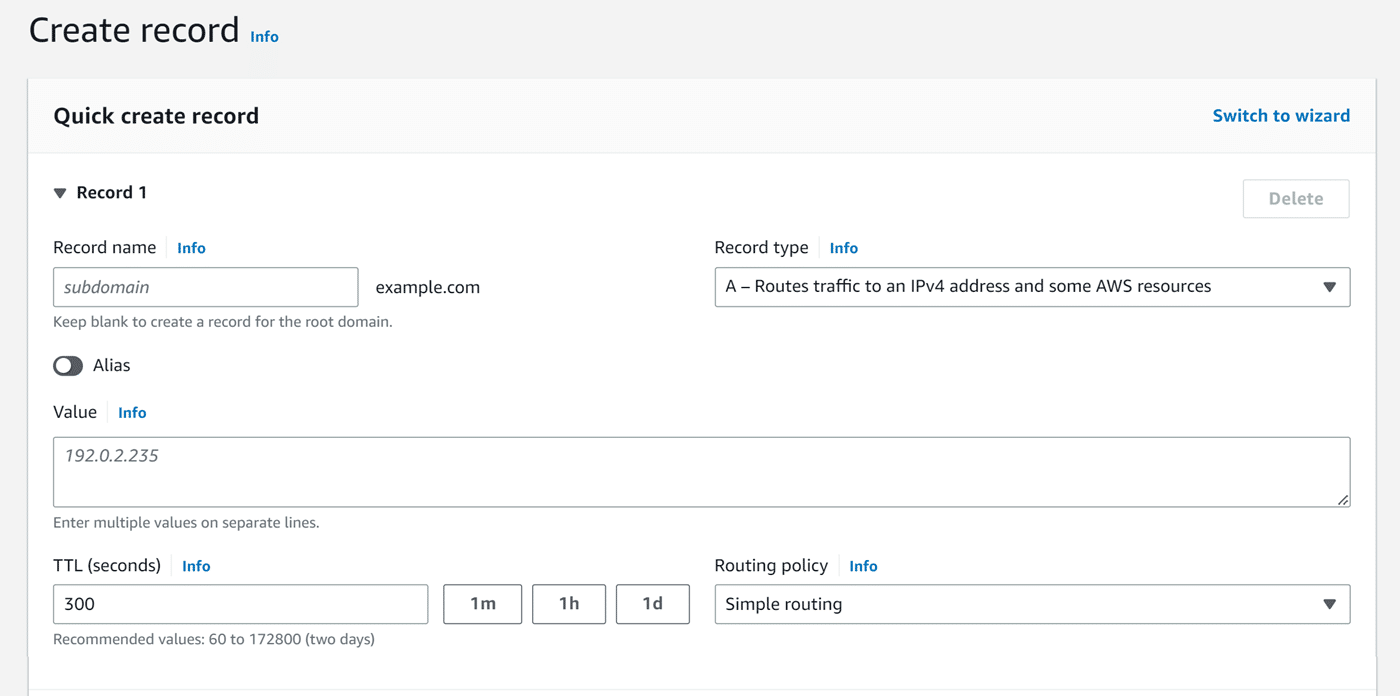
For each of the 5 DNS records that SendLayer generates, you’ll need to add the TYPE, HOSTNAME, VALUE, and TTL to the corresponding fields in Amazon Route 53.
As an example, we’ll add our first CNAME record to our Amazon Route 53 DNS settings.
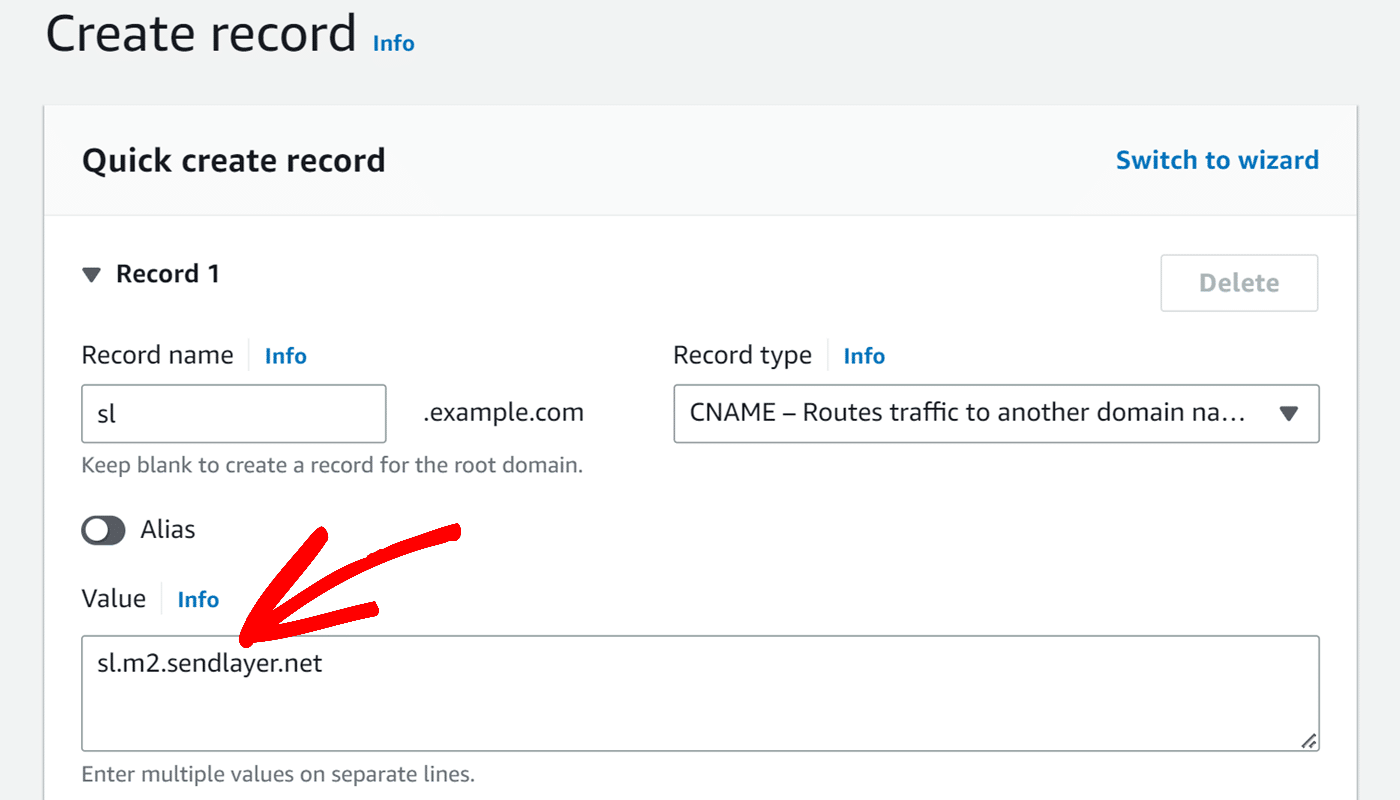
First, navigate to your SendLayer account and locate the HOSTNAME. Here, you’ll need to copy the sl subdomain and add it to the Record name field in Amazon Route 53.
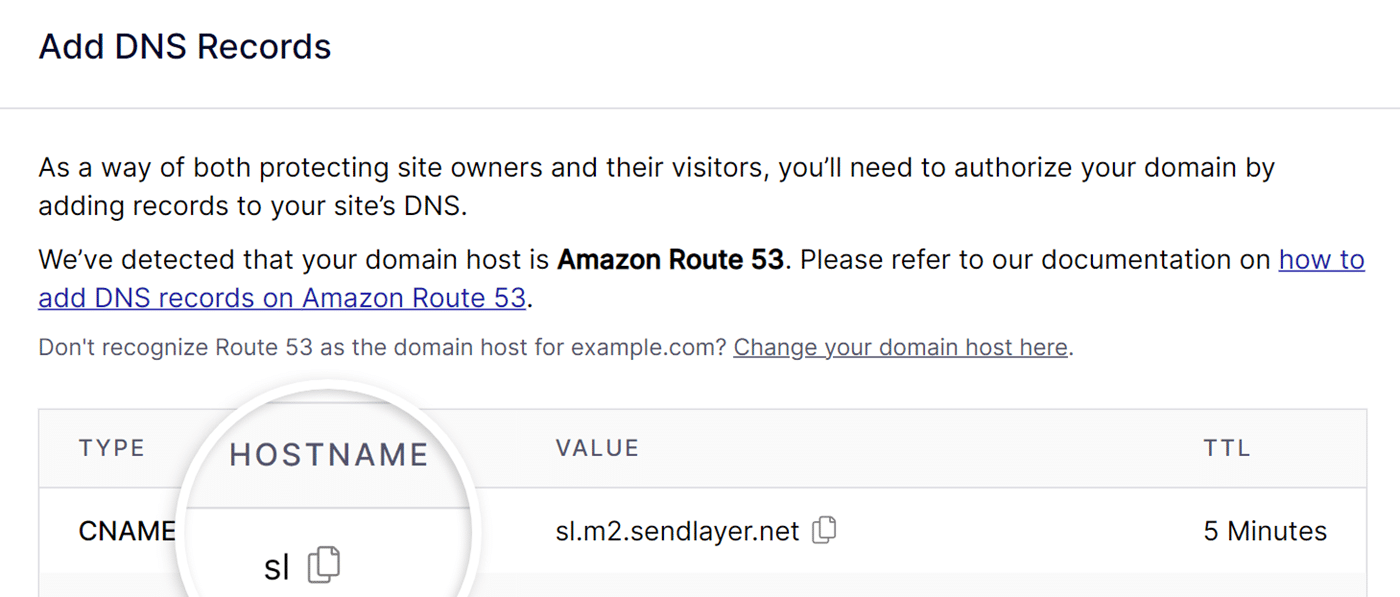
Amazon Route 53 will automatically add your domain name to the hostname of the DNS records that you add to your account.
Note: If you’re using the Other domain host option, the CNAME record in SendLayer will have a HOSTNAME of sl.example.com. In Amazon Route 53, we only need to enter the sl subdomain since Amazon Route 53 will expand this to sl.example.com on its own.
Once you’ve identified the HOSTNAME, switch over to your Amazon Route 53 account and add the HOSTNAME to the Record name field.
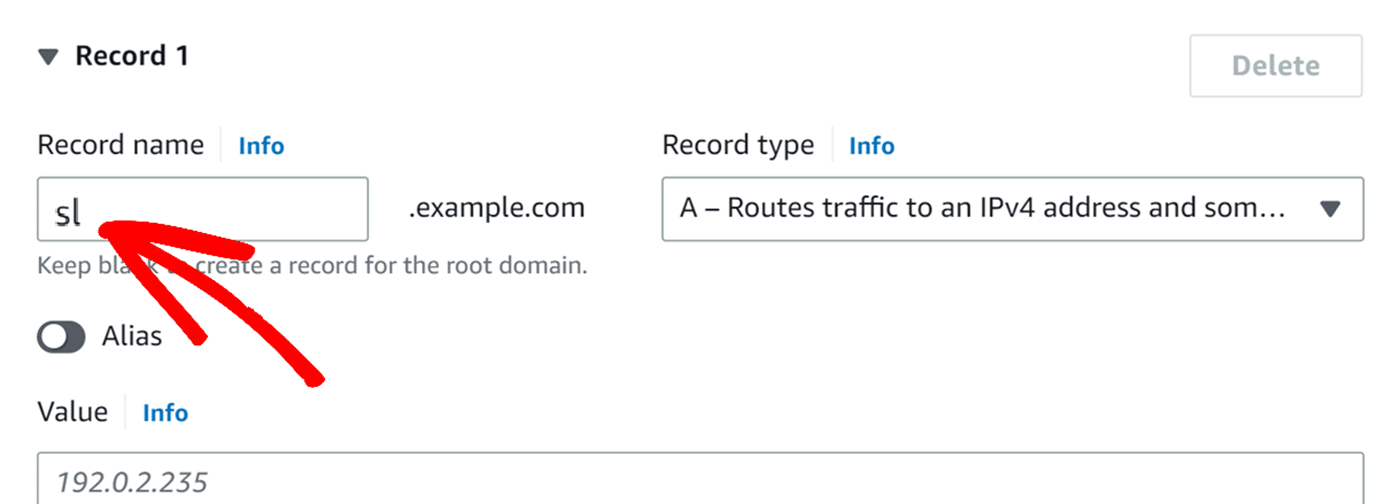
Next, select the type CNAME from the Record type dropdown.

After that, switch back to your SendLayer account and copy the VALUE by clicking on the copy icon.
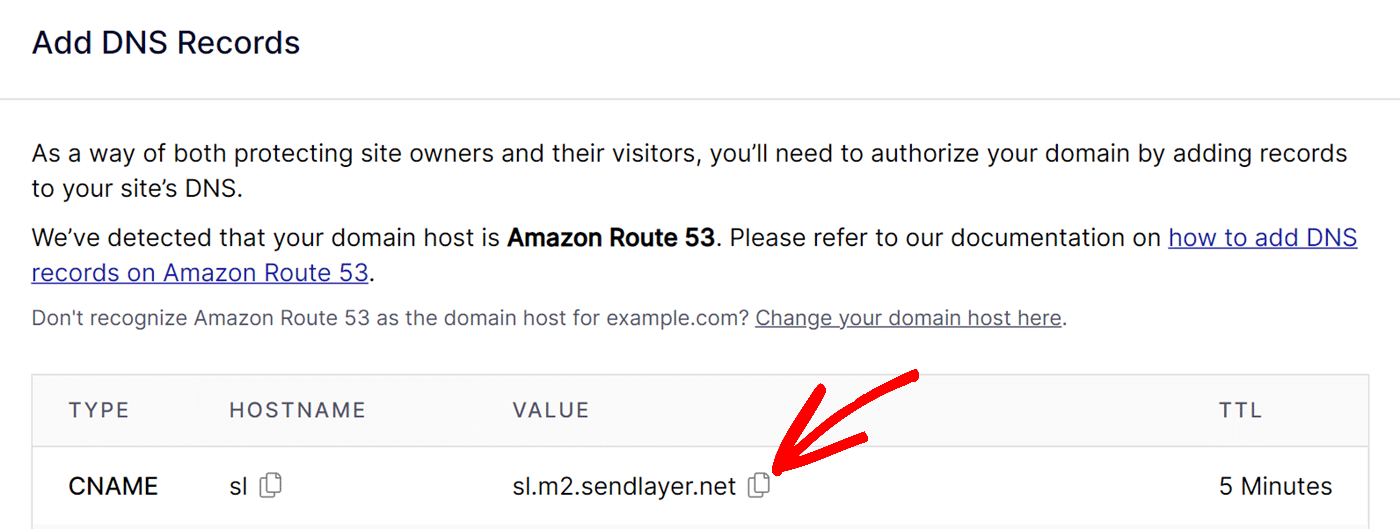
Next, head back to Amazon Route 53 and paste the VALUE into the Value field.
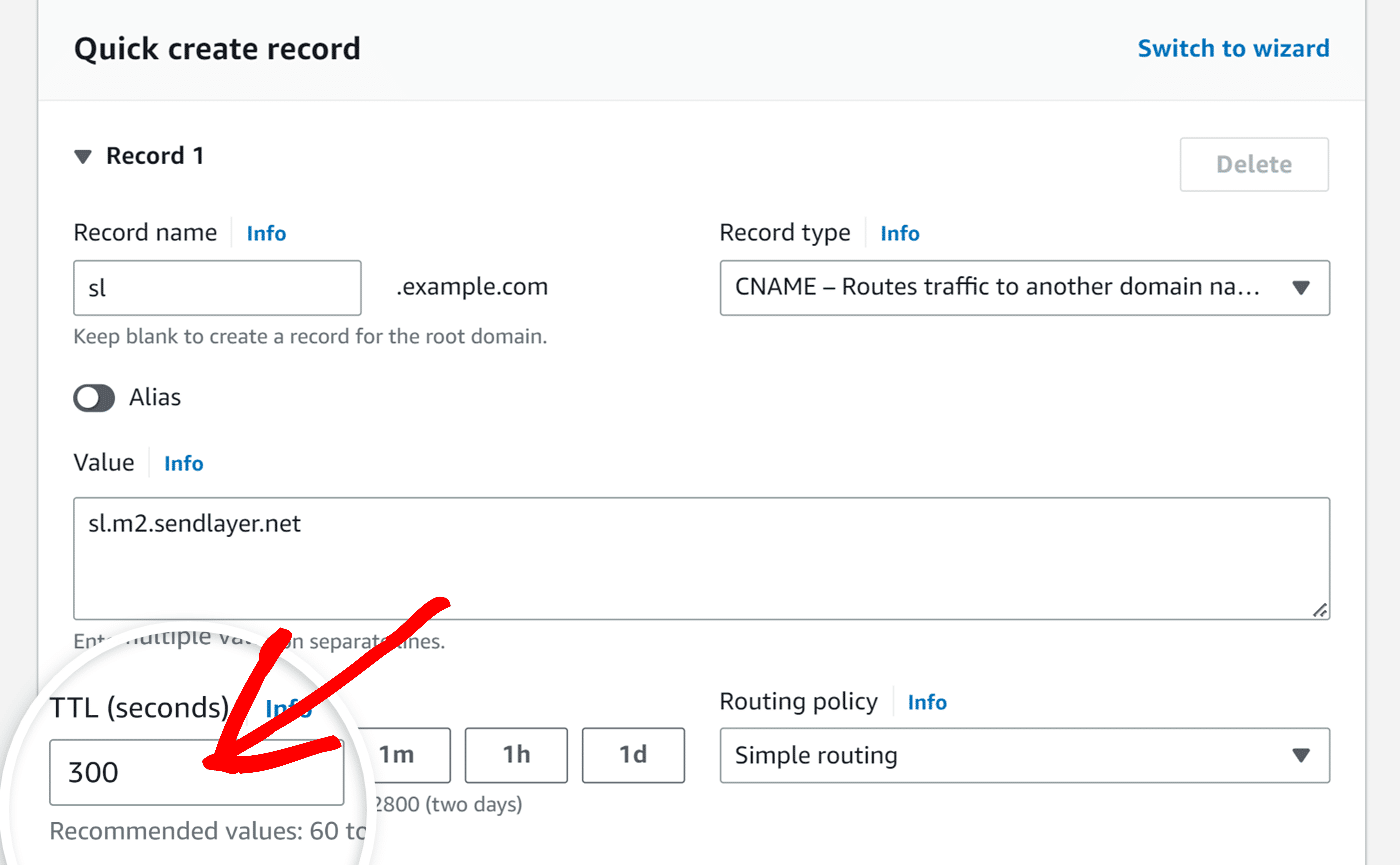
Then, click the TTL field and enter 300, which is equivalent to 5 minutes.
We’ll skip the Routing policy dropdown and leave it as its default setting.
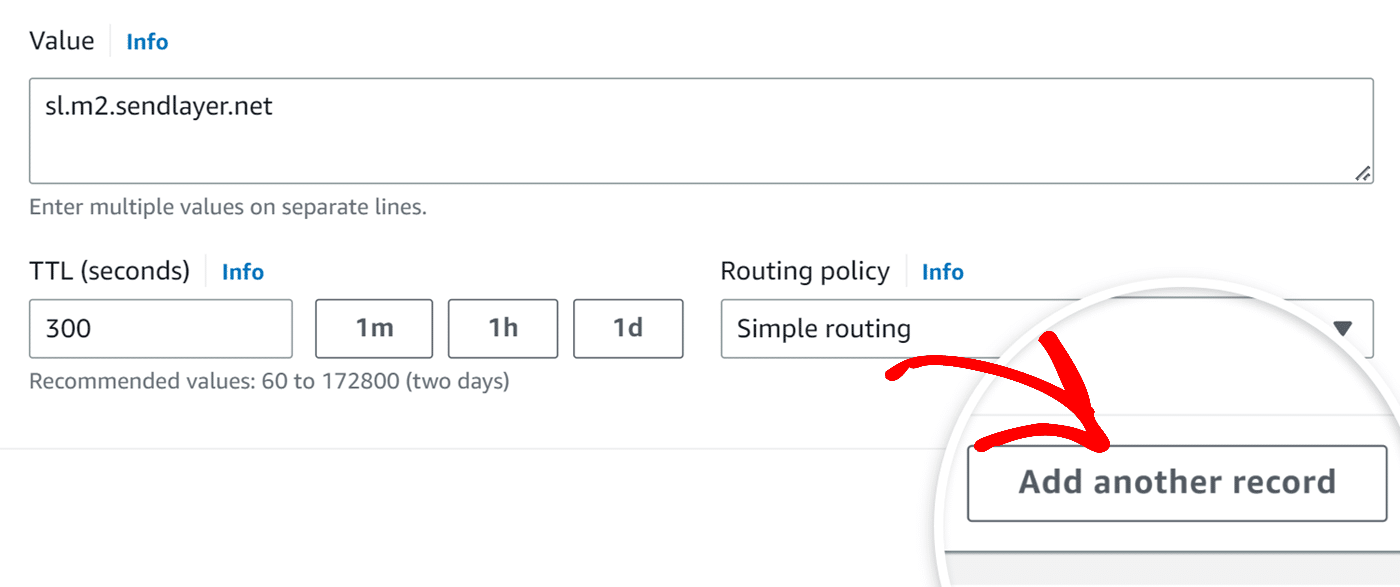
After you add your first DNS record, you’ll need to add 4 more. You should be adding a total of 4 different CNAME records and 1 TXT record. Click the Add another record button for each new one.
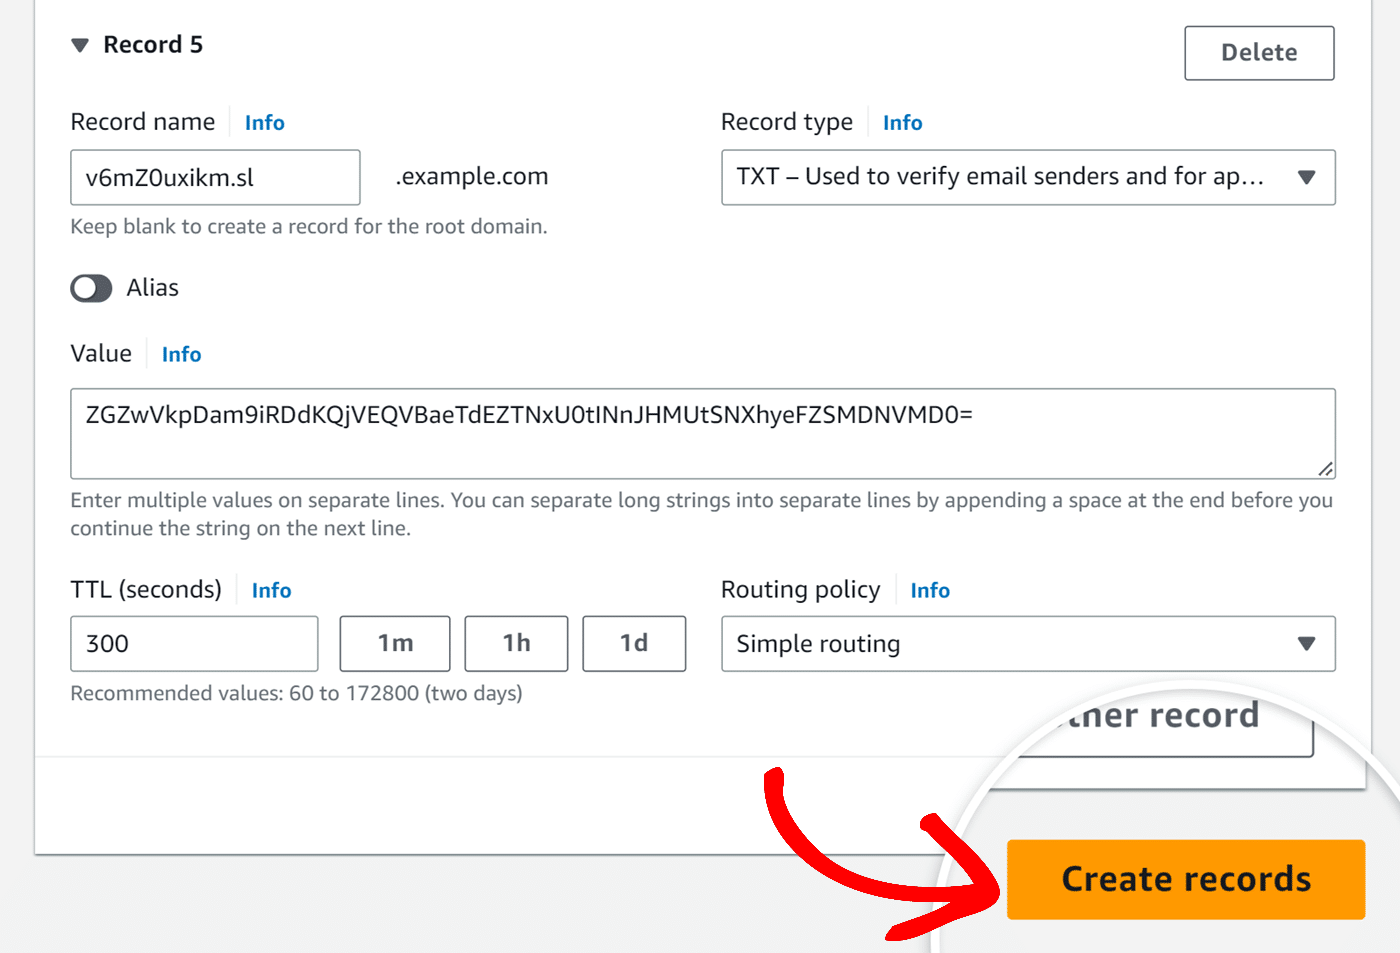
When you’ve added all 5 DNS records, click the Create records button to save all DNS records.
After you’ve added all 5 DNS records, you should see them listed in the Records table in your Amazon Route 53 account.
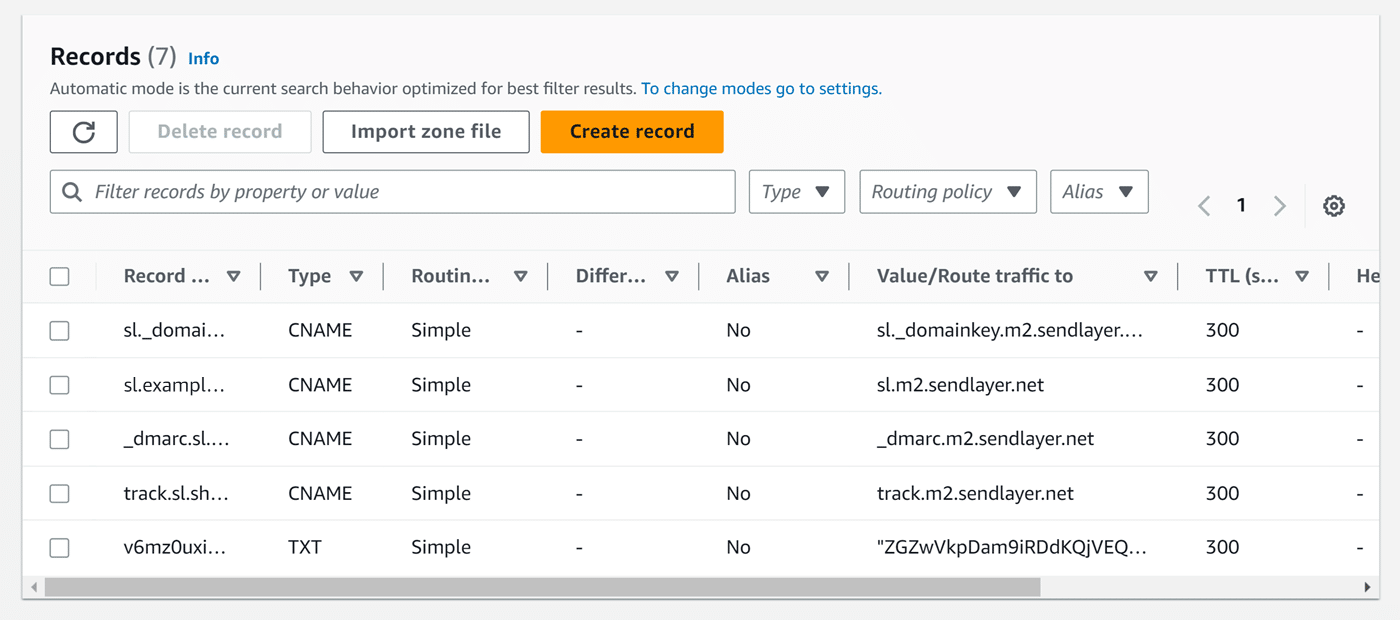
Note: New records may take between 24 to 48 hours to propagate.
Checking Your Domain Status
After adding the DNS records to your Amazon Route 53 account, you can check for successful propagation from your SendLayer account. Note that it may take 24-48 hours for your web hosting account to implement the DNS changes.
To learn how to check if your DNS records have been added successfully, check out our tutorial on checking your domain status.
That’s it! Now you know how to set up SendLayer on Amazon Route 53.
Next, would you like to learn how to add additional domains to your account? Check out our tutorial on adding additional domains for more information.