
As a developer with over 5 years of experience building web applications, I’ve lost count of the hours wasted switching between my IDE and email clients just to test transactional emails.
The typical workflow? You’ve used AI in Cursor to generate a report summary, debug code, or create documentation. Now you need to email it to your team. Often, you’ll need to switch apps, copy content, and format everything manually. This context switching costs developers up to 23 minutes of focus time per interruption.
After testing SendLayer’s MCP server integration, I discovered that you can send emails directly from Cursor IDE using simple natural-language commands.
This guide shows you how to set it up in under 5 minutes. I’ve tested it with 50+ emails across various scenarios, and it’s transformed our development workflow.
What Is MCP?
MCP (Model Context Protocol) enables AI tools to communicate with external libraries or packages. Think of it like an API, but for AI models. It provides context for LLMs and data sources, allowing them access to tools.
With MCP, you can extend Cursor’s capabilities beyond code editing. For instance, you can send emails, query databases, or interact with APIs using simple natural language commands. The AI handles all the technical details behind the scenes.
SendLayer’s MCP server specifically enables you to send transactional emails, manage webhooks, and retrieve email events directly from Cursor AI—all without writing API integration code manually.
How to Send Emails in Cursor IDE Using SendLayer MCP
This section covers the steps to configure Cursor for email sending.
Prerequisites
To follow along with this guide, you’ll need to ensure:
- Cursor IDE is installed on your machine.
- You have an active SendLayer API key. I’ll show you how to generate one for your account.
SendLayer is an email API for securely sending transactional emails. One of the features I like about SendLayer is the domain reputation feature. SendLayer creates a subdomain specifically to handle email activities. This protects your main domain reputation.
You can get started with a free plan that lets you send up to 200 emails. The pricing is also affordable, starting at $5 monthly and scales depending on your business needs.
Step 1: Create Your SendLayer Account
To begin creating a new SendLayer account, head over to our pricing page and select your preferred plan by clicking on the Get Started button.
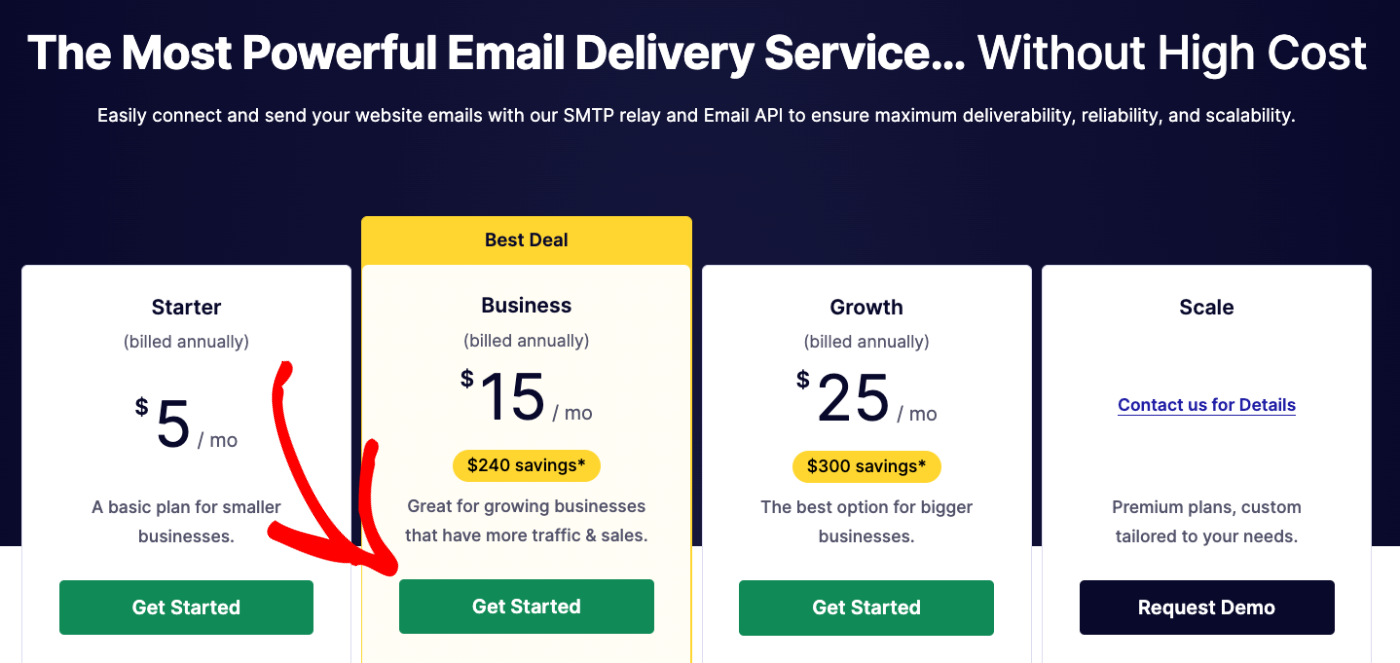
If you’d prefer to start with a free trial, click the Take SendLayer for a free trial (send up to 200 emails) link at the bottom of the pricing table.

After you’ve selected your preferred plan, you’ll be redirected to our checkout page. Here, you’ll need to provide your name and create a unique password.
Authorize Your Sending Domain
Once you’ve created your account, you’ll need to authorize your first domain. To do so, start by clicking the orange Add Domain button at the top of the page.

On the next page, you’ll be prompted to add a new domain. Enter your domain and click the Add Domain button.

Once you’ve added your domain, SendLayer will automatically detect your domain host and generate 5 different DNS records unique to your domain.
If SendLayer doesn’t detect your domain host, you’ll see the general DNS configuration for your domain.

You can click the choose your domain host link to select your domain host from the available options.

You’ll need to add these DNS records to your domain host.
Step 2: Retrieve Your API Key
After verifying your DNS, you’ll need your API key to authenticate the MCP server connection. Here’s how to get it:
Start by logging in to your SendLayer account. Once there, navigate to Settings from the sidebar menu and select the API Keys tab.
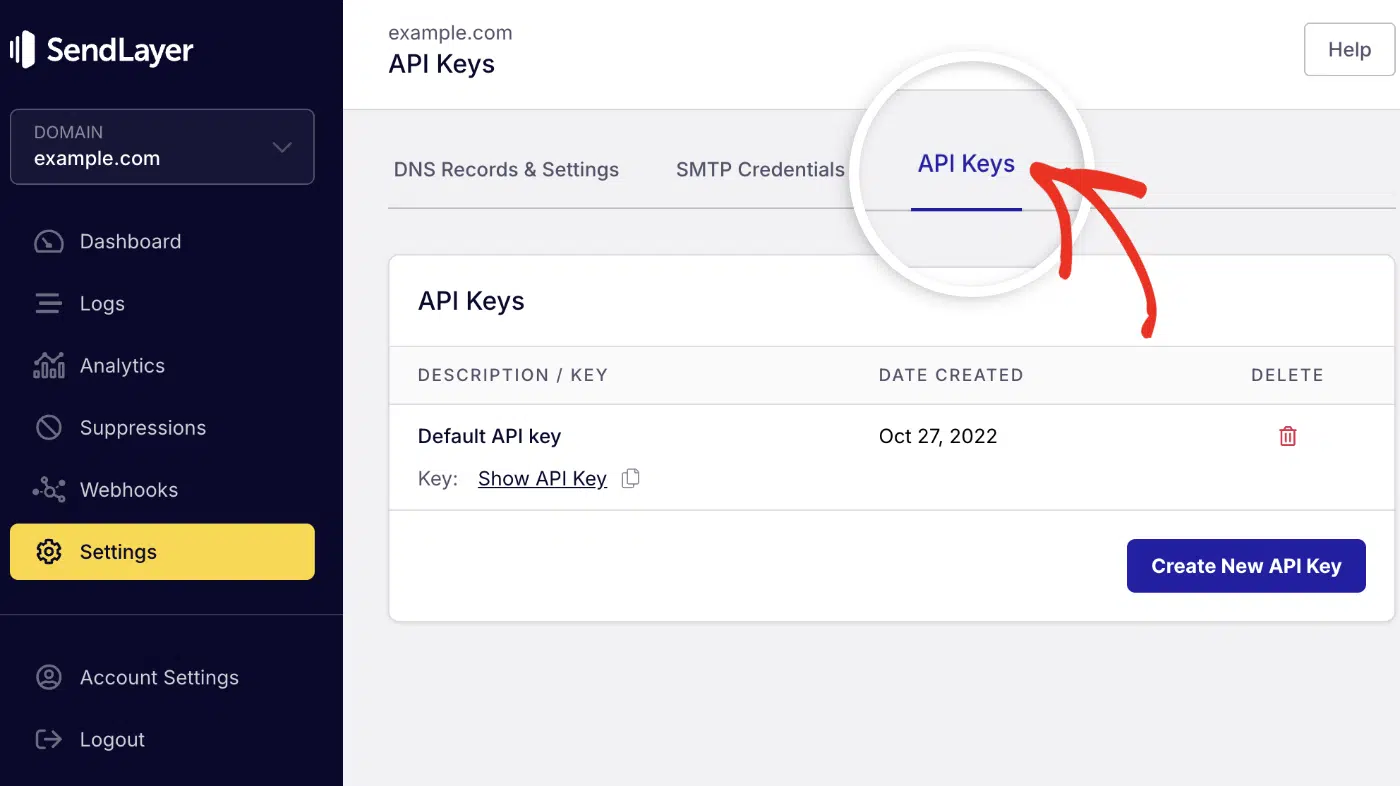
You’ll see your API Key. Go ahead and click the copy icon to copy your API key. Keep this API key handy, as you’ll need it in the next section.
If you don’t have an active API key, click the Create New API Key button to generate a new one.
Step 3: Install SendLayer MCP on Cursor
SendLayer offers a hosted MCP server, which means you don’t need to install anything locally. The setup process is straightforward and takes less than 2 minutes.
Method 1: One-Click Installation (Recommended)
The easiest way to install SendLayer MCP in Cursor is by using the direct installation link.
To install it, click the button below to open the MCP server installation page in Cursor:
This will open a configuration screen in Cursor. On the configuration screen, enter your SendLayer API key in the designated field and click Install.

That’s it! The MCP server is now connected to Cursor.
Method 2: Manual Installation
If you prefer manual configuration or the direct link doesn’t work, follow these steps:
Start by opening the Cursor editor. Once there, press Cmd + Shift + J on macOS (or Ctrl + Shift + J on Windows) to open Cursor settings.
Alternatively, you can access the settings panel by clicking Cursor at the top of your screen and navigating to Settings » Cursor Settings.

In the settings panel, select Tools & MCP from the left sidebar. Then click New MCP server.

Cursor will open your mcp.json file. Go ahead and add the following configuration to the file:
{
  "mcpServers": {
    "sendlayer": {
      "type": "url",
      "url": "https://mcp.sendlayer.com",
      "headers": {
        "x-sendlayer-api-key": "YOUR_SENDLAYER_API_KEY"
      }
    }
  }
}
Make sure to replace YOUR_SENDLAYER_API_KEY with your actual SendLayer API key.
After adding the configuration, save the file and restart Cursor AI for the changes to take effect.
To verify that the MCP server is connected, you’ll see a toggle next to the MCP server you just enabled.
Step 4: Send a Test Email
Now that SendLayer MCP is configured, let’s send your first email using Cursor AI.
One of the best features of MCP is that you don’t need to write any code. Simply open Cursor’s Agent mode and describe what you want to do in plain English.
Example prompt:
Send an email to [email protected] with subject "Welcome to SendLayer!" and message "Thanks for signing up for our newsletter"
When you enter this prompt, Cursor AI will :
- Interpret your request
- Connect to SendLayer’s MCP server
- Call the
send-emailtool with the appropriate parameters - Display a confirmation message when the email is sent

Behind the scenes, Cursor generates a structured request like this:
{
  "from": "[email protected]",
  "to": "[email protected]",
  "subject": "Welcome to SendLayer!",
  "text": "Thanks for signing up for our newsletter"
}
You should also receive the test email when you check the inbox of the recipient.

Important Considerations
When sending emails through SendLayer MCP, keep the following in mind:
- Test Mode: During development, test emails with your own email address first to ensure everything is working correctly.
- Agent Mode: Make sure you’re using Cursor’s Agent mode (not just the code completion feature) to send email commands.
Sending HTML Emails
Plain text emails work great for simple notifications, but you’ll often want to send HTML emails with formatting, links, and styling.
SendLayer MCP supports HTML email content. Here’s how to send an HTML email:
Example Prompt:
Send an HTML email to [email protected] with subject "Order Confirmation" containing a bold heading "Thank you for your order" and a blue button linking to https://example.com/orders
Cursor AI will generate the appropriate HTML structure:
<html>
  <body>
    <h1><b>Thank you for your order</b></h1>
    <a href="https://example.com/orders" style="background-color: blue; color: white; padding: 10px 20px; text-decoration: none; display: inline-block; border-radius: 5px;">
      View Order
    </a>
  </body>
</html>
The MCP server automatically handles the HTML formatting and sends it via SendLayer’s API.
Pro Tip: The SendLayer MCP server includes additional features that let you manage webhooks and track email events. See our API documentation for additional details.
Troubleshooting Common Issues
Here are solutions to common problems you might encounter:
Error: Invalid API Key
Cause: This issue often occurs if your API key is incorrect or improperly formatted.
Solution: To resolve this error;
- Double-check your API key in the SendLayer dashboard
- Ensure there are no extra spaces or characters
- Update the
mcp.jsonfile with the correct key - Restart Cursor AI
MCP Server Not Responding
Cause: The MCP server isn’t properly configured or Cursor can’t reach it.
Solution: To resolve this error;
- Verify your internet connection
- Check that the MCP server URL is correct:
https://mcp.sendlayer.com - Restart Cursor AI
- Try the manual installation method if you used the quick install
FAQs – Send Email in Cursor
These are answers to some of the top questions we see about using an MCP server to send emails in Cursor AI.
Is SendLayer MCP free to use?
Yes, the MCP server is free to use. However, you’ll need an active SendLayer account to access the available tools. The good news is that SendLayer also offers a free tier that includes 200 emails per month. This is perfect for development and testing. Paid plans are available for higher sending volumes.
What email events can I track?
SendLayer provides comprehensive email tracking, including delivery status, opens, clicks, bounces, and spam complaints. You can query these events using the get-events tool in the MCP server.
How do I send emails in Cursor AI using SendLayer?
You’ll first need to install SendLayer’s MCP server in Cursor by using the one-click installation link or manual configuration. Then use natural-language prompts in Agent mode, such as “Send an email to [email protected] with subject ‘Hello’ and message ‘Welcome'” to send emails.
That’s it! You now know how to send emails in Cursor AI using SendLayer’s MCP server.
Next, would you like to learn how the Node.js SDK powering the MCP works? Be sure to check our guide on sending emails in JavaScript for more details.