
When I launched my first WordPress site, I learned a frustrating lesson the hard way: user registrations weren’t getting confirmation emails, password reset emails vanished into thin air, and contact form submissions disappeared without a trace.
The culprit? WordPress’s built-in email system.
If you’re wondering how to set up WordPress email properly, you’re not alone. Thousands of WordPress site owners face email delivery issues every day, often without realizing their messages never reach the inbox.
The solution is simple yet powerful. Configure WordPress SMTP settings to authenticate your emails properly.
In this guide, I’ll walk you through the complete WordPress SMTP setup process, from installing the right plugin to sending your first authenticated email.
- Understanding WordPress Email Problems
- Why SMTP Is the Solution
- How to Set Up WordPress Email (Step-by-Step)
- Testing Your WordPress Email Settings
- Troubleshooting Common Issues
- Frequently Asked Questions
Understanding WordPress Email Problems
WordPress ships with a basic email function that works fine on some hosting environments. But more often than not, it fails spectacularly.
The default WordPress installation uses PHP’s mail() function to send emails. This method has three critical flaws:
- No authentication: Mail servers can’t verify that emails actually come from your domain.
- Poor deliverability. Internet Service Providers (ISPs) flag unauthenticated emails as potential spam.
- Limited functionality: You can’t track deliveries, handle bounces, or manage sending limits.
Think about it from the perspective of Gmail or Outlook. When they receive an email claiming to be from yourdomain.com but lacks authentication, they have no way to verify its legitimacy. Their spam filters err on the side of caution and block it.
According to data from email deliverability studies, emails sent via PHP mail() have a 40-60% chance of landing in spam folders. That’s essentially a coin flip determining whether your users receive critical account notifications.
Why SMTP Is the Solution
SMTP (Simple Mail Transfer Protocol) solves WordPress email problems by adding proper authentication to your messages.
When you configure SMTP WordPress settings correctly, every email includes authentication headers that prove to receiving servers:
- The email genuinely comes from your domain
- The message content hasn’t been tampered with in transit
This authentication happens through three key technologies:
SPF (Sender Policy Framework) – Specifies which mail servers can send emails from your domain.
DKIM (DomainKeys Identified Mail) – Adds a digital signature to verify message authenticity
DMARC (Domain-based Message Authentication) – Tells receiving servers how to handle failed authentication
Professional email service providers handle all of this automatically once you complete the initial WordPress email settings configuration.
How to Set Up WordPress Email (Step-by-Step)
This section covers everything you need to get WordPress email working correctly.
Step 1: Install an SMTP Plugin for WordPress
WordPress doesn’t include built-in SMTP configuration options, so you’ll need a plugin to handle the connection.
I recommend Easy WP SMTP for its straightforward interface and compatibility with major email providers. It handles the technical details of WordPress SMTP setup while keeping the configuration process simple.
To install the plugin:
Navigate to your WordPress dashboard and click Plugins » Add New from the sidebar menu.
In the search box at the top right, type “Easy WP SMTP” and press Enter.

Locate the Easy WP SMTP plugin in the search results and click the Install Now button.
After the installation completes, the button changes to ‘Activate’. Go ahead and click the Activate button to continue.

Great! The Easy WP SMTP plugin should now be ready on your site.
Before we move on to configuring Easy WP SMTP for your site, you’ll need to ensure you have an active account with an SMTP email provider.
Step 2: Choose Your Email Provider
Before configuring WordPress email settings, you need an email service provider that supports SMTP connections.
Easy WP SMTP supports multiple providers, including SendLayer, Gmail, SendGrid, and more.
If you don’t have an email provider yet, I recommend SendLayer for WordPress sites. It offers reliable delivery, a straightforward setup, and protection of your domain reputation by using a dedicated subdomain for email delivery.
Creating Your SendLayer Account
Head over to SendLayer’s pricing page and select a plan. For testing purposes, you can start with the free trial that includes 200 emails.
Click Get Started on your preferred plan, or select the free trial link at the bottom of the pricing table.
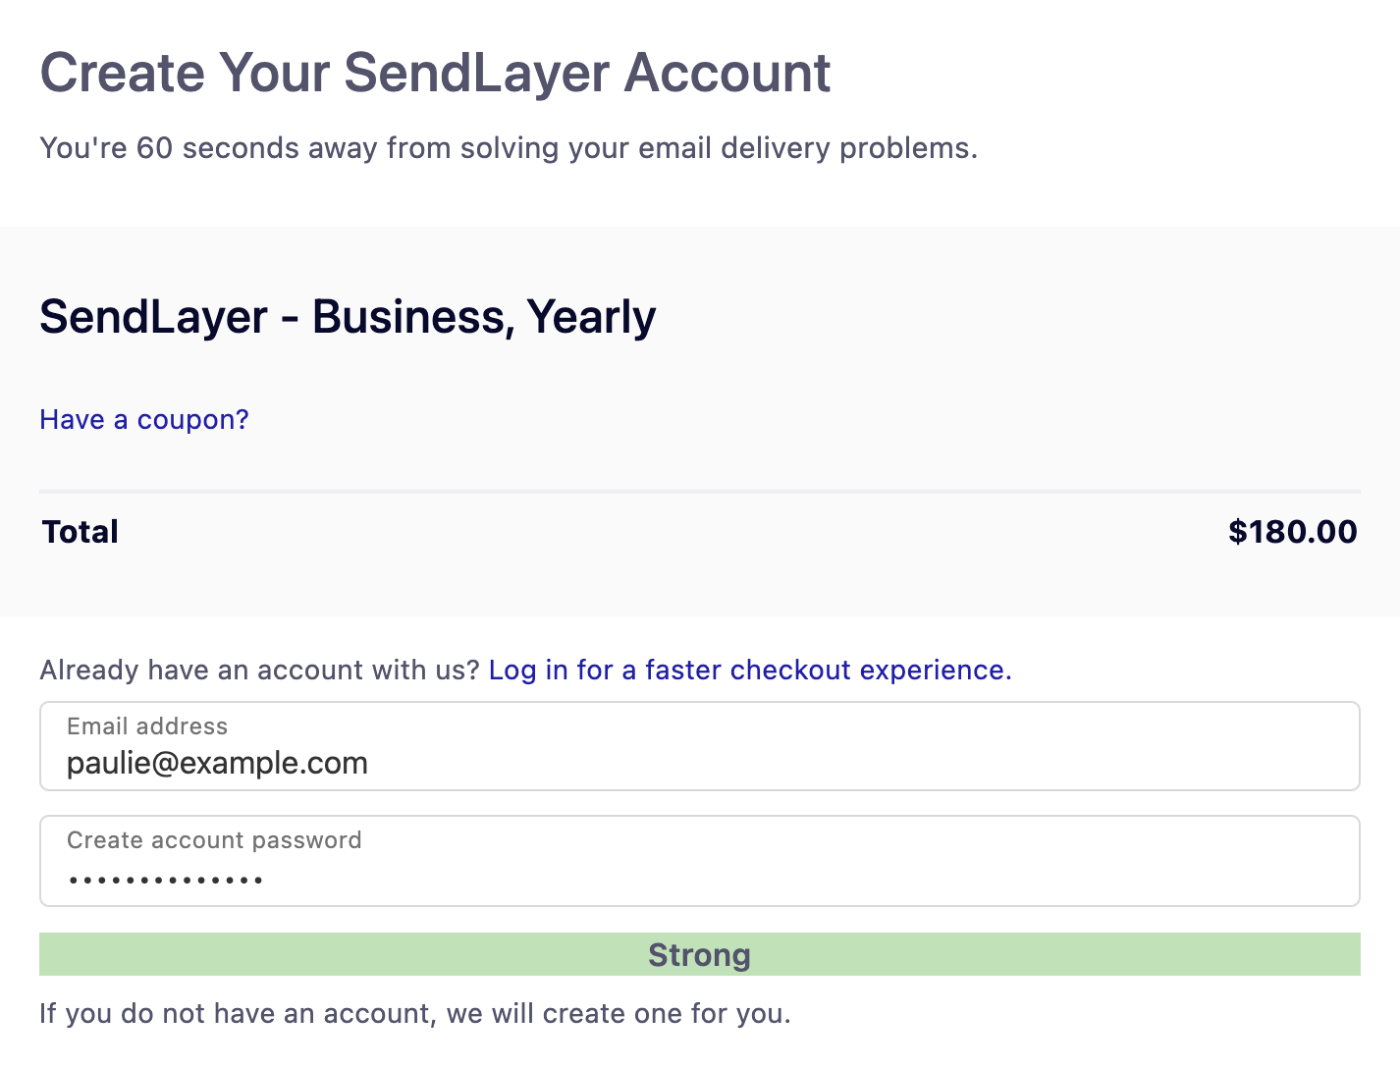
On the registration page, enter your email address and create a strong password for your account.
After creating your account, SendLayer prompts you to authorize your first sending domain.
Step 3: Authorize Your Domain
Domain authorization is the most critical step in the entire WordPress email setup process. Without it, even a properly configured SMTP server won’t guarantee inbox delivery.
When you authorize a domain, you’re adding special DNS records that tell receiving mail servers: “This email provider is authorized to send emails on behalf of my domain.”
Adding Your Domain to SendLayer
After logging into SendLayer for the first time, click the orange Add Domain button at the top of the page.

On the next page, you’ll be prompted to add a new domain. Enter your domain and click the Add Domain button.

Once you’ve added your domain, SendLayer will automatically detect your domain host and generate 5 different DNS records unique to your domain.
If SendLayer doesn’t detect your domain host, you’ll see the general DNS configuration for your domain.

You can click the choose your domain host link to select your domain host from the available options.

You’ll need to add these DNS records to your domain host.
With your domain authorized, you’re ready to connect SendLayer to WordPress.
Step 4: Configure WordPress SMTP Settings
Now comes the easy part: connecting your WordPress site to SendLayer using the plugin you installed earlier.
Accessing Plugin Settings
In your WordPress dashboard, hover over Easy WP SMTP in the sidebar menu and click Settings.

This opens the plugin configuration page where you’ll set up your SMTP connection.
Selecting Your Mailer
On the settings page, you’ll see options for different email providers. Click SendLayer to reveal the API key field.

SendLayer uses API authentication instead of traditional SMTP credentials, which simplifies the configuration and improves security.
Getting Your SendLayer API Key
Switch to the browser tab where your SendLayer dashboard is open. Navigate to Settings » API Keys in the sidebar.
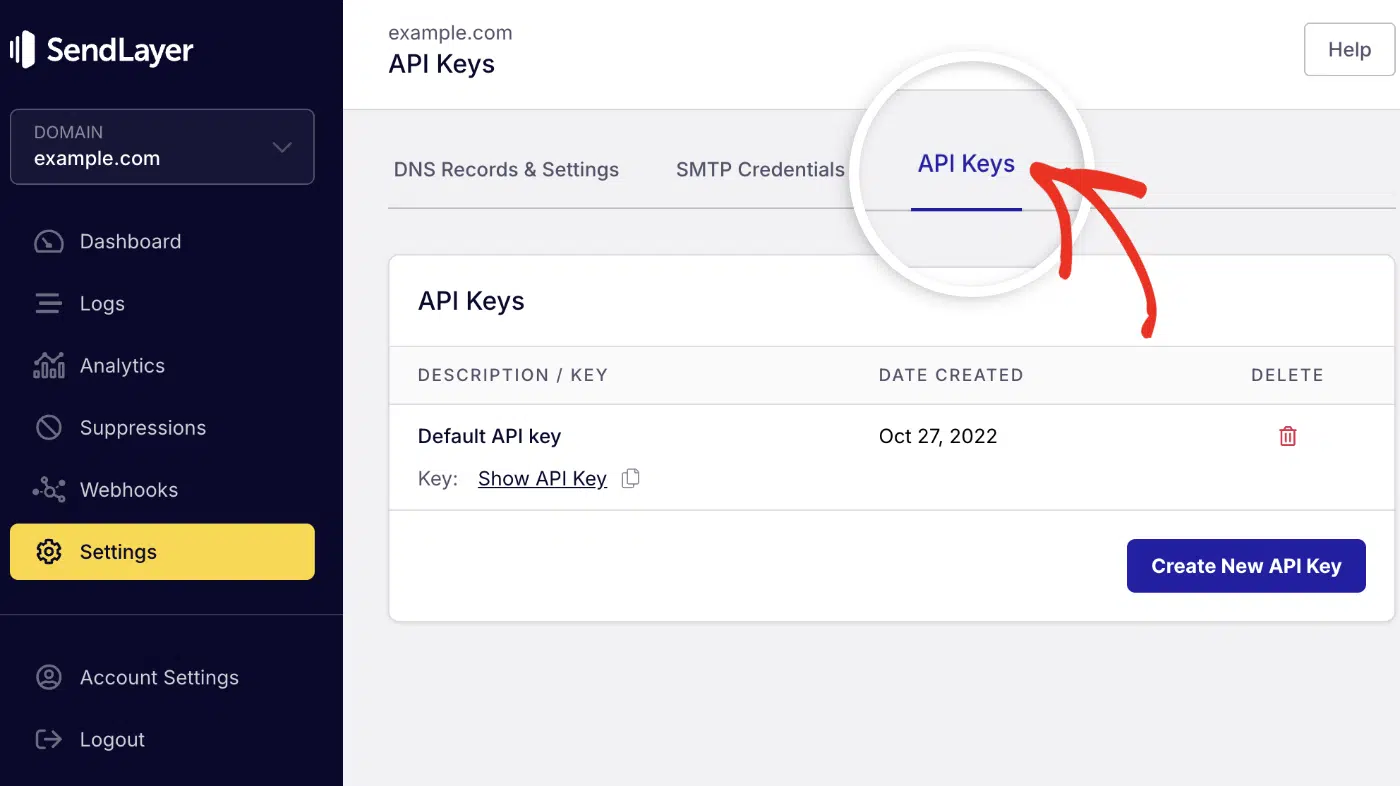
You’ll see your default API key listed. Click the copy icon next to it to copy the key to your clipboard.

Connecting to SendLayer
Return to your WordPress tab with Easy WP SMTP settings open. Paste the API key you just copied into the API Key field.

Scroll down to the General Settings section to configure your sender information.
Setting Your From Email Address
The From Email field determines which email address appears as the sender on all WordPress emails.
This address must use the domain you just authorized in SendLayer. For example, if you authorized example.com, your from email could be:
Enable the Force From Email option to ensure WordPress uses this address for all outgoing emails, overriding any other plugins’ settings.

Setting Your From Name
Scroll down to the From Name field. This is the friendly name that appears alongside your email address in recipients’ inboxes.
Set this to your site name or business name. For example, “WordPress Site” or “Your Business Name.”

Enable Force From Name to use this name consistently across all WordPress emails.
Saving Your Configuration
Scroll to the bottom of the page and click the blue Save Settings button.

Congratulations! Your WordPress SMTP setup is now complete. All emails from your WordPress site will route through SendLayer with proper authentication.
But before you celebrate, let’s verify everything works correctly.
Testing Your WordPress Email Settings
After completing the configure SMTP WordPress process, always send a test email to verify that the connection works properly.
Easy WP SMTP includes a built-in email testing tool that makes this simple.
Sending a Test Email
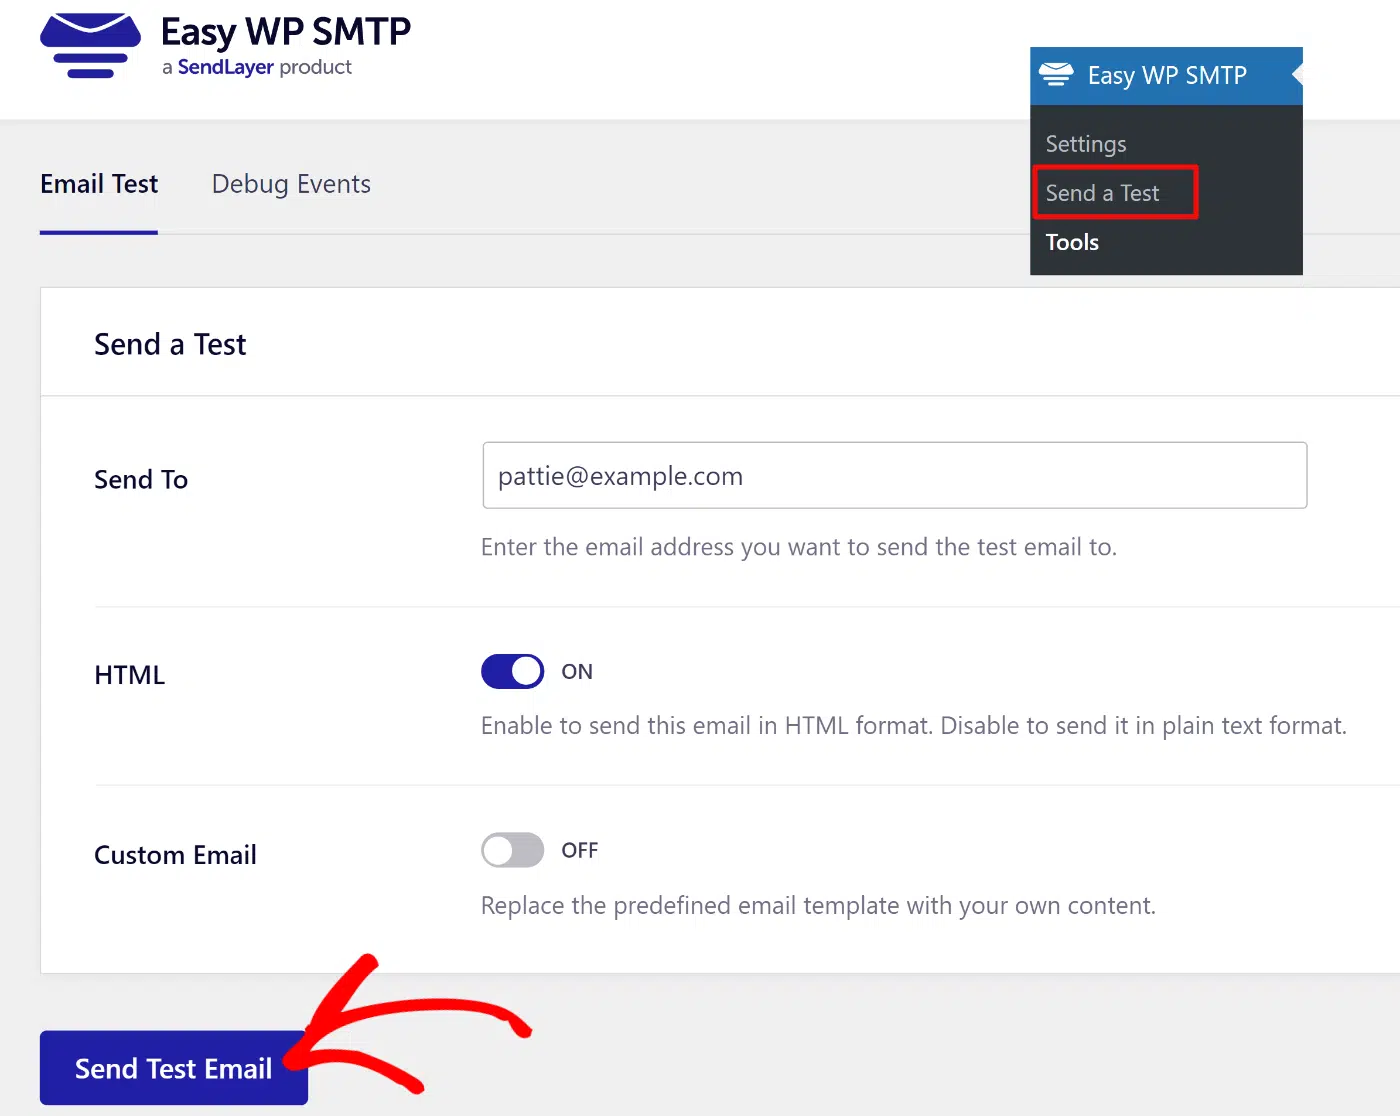
In your WordPress dashboard, navigate to Easy WP SMTP » Send a Test.
Enter an email address where you can check for the test message. Use a personal email you have access to, since we’re testing external delivery.
Click the Send Test Email button at the bottom of the page.
If your WordPress email settings are configured correctly, you’ll see a success notification appear at the top of the page within seconds.

Now check the inbox of the email address you specified. The test email should arrive within a few seconds to a minute.

Pro Tip: If you don’t see the test email in your inbox, check your spam folder. If it landed there, your DNS records may not have fully propagated yet. Wait a few hours and test again.
Verifying Email Logs
SendLayer provides detailed logs for every email sent through your account, which helps with troubleshooting and monitoring.
To view your email logs, log in to your SendLayer dashboard and click Logs in the sidebar menu.

You’ll see a record of every email sent, including delivery status, recipient address, timestamp, subject line, and any error messages.

This visibility helps you quickly identify and resolve delivery issues that might occur with specific recipient addresses or domains.
Troubleshooting Common Issues
Even with proper WordPress SMTP setup, you might encounter issues. Here are solutions to the most common problems.
Test Email Not Arriving
Symptom: The test email shows success in WordPress, but never reaches your inbox.
Causes and solutions:
- DNS records not propagated – Wait 4-24 hours after adding DNS records, then test again
- Recipient server rejection – Check SendLayer logs for bounce messages
- Caught in spam filters – Look in spam/junk folders
“Invalid API Key” Error
Symptom: Easy WP SMTP shows an error when saving settings for an invalid API key.
Solution:
- Verify you copied the entire API key from SendLayer without extra spaces
- Check that you’re using an active API key (not a revoked one)
- Regenerate a new API key in SendLayer if needed
Emails Go to Spam
Symptom: Test email arrives but lands in the spam folder.
Causes and solutions:
- DNS records incomplete – Verify all five DNS records are added correctly
- Email content triggers filters – Avoid spam trigger words in test emails
- Domain reputation – New domains need time to build sending reputation
Frequently Asked Questions
These are answers to some of the most common questions we receive about setting up WordPress email.
Do I need SMTP for WordPress?
While WordPress can send emails without SMTP using PHP mail(), this method is unreliable. Most modern mail servers reject or filter unauthenticated emails from PHP mail(). Setting up SMTP ensures your WordPress emails are properly authenticated and consistently reach recipients’ inboxes.
Can I use Gmail SMTP for WordPress?
Yes, Gmail offers SMTP services that work with WordPress. However, Gmail limits sending to 500 emails per day for regular accounts and 2,000 per day for Google Workspace accounts. For WordPress sites with higher email volumes, dedicated email providers like SendLayer offer better reliability and higher limits.
How do I fix WordPress not sending emails?
The most reliable fix is to configure SMTP WordPress settings using a plugin like Easy WP SMTP and an email provider like SendLayer. This replaces WordPress’s unreliable PHP mail() function with authenticated SMTP delivery. Follow the steps in this guide to properly set up SMTP.
What’s the difference between SMTP and API email sending?
Traditional SMTP requires entering server hostnames, ports, and authentication credentials. API-based providers simplify this by using a single API key for authentication. Both methods reliably deliver authenticated emails, but API connections are generally easier to configure and maintain. To learn more, see our SMTP vs API comparison guide.
How many emails can WordPress send?
This depends on your email provider’s limits, not WordPress itself. SendLayer’s free tier includes 200 emails, with paid plans starting at 1,000 emails per month and scaling depending on your business needs. Other providers have different limits. Choose a plan based on your site’s typical email volume.
Will SMTP slow down my WordPress site?
No. With proper WordPress SMTP setup, email sending happens in the background and doesn’t affect page load times. Email plugins queue messages and send them asynchronously, so visitors don’t wait for emails to deliver before seeing content.
That’s it! Now you know how to set up WordPress email properly.
Next, would you like to learn about email authentication best practices? Check out our tutorial on email authentication to further improve your deliverability.